Plastic insert in the well: step-by-step installation instructions
Arranging an autonomous source of water intake on the site requires a careful approach. Particular attention should be paid to sealing the walls of the well.Agree, I would not want to receive water contaminated by the earth during the operation of the mine.
A plastic insert in the well, which is used to install a new or restore an existing water intake point, helps prevent this problem. In the article, we examined in detail the pros and cons of this solution, provided tips on choosing a polymer insert, and also described the procedure for installing it in a well.
The content of the article:
Purpose of plastic inserts
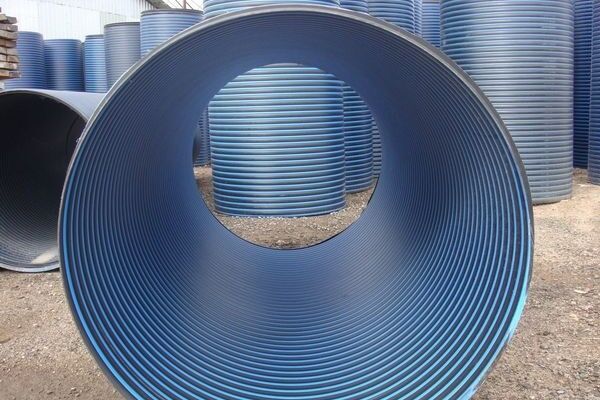
The main advantage of plastic structures is their practicality. Unlike concrete rings they are easy to transport to the assembly site, which inevitably reduces shipping costs. Their installation does not require special equipment.
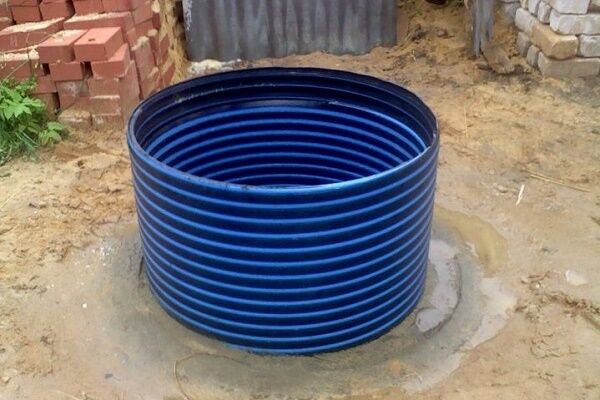
Plastic inserts protect against the entry of collapsing earth into the well, the seepage of ground and surface water, and serve as an insulating barrier and an element in the formation of the walls of the well.

The better the quality of the plastic, the longer the well lasts.
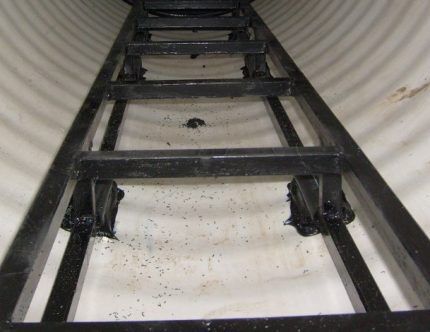
Stiffeners perform two important functions in a structure:
- Gives additional strength to the structure.
- They serve as ground hooks, protecting against floating.
Additional rigidity is needed to prevent deformations caused by soil movement. Mostly they occur due to natural causes. In this regard, concrete structures are more resistant to mechanical stress.
Acting as ground hooks, the stiffening ribs prevent the container from floating up. If they were not there, then as the groundwater level rose, the capacity would inevitably rise. Such ascent leads to deformation of the structure.
Advantages and disadvantages
Plastic is resistant to natural biodegradation and can remain in the ground for more than 50 years. At the same time, it combines the properties of strength, elasticity and tightness. Concrete products used in the construction of wells cannot boast of such characteristics.
In addition to being resistant to decomposition, the walls of the plastic container are not affected by moss. If we compare plastic with concrete, the latter tends to collapse under the influence of the environment.
When the temperature drops below zero, the water contained in the pores of concrete begins to crystallize and increase in volume. As a result, the porosity increases and the density of the concrete stone decreases along with its strength.

Disadvantages of the design include possible damage to the plastic by tree roots. Not recommended build a well or a well with a plastic shaft near them.
Another disadvantage is that with prolonged exposure to sunlight, the material becomes brittle. This leads to breakage of the hatch cover if it is made of plastic. In addition to sunlight, the polymer is not resistant to freezing and is easily damaged in severe frosts.
It is not recommended to use plastic covers for wells if the winter temperature drops below -25°C.
The advantages of plastic inserts include their reliability. Since, with proper insulation, the temperature around the trunk within the seasonal freezing zone does not drop to zero, the risk of damage to plastic in tube and shaft wells is minimal. A seal failure can occur if the plastic insert is not fastened correctly.
During restoration and repairing an old well The following method of fastening of concrete rings is sometimes used:
- Lower the insert into the well.
- It is fixed using anchors with rubber or silicone gaskets.
- Fill the remaining space between the rings and the insert with gravel, small crushed stone or sand.
This installation leads to the need to replace gaskets, which become unusable over time. With this installation method, damaged rubber parts are difficult to repair. As a result, a gap is formed between the anchor and the insert. Through these cracks, surface water enters the well, leading to a deterioration in the quality of drinking water.

Through holes created by improper installation, bacteria can enter the well. A sure sign of depressurization is dark wet or dried smudges going down from the anchors. If they are detected, it is necessary to immediately treat the leakage area with sealant. This procedure will have to be repeated as necessary.
The main causes of clogged wells
If the sealing of the shaft is not broken, then the reasons for clogging or deterioration in the quality of water from the water intake structure may be:
- Rare use of the source.
- Ingress of contamination from outside.
- Wrong location.
The problem with water stagnation at water intake points usually occurs in dachas. In houses where residents live all year round, water is continuously renewed. This problem can be easily solved by emptying and then disinfect the well.

A serious mistake is the construction of a water supply source in ferruginous soils close to the surface. With this problem the water becomes cloudy and takes on a noticeable rusty tint.
The issue is resolved by installing a multi-level filtration system. In addition, the concentration of iron in water may be increased. This makes it unsuitable for drinking purposes without pre-cleaning.
How to choose an insert for a water supply well
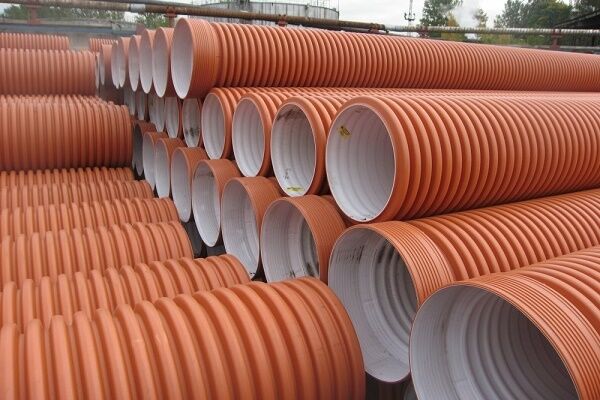
When planning to purchase a plastic “sleeve,” you need to evaluate two main selection criteria: the diameter of the insert and the thickness of the polymer.
Insert diameter. If there is a ready-made well shaft, then the insert should be of such a diameter that there is a distance to the edges of the pit that is sufficient for filling with fine crushed stone, sand or for filling with mortar.
The distance from the edge of the pit to the corrugated insert should not be less than 20 cm. This determines the diameter of the insert.
Plastic thickness. The thicker it is, the stronger the structure, but this affects the cost per linear meter. You should not save money by purchasing an option that is too cheap, since if the walls are damaged, you will have to dismantle the entire structure.
When used, the elements of the stairs can damage the plastic walls, however, if the water supply source is very deep (4-5 m or more), then you cannot do without them. If the aquifer is located in bedrock, then a permit will be required to install a water intake structure.
Restoration of an old well: progress of work
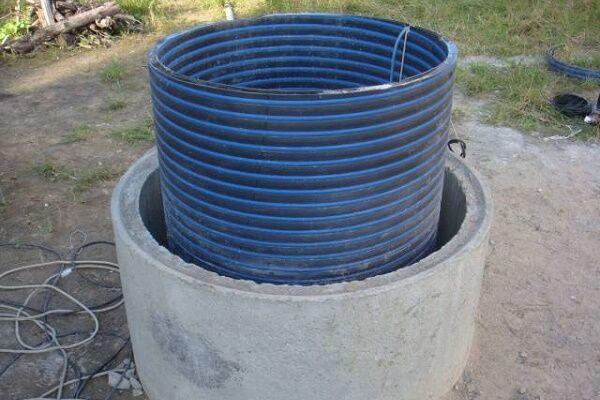
Plastic inserts can be installed directly into the well, or into an existing concrete well. Both installation options will be considered. First, the process of restoring an existing well.
This requires a minimal amount of time, since most of the work has already been done. Drilling a tube well from scratch requires a lot of effort. It is important to choose the right place. The service life of the well largely depends on this.
Before starting work, it is necessary to pump out the water and clean the walls of the old well. This can be done with a regular spatula, going down to the bottom of the excavation.This must be done if the distance between the insert and the concrete rings will be filled with concrete mortar.
Filling with mortar completely solves the problem with the strength of the structure, but makes it immobile. With this method, the insert cannot be reused.
Fixing with crushed stone or sand allows for simple dismantling, which will make it easy to fill up the old well. In this case, no concrete structures remain on the site. Everything is dismantled and can be moved.
If the well is not overgrown with moss, then it is not necessary to clean its walls. After cleaning the walls, it is necessary to completely remove the old drainage. As a rule, crushed stone of different fractions is used for filtration.
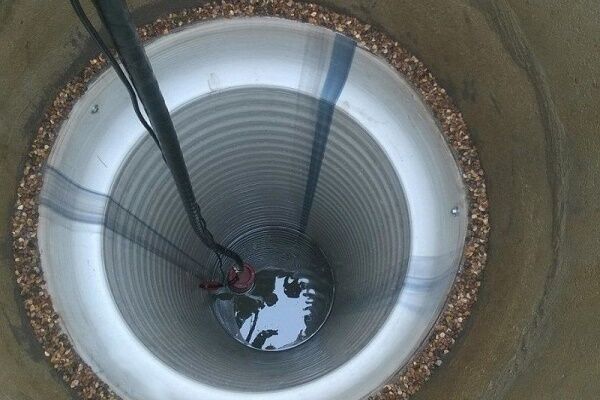
After removing the crushed stone, you can proceed to installing the insert. First, you need to assemble it correctly. The individual segments are connected to each other using sealing rubber parts. The connection method is similar to sewer pipe assembly, but on a larger scale.

Depending on the length of the structure, it can be installed manually or using machinery. You need to lower it carefully. It is necessary to ensure that there is no sharp impact on the bottom of the excavation, since a single mechanical impact may cause the plastic to crack. At the next stage, the insert is fixed in the well.

If the diameter of the well is slightly larger than the insert, then the distance is filled with a solution with a cement or gypsum base. To mix the binder composition you will need a sand-gravel mixture, the binder itself and water. For the solution, you need to mix three parts of ASG and one part of cement.
Water is added gradually, its amount directly depends on the humidity of the ASG. The finished solution is poured between the insert and the well along a special chute, which is a sheet of bent tin. After pouring, it is necessary to leave the well for 2 - 3 weeks until the solution completely hardens.
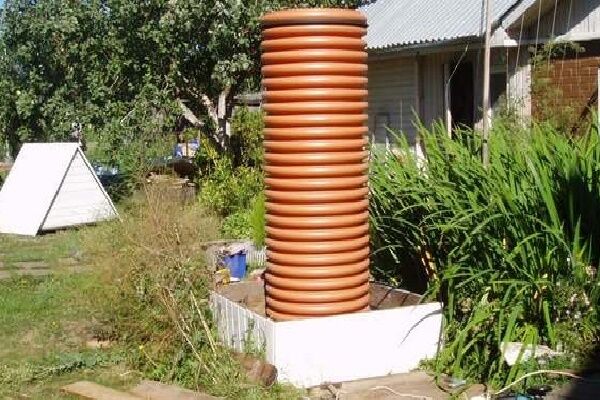
Construction of a new water intake point
Let's consider a step-by-step technology for creating a well using a plastic “sleeve”. All work will be divided into three stages.
Pre-planning and marking
If a water source has not yet been installed on the site, then it is better to give preference drilling a well. Professional drillers will build a working in one or two days. These services can be ordered from specialized companies or firms engaged in drilling wells in the private sector.

Before starting work, it is worth interviewing neighbors who have their own borehole or well. The information obtained from them will help determine the approximate depth of the excavation, the level of the water table and the presence of perched water, if it was encountered during the construction of neighboring springs.
In addition to this requirement, it is necessary to select a suitable location on the site. The source of drinking water should not be located near a septic system or farm buildings. The minimum distance of designated objects is 25 m.

After marking and drilling, the insert segments are assembled into a single whole. The process is simple. Anyone can handle it. The process of assembling the segments has already been described. Unlike the previous method, concrete rings are not used here. The plastic insert is placed in the hole and sprinkled with crushed stone. Next comes the filter device.
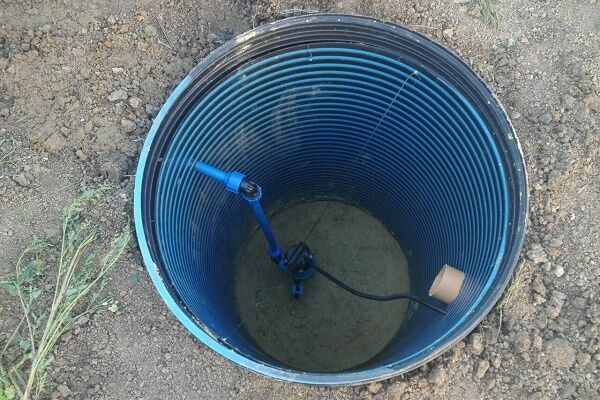
Installing a bottom filter
The bottom filter consists of several layers. If the bottom of the excavation is buried in fine or dusty sand, then the first one is a wooden grid or a perforated board made of boards.
It fits to the bottom. A piece of geotextile cut to the diameter of the excavation is placed on top of it. It will perform the function of fine cleaning instead of sand. The material is easy to use, but requires replacement as it becomes clogged.
Crushed stone is placed on top of the geotextile in the following order:
- A layer of fine crushed stone is 15 - 20 cm.
- A layer of coarse crushed stone is 10 - 15 cm.
This prevents fine sand and gravel from getting into the produced water. The installation of a bottom filter is especially important if a pump is installed in the well, because the listed contaminants can damage the unit.
Crushed stone is poured into buckets at the bottom of the well. It is necessary to control the uniformity of distribution bottom filter - this affects water quality.
Equipment testing and adjustment
The first start-up should be made only after making sure that the equipment is connected correctly. Water cannot be used for drinking purposes immediately after installation. It is necessary to remove the dirty liquid accumulated in the well with a pump, and along with it, remove the sediment that got into the shaft when installing the liner.
To remove water, you need to lower the pump hose to the bottom of the well and pump the water into a container in your garden. In the future it can be used for watering.
If there is no storage tank, then you can drain the water directly into the ground, but at a considerable distance from the well. Only after these steps can you connect the pump to the home plumbing system.
Well maintenance and cleaning
Regardless of what material the well is made of, it needs cleaning and system care. Periodic inspection is necessary as debris may enter the shaft. This can lead to clogging and rotting of water at the water intake point. In such cases, the mine is cleaned and water is repeatedly pumped out.
Another cleaning method is to replace the bottom filter at the bottom of the well. If this element becomes clogged, the water becomes cloudy and musty. To prevent such situations, it is necessary to change the gravel and geotextiles at the bottom of the well.
A popular cleaning method is to add a small amount of potassium permanganate to the well. It kills microorganisms that live on the surface of stones. After such disinfection, water from the structure must be pumped out several times. If you do not clean the well and neglect disinfection, then over time the water will become unusable.
Conclusions and useful video on the topic
The video demonstrates the process of installing a plastic insert followed by preparing the water intake structure for operation:
How to make a bottom filter to purify well water:
In some areas, own water intake is the only way to obtain drinking and process water. Using a plastic insert can extend the service life of the structure, which means saving on repeated drilling work or digging a new one.
If installed correctly, the insert can be reused if the well becomes unusable. This is a useful acquisition that reduces the cost of well equipment work.
If you have anything to add, or have any questions about using a polymer insert for a well, you can leave comments on the publication. The contact form is located in the lower block.


To be honest, I don’t see any other advantages other than ease of delivery and relative durability. The mechanical strength of such a design is questionable. What if a heavy machine, about 8-10 tons, stands next to such a well? It is not a fact that the earth will not “move” and crush the wall. That's why only reinforced concrete rings, they last at least 50 years, even if they are all covered with moss and other things.
In your area, the movement of tectonic plates begins when a car stands nearby? And how often do you drive trucks close to a well?
Gennady, even the durability is questionable. If the well is shallow and the water freezes, the plastic will crack within a couple of years. Well, the main drawback that I see is the danger to health.The plastic still breaks down and small particles, which then cannot be stopped even with a filter, end up in the water. If cement is still a stone and is easily excreted through the gastrointestinal tract, then in the case of plastic it, or rather particles, can damage the kidneys. I don’t want to be treated and even keep the water in my garden in metal cans.
For Gennady - What about sand and kidney stones and more?! And what about metals in water samples?! Even mineral water, juices, beer and other drinks are recommended to be purchased in glass! And not iron and plastic.