Restoring ventilation: reasons for decreased efficiency and restoration of air ducts
Proper organization of ventilation not only ensures the influx of fresh air and the outflow of exhaust air, but also minimizes the risk of mold formation in the apartment.However, over time, even a well-functioning system breaks down, signaling problems with unpleasant manifestations.
Regardless of the reasons for the failure, ventilation restoration must be carried out in a timely manner - after a comprehensive check and assessment of the condition of the air ducts. How to perform the check correctly and what you should pay attention to - we will consider all these questions in our article.
We will also analyze in detail the main reasons influencing the decrease in air exchange efficiency. We will supplement the material with visual diagrams and thematic photos.
The content of the article:
Signs of decreased ventilation efficiency
In apartment buildings and private buildings, the quality of the air is usually maintained through the operation of a supply and exhaust ventilation system with natural circulation.
The flow of fresh air is provided by windows, vents, doors or special valves. Removal of waste materials is through exhaust ducts installed in the kitchen or bathroom.

With sufficient air circulation, few people think about installing an air exchange complex.
These questions become relevant with the appearance of the first signs of deterioration in ventilation:
- increased humidity and air stuffiness;
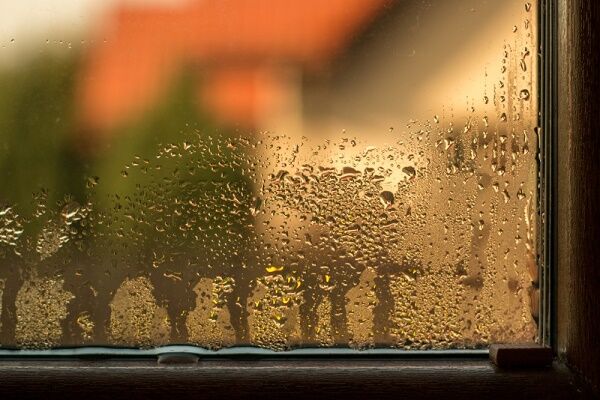
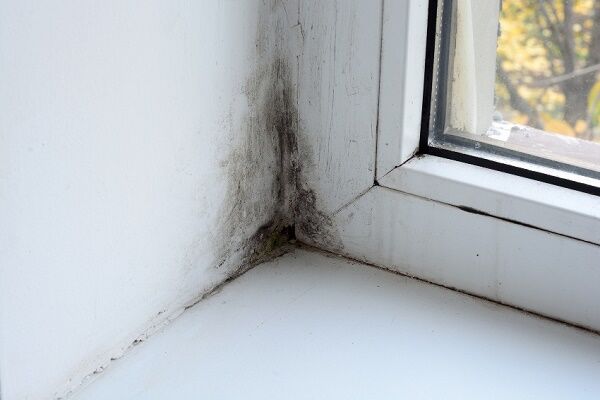
- the appearance of condensation on windows, “black spots” on slopes, mold on walls, especially in corners and behind furniture;
- after ventilation, the room very quickly becomes stuffy - the windows always have to be kept in “micro-ventilation” mode;
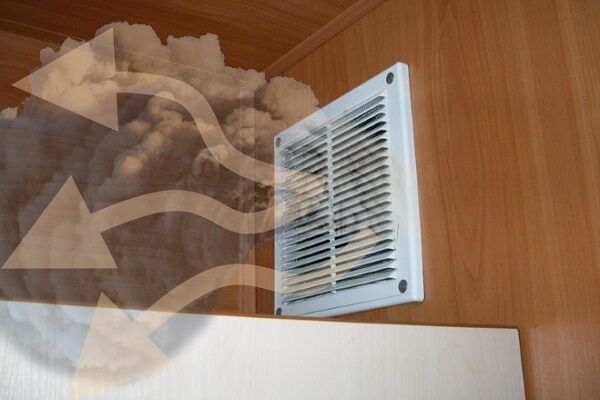
- reverse thrust with foreign odors coming from neighbors - the air flow rushes into the apartment, and not into the ventilation duct;
- Dust quickly accumulates on furniture;
- kitchen aromas spread throughout the apartment.
In addition to external manifestations, there are indirect signs of a lack of clean air. Household members begin to complain about deteriorating health, the appearance of unexplained drowsiness and fatigue. To feel comfortable, the air in the room must contain at least 21% oxygen.

The listed factors indicate a malfunction of the ventilation system and are the basis for checking the performance of the ventilation ducts. It is necessary to promptly establish the cause of the failure and determine a method for restoring ventilation.
Causes of poor ventilation and solutions
Problems with the functioning of natural ventilation occur for the following main reasons: a decrease in the capacity of the air duct, blocking the air flow, or “equalizing” the temperature inside and outside the building.
Let's look at each reason and possible ways to eliminate it in more detail.
Problem #1 - ventilation shaft malfunction
Insufficient draft of the ventilation shaft is most often explained by clogging of the channel, narrowing of the cross-section of the air duct or its complete blocking.
Over time, an impressive layer of dust is deposited on the walls of the ventilation duct, and the air duct becomes overgrown with cobwebs. Debris accumulated over many years leads to a narrowing of the shaft - the volume of exhaust air is reduced.In addition, clogged ventilation can cause a fire.

Sometimes clogging of the mine occurs due to the fault of unscrupulous apartment owners or hired workers. Without thinking about the consequences, some builders throw some of the garbage into the air duct. The narrowing of the channel is also accelerated by the irreversible processes of shrinkage of the foundation, deformation of walls and ceilings.
The solution to the problem is obvious. It is necessary to determine the degree of contamination and carry out cleaning ventilation ducts. You can process the exhaust vent on the apartment side yourself. Deep cleansing is performed by masters using special equipment.
Often the culprits for a sharp decrease in ventilation efficiency are the residents themselves. When repairing or remodeling an apartment, some “craftsmen” block the ventilation ducts: install built-in furniture or narrow the exhaust vent at their discretion. Rash actions lead to a stop in air circulation or reverse draft.

The greater the number of storeys of the house and the number of supply channels, the stronger the traction. Accordingly, if you remove any element of the exhaust system from the chain, the draft weakens. When several “sleeves” are simultaneously blocked, the flow power is not enough to lift and push out the exhaust air.
As a result, the opposite effect occurs - air flows rush down and enter apartments mainly on the upper floors.To prevent reverse draft, the exhaust air ducts of the top floors are led directly into the attic. However, this does not eliminate the problem of insufficient air flow in the ventilation shaft.
The issue is especially acute in houses where the ventilation duct passes through the kitchen. In an effort to free up usable space, would-be craftsmen completely or partially cut off the air duct. “Modernization” of space leads to unpleasant consequences for neighbors.

Air with “aromas” enters the channels of the bathroom and kitchen. After walking about 3 meters, he ends up in a mine. Thanks to this device, exhaust fumes do not leak from the upper floors to the lower ones, and prevents kitchen fumes from entering the bath, toilet and living rooms.
After cutting off part of the box, the shaft narrows significantly, and a small portion (about 30-40 cm) remains of the three-meter “sleeves”. As a result of the alteration, the air coming from below rests against the barrier and excess pressure is formed - part of the flow rushes upward, and part of it into the nearest ventilation window.

The solution to the issue comes down to the following steps:
- Invite a specialist for an expert analysis of the effectiveness of ventilation.
- Get a diagnostic conclusion. The document should indicate the level of air exchange, probable reasons for its decrease and recommendations for improvement.
- Oblige the owner of the apartment who blocked the exhaust hatch to restore the ventilation duct. The requirement is issued by a supervisory authority or by court decision.
After the air duct is restored, the owner of the apartment receives documents to transfer them to the housing inspectorate, BTI, court, DEZ and other authorities.
Problem #2 - high airtightness of the room
According to SNiP, a full flow of air during ventilation with natural impulse occurs through leaks in external fences, mainly window filling.

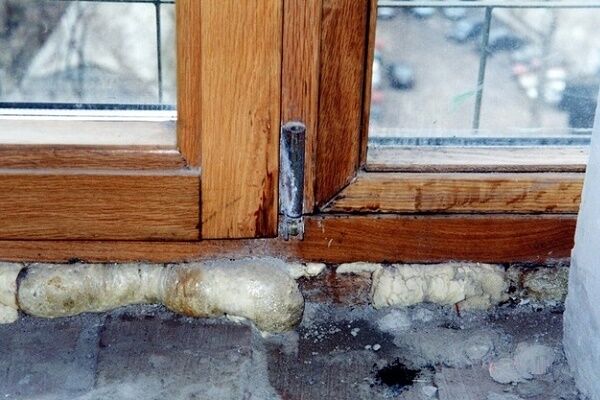
In the era of “European renovation”, this dogma requires revision. Replacing old double-glazed windows with PVC window systems and installing modern doors block the flow of air. New generation structures are highly airtight, thereby solving the problem of heat conservation and sound insulation.
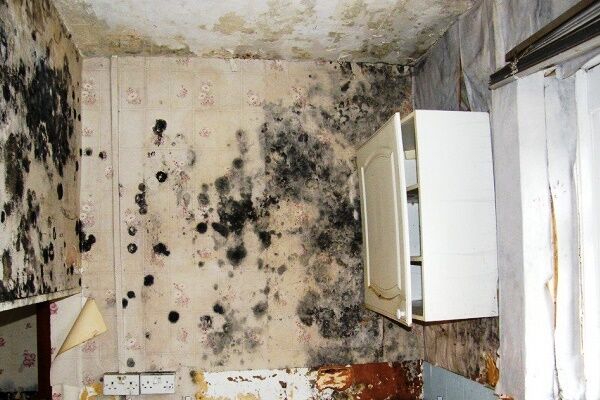
At the same time, blockage of the supply channels leads to a malfunction of the ventilation. There is a feeling of stuffiness in the air, increased humidity, and the appearance of dampness and mold.
Ways to solve the problem:
- operation of windows in micro-ventilation mode;
- installation supply window valve or its wall variety.
The first option can be implemented on most window units. The mechanism for adjusting the position of the sash is mounted in the profile when assembling the window. The fittings are controlled by turning the handle 45°.

A more effective method of restoring circulation is installing a supply valve.Window and wall inlets normalize air speed in the room, keeping microclimate indicators (temperature and humidity) normal.

Each type of supply valve has its own characteristics. Window models are easy to install, but their performance is not always enough to fix the problem.
And here wall supply valves are more effective, but for installation you will need to make a through hole in the wall. Installation errors can cause the air duct or wall to freeze.
Problem #3 - influence of external factors
Ventilation works effectively when the outside air is colder than inside the house. In winter, warm room air penetrates faster into the exhaust ducts - intense circulation occurs.
High outside temperatures in summer can cause air stagnation or back draft. There is no prerequisite for the natural influx of air masses - a temperature difference at which cold currents replace warmer ones. That is why, when it is warm and humid outside, mold most often appears on the walls of the bathroom.
Solution to the problem: bathroom fan installation or in the kitchen to provide forced exhaust.

Diagnostics of performance and efficiency
Checking the operation of ventilation solves the following problems:
- Analysis of microclimate parameters and its compliance with sanitary standards.
- Detection of malfunctions in the operation of the exhaust and supply components of the system.
- Develop a troubleshooting plan.
The organization of the inspection includes visual, tactile diagnostics, as well as marker and instrumental control of air flow.
Inspection of the room and hood:
- Check window frames, walls in corners and behind furniture. Wet surfaces are a clear signal of insufficient air circulation.
- Assessment of the supply capacity of the system. Bring a damp palm to the window frame - the feeling of a draft indicates the serviceability of the supply channel. The operation of the exhaust opening is checked in the same way.
- Controlling the speed of odor removal. Leaving the windows closed, leave the apartment for 30-40 minutes. If, upon returning, you smell food or the “aromas” of a garbage can in the kitchen, then there are problems with ventilation.
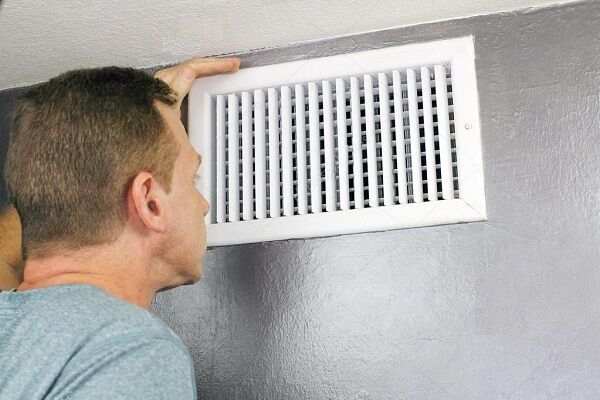
- Checking the external exhaust duct grille. Simple clogging of the ventilation holes can greatly reduce the exhaust draft.
For further research, the grille must be removed, cleaned and reinstalled. After manipulation, the pressure in the ventilation shaft should increase.
Sometimes, if the ventilation system is working properly, the “odors” are caused by neighbors. In this case, installing such a simple but effective device as check valve for ventilation.

Checking traction experimentally:
- Open a window in any room to ensure an influx of air masses.
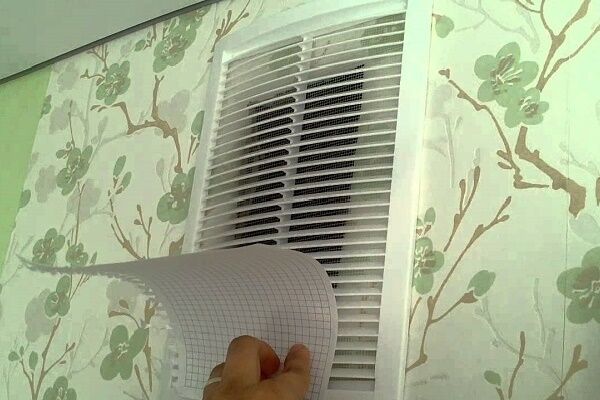
- Place thin paper near the ventilation duct grille.
- Evaluate the result. If the sheet is held and does not move, it means that the draft is sufficient and the hood is working properly.If the paper deviates in the opposite direction, we can talk about reverse thrust.
The sheet is attracted to the grate if you place it close to the wall. At a distance of 10-15 cm from the air duct, the thrust force is about 5% of the real value.

Instrumental measurements allow us to objectively assess the effectiveness of supply and exhaust ventilation.
Conditions for obtaining correct verification data:
- temperature difference between indoor and outdoor air – at least 13 °C;
- outside temperature – no higher than +5 °C.
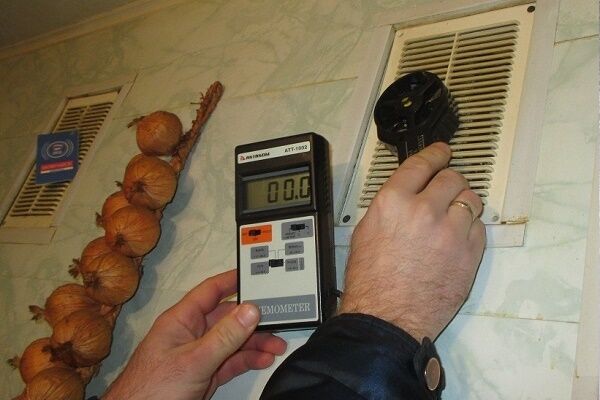
An anemometer is used for diagnostics - the device shows the speed of air movement in the ventilation duct. The readings obtained by measurements are compared with standard speed air in the duct.
Measuring algorithm:
- Open the window slightly.
- Release the exhaust vent from the grille.
- Turn on the anemometer and bring the device to the channel.
- Take readings.
The minimum circulation speed of air flows in the common shaft is 5 m/s, in channel branches – 3 m/s.

Calculation formula:
Q=V * S * 360,
Where V – measured air speed (m/s), S – cross-section of the ventilation duct (sq.m).
According to accepted standards, at least 60 cubic meters per hour must come out through the hood in the kitchen, and from 25 cubic meters per hour in the bathroom.
Do you want to check the ventilation yourself, but have never done it? We recommend that you read the step-by-step instructions for checking the operation of channels.
Methods for eliminating ventilation defects
The method for restoring the functionality of the ventilation system depends on the reason for the decrease in its efficiency.Some troubleshooting methods can be implemented independently. However, a number of issues require the involvement of professionals and the use of special equipment.
Do-it-yourself air duct cleaning
Cleaning the general building ventilation line, to which the side branches are connected, is the task of utility workers. They are required to carry out preventive inspections and maintenance of the ventilation system twice a year.
Residents are prohibited from performing any manipulations with central engineering systems. The maximum that an apartment owner can do is clean the ventilation duct from your home.
The first step is to remove the grill, clean it and rinse it under running water. To wash the ventilation grille, it is permissible to use neutral detergents. No chemicals should be used inside the canal.

To clean the ventilation duct deeper, a flexible steel cable with a brush for servicing chimneys is suitable. Insert the structure into the air duct opening and scrape off dirt from the walls with a brush. Remove any remaining debris from the canal with a vacuum cleaner.

If the measures taken do not improve the exhaust draft, it means that the main shaft is clogged. To clean it, you need to invite a special service.
Restoration of the ventilation riser
Spontaneous modifications affecting the ventilation duct will sooner or later have to be corrected.Understanding the structure of the air duct, its restoration will not cause any particular difficulties.

The cost of the upcoming work must include the following:
- material for fencing the ventilation duct (foam block, plasterboard, plaster blocks or OSB sheets with fire protection);
- corrugated pipes for the installation of ventilation ducts coming from the kitchen and bathroom;
- cement-sand mortar or ready-made adhesive composition for laying foam blocks;
- plaster and finishing of the box.
To restore the kitchen air duct, gypsum boards or foam blocks are optimal. Building materials have the necessary strength, impermeability and fire resistance. In addition, the slabs provide sufficient sound insulation.
Restoration of the ventilation riser is carried out in several stages.
Stage 1 - preparing the premises and opening access to the mine
The kitchen must be emptied as much as possible - remove furniture, dishes, and light household appliances. Cover built-in cabinets, cabinets, equipment and floors with polyethylene.
To open access to the shaft, markings must be made on the wall and floor according to the dimensions of the future box. Remove the tiles, concrete screed and open the air duct.

Stage 2 - restoration of side walls and partitions
The side and front sides of the air duct are laid out, corresponding to the previously dismantled structure. The companion channels are separated from each other and from the common shaft by foam blocks.At the same time, the cross-sectional area of the “sleeves” necessary for the free passage of air is preserved.

Stage 3 - checking ventilation and decoration
To assess the effectiveness of the ventilation system, it is better to invite a specialist. In any case, he will be required to provide a conclusion to receive an acceptance certificate for the work performed.
Decorative design. If the air circulation does not raise any questions from the supervisory authorities and there are no complaints from the neighbors, then you can safely begin finishing the box.

Conclusions and useful video on the topic
Operation of the ventilation system of an apartment building, reasons for decreased efficiency and solution to the problem:
Restoring a ventilation duct using foam blocks and metal pipes:
Prerequisites for the appearance of reverse thrust and ways to eliminate it:
Regularly checking the efficiency of the ventilation system and preventive cleaning of air ducts will help you avoid unpleasant consequences: the appearance of dampness, damage to wall finishes and deterioration in well-being. Uninterrupted operation of supply and exhaust ducts is the key to a healthy microclimate.
Have you discovered a decrease in ventilation efficiency and want to identify the cause and eliminate it yourself? Maybe you have problems identifying the cause or want to consult our experts about a solution?
Or maybe you are professionally involved in installing ventilation systems, cleaning ducts and restoring ventilation and want to supplement the above material with useful tips and important nuances? Write your comments, ask questions, add photos - your activity will help beginners better understand the topic of the article and solve their problems with ventilation.


