How to connect a washing machine yourself: step-by-step installation instructions
To install an automatic washing machine, it is not at all necessary to call a specialist. After all, his services will not be cheap.Detailed instructions explaining how to connect a washing machine yourself will help you correctly carry out all the necessary manipulations with minimal financial costs.
We will tell you how to install and connect household washing equipment with your own hands. The article we presented describes in detail the process of unpacking, leveling and connecting the unit to communications. Taking into account our advice, you can carry out all the work flawlessly.
The content of the article:
- The procedure for connecting an automatic machine
- Stage #1 - choosing a location for installation
- Stage #2 - preparation for installation
- Stage #3 – leveling the washing machine
- Stage #4 - connecting the machine to the water supply
- Stage #5 - connection to the sewer
- Stage #6 - connecting to the electrical network
- Stage #7 - test activation
- Conclusions and useful video on the topic
The procedure for connecting an automatic machine
To start the operation of the washing device, you need to choose the optimal location for its placement. Then prepare the washing machine for connection work.
After this, all that remains is to correctly perform the following steps:
- align the device, giving it the optimal position;
- connect to the water supply to collect water needed for washing;
- connect to the sewer to drain water when implementing a given program (washing, soaking, rinsing, spinning);
- connect to the electrical network to ensure the supply of electric current that drives the unit’s motor.
Next, we will consider in detail all the above stages.
Stage #1 - choosing a location for installation
First of all, you need to think about the place where the unit will be installed. Modern models that require connection to water supply and sewerage are permanently located, since moving them is very difficult.
Rules for the location of the washing unit
For the correct location of the washing machine, the following requirements should be taken into account:
For the optimal location of the automatic machine, factors such as:
- existing water supply and sewerage systems nearby;
- the ability to easily connect to the mains (preferably not through an extension cord, but directly);
- the presence of a flat (preferably reinforced concrete) floor;
- washing machine dimensions, the method of loading laundry into it, the side of the hatch opening for front models;
- free access from all sides: in addition to easy loading of laundry, it is important to have a gap on the side of the wall so that you can get out accidentally dropped laundry or other items.
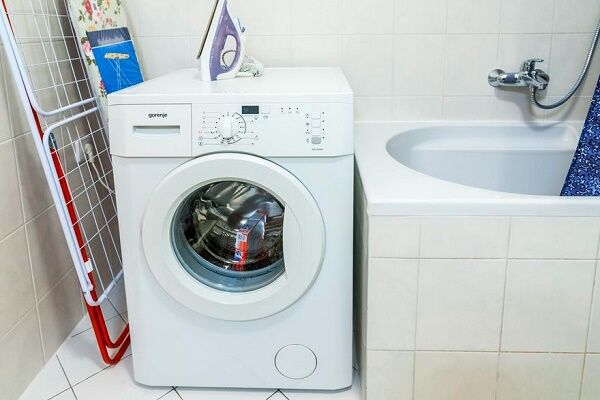
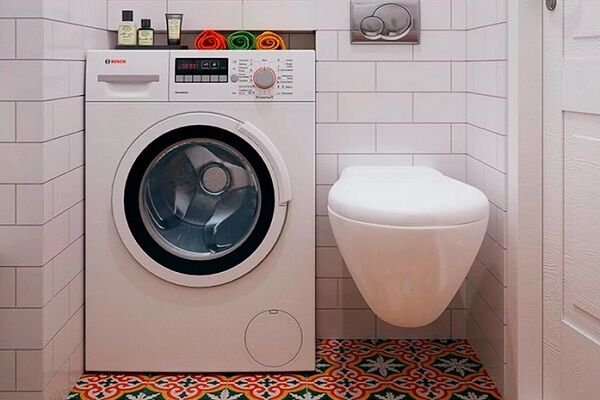
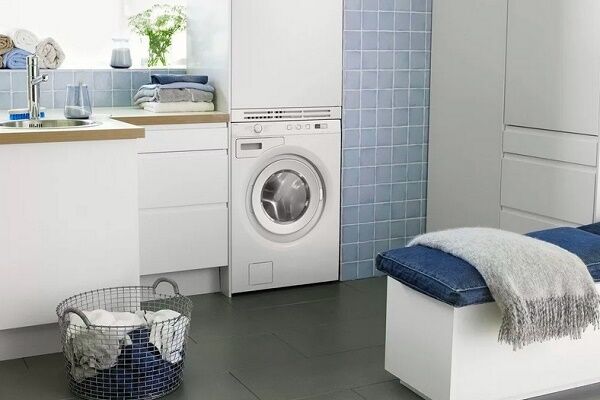
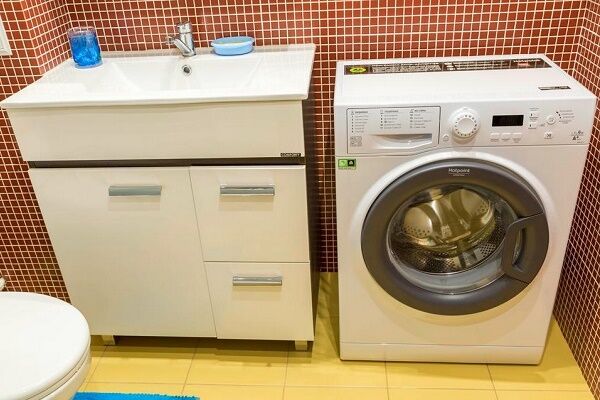
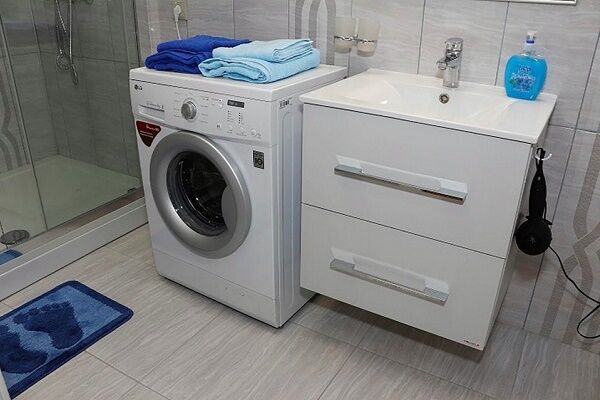
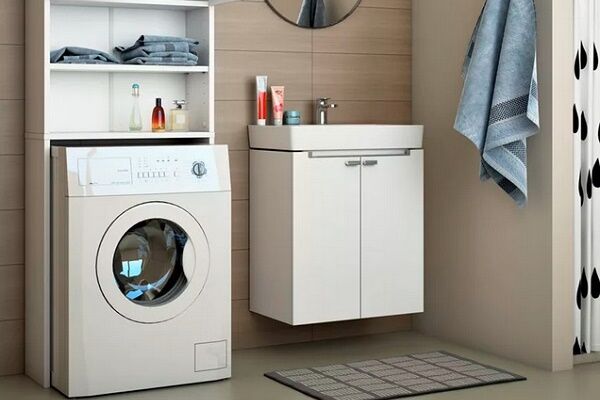
In practice, washing devices are usually installed in the bathroom, kitchen or hallway.
Determining the installation room
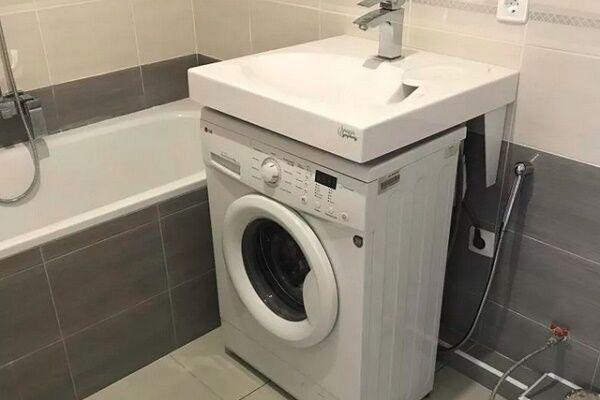
Bathroom. This is a traditional location for placing the machine, since in this room, which has all the necessary communications, it is easy to install a drain and water supply.
The disadvantages of this option include the miniature size of most bathrooms, which is why owners often have to choose compact models.

In addition, such spaces are characterized by high humidity, which can affect both the condition of the electrical wiring and the serviceability of various components of the washing machines.
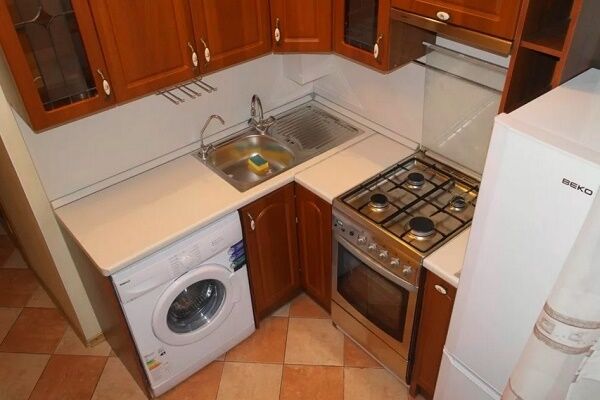
Kitchen/dining room. This room is also often used for installing the unit, which is usually installed under the sink or next to the sink. Since this room is usually also small in size, doing laundry here sometimes bothers the housewife.
In addition, the temperature and humidity conditions in the kitchen also do not always correspond to the operating rules for washing machines.

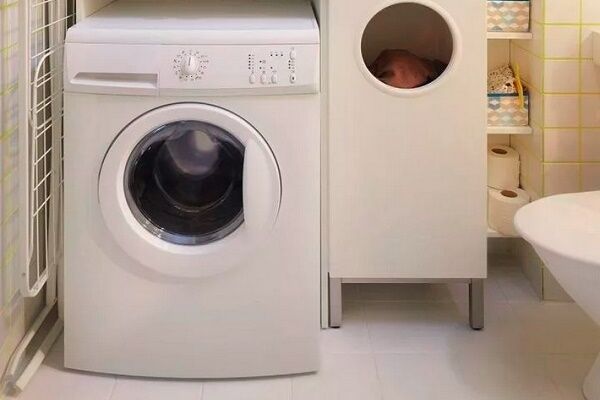
Entrance hall and utility rooms. An unusual, but quite acceptable option would be to install an automatic device in the hallway, closet, utility room or even a spacious closet. The only obstacle in this case may be the lack of easy access to communication systems.
Future installers of the washing machine need to consider:
Stage #2 - preparation for installation
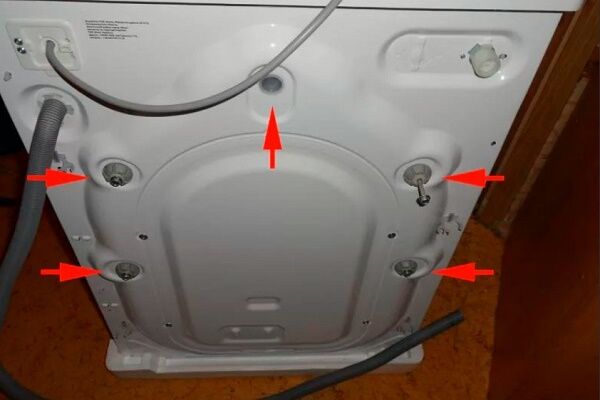
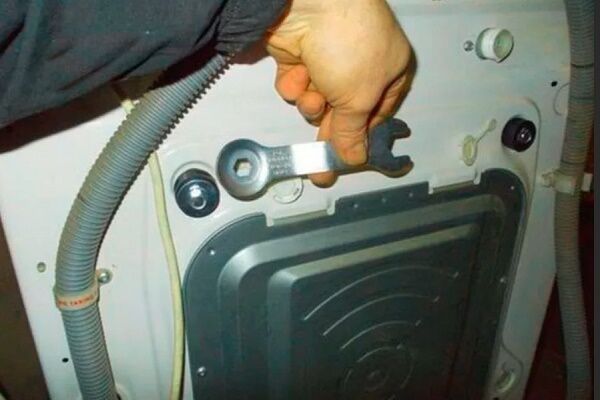
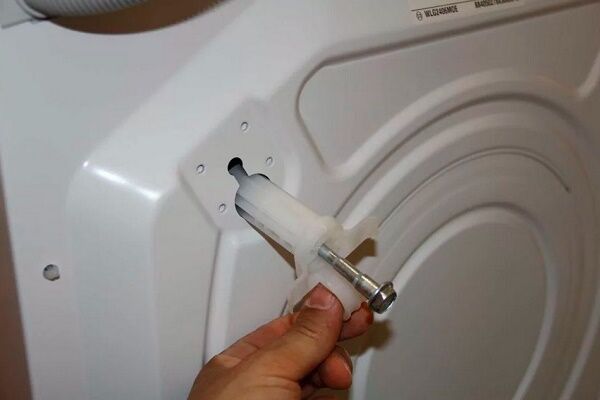
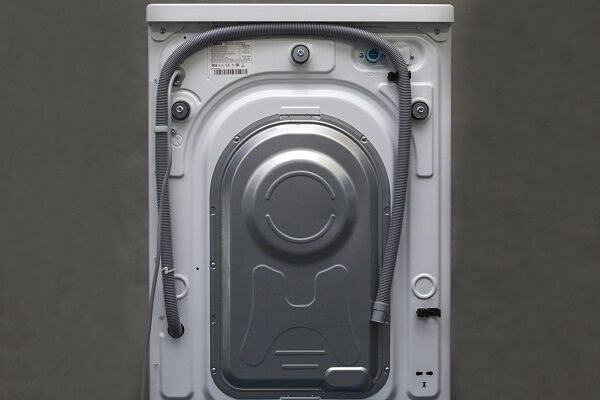
The purchased machine is delivered to the apartment in packaged form. All rotating parts are fixed with fasteners (bolts, bars, brackets), which protect the device from accidental damage during transportation.

The delivered washing machine should be freed from the box, and then begin removing the fixing parts:
- You need to remove the brackets from the rear wall of the unit, which are installed for the rigidity necessary for transporting household appliances. Such elements also hold flexible parts of the structure, namely the hose and electrical cord.
- Following this, it is necessary to remove the bars, placed between the tank and the device body. To do this, just tilt the washer slightly forward.
- You should also remove the bolts, which are installed on the front of the machine to fix the drum. It is better to immediately insert plastic plugs into the holes from the removed elements (they are usually included with the model).
Released fasteners must be carefully packed and stored: they may be needed when calling for service.
Stage #3 – leveling the washing machine
In order for the automatic machine to serve with maximum efficiency, installation and connection of the washing machine should be approached with the utmost care.
The floor base requires special attention, which must meet a number of criteria:
- strictly horizontal surface;
- durable structure;
- sustainability;
- protection from vibration and other influences inevitable during operation of the unit.
If the foundation does not meet these criteria, it is better to take measures to meet them.
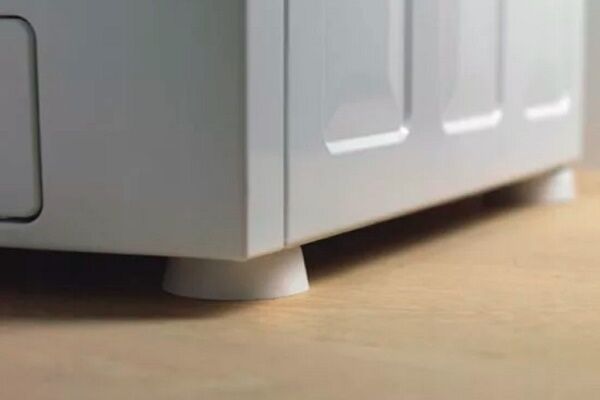
In addition to levelness and reliability, the base for installing the washing machine must also have anti-vibration properties. If you are going to install it on a tiled or wooden floor, then it is better to carry out the whole process using devices that dampen vibration:
On fragile surfaces, it is advisable to make a cement-sand screed or strengthen the existing floors in the place where the washing device is supposed to be installed.
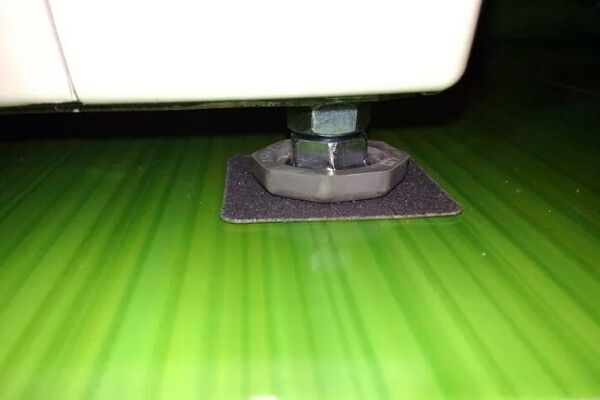
After making sure that the base meets all the previously mentioned requirements, you can begin installation. The fully unpacked machine with the fasteners removed is placed in the selected location.
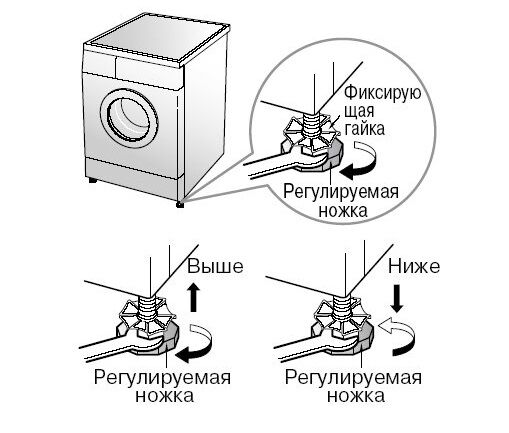
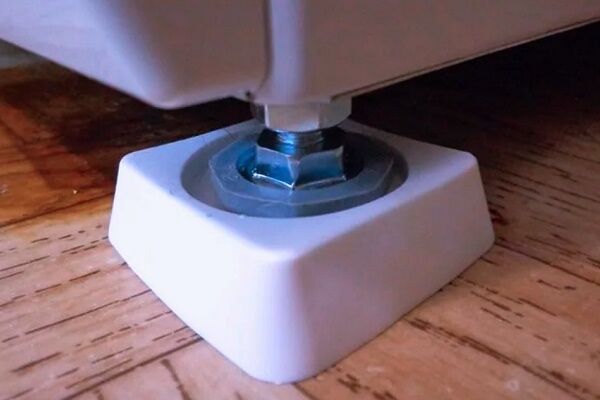
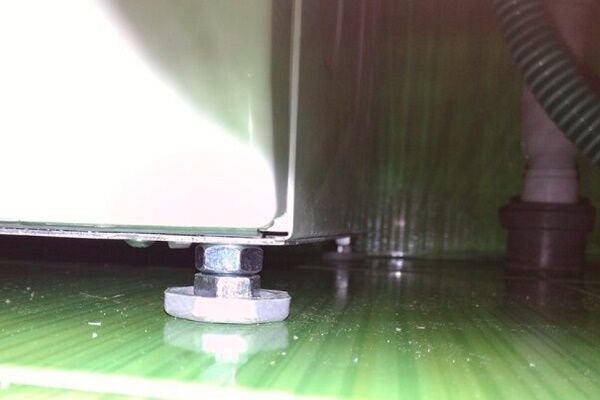
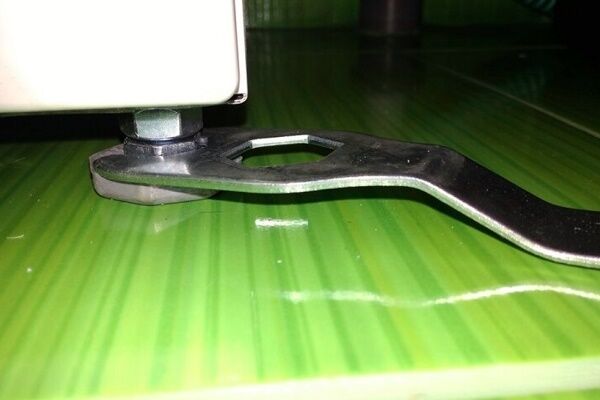
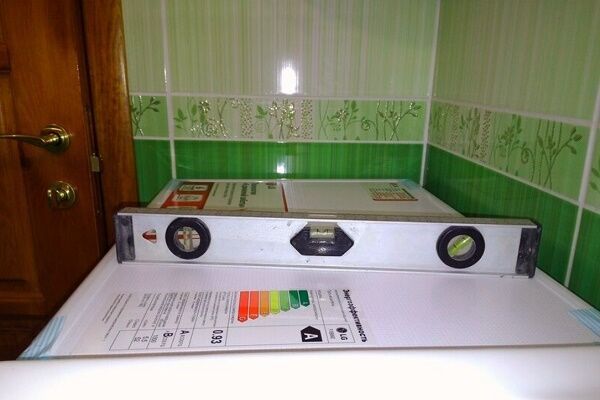
The horizontal installation is determined by the top panel, while the angle of deviation, which is checked by the top cover, should not exceed two degrees. Exceeding this indicator leads to a sharp increase in vibration, which has a very negative effect on the condition of the components and significantly reduces the service life of the machine.
Placing improvised materials under them that could slip out from under the supports during work is strictly prohibited. This may lead to an emergency situation. At the same time, it is allowed (and even recommended) to place a thin rubber mat on the sliding tiled surface.
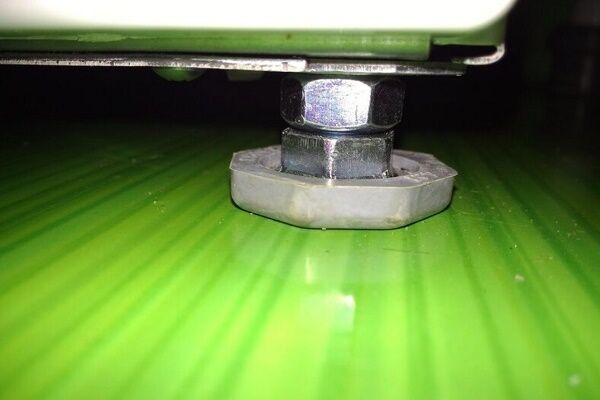
As soon as the body of the machine is in a perfectly horizontal position, you should tighten the locknuts counterclockwise, fixing the optimal height of the support legs.
When leveling the machine, it is recommended to consider the following factors:
- The greatest degree of stability of the unit is achieved with the adjusting supports screwed in as much as possible, but this option is only permissible on a perfectly flat surface.
- When installing the machine on an inclined floor, it is advisable to use fixing parts to secure the supporting structures.
- To check whether the unit is installed correctly, you need to try to swing it diagonally. If the process is done correctly, there is no free play or its amplitude is the same for different diagonals.
Once you are sure that the unit is in the correct position, you can proceed to the next steps.
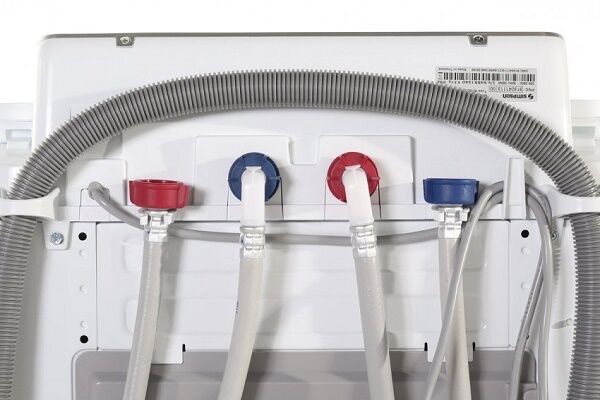
Stage #4 - connecting the machine to the water supply
The most difficult and critical part of installing an automatic machine is connecting it to the water supply system.
To make a proper connection you should:
- Assess the location of the unit in order to choose the connection method, which determines the selection of hoses, fittings, and fittings.
- When determining the required length of flexible pipes, it is important to note that they should be placed behind furniture and plumbing fixtures so that they do not interfere with walking.
- As a rule, hoses are supplied with the machine, but their size is often insufficient. In this case, it is better to purchase extensions that make installation easier.
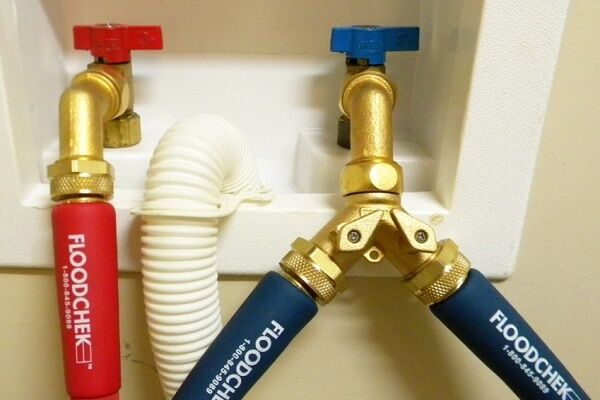
- The necessary elements for connecting to the water supply system are also a ball faucet for washing machine or valve, the choice of which depends on the wiring features.
Typically, the connection is made on a straight section of the pipeline, using a tee or pipe extension to which a flexible line from the toilet tank is attached.

Let's take a closer look at all the steps to connect the machine to the water supply network.
Preparation of materials and tools
To connect to a metal pipeline, you will need gas and adjustable wrenches, as well as sealants - FUM tape or combed flax. It is better to give preference to the latter, since it swells when exposed to moisture.

If we are talking about inserting into an internal water supply system made of polymers, you will have to use special equipment for soldering plastic pipes, a calibrator, as well as special fittings designed for plastic and metal-plastic.
Having prepared everything you need, you can proceed directly to connecting the washing machine to the water.
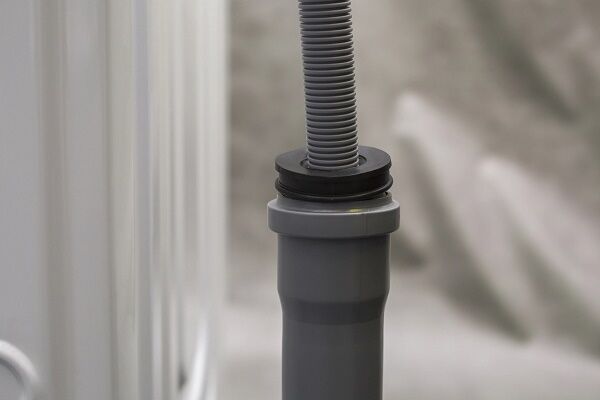
Fastening the hose to the washing machine
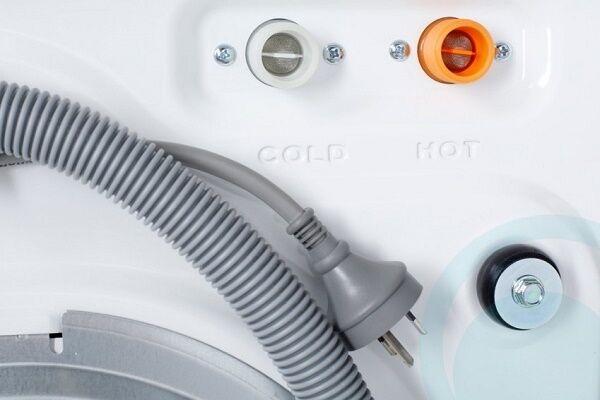
First of all, connect the supplied or separately purchased hose directly to the unit. To do this, you need to place a filter at the end of the hose - its convex edge should be directed towards the outlet of the washing machine.
Then you need to tighten the nut at the place where the hose is attached to the device. Tightening is done by hand; the use of keys is not recommended.

After this, you can begin connecting the machine to a water source. In this case, several options are possible.
Connecting the “machine” to the toilet cistern
The easiest and fastest way to connect a washing unit to a water supply, which has become widespread. Instead of complex installation operations, it is enough to complete a few basic steps that are accessible even to a beginner.

To connect you need:
- remove the flexible liner from the pipe extension;
- screw on the tee fitting;
- connect to it a flexible line from the tank and a hose to supply water to the washing machine through a valve or stopcock.
Unfortunately, this option cannot be used when installing a washing device in a separate bathroom or kitchen, since the automatic unit and the toilet must be located in the same room, preferably at a short distance from each other.
Connecting the hose to the mixer
A popular option is also to connect the washing unit to a mixer, which can be used in almost any room.

This method requires a special version of the tee, the design of which includes a built-in ball valve. This part is installed in the space between the cold water supply connection in the mixer and the cold water supply to the same part.
This method is reliable and simple, but has a significant disadvantage, since the hose with which the water supply is connected to the washing machine is always visible. You can hide it by arranging a box and then finishing it with tiles.
Subtleties of tapping into a pipe
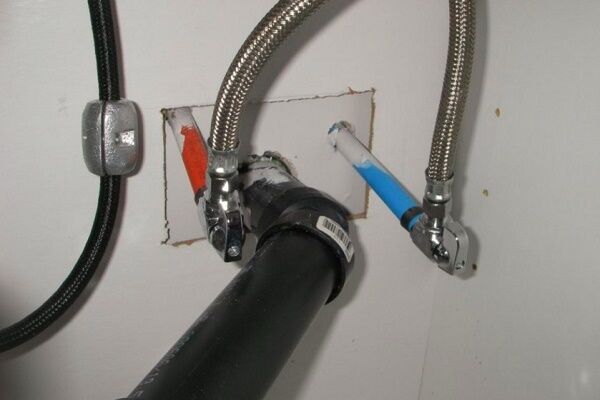
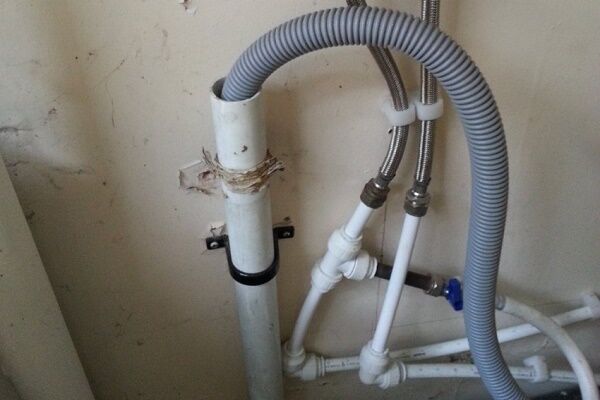
The machine can be connected to communications made of metal-plastic or polypropylene almost anywhere. To do this, it is enough to cut the pipe, installing a metal tee at the cut site, thanks to which you can make a communication branch to the washing unit.

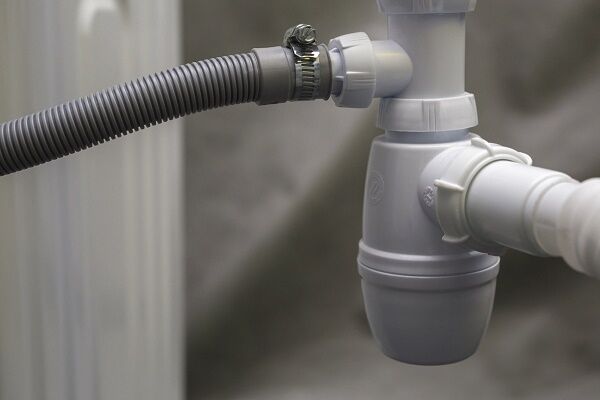
One of the simplest and most convenient options for connecting a washing machine to a sewer outlet is to connect its hose to a special siphon, equipped with a telescopic side pipe. In this case, it is enough to put the outlet hose on this “branch”, selecting the required diameter on it.
To perform this operation, you must take the following steps:
- cut the pipe;
- measure the parameters of the fitting (tee);
- cut off a piece of pipeline corresponding to the transition device;
- attach the connecting ring with the nut;
- using a special tool - a calibrator - flare the ends of the pipe at the points of connection with the tee;
- put the pipe onto the fitting fitting;
- push the o-rings at both ends, then tighten the nuts tightly.
It is better to screw the shut-off valve to the transition device in advance, before starting the tapping. This will avoid damage to the fairly elastic metal-plastic pipe. After connecting the tee, flexible water hoses are attached to the screwed faucet.
If a plastic pipeline is installed in the apartment, you will need a more complicated version of connecting the washing machine. In this case, to perform installation work, you need not only special fittings, but also a special tool that allows you to solder pipe fasteners with adapters.
Here, a tee is installed on the cold water supply pipe, to which a hose is connected through a shut-off valve, supplying water to the “machine”.
Connection to water supply in any location
In some cases, it is convenient to connect the washing device at a certain point in the straight pipe. To perform this operation, you will need a special adapter - a coupling saddle, which is a clamp made of a clip with a threaded outlet.

You can purchase such an element at specialized retail outlets, but it is important to pay attention to the diameter of the fitting, which must match the size of the pipe.

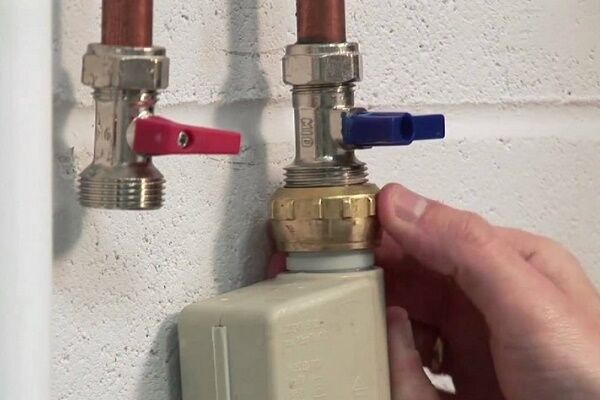
An adapter firmly fixed to the desired fragment blocks the flow of water.After this, a hole is drilled through the saddle pipe. A valve (ball valve) is screwed onto the outlet of the coupling, which is used to connect the hose that supplies water to the washing machine.
For greater operating comfort, it is also possible to connect an angle tap to the unit.
The nuances of using a washing machine without running water
The operation of automated washing machines is possible if water is supplied under pressure. Absence water supply in a private house or at the dacha does not mean giving up the usual amenities, since in this case you can use an alternative solution.
To use a modern machine, it is enough to raise a volumetric water tank to a certain height (at least one meter), to the bottom of which you need to connect a hose leading to the corresponding outlet of the unit. Water should be added to the container in a timely manner.

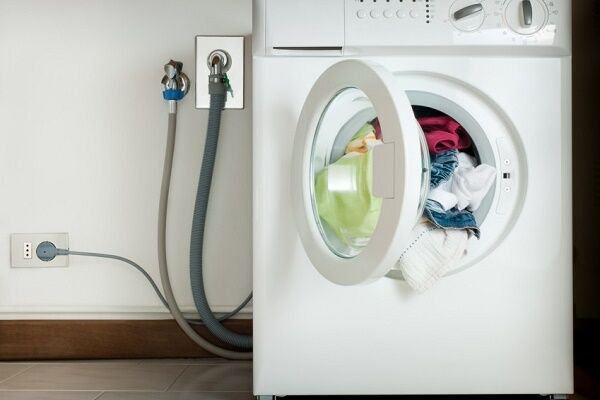
Stage #5 - connection to the sewer
Connecting the washing machine to the sewerage system allows you to solve the problem of draining dirty water that remains after washing.
This can be done using different schemes:
- Temporary, by using a special hose directed into the toilet or bathtub.
- Constant, providing for a stationary drainage device.
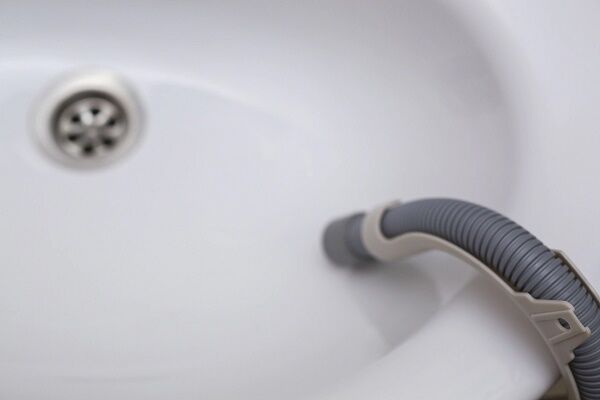
The first method is very simple: the water is drained through a hose attached to the edge of the bathtub, toilet or sink, which can be done using special fixing elements.
In the second case, two options are possible.Drainage is carried out using a siphon of a special design, which has a separate outlet for connecting automatic washing machines, located under the siphon elbow.
You should not replace such a device with a conventional analogue, since waste water will linger in it, spreading an unpleasant odor.

The washing machine can be connected without a siphon. With a sewer pipe diameter of 4-5 cm, the outlet for the machine can be connected directly to this element.
The S-curved drain hose is inserted into the pipe so that it does not touch the waste water, and then carefully surrounded by a sealant and sealed. The distance from the inflection point to the floor must exceed 0.5 m.
The maximum hose length is usually indicated in the instructions supplied with the model. If you select a large part, the load on the pump will increase sharply, which can lead to unexpected failure.
If the design of the washing unit does not provide for a check valve, then when installing the model, there is a restriction on the height at which the drain hose is located. The manufacturer usually provides specific information in the instruction manual.
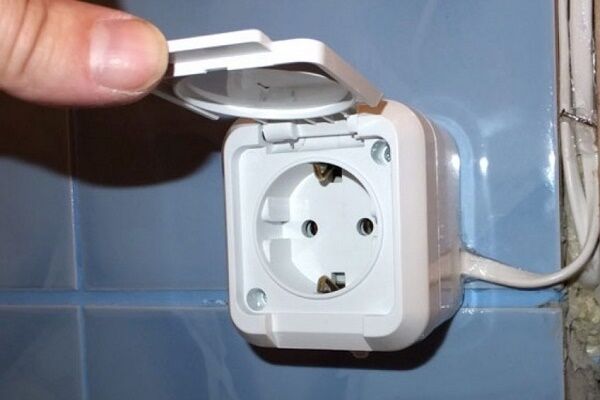
Stage #6 - connecting to the electrical network
Specific information on how to properly connect a newly purchased washing machine to the power supply can be found in the instructions. Particular attention must be paid to safety rules, since the device has a high level of power consumption (1.5 - 2.5 kW) and also comes into contact with water.

As a rule, to connect a washing machine yourself, you need a three-wire socket, which has a phase, a neutral, and a carefully insulated ground wire. The distribution board is grounded by using a special bus with a cross-section of at least 0.3 cm.
When connecting, it is advisable to follow several recommendations:
- The best option is individual power supply. In this case, the washing machine is powered from the distribution panel via a separate input, and electricity is supplied through additionally laid power cables. To prevent wires from spoiling the interior, they can be placed in neat plastic boxes.
- Application of specialized electrical protection devices. In addition to the mandatory circuit breakers, it is recommended to additionally install in the power supply line of the automatic machine residual current device (RCD).
- Strict compliance of all components of electrical circuits with the requirements/technical/operational characteristics. For wiring, it is important to use three-core cables, and the cross-sectional area must exceed 1.5 sq.cm.
- Connecting the socket according to the diagramspecified in the instructions. It is important to comply with a mandatory condition - the presence of protective grounding. The wire must be connected to the grounding bus of the distribution panel.
- Connecting a conductor to heating or water supply lines is strictly prohibited, since this can lead not only to machine failure, but also to the creation of emergency situations.
- It is better to give preference to sockets with IP44-IP65 when choosing models that have a high degree of safety; It is desirable that they have a lid that protects from moisture and a ceramic base.
- Extensions, tees and adapters should be avoided when connecting a washing machine: additional connections inevitable in this case can provoke an increase in temperature in the contacts, which leads to breakdown of the unit.
It is undesirable for the socket for an automatic machine to be located in rooms with constant high humidity.If the electrical cord is long enough, it is better to place the power supply in an adjacent space, for example, a corridor.
Stage #7 - test activation
Having completed all the work described above, you need to check the correct installation by starting the washing machine one by one to operate in all modes.

To do this, you need to inspect all the assembled components, and then conduct a test run of the machine without laundry, during which you need to pay attention to the following options:
- the period of time (it should be short) during which the tank is filled;
- no leaks;
- correct functioning of the drain;
- uniform rotation of the drum;
- good spin;
- full heating of water, which occurs 5-7 minutes after the completion of water collection.
At all stages of operation of the unit there should be no extraneous sounds.
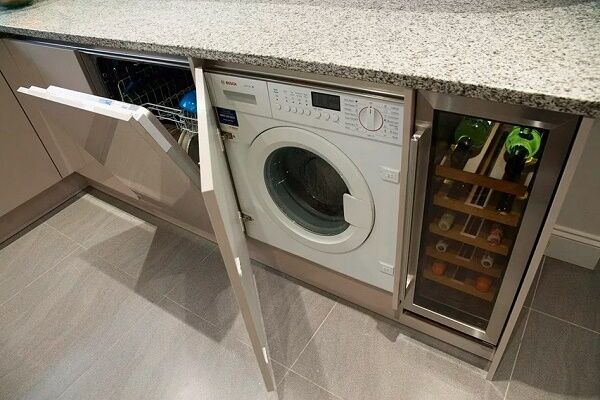
You can install and connect to communications yourself not only a washing machine. We suggest that you read the instructions for installation of a dishwasher. The step-by-step guide we offer will provide effective assistance in carrying out the work yourself.
Conclusions and useful video on the topic
The presented video explains in detail the process of connecting the unit to the water supply, electrical network and sewerage system.
If there is a need to connect the washing machine drain to the washbasin, then detailed video instructions can be viewed in the following video:
The intricacies of connecting washing equipment to the sewerage system and water supply system with your own hands without the involvement of a specialist are discussed in the following video:
By strictly following the detailed instructions, which describe step by step how you can connect the washing machine to all communications with your own hands, you will be able to handle the installation of household appliances quickly and easily.
If you have doubts about your own abilities, then it is better to invite a technician from the service department.
Tell us about how you installed and connected the washing machine with your own hands. Share technological nuances that will be useful to site visitors. Please leave comments, ask questions, post photos on the topic of the article in the block form below.


There was a situation also related to connecting a washing machine. So we bought a new washing machine, and in order not to spend money on installation, we decided to do it ourselves. In general, after a couple of hours the entire bathroom was flooded, and they also collected water as quickly as possible so as not to flood the neighbors.It’s true what they say - the miser pays twice) But if you need your hands, then you can try, the information is useful.
There is nothing complicated about connecting a washing machine yourself. Of course, ideal conditions are if you already have prepared entrance and exits to the water. In my life I have had to connect a washing machine 2 times. The first time was in the combined bathroom, the second time in the kitchen. In the bathroom I encountered a water supply problem. I decided simply: I installed a tee to supply water to the toilet tank, and to get out, I threw a corrugation into the drain tee under the bathtub.
But in the kitchen everything turned out to be simpler. The tee was installed to supply water to the machine, the outlet was led into a siphon under the sink.
I did the balancing without a level. I tried the stability with my hands so that the machine would not wobble. That was enough.
When we moved into the apartment, it turned out that we had to install the machine and install the pipes ourselves. The peculiarity was that water was supplied to the toilet, sink and meters using a flexible hose, instead of plastic pipes. For now I decided not to change to PVC and without any problems supplied water to the washing machine with a flexible hose (metalized).
I did the balancing according to the level.
The problem with connecting the washing machine only arises when you need to cut the tee into the water supply pipe. Especially when I never knew how to do this. Here it’s either experiment or call a specialist. In my case there were experiments and Google. And in all other cases, these are rather trifles. You put it wherever you want, the main thing is that there is a drain and a connection, remove the bolts, level it in two planes and you go happy.