Connecting a shower stall to sewerage and water supply: step-by-step instructions
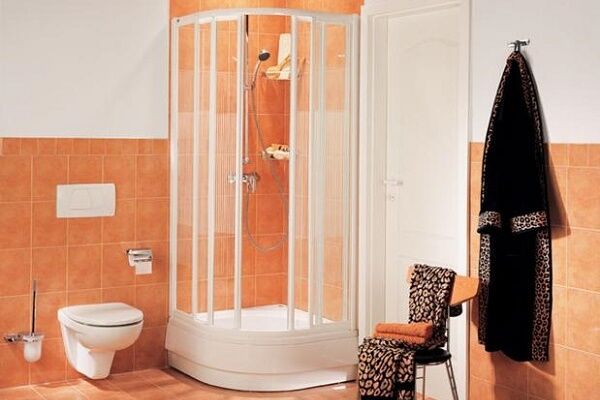
As a result of installing a shower cabin instead of a bathtub, there is more free space in the bathroom.At the same time, the functionality of this room is not reduced. Connecting a shower stall yourself should not cause any difficulties even for a novice home DIYer.
You just need to follow the simple rules for connecting it to the water supply and sewerage system, which are listed in the article we presented. We suggest that you familiarize yourself with the connection technology described in detail. Here you will find valuable advice shared by experienced plumbers.
To make it easier to understand, the information is supplemented by photo collections, diagrams and video instructions.
The content of the article:
Types of shower cabins and the nuances of their installation
A shower cabin in a bathroom is a plumbing fixture in the form of a small box designed for taking water procedures. It consists of a tray, an enclosing structure with hinged or sliding doors and devices for supplying water (taps, shower heads and hydromassage nozzles).
Some models are also equipped with built-in radios, steam generators and aromatherapy devices.
All shower cabins are divided into two types:
- Open – without a ceiling as part of the structure, only with fencing on the sides.
- Closed – with an internal space closed on all sides.
Shower cabins come in a variety of widths and lengths – from small models 70 x 70 cm to large ones with a 2 x 2 m bathtub instead of a tray.The latter is available in acrylic, enameled steel, cast iron or artificial marble.

The materials used to make this plumbing and its dimensions do not have much influence on the technology for connecting to sewer and water pipes. In all cases, the same connection diagrams, techniques and tools are used.
Difficulties can arise only in the absence of a pan, when the drain hole and the outlet from it to the sewer are walled up in the floor.
The easiest to install is a standard prefabricated model with a tray and shower panel. To connect it to communications, it will be enough to connect the siphon (drain ladder) to the sewer, and the hot/cold water pipes to the corresponding water supply pipes on the bathroom wall.
The layout of all pipelines should already be completely completed by the time the shower cabin is installed.

A shower cabin without rear partitions and without a shower panel can also create difficulties. The role of the first in such a design is played by the walls of the bathroom. And instead of the second one, a simple mixer with a watering can is installed.
In this case, connecting the shower cabin will consist of connecting it to the sewer and fixing the water tap to the wall. In this case, you will not only need to lay water pipes to the mixer, but also cover them beautifully with tiles.
Shower cabin connection technology
The water supply and drainage points for different models of shower cabins are located in different places. Before you do plumbing in the bathroom and sewerage from risers, it is necessary to purchase installed plumbing equipment or at least study its documentation.
Some shower cabins may require laying a drain pipe in the floor screed or constructing a stand (pedestal).

The closer the water sockets are to the mixer, the shorter the flexible outlets will be required to connect the plumbing to the water supply. The situation is similar with sewerage. The shorter the branch from the shower drain to its main pipe is, the less likely it is that the drainage system will become clogged.
The following manual will help you familiarize yourself with the sequence of stages of assembling and connecting the shower stall to the sewer:
Let's assume that we did not have to move the water sockets, water has already been supplied to the installation site of the system and a mixer has been installed. Having completed connecting the pan to the sewer system through a siphon and a section of sewer pipe, we begin the finishing work:
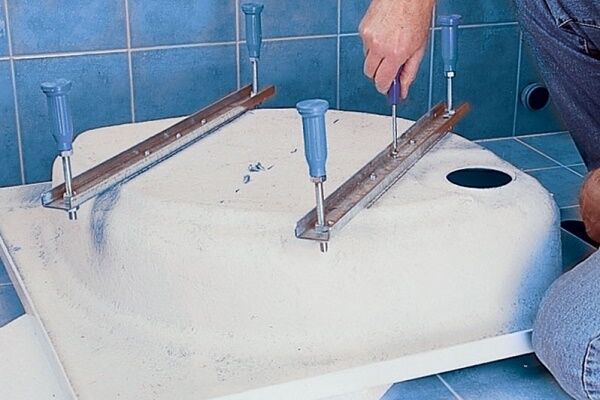
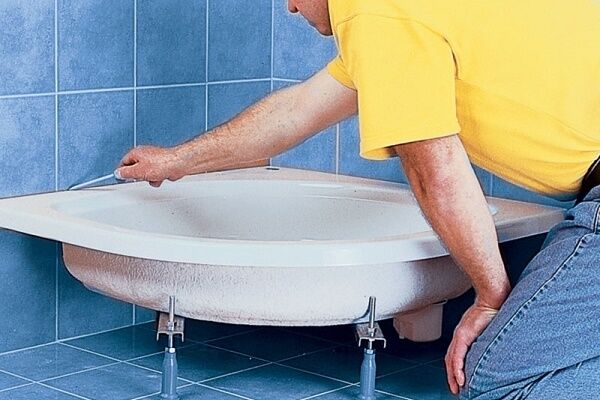
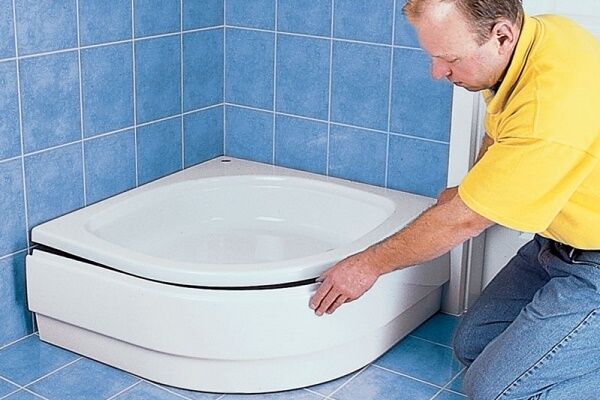
Step #1: installation of a pallet or podium
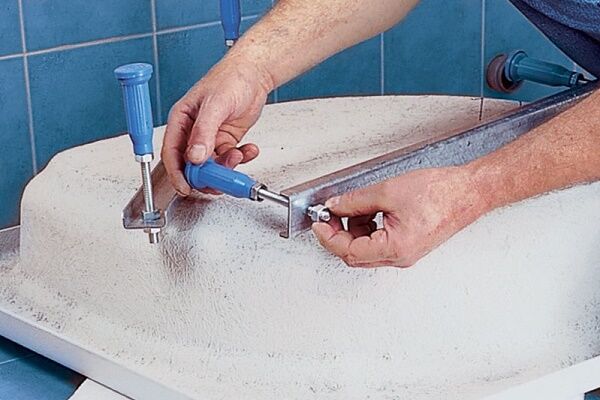
First produced pallet installation, if it is provided for in the design of the shower stall. This “bathtub” is installed on adjustable supports, allowing you to adjust the height from the floor. With their help, the horizontal position of the side is leveled.

The pan must stand strictly horizontally, then the water from it will flow into the drain without any residue. Its bottom is specially made at the factory with a slight slope towards the sewer drain. If installed incorrectly, it will leave puddles and dirty stains from drying out.
If there is no tray in the shower stall, then you will have to make one instead drainage structure. The easiest way to make this elevation is from concrete with tile or mosaic cladding.
To do this, first the perimeter of the pedestal is laid out from solid ceramic bricks. Then a drain is installed inside at the required height and connected to the sewer. Then a concrete screed is made with a slope towards the drain hole.
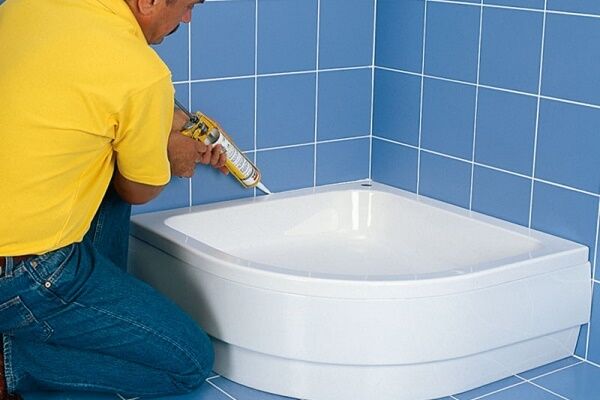
To prevent it from getting wet later, it is recommended to add liquid glass or PVA to the cement mortar to increase water-repellent properties.

The tiles should be glued to the screed with waterproof glue, and the seams should then be rubbed with hydrophobic paste or sanitary sealant. The drain pipe for a drain or drain with a siphon in all cases is selected with a standard diameter of 4 cm.
If you choose a smaller cross-section, the risk of blockages will increase sharply. And it will simply be difficult to place a pipe that is too large in a narrow space under the tray or cabin floor.
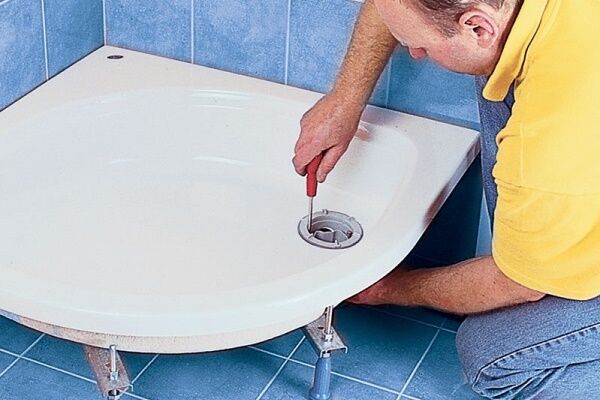
Step #2: connecting the pan to the sewer
When connecting a shower cabin with a tray to the sewer system, the work technology is as follows:
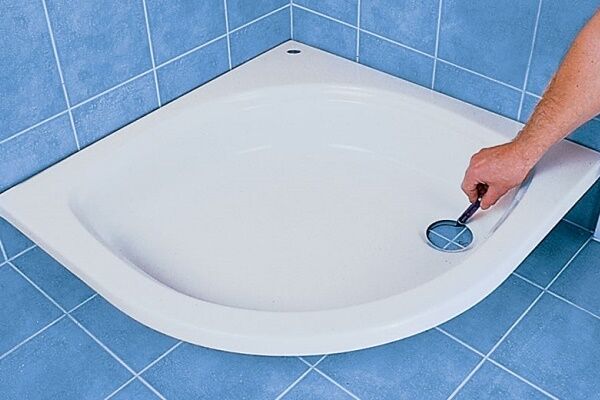
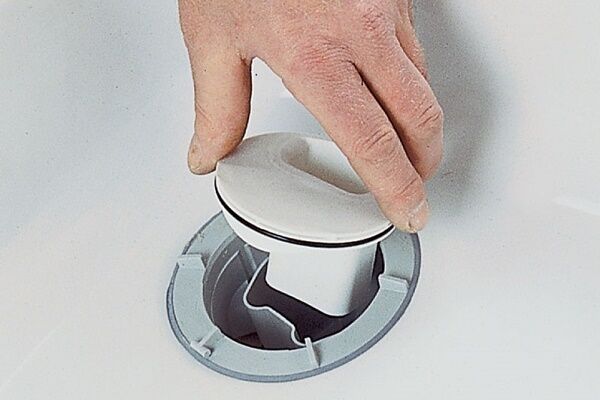
- A drain is mounted on the pallet in the corresponding hole.
- A siphon is installed.
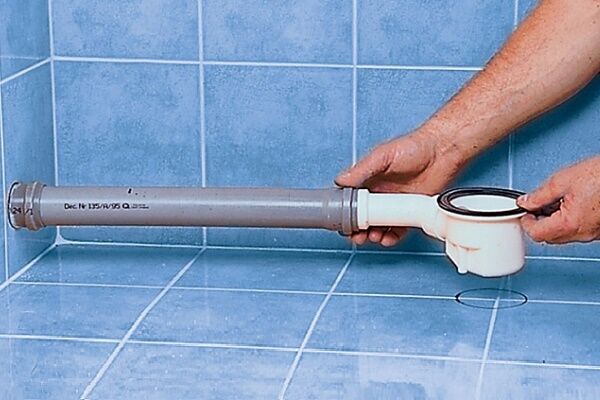
- A corrugated drain pipe is connected to discharge into the sewer.
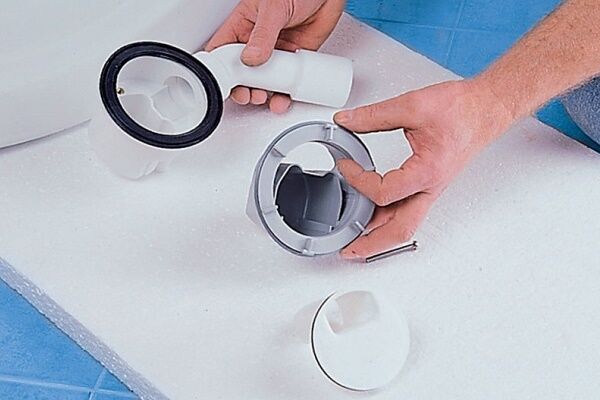
The diagram for connecting a shower cabin to a sewer pipe flat siphon must be included. It forms a water seal that prevents unpleasant odors from leaving the drainage system.
In its absence, a stench will constantly spread from the drain hole, which will turn the bathroom into an outdoor toilet in an enclosed space. And then, in the process of taking a shower, you will have to inhale the stench-rich ambers.

Unlike siphons for sinks, their counterparts for shower cabins are non-separable and have smaller dimensions. This is due to the lack of free space under the pallet above the floor.
If the drain hole of the shower stall is equipped with a mechanical “click-clack” pressure plug, then if it is clogged, it will not even be possible to clear it with a cable. If a plug of debris forms inside, you will have to move the shower box and disassemble the drainage system.

To ensure that the junction of the corrugated pipe and the sewer inlet does not allow odors to pass through, it is necessary to put a rubber cuff on the end of the first. It must match the diameter of the sewer tee into which the drainage system from the shower stall is inserted.
Step #3: connecting water pipes
It is best to supply water to the shower from the washbasin. This is done using long hoses or by installing plastic outlets. And in order not to completely shut off the entire water supply riser in case of cabin repairs, they should be equipped with additional valves.
If the water in the pipes is of poor quality, then it is also necessary to install filters. Otherwise, the shower nozzles will quickly clog.
As a rule, all the pipes on the shower panel for supplying water to the various nozzles are connected into a single system at the factory. You just need to tighten all the fitting nuts with a wrench for reliability. If the set of pipes and fittings comes disassembled, then it will have to be pre-assembled according to the instructions.

To connect a cabin with a shower to the water supply, you need to do the following:
- Completely shut off the water supply.
- If there is a connected faucet, open the taps to relieve pressure in the water supply.
- Remove old taps and showers.
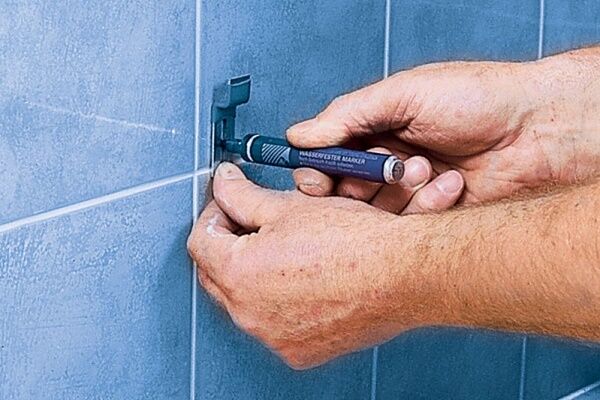
- Screw in adapters (eccentric bushings) at the ends of the water supply connections and adjust them so that their center lines correspond to the mixer outlets.
- If a panel is connected, then flexible reinforced hoses are connected instead of eccentrics.
- Tow or FUM tape is wound onto the threaded connections, and then the washers are tightened on the fittings.
The water supply to the shower stall is assembled from plastic or metal-plastic pipes, connected to each other by welding or crimp sleeves. But its connection to the shower must be made with threaded fittings. The need to separate them may arise at any time.

There is no need to connect any water pipes to the hydromassage. Its pump takes water to form jets from the shower tray. The steam bath system also does not require a water supply connection. Water also enters the heat exchanger from the pan.
If installed in the shower stall thermostatic mixer, then you cannot connect it through a flow-through gas water heater. The thermostat, when regulating the temperature, causes a pressure difference in the pipes. And the automation of a gas instantaneous water heater in such a situation simply turns it off.
When installing a shower cabin in a private house with an autonomous water supply, it is recommended to supply hot water exclusively through a storage boiler.
Step #4: connecting to the power grid and testing
Before checking the connections for leaks and starting the water, you still need to connect the shower stall to the electrical network and install all its glass panels on the tray.
If the latter is made of steel or cast iron, then it must be grounded. A hairdryer or electric razor cannot be ruled out falling into water, so it doesn’t hurt to worry about safety.
First you need to assemble all the panels together, without tightening the screws and screws until they stop. Only if everything worked out correctly will it be possible to tighten all the fasteners completely. As a result, the structure should not have distortions or gross displacements of elements.

The power supply line must have conductors of sufficient cross-section and grounding. Modern shower cabins with a wide range of additional functions consume a lot of electricity. It is best for them to lay a separate three-core cable from the panel with the RCD.
All electrical appliances in the shower are powered through a step-down transformer with a voltage of 12 V, so the likelihood of getting an electric shock is almost zero.
However, in the bathroom there are many other household devices connected to a 220 V network. The danger from them is quite real. Therefore, according to the rules, cabins with showers must be connected to the power supply via a grounded cable and the devices themselves must be grounded; waterproof sockets.
Previously, when all water supply systems were completely installed from iron pipes, there was no need to perform these unnecessary operations. The pipeline lying in the ground served as a completely reliable grounding system. But now metal is being replaced by plastic in many places. As a result, this natural conductor of current is severed in several places.
Advice from experienced plumbers
No matter how reliable the factory assembly of the shower panel may seem, the nuts of the connected pipes, hoses and pipes should be checked and tightened with a wrench. After installing the shower in place, all connecting nodes will be invisible.
What will happen there behind the blank panels is unclear. There is no point in bringing things to a flood. Tightness and tightness again. No pipe connection should leak a week or month after completion of the connection and shower installation.
If the drain hole of the shower stall is too far from the sewerage inlet, then you will need to install a waste pump. It will not be possible to organize gravity flow through pipes here. This unit operates silently and is just the right size to be placed under a pallet.

All pipelines must be located at a slight slope. Gravity flow is needed for both sewerage and water supply. Sewer pipes are laid with an inclination to the riser, and water pipes - from it to the shower cabin, so that when shutting off, the water completely flows out of the system.
In overly budget models, the drain can be made of silumin alloy. This drain will last a maximum of two to three years.It’s better to immediately spend money and replace it with a stainless steel analogue, which also comes with a normal siphon made of high-quality plastic.
Water pipes laid to the shower stall should be equipped with ball shut-off valves and dirt traps. Water in centralized systems is not always perfectly clean. If the holes in the watering can are not yet clogged with grains of sand, then the nozzles will definitely stop working. Filters with valves can be placed directly at the riser or at the ends of the inlets near the booth.
If you want to know how to repair a shower box, you can from one of popular articles our site.
Conclusions and useful video on the topic
Videos will help you understand the nuances of assembling and connecting plumbing equipment.
Video #1. Instructions for assembling and connecting the shower stall to the water supply:
Video #2. How to install and connect a shower cabin:
You can connect a shower cabin to utilities without involving specialists. You just need to have the skills to use a wrench to connect pipes and a screwdriver to assemble the cabin itself. It will take several hours to complete the installation, but everything will be done accurately.
You can share your own experience in assembling and installing a shower box, ask questions, and talk about the operating features in the block below. Please comment and ask questions.


Experience shows that a shower stall in an apartment, if the bathroom floor is not equipped with a drain, is a time bomb. At the same time, oddly enough, the most harmless option is when a person buys a cheap shower corner without a back wall and lid.If he smartly plugs the siphon hose into the sewer and isolates the connection between the pan and the wall with something like a swallow border, his neighbors below will be in almost no danger.
But serious buildings with a faucet on the back wall and a lid... there are so many possibilities for not tightening them, so many seams that you can forget to coat with sealant, which, even if applied, can dry out and crack over time... Apartments in which the neighbors above have such a cabin , should cost 10 percent less.
It’s a pity that the shower cabin is not assembled like a construction kit, and even if you know where the specified part comes from, you still won’t be able to assemble it the first time. The main thing is that it is a quality item, otherwise this procedure will drag on for several days. For some reason, the bottom of the cabin stubbornly does not fit tightly... also, when installing, I was faced with the fact that it turned out that it was necessary to install silicone between the side and the adjacent wall, water flowed out from there during the first use.
Nice article, thanks!
I liked the article, a lot of useful information