DIY HDPE pipe installation: welding instructions + how to bend or straighten such pipes
Low-density polyethylene occupies a leading position in the popularity ranking among materials used for pipeline assembly.The secret of such demand is easily explained by the versatility of use and ease of installation of polyethylene pipes.
But as when working with any other polymer, high-quality installation of HDPE pipes with your own hands can only be done subject to strict adherence to technology. We will tell you what nuances to consider when joining elements. We will explain how to correctly bend and straighten them.
The content of the article:
Effective methods of joining HDPE pipes
Technologically, HDPE pipes can be connected using two main methods – one-piece and detachable.
The first involves the involvement welding machine, the second is implemented without using it.
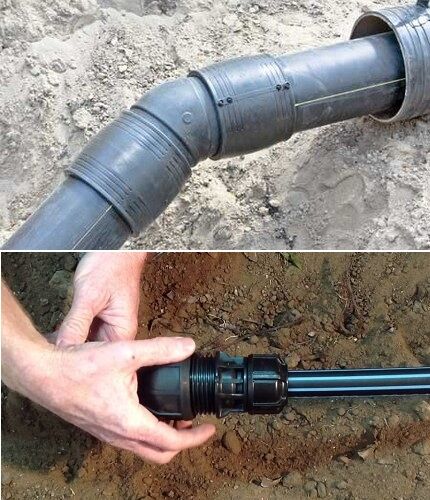
Welded permanent connections enable maximum sealing, which is especially important when arranging lines under pressure. Detachable connections are easy to install and make it possible to disassemble the pipeline at any time in order to change the configuration of the main line or add new bends to it.
Permanent connection methods
To join HDPE pipes, two permanent connection methods are used: by butt welding and by installing an electric welding coupling.
In any case, when implementing these methods, the following requirements are imposed on connections:
- The maximum displacement angle of the welded sections should be no more than 10% relative to the wall thickness of the pipes being joined.
- The joining seam should be made above the outer level of the surface of the adjacent sections.
- The height of the bead of a well-made seam should vary in the range of 2.5-5 mm.
The optimal value of the roller height depends on the thickness of the walls of the product being fused. On thin-walled pipes (up to 5 mm) it should be no more than 2.5 mm. If the thickness of the pipe walls varies between 6-20 mm, then the height of the roller should be no more than 5 mm.
By butt welding of pipes
The creation of a permanent connection is carried out by softening the material to the state of a viscous substance so that a diffuse unification of its parts occurs. It is used for pipes with a wall thickness of over 5 mm.
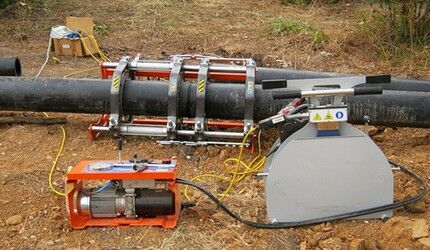
The welding connection method is used on straight sections of water pipelines that are supposed to be operated under pressure. Only it allows you to obtain a tight connection with diameters over 200 mm, since it does not create a loss of pipe rigidity, leading to deformation.
Do-it-yourself durable welding of HDPE pipes is carried out using a special tool. The essence of the method is to heat the ends of the joined elements to a viscous state using a heating nozzle. The softened ends are simply connected to each other under pressure, after which the connection area is simply allowed to cool.
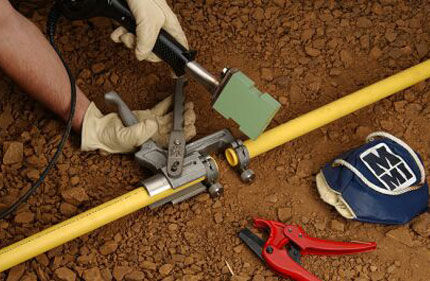
When performing welding work, it is important to maintain the temperature conditions of the heating elements.
The parameters of the time delay and temperature of the heating elements are determined taking into account three factors:
- Pipeline wall thickness.
- Diameter of bends.
- Technical parameters of the soldering device.
Connecting pipes by welding is the most reliable and durable option. With its help, you can create a one-piece mount that can withstand the pressure of both free-flow and pressure water supply systems.
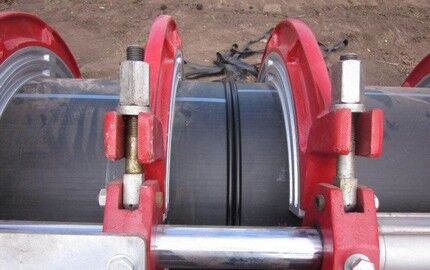
Welding is performed in the following sequence:
- The communication is trimmed to the specified size. The parallelism of the plane of the ends is adjusted. The ends are cleaned with a piece of sandpaper.
- A chamfer 2-3 mm wide is removed from the ends. The welding site is thoroughly cleaned and treated with a degreasing compound.
- The soldering iron is set to the heating mark of 260°. While it is warming up, string the welding nozzles and wait until their degree of heating reaches the set temperature.
- Using a centering mechanism, the fitting and the end of the pipe are buried in the cavity of the nozzle. If the soldering iron does not have a centering mechanism, the alignment will have to be checked “by eye,” making the alignment as accurate as possible.
- The centered elements are pushed to the specified mark, connecting under pressure, and the time specified in the instructions is maintained for melting.
- After completion of work, the device is moved to the side and disconnected from the network. The welding area is fixed in a given position without displacement or rotation until the surface is completely cooled.
When welding, it is important not to overexert it. This can provoke the formation of an influx of polyethylene onto the inner diameter of the product.
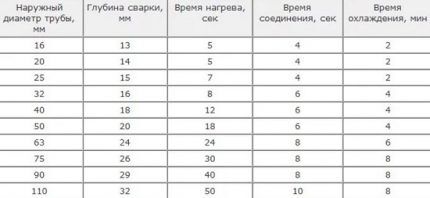
To obtain reliable fastening, the installation depth should be about 2 mm. By maintaining a given depth, the resulting weld will have an even, presentable appearance with the same indent height.
The following selection of photos will introduce you to the stages of butt welding of HDPE pipes:
Through electrofusion welding
When implementing this method of continuous connection, electrofusion welding or an electric welding fitting is used.
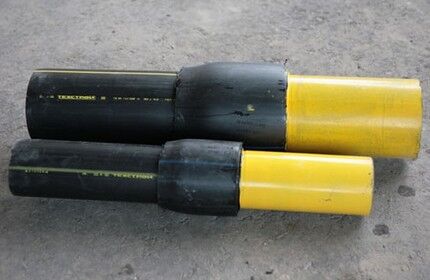
This method is effective when you have to work in cramped conditions. For example, when performing repair work in wells or when you need to make inserts into previously connected pipes.
There are no uniform standards for socket soldering in domestic regulatory documents. This technology is more often used in European countries and is regulated by DVS-220715 standards.
The technology for connecting HDPE pipes using couplings includes a number of main stages:
- Preparation of the communication area. The outer surface of the outlet is cleaned of grease and dust. For this purpose, soap and alcohol solutions are used, which are available in a wide range in hardware stores.
- Treatment of joints. The tightness of the fastening directly depends on how smoothly the cut is made. To obtain a perfectly smooth surface, the end of the pipe is rubbed with a piece of fine-grained sandpaper.
- Creating chamfers. The elbow joint is cut at 45°. The bevel will ensure the tightest possible fit of the elements and their fastening.
- Installation of the coupling. The coupling is connected to a power source. After it has heated to a given temperature, one side (mandrel) of the coupling is put on the pipe, and the other end (sleeve) is connected to the second pipe outlet.
The key condition for performing electrofusion welding is to ensure that the parts remain immobile during the heating and solidification of the elements. When deepening the branches of the segments into the cavity of the heated coupling, it is important to perform the work quickly, but as carefully as possible so as not to overheat the polyethylene.
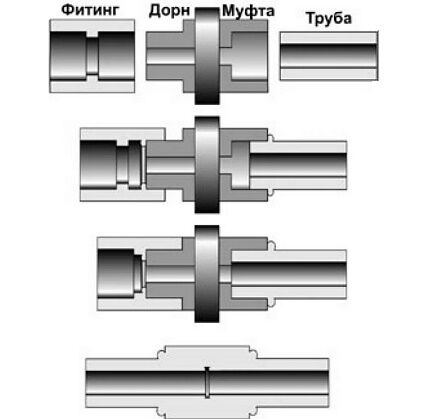
At the moment of deepening the segments into the cavity of the coupling, be prepared for the fact that liquid plastic will gradually begin to emerge from under it. After completing the work, all that remains is to remove the coupling and lay out the connected pipeline on a hard surface in order to fix it in the desired position.
After the melt has solidified, a crimp clamp tightly fitting to the pipe will be visible at the joint.
But when choosing this method, it is worth considering that plastic pipes are not very rigid.Therefore, with strong internal pressure, the created seam can simply separate. A coupling connection is not the best solution for arranging heating communications and creating outlets for a washbasin.
Assessing the strengths and weaknesses of various methods of welding HDPE pipes This article is devoted to the contents of which we advise you to familiarize yourself with.
Detachable connection methods
If we consider detachable connection options, they are implemented using flanges and compression fittings. With strict adherence to installation, they turn out to be as reliable as those created by using a welding machine.
Any type of permanent connection includes an elastic part. When compressed with a tightening tool, it fills all the voids in the joint area, thereby eliminating leaks.
Using HDPE fittings
To implement this method, compression fittings are used, which are fittings supplemented with external threads on both sides.
They are able to join pipes, providing a tight connection with high sealing performance. In this case, the detachable connection will not be difficult to remove at any time in order to change the configuration of the main line or carry out urgent repairs.
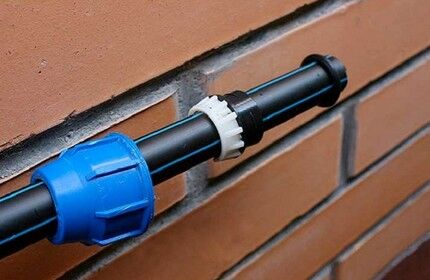
Sequence of actions to obtain a fitting connection:
- A spacer ring made of polyurethane or rubber is put on the prepared ends of both pipes. The outer diameter of the ring must be equal to the inner size of the pipes being joined.
- The ends are equipped with a tension nut and two washers. The first washer is designed to press out the spacer ring, the second is designed to seal the nut relative to the end of the pipe.
- The connection is joined according to the “pipe - fitting - pipe” principle. To increase reliability, it is pressed all the way on both sides with a tension nut.
A special key is used to assemble the mounted parts. They unscrew the clamping nuts on the connecting fittings.
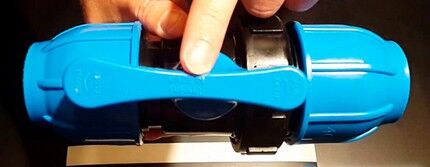
The main advantage of this connection method is that it is convenient to carry out even with a significant decrease in ambient temperature. While the limit for welded joints is at least +5°C.
A wide range of connecting elements with different diameters makes it possible to assemble any wiring, making the necessary branches in the pipeline.
By installing a flange
The flange type of connection is chosen when it is necessary to connect the HDPE pipeline to steel pipes. Using flanges, it is convenient to connect valves, regulators and gate valves to pipelines.
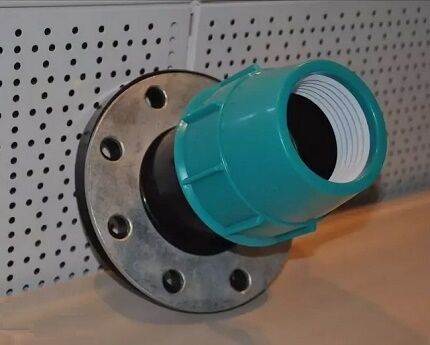
For installation on polyethylene pipes, flanges are used that comply with GOST 12882.80. They have an expanded inner diameter.
Work on installing the flange is carried out in the following sequence:
- At one end of the communication a thread is made.
- The element is screwed into the thread.
- The outlet of the connected pipe is placed on the element.
- The joint is heated with a coupling or a hair dryer.
Before putting on the flange, it is necessary to inspect it for the presence of sharp protrusions and burrs that could damage the end of the polyethylene pipe.
How to bend or straighten a product?
Polyethylene pipes are sold in straight 12-meter sections or in the form of solid products wound on large coils.Being in a twisted state, the products take the shape of rings and are deformed. Before straightening or bending a deformed HDPE pipe, it must be heated.
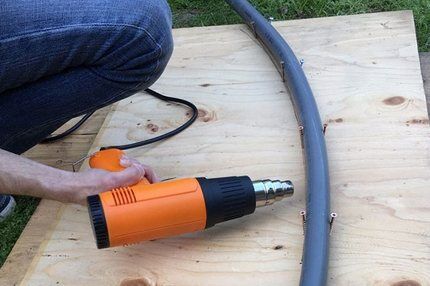
Low-density polyethylene is famous for its good elasticity. But it loses this property at heating temperatures above +80°C. This moment is used if it is necessary to change the configuration of the product.
But it is worth remembering that for straightening or bending, the temperature can only be increased for a short period of time. After all, a polyethylene pipe belongs to the category of building materials that can be damaged if the temperature conditions are violated.
Overview of pipe bending methods
The easiest way to straighten the pipe, eliminating creases that arose during its storage and transportation, is after slightly heating the product. If the replacement or repair of a pipeline is carried out in the summer, when the sun's rays are at their maximum, you can use them to achieve the task.
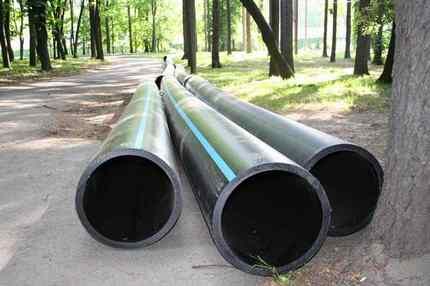
UV rays will not deteriorate the performance parameters of polyethylene, but at the same time they can temporarily soften the walls of the product. All you have to do is secure the softened pipe along a rigid support or wall, or lay it in a pre-dug trench. Before straightening a bent HDPE pipe on the ground, you need to clear the area.
If the work has to be done in winter, use hot water to heat the product.But this method is effective for pipes whose size does not exceed 50 mm. Metal railings and brickwork can be used as straightening aids. In any case: the shorter the piece of the product, the easier it will be to work with.
Effective methods for bending the workpiece
If the opposite situation arises, when you need to bend a HDPE pipe, the same heat treatment is used.
The following methods are used for warming up:
- blow with hot, directed air from a hair dryer;
- heat the walls of the product with a gas burner;
- pour boiling water over the surface.
To simplify the bending procedure, it is better to build a molding frame. The frame, the size of which corresponds to the diameter of the pipe being bent, can be made from ordinary fiberboard sheets. To make the surface of the frame smooth, sand it with a piece of sandpaper.
To bend a HDPE pipe using a hair dryer, the work is performed in the following sequence:
- The area to be treated is heated with a hair dryer.
- The softened workpiece is buried in the molding frame.
- Gently bend the pipe, without applying excessive force, so as not to tear the product at the bend.
Having created the required bending angle, you need to leave the product until it cools completely and only then remove it from the frame.
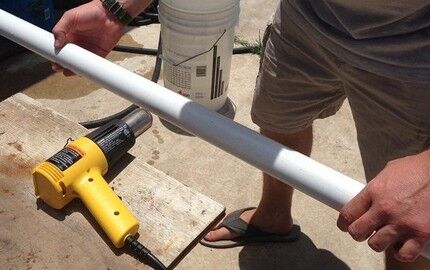
An important point: when heating the pipe, you must adhere to the “golden mean”. If the surface is not heated sufficiently at the moment of bending, the pipe may break.If, during heating, you bring the heating element too close to the product, the polymer may ignite.
Conclusions and useful video on the topic
Learn about the nuances of welding and processing HDPE pipes in the following videos.
Video #1. How butt welding is carried out:
Video #2. An example of creating electrofusion welding:
Video #3. Pipe straightening option:
When choosing a method for connecting and aligning polyethylene pipes, you need to take into account the pressure level of the working environment. This will minimize the negative impact of manipulations with the pipeline on its technical characteristics.
Do you know the technological nuances of connecting polyethylene pipes that are not described in the article? Do you have personal experience in installing HDPE pipelines that you would like to share with site visitors and with us? Please write comments in the block below, post photos, and ask questions about the topic of the article.


