Replacing pipes in the bathroom: a step-by-step guide to the work
Dismantling and installing new communications is an integral part of any major renovation.Usually, replacing pipes in a bathroom is carried out by the plumbers of the management company. It’s true that you can dismantle old elements and install new ones yourself, if you know how it’s done. Do you agree?
We will tell you how work is carried out on pipeline repair by replacing hazardous areas. The article we presented describes step by step methods for removing worn pipes and methods for attaching new ones. Using our advice, you can restore the tightness of a trouble-free system.
The content of the article:
Choosing pipes for the bathroom
Before carrying out work to replace communications in the bathroom, it is important to decide which structural elements to give preference to when installing a new system.
For wiring, as a rule, the following types of pipes are used:
- plastic;
- steel;
- cast iron;
- metal-plastic;
- ceramic;
- copper;
- asbestos-cement.
Pipes made of steel alloys (they contain various additives, aluminum, honey, nickel) are usually used in multi-story buildings where it is necessary to create efficient and durable wiring.
Such communications are resistant to hot/cold water and can withstand high pressure.Among the disadvantages are possible blockages from mineral deposits, which often accumulate on the walls.
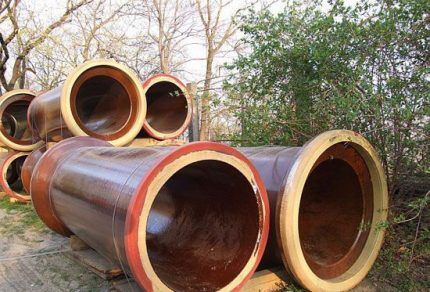
Copper pipes are high-quality, durable products that are resistant to corrosion and aggressive chemicals. It is worth considering that such elements are expensive and poorly compatible with steel and other metals. Because of these disadvantages, they are most often used in private homes.
Older buildings built in the 1960s and 1970s typically used cast iron pipes. Such systems have important advantages, since this metal has good heat capacity and resistance to temperature changes.
A significant disadvantage of such structures is their heaviness (installation and disassembly requires special equipment), as well as intolerance to shock loads and a tendency to clog - accumulations of mineral deposits and debris easily form on their surface.
Currently, widespread polypropylene pipes, which are distinguished by their affordable price, lightness, elasticity, resistance to corrosion and aggressive substances, and not prone to congestion.
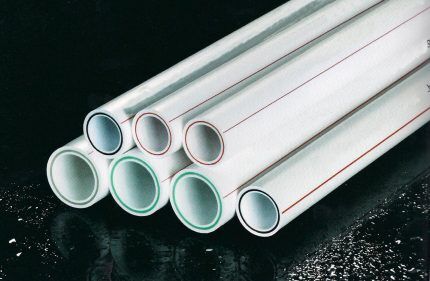
However, their use is justified only for laying internal communications, since plastic does not tolerate temperature changes well.In addition, polypropylene pipes are deformed when exposed to high temperatures, so they should be used with caution for hot water supply.
Another popular material today is metal-plastic, combining polymer and metal layers. This material weighs slightly more than its plastic counterparts, but is durable, resistant to mineral deposits, and most importantly, has an extremely low deformation rate.
As a rule, to carry out the work yourself, the last two options are used, since polymer and metal-plastic pipes are easy to process and install. Moreover, all work with them can be done with a minimum of special equipment.
When selecting material for replacing communications, it is also necessary to determine the dimensional parameters of the elements:
- for internal risers, pipes with a diameter of 40 mm are suitable;
- for sewer drain – 50 mm;
- for laying hot/cold water supply systems - 15, 25 and 32 mm.
The process of replacing pipes in a bathroom consists of dismantling the existing water supply and sewer systems and installing new structural elements.
Compare Features PP and metal-plastic pipes An article entirely devoted to assessing the positive and negative aspects of sought-after positions on the market will help.
What materials and tools will be required?
The first step is to prepare the equipment and materials that will be required for the work:
- grinder with a metal disc for cutting old pipes and fasteners;
- a manual die, the diameter of which must match the size of the material (usually this figure is one inch).Instead, you can use another device designed for cutting threads on metal pipes located in the apartments above and below;
- a hammer drill (preferably an impact type), which will be needed for drilling holes for fasteners, as well as for laying pipes through walls;
- a pipe cutter or a special cutter that allows you to cut sections of the required length from pipes;
- electric soldering iron with attachments for installing the system;
- adjustable wrench;
- technical petroleum jelly, FUM tape;
- hammer;
- screwdriver;
- chisel;
- marker and tape measure, which will be needed to apply dimensions.
It is also necessary to stock up on materials, calculating their supply in advance. To accurately determine the quantity, it is better to draw up a communication plan. It is advisable to add a small reserve for unforeseen circumstances to the resulting result.

For a standard bathroom you will need:
- pipes with a diameter of 25-32 mm; for installation of the system there are enough elements, the total length of which will be 20-30 m;
- end and corner fittings (15-20 pieces of each type);
- shut-off valves for each unit;
- wall mounting;
- two adapters from metal pipes to plastic ones.
In addition, you may need screws, tees and other elements.
Selection of pipe laying system
The pipeline can be installed in different ways. The system can be open when the networks are laid directly along the walls. In this case, access to the pipes is easier, but the appearance spoils the interior of the bathroom.
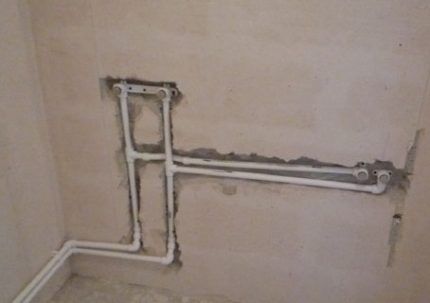
The option with closed communications looks more aesthetically pleasing. In this case, grooves are made in the walls - special grooves where structural elements are hidden, which are then sealed with plaster and finishing materials.
Nowadays, for laying pipes, a masking method is often used, which does not require much trouble. In this case, when laying structures, they are hidden under plumbing fixtures, interior items, or hidden in boxes specially constructed to protect and decorate communications.
Organizational issue when replacing a riser
Installation of new equipment is impossible without dismantling the old one. In this case, the difficulty arises in replacing the riser in the bathroom, since it affects the neighbors above and below.
It is not enough to change a piece of pipe in one apartment; it is also important to carry out work in the ceilings, where there are also structural elements. They pose a considerable threat: cement damages pipes over time, which can lead to leaks, which are quite difficult to identify and eliminate.
To resolve the issue with your neighbors, you can do the following:
- Get written confirmation from the neighbors below that in the event of a leak in the old riser, they will not make claims.For residents living above, try having them sign a document guaranteeing payment for possible damage caused by a break in old communications. Very often this approach brings results, and neighbors agree to joint repair work.
- You can contact the Housing Office with an offer to make full payment for replacing the riser. In this case, the mission of persuading uncooperative neighbors is assigned to representatives of the management company.
It should be remembered that even in a privatized apartment, all central communications located in it belong to public utilities.
Dismantling the old pipeline
The initial stage of work is the removal of all communications located in the room. To carry it out, it is necessary to turn off the water supply at the risers, and when replacing it, the water supply in the basement.
In this case, the following rules must be observed:
- Coordinate the planned work with an organization that maintains in-house water supply systems.
- Be sure to inform residents living in the apartments above and below about the upcoming replacement of communications, informing them of the exact date and time of work.
- Take all measures to promptly complete repairs to ensure that water is turned on in a timely manner.
After turning off the water, you can begin dismantling, which is carried out in several stages.
Stage 1: cutting structures and removing pipes
Having received the consent of the neighbors, you need to turn off the water in the riser, and then drain the remaining liquid in them. Then you can proceed to trimming the old pipes with a grinder. In this case, you should step back 0.5 m from the floor/ceiling of adjacent apartments to facilitate the process of connecting pipes.
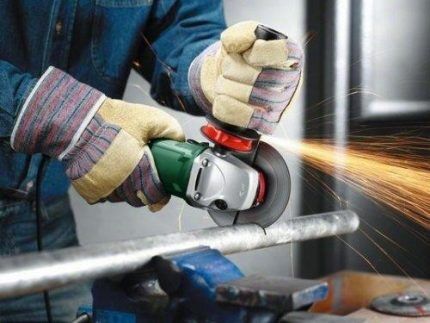
The pipe section located in the slab is loosened with transverse blows with a hammer, after which it is knocked out (you can also use a chisel or hammer drill). To recycle old metal pipes, they can be cut into small pieces that are taken out or sold for scrap.
Stage 2: replacing shut-off valves and water drains
To replace shut-off valves at the inlet, old models are screwed together or cut off from the inlet pipe with a grinder, after which the threads are cut with a screw or other device, then the new equipment is screwed on. The screwed inlet taps are closed, after which you can turn on the water in the riser.
Water is drained from old pipes so that it does not interfere with further dismantling. The washing machine, faucets, and other water consuming appliances are disconnected from communications. All plumbing fixtures connected to the sewer are disconnected in the same way.
Stage 3: removing dowels and laying grooves
Previously, when installing pipes in the bathroom, dowels driven into the concrete with a gun were widely used for fastening to the walls.
Since such elements are extremely difficult to remove, you can remove their heads using a grinder. In this case, a smooth surface of the walls is created, thanks to which you can safely lay tiles or other finishing materials.
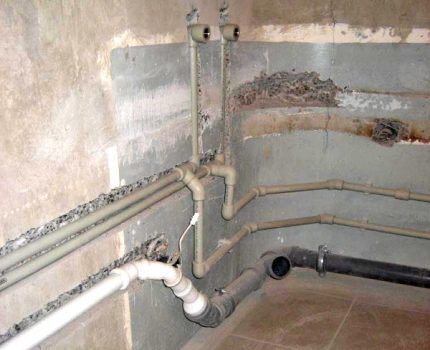
If it is necessary to lay channels in the walls (grooving), it is advisable to replace the metal disk inserted into the grinder with a similar part designed for working on concrete, brick and stone. If there is reinforcement in the wall, it is again replaced with a disk for metal.
Installation of communications in the bathroom
After dismantling and gating the walls, you can proceed to laying new pipes. However, before this process, you should once again make sure that everything is taken into account in the prepared drawing, and whether additional materials will be required.
Pipe replacement work consists of several steps:
- installation of the riser and plumbing;
- installation of sewer networks;
- testing.
By following the technological instructions, all manipulations can be performed quite quickly.
Installation of riser and installation of wiring
Before starting work, you should make sure that the internal diameter of the new pipes for the riser and distribution corresponds to the old one. After this, you can start the process.
How to properly replace the riser?
Initially follows replace the riser itself, taking into account the subsequent pipe routing. To do this, it is necessary to determine at what distance from the riser the internal wiring elements will extend, and then cut the pipe prepared for the riser into parts corresponding to the calculation made.
On old parts of risers located in adjacent apartments, threads are cut with a die. After this, adapter flanges are installed on the risers, then these elements are assembled from polypropylene pipes using soldering. Threaded connections are sealed with Fum tape.This procedure is suitable for metal/plastic joints.
A small section of pipe with a diameter of 0.5 inches is soldered to the outlet flange, at the end of which there is a ball valve set to the “closed” position.
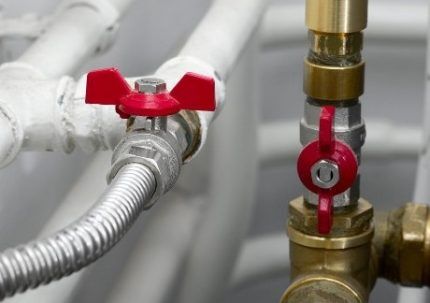
After this, you can open the valve in the basement to restore the water supply, and then check the tightness of the connections made.
Installation of pipes and connection of devices
Pipes are laid from the riser. Their installation takes place in parallel, fastening is carried out at several points so that there is no sagging. The elements are connected using both fasteners (fittings of different types) and by soldering, which requires a soldering iron.
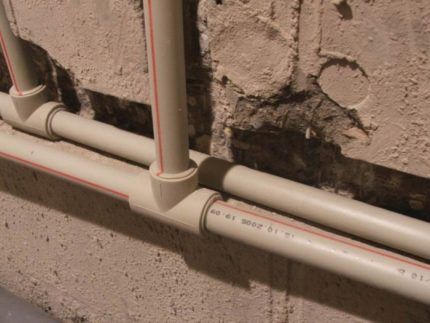
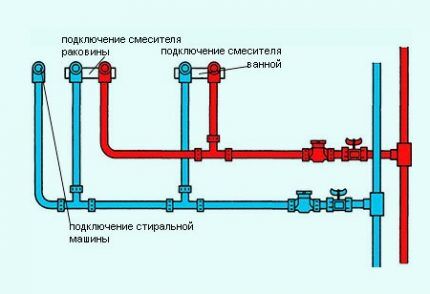
In the area where the sink, shower, bathtub, and washing machine are located, branches are made that are cut off by ball valves. Cold water is supplied to the toilet, cold and hot water is supplied to all other appliances. Valves are installed at the ends of the pipes, which must be closed.
If you plan to disguise cold water pipes behind a false wall, they need to be insulated with polyethylene foam to get rid of condensation.
To install a faucet over a bathtub, you need to knock out the wall to bury a piece of pipe into it.A special film and flanges fixed at a certain distance are placed at the ends, which must be fixed flush with the wall surface, with a small tolerance on the thickness of the finishing material.
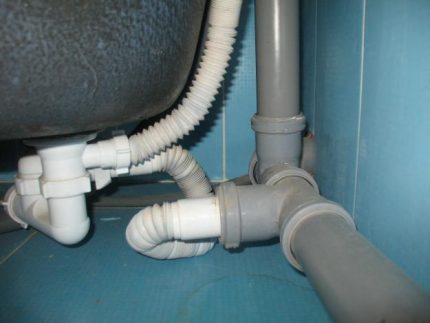
Due to the elasticity of the material, polypropylene pipes can be slightly bent, thus reducing the number of fittings used when laying the system. This is important not only for saving money: a smoothly laid water supply reduces the likelihood of blockages caused by sediment.
To prevent rupture of communications from water hammer, a compensation loop must be provided in the system.
Replacement of sewer pipes
An important and responsible step is the replacement of old sewer pipes, which are often in poor condition due to corrosion and rotten seals. A new plumbing system will improve drainage and eliminate unpleasant odors and leaks.
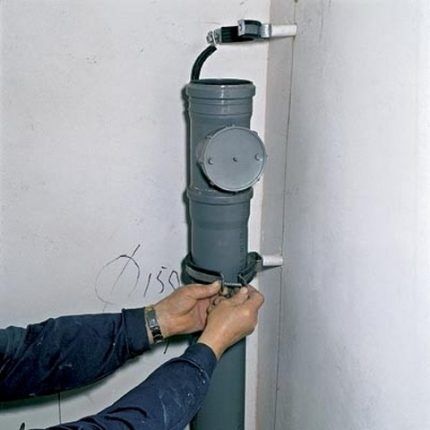
To replace sewer pipes, the following algorithm is used:
- The places where plumbing fixtures will be installed are indicated.
- Taking into account the dimensions of the plumbing products, precise measurements are taken to determine the drain points.
- A sketch is drawn up with an approximate diagram of the sewer system, which indicates the branches of communications, the location of installation of revisions, and the parameters of the elements.
- According to the drawing, calculations are made, based on the results of which materials are purchased.
- Using a grinder, old elements are dismantled.
- If you plan to replace the riser, it is necessary to connect its parts using special adapters. This work will have to be carried out in the apartments of residents located above and below after prior approval.
- Having dismantled the old communications, you can begin installing a system of new pipes, making fastenings so that the elements are located at an angle of approximately 5O. It is advisable to reduce the number of unnecessary bends, in which deposits often accumulate, and, if necessary, make them as smooth as possible.
Finally, the communications carried out through the wall are diverted from the kitchen to the bathroom. After this, you need to connect all the pipelines by connecting them to each other. Upon completion of the tests, open pipeline sections are closed by any of the popular methods.
Checking your work results
The installation of new water and sewer pipes must be completed by inspection. To do this, turn on cold and hot water alternately, and carefully inspect the connections.
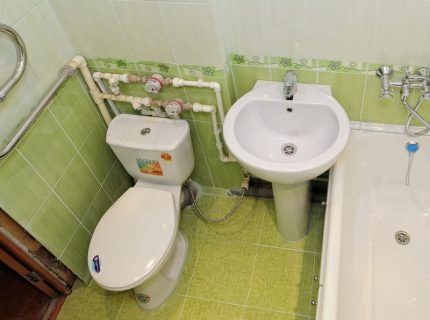
Large leaks can be detected by eye; small ones can be detected using a paper napkin, which is used to wipe the questionable section of the pipe.
All faults should be eliminated by disassembling the structure and reassembling it or replacing the defective fragment.
Conclusions and useful video on the topic
You can clearly see the process of laying pipes in the presented video.
The process of replacing the water supply and sewerage system in the bathroom is quite within the capabilities of a master who has some skills in working with plastic pipes. By carefully following the instructions and using high-quality materials, such operations can be completed fairly quickly.
Newly installed communications made of modern plastic will reliably serve for a long period of time.
Would you like to tell us about how you changed the pipes in the bathroom yourself? It is possible that you know technological subtleties that will be useful to site visitors. Please write comments in the block below, post photographs and ask questions on the topic.


I consider polypropylene to be the best option for plumbing. It's inexpensive, sold everywhere, and easy to work with. There is no need to think about the length of the pipes - you cut as much as necessary and make the cut in the right place. The connections are also basic. The only problem is the mounting to the wall, for this you need to drill holes, here success depends on experience and the material from which the house is built.
The most difficult thing in replacing pipes turned out to be to come to an agreement with the neighbors above and below. I had to cut the threads from them so that the ceiling would be made of polypropylene and not rotten iron. In general, these negotiations cost a lot of nerves.Plus, to all the troubles, the risers were very close to the wall, and it was necessary to start the plugs, and even more so, to turn the handle, under the tension of the pipe. But I did it, I can’t believe it myself!
And wiring in the bathroom is already easier, because you work at home, no one is breathing in your back.
The article is timely for me. Thank you.
Today I will kick this sharash company out and take care of it myself. I invited the plumbers to repair the bathroom, and they, the bastards, have been drinking for a week.
At whose expense are they drinking? 🙂
Hello 🙂 I share your indignation 🙂 My only advice is, if you live in an apartment and the plumbers are from the management company, file a complaint addressed to the head of the management company and in case of self-repair, agree on everything in advance.
Thank you! Very informative! I wanted to do it myself, but.. I’ll call a company specialist.
Thanks for the detailed description!