Installation DIY polypropylene pipes: technology for working with PP pipelines
Have you decided to do a major renovation in your apartment? Then it is worth considering that without replacing the water supply it will be incomplete.Agree, it would be a shame if immediately after the repair one of the pipes leaks, and, what good, you flood your neighbors. An excellent alternative to outdated water supply lines are plastic pipes.
Making plastic wiring for a heating system or water supply in an apartment is quite simple. To install polypropylene pipes with your own hands, you only need a set of special equipment and a minimum of technical skills.
Next, we will tell you what tools are needed for the job and how to use them correctly. In addition, in the article you will find information on how to correctly draw up a wiring diagram for a plastic pipeline, as well as step-by-step instructions for welding polypropylene pipes. To help the home craftsman, we have selected thematic videos.
The content of the article:
Anatomy of polypropylene pipes
Most polypropylene (PP) pipes are the same at first glance. A more detailed examination of them will allow you to notice differences in material density, internal structure and wall thickness. The scope of application of pipes and the features of their installation depend on these factors.
Classification of PP material
The quality of a polypropylene weld and the operational characteristics of pipes are largely determined by the PP manufacturing technology.
There are the following types of parts, based on the material they are made of:
- PRN. Single-layer products made of homopolypropylene. Used in industrial pipelines and cold water supply systems.
- RRV. Single-layer products made from PP block copolymer. Used for installation of underfloor heating networks and cold pipelines.
- PPR. Single-layer products made from random copolymer PP. They are used in water supply and home heating systems with water temperatures up to +70°C.
- P.P.S.. Refractory type of pipes with operating temperatures up to +95 °C.
There are also multilayer reinforced PP parts.

They have an additional internal aluminum shell, which dramatically reduces thermal expansion, facilitating wiring installation and operational safety.
The disadvantage of these products is the need to remove the top polymer layer and aluminum to the depth of penetration of the pipe into the fitting before soldering.
We examined in more detail the types of PP pipes by material of manufacture and fittings in our other article.
What does the marking look like?
You can select the required pipes and fittings for plastic wiring in the construction market yourself. You just need to know the labeling symbols.

To determine the scope of application of polypropylene products, the main indicator is PN.This is an indicator of the nominal pressure in kgf/cm2 (1 kgf/cm2 = 0.967 atmospheres), at which the operational life does not change. The base temperature of the coolant in the calculation is assumed to be 20 °C.
In the domestic sphere, 4 main types of PP pipes with different PN values are used:
- PN10 – for cold water supply;
- PN16 – for cold and warm water supply;
- PN20 – for hot water and heating systems;
- PN25 – for heating systems, especially central type.
Products with PN25 often have a large linear length, so they are almost always reinforced with aluminum foil or strong fiberglass for less expansion when heated. We recommend that you take a closer look at PP pipe markings for heating.
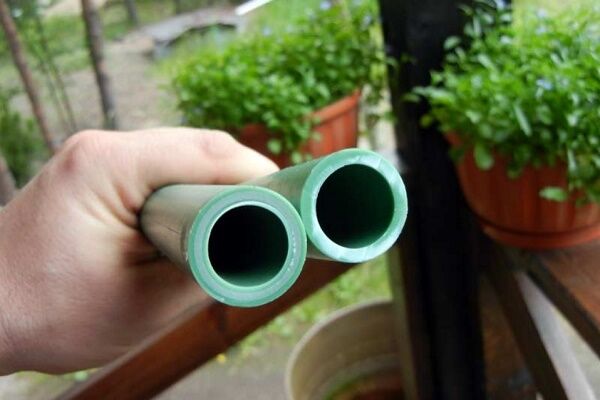
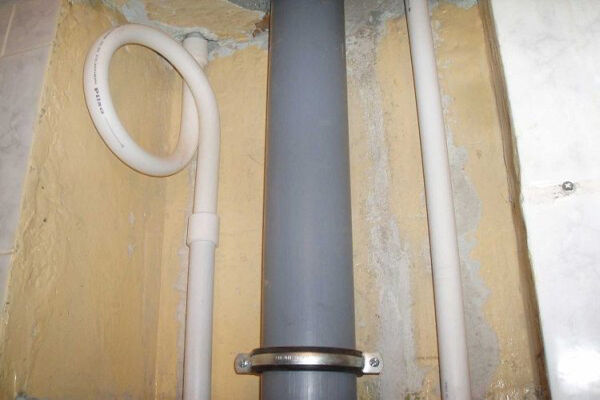
Appearance and internal structure
High-quality PP pipes have a perfectly round shape when cut. The thickness of the walls and reinforcing material should be the same around the entire circumference, and there should be no breaks in aluminum or fiberglass.

A reinforced pipe traditionally consists of three layers: inner and outer polypropylene and middle aluminum or fiberglass. The surfaces of the pipes must be smooth, without sagging or depressions.
The color of the material can be green, white or gray, but the quality and characteristics of the pipes do not depend on this at all.
Advantages and disadvantages of PP
The advantages of PP pipes in the installation of internal heating and water supply are obvious and are confirmed by their undivided dominance in this area.
The properties that make this product a priority for the assembly of intra-house communications are:
- noiselessness;
- impact strength;
- ease;
- corrosion resistance;
- durability;
- tightness of connections;
- cheapness;
- immunity of the internal walls to plaque.
But polypropylene pipes also have negative sides that cause inconvenience during installation:
- lack of flexibility;
- strong relative elongation when heated;
- the need for special tools when connecting individual products.
Specialists who assemble PP pipes every day have long developed ways to compensate for the listed disadvantages, so there are no special alternatives to polypropylene.
Preparation for installation of PP pipes
It is impossible to do plumbing with hands and pipes alone, so you should understand the heating and water supply schemes, the necessary tools, connection methods and materials used.
The assembly of a water supply system from PP pipes includes a number of traditional steps:
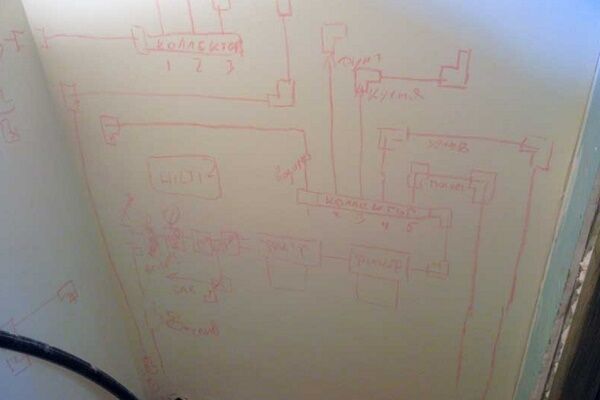
Stage #1. Drafting
Before purchasing material for installing heating and plumbing, you need to decide on their wiring diagram.
There are four main ways to connect batteries to the heating circuit:
- flow-through;
- with unregulated bypass;
- with valves;
- with three-way valve.
The final choice of installation option is usually determined by the financial capabilities of the apartment owners, because shut-off valves are not cheap.
We discussed in detail the features of installing heating made of polypropylene in this article.

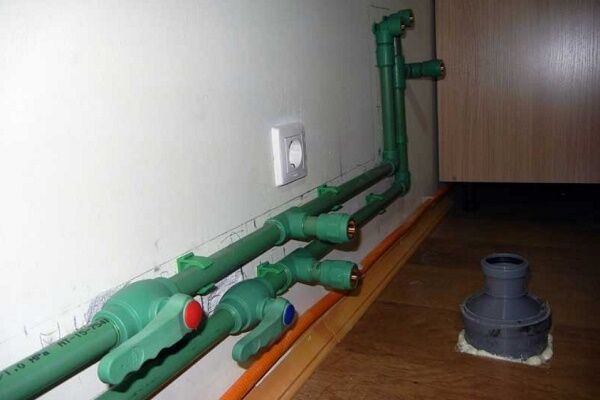
The water supply system also has basic design diagrams for wiring, but there are only two of them: collector and tee (traditional in apartments).

A tee circuit is also called sequential. It involves running one pipe along all plumbing fixtures, from which branches are made sequentially using a tee.
The collector circuit involves installing a flute-shaped collector at the water inlet to the house. It allows you to compactly make several bends in different directions.

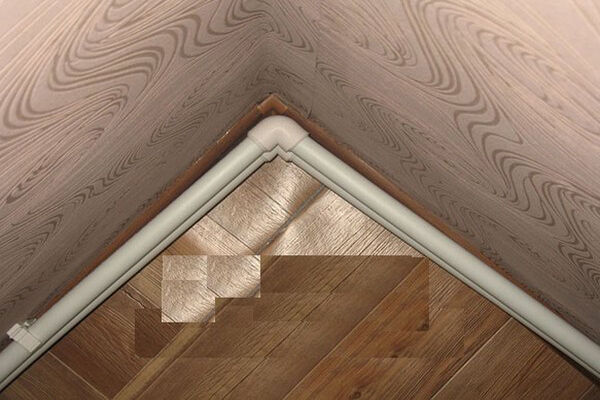
The wiring can be done inside the walls or in the open. The first option requires detailed calculations that take into account the elongation of pipes when heated.
We recommend that you read more about water supply wiring diagrams from PP pipes.
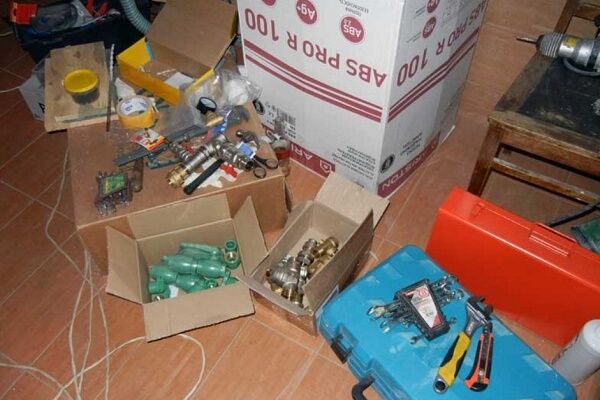
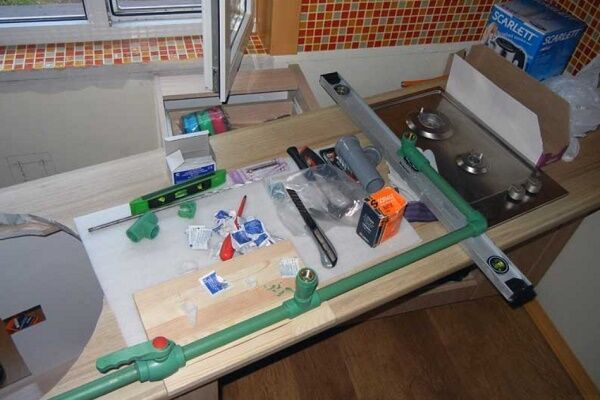
Stage #2. Preparing tools
A significant disadvantage of working independently with polypropylene pipes is the need to use special tools. The price of an installation equipment kit ranges from 100 to 200 dollars.

This set should include:
- electric welding machine with a stand or simply soldering iron for PP pipes;
- pipe cutters;
- shaver for removing the outer layer and aluminum from reinforced pipes;
- calibrator and chamfer for monitoring and adjusting the diameter of parts;
- nozzles for heating the elements being soldered.
In addition to special equipment, to install PP pipes you will need an adjustable wrench, a marker, a tape measure and other general household tools.
If you are planning one-time installation work, you can rent a soldering kit.
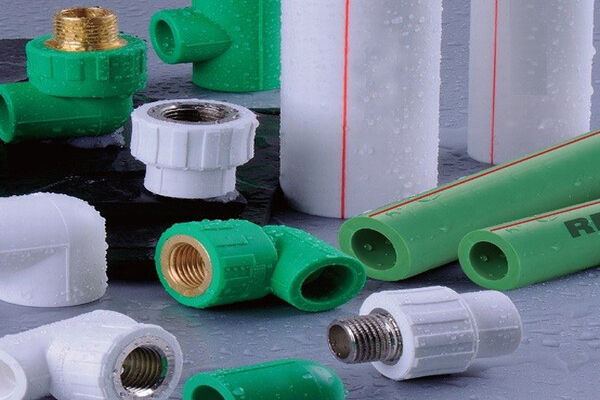
Stage #3. Selection of polypropylene fittings
PP fittings are used to weld PP pipes together in various combinations, as well as to connect them to plumbing fixtures.
These include;
- adapters;
- nipple bends;
- couplings;
- threaded couplings;
- tees;
- plugs;
- crosses;
- detachable connectors;
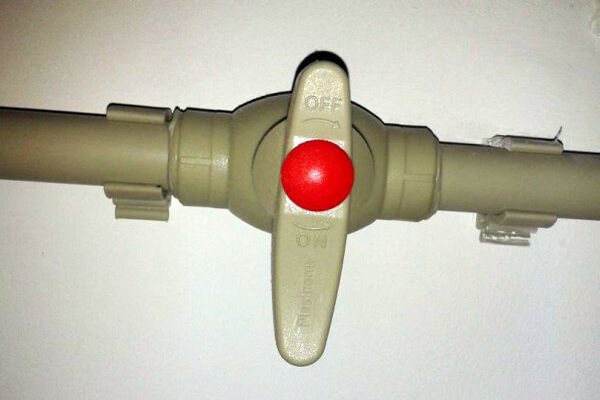
- Ball Valves;
- clamps.
Some tips for choosing fittings and installing pipes:
The quality of polypropylene and the wall thickness of fittings may also differ, so you need to choose them according to the marking of the pipes.
Stage #4. Selecting a connection diagram
There is a fundamental difference in soldering pipes with a diameter of up to 63 mm and from 63 mm.Pipes that are equal to or larger than this size are butt soldered, and those that are smaller are connected using the socket method.
The latter involves the formation of a joint due to the fact that the molten cut end of the pipe enters a few centimeters into the expanded socket of the fitting.
The same method is used to connect two pipes to each other using a coupling.

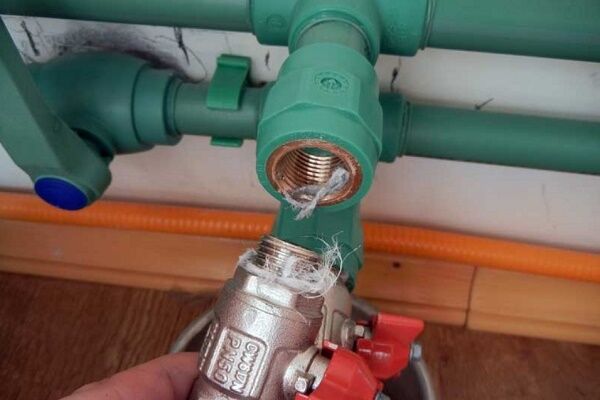
Depending on the presence of threaded parts, connections of PP products can be:
- detachable;
- one-piece.
Detachable connections involve soldering two threaded fittings with external and internal threads to the ends of the connecting parts.
The one-piece type includes the above-described socket connection method by soldering two polypropylene products.
To learn more about the technology of welding polypropylene pipes, go to via this link.
Step-by-step instructions for welding PP pipes
After purchasing all the necessary pipes and fittings, you can begin welding them. This process will be discussed step by step, with illustrations, so that no questions remain.
Step #1 - cutting the pipes
This process is done using pipe cutter. If the cut is beveled, then the longer edge can form a bead during soldering and narrow the internal passage of the fitting.

Pipe cutters have a maximum diameter limitation, so you need to choose the model that fits the purchased pipes.
Step #2 - pipe processing and chamfer formation
After trimming, it is necessary to form a small chamfer on the part that will fit into the socket. For this purpose, hand calibrators or screwdriver attachments of various sizes are used.
Both tools have built-in knives that form a chamfer with standard parameters.

To obtain a cut, you need to place the pipe on a hand calibrator and rotate it around the axis several times with pressure.
On reinforced pipes, in addition to chamfering, the top layer of PP and aluminum foil is removed using a shaver. It looks like a cylinder with handles and fits only one specific size.

After chamfering and removing the aluminum foil, you need to wipe all parts clean.
Step #3 - preparing the soldering iron
The soldering temperature for polypropylene pipes varies from 260 to 280 °C, but amateurs are better off using non-adjustable soldering irons or heating up to 260 °C. We recommend taking a closer look at the values soldering temperature of polypropylene.
Before turning on, you need to put double-sided attachments (mandrel and sleeve) on the soldering iron and place the device on a cross-shaped stand.

Then you should turn on the soldering iron.When it reaches a temperature of 260 °C, the green signal light will light up.
Step #4 - heating and joining parts
It is recommended to wear gloves when working with pipes. To heat the parts, it is necessary to simultaneously place one part to be connected onto the mandrel and insert the second into the sleeve.

To maintain the depth of the connection, you can make a corresponding mark on the pipe with a marker in advance and focus on it when inserting the product into the socket.
The table below shows the standard heating, connecting and cooling times for pipes, depending on their diameter, as well as the depth of insertion into the socket. When working in a cold room, the heating time can be increased by 1-2 seconds.

After heating, the parts to be joined must be joined with force and direct movement to the intended line. It is important to prevent parts from rotating.
Shifts of the pipe and fitting relative to each other are allowed only for 4-12 seconds. After this, any progress will have a very negative impact on the quality of the connection.

After joining, it is necessary to allow the polypropylene to cool for the time indicated in the table. It is advisable to look at the resulting internal seam to make sure that the overlap does not block the passage. Otherwise you will have to resolder the parts.This completes the soldering process.
To avoid common mistakes in the process of welding plastic, we recommend that you familiarize yourself with soldering rules and mistakes.
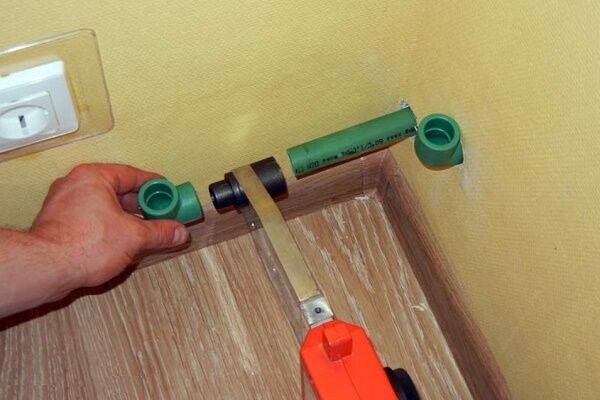
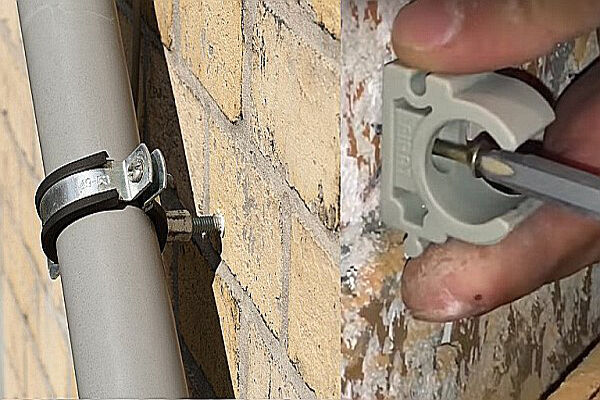
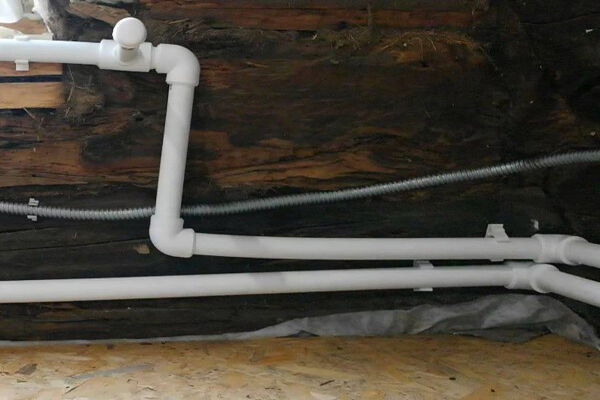
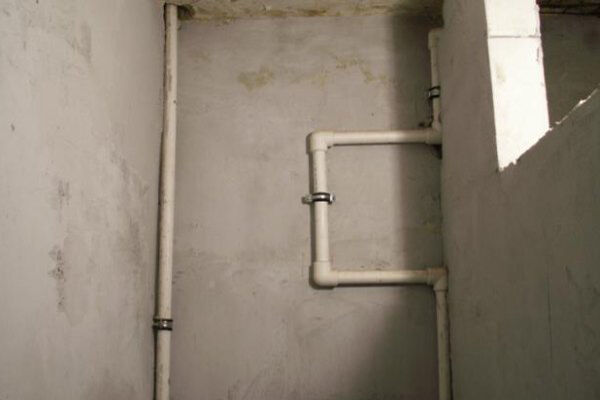
How to properly secure the pipeline?
Good heating or plumbing installation is not only about the quality of the connection, but also about the implementation of knowledge on how to install assembled polypropylene pipes.
Proper fastening of plastic wiring to the walls will prevent it from sagging and deformation when heated with hot water.

For fixing pipes, the following are used: clips (single, stacked, with a clamp) and clamps (on a hairpin, paired, wall).
New models are constantly appearing on the market, so choice of clamps and it is better to produce clips directly in the store. Clips basically ensure free movement of pipes along the axis, and clamps firmly fix them in one position.
A particularly dangerous consequence of improper installation is neglecting the thermal expansion of pipes.
The length of simple PP pipes can change by 10-15mm/1m when heated. When they are rigidly fixed, deformation occurs at the adhesions, which can lead to rupture of the connection. To relieve stress, the following types of compensators are used:
- Z-shaped;
- U-shaped;
- L-shaped
- ring.
Rules for working with a compensator:
After soldering the expansion joints and attaching the pipes to clamps and clips, you can begin testing the assembled system.
Conclusions and useful video on the topic
The algorithm of actions for soldering polypropylene pipes is best remembered after watching the corresponding videos. The types of fittings and the features of their welding will also be shown.
Types of soldering irons and instructions for soldering polypropylene pipes:
Secrets of installing PP pipes:
Types of fittings and rules for soldering them:
The above-described technologies for installing polypropylene pipes and fittings are simple and do not require professional skills. The videos clearly demonstrate the stages of the soldering process, which you can master yourself in a few minutes.
Therefore, to assemble a plumbing system with your own hands, it is enough to purchase the necessary materials, find equipment and follow the action algorithms described in the article.
Do you want to assemble a plastic pipeline, but have not fully understood the nuances? Ask for advice - we will try to answer you as fully as possible.
Or maybe you are an expert in soldering PP pipes and want to share valuable tips with beginners? Write your recommendations in the comments block - many home craftsmen who are encountering polypropylene soldering for the first time will be grateful to you.


Before I started installing a water supply system in a country house (dacha), I practiced using a soldering iron for plastic pipes. It was necessary to build a trellis for cucumbers, tomatoes and clematis. Everything seemed to work out smoothly. After this, he began to bring water into the house. The task was not difficult, since they planned to supply only cold water to the house. There was no need to turn on the hot heating. We decided not to install a bathtub and toilet yet. Therefore, my first experience was quite successful.
In my opinion, polypropylene pipes marked Pipies are the most reliable. I installed it on cold and hot water, it can withstand temperature changes normally. By the way, does anyone know the shelf life of pipes before the operational period?! I have pipes lying around with a production date of 1999, I think that they can no longer be used for their intended purpose and it is better to take them to the dacha.
Explained very clearly and clearly. Thank you!