Single-pipe heating system Leningradka: diagrams and principles of organization
To heat a small living space or a two-story private house, it is not necessary to use complex, expensive technologies.The Leningradka heating system, known since the times of the Soviet Union, is now effectively used to provide heat to small residential buildings.
It remains popular due to its ease of design and economical consumption of materials. After all, you see, more expensive and more complicated does not always mean better.
You can equip the single-pipe Leningradka yourself. We will help you understand the operating principle of the system, provide basic technological diagrams and describe step by step the technology for installing the heating system. Visual photo and video material will help plan the implementation of the project.
The content of the article:
Operating principle of the Leningradka heating circuit
The emergence of modern heating equipment and new technologies made it possible to improve the Leningradka, make it controllable and increase its functionality.
The classic “Leningradka” is a system of heating devices (radiators, converters, panels) connected by a single pipeline. A coolant - water or an antifreeze mixture - circulates freely through this system. The boiler acts as a heat source. Radiators are installed along the perimeter of the home along the walls.
The heating system, depending on the location of the pipeline, is divided into two types:
- horizontal;
- vertical.
The system piping can be located either below or above. The upper arrangement of pipes is considered the most effective in terms of heat transfer, while the lower pipes are easier to install.
Bottom connection of devices requires mandatory pump use, due to which the economic priorities of the system are somewhat reduced. The upper option requires precise calculations during the design period and the construction of a booster section, which increases the length of the pipeline and the costs of its construction.

Coolant circulation can be forced (using a circulation pump) or natural. The system can also be closed or open. We will talk about the features of each type of system in the next section.
Called "Leningradka" single pipe heating system suitable for one- and two-story residential buildings of a small area, the optimal number of radiators is up to 5 pieces.
When using 6-7 batteries, it is necessary to make scrupulous design calculations. If there are at least 8 radiators, the system may not be efficient enough, and its installation and modification may be unreasonably expensive.

Overview of basic technological schemes
Each of the Leningrad heating schemes has its own features of practical implementation, advantages and disadvantages, which we will familiarize ourselves with below.
Features of horizontal schemes
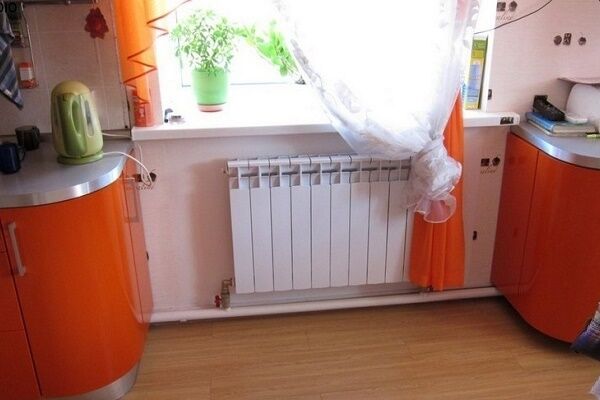
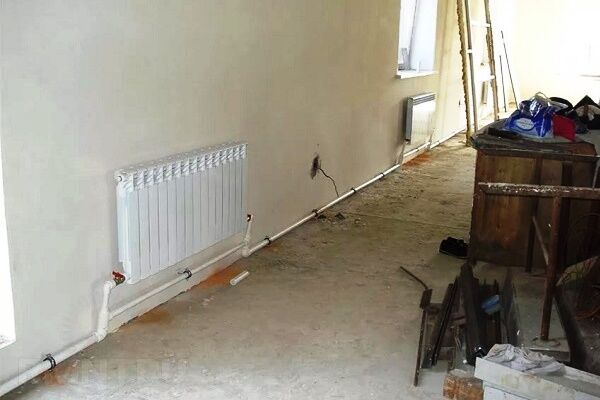
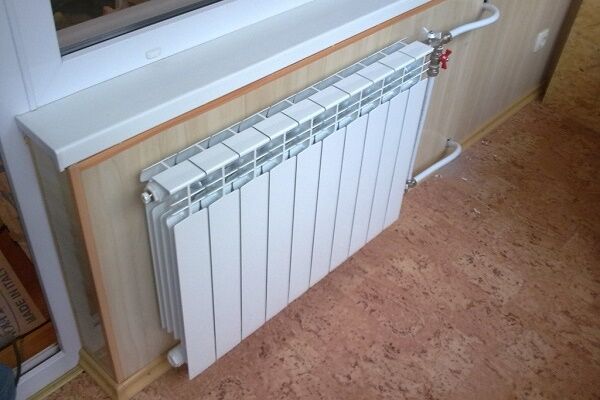
In one-story private houses or small premises, Leningradka is usually installed in a horizontal pattern. When implementing horizontal schemes in practice, it should be taken into account that all heating elements (batteries) are located on the same level, and they are installed along the walls along the perimeter of the room being equipped.
Let's consider the simplest classical horizontal open circuit with forced circulation.

The diagram shows that the system consists of:
- Heating boilerwhich is connected to the water supply system and sewerage networks;
- Expansion tank with pipe – due to the presence of this tank, the system is called open. A pipe is connected to it, from which excess water comes out when the circuit is filled, and air, which can appear when the liquid boils in the boiler;
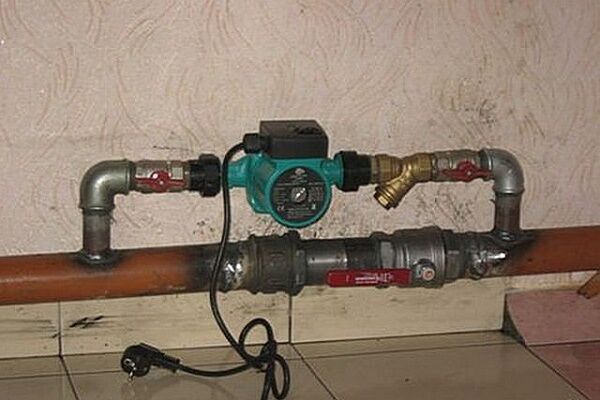
- Circulation pump, which is built into the return pipeline. It ensures water circulation along the circuit;
- Hot water pipe and the cooled coolant removal pipeline;
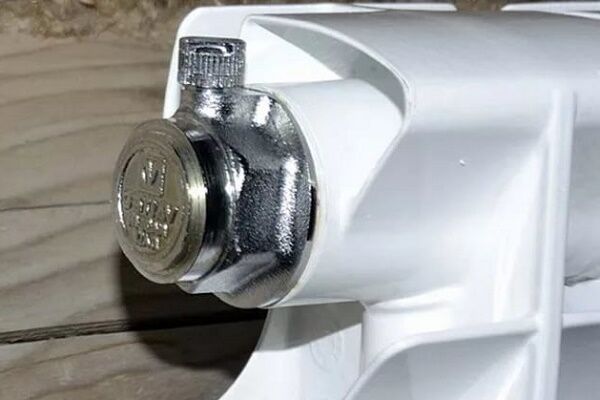
- Radiators with installed Mayevsky valves through which air is released;
- Filter, through which water passes before entering the boiler;
- Two ball valves — when one of them is opened, the system begins to fill with coolant-water up to the pipe. The second is secret; with its help, water is drained from the system directly into the sewer.
The batteries in the diagram are connected via a pipeline from below, but a diagonal connection can be arranged, which is considered more efficient in terms of heat transfer.

The above scheme has significant drawbacks. For example, if a radiator needs to be repaired or replaced, you will have to completely turn off the heating system and drain the water, which is extremely undesirable during the heating season.
Also, the scheme does not provide the ability to regulate the heat transfer of the batteries, reduce the temperature in the rooms or increase it. The improved circuit below solves these problems.

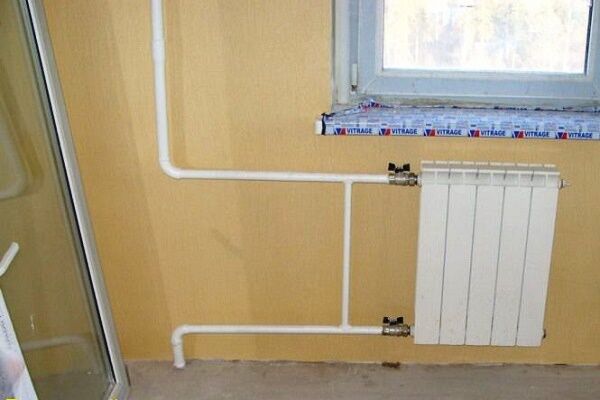
Ball valves installed on both sides of the battery are installed in order to be able to stop the flow of water to the radiator.To remove the battery for repair or replacement without draining water from the system, you can close the ball valves.
Thanks to the availability bypasses The battery can be removed without shutting down the system - water will flow through the circuit through the lower pipe.
Bypasses also allow you to regulate the amount of coolant flow. If the needle valve is completely closed, the radiator receives and releases the maximum amount of heat.
If you open the needle valve slightly, part of the coolant will flow through the bypass, and the other part through the ball valve. In this case, the volume of coolant entering the radiator will decrease.
Thus, by adjusting the level of the needle valve, you can control the temperature in a particular room.
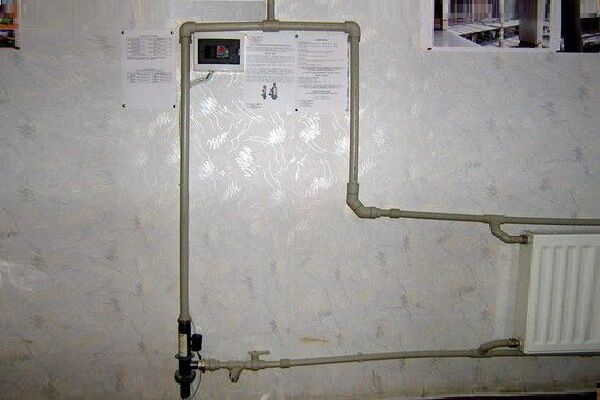
Let's consider a horizontal closed heating circuit with forced circulation.

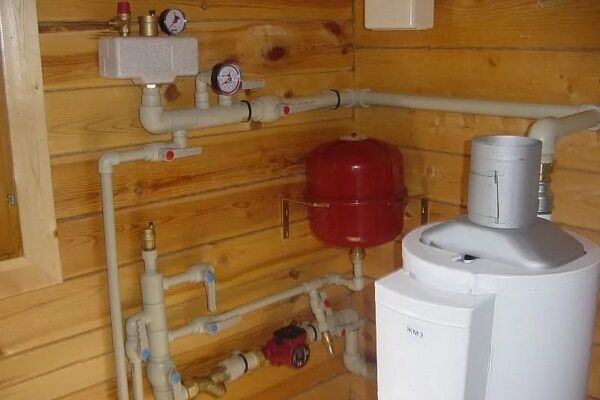
Unlike an open circuit, closed system is under pressure due to the presence closed expansion tank. The system also includes a control and management panel.
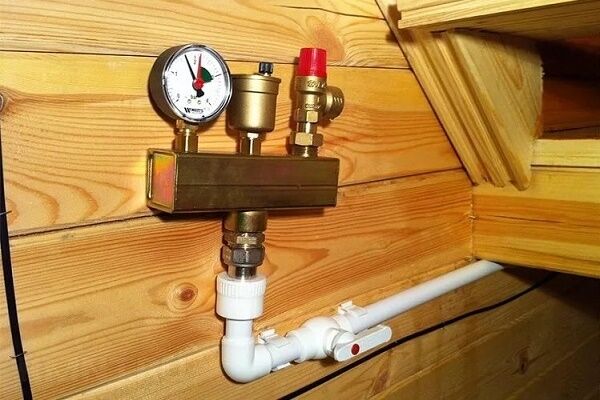
It consists of a housing on which is installed:
- Safety valve. It is selected based on the technical parameters of the boiler, namely, the maximum permissible pressure. If the thermostat breaks down, excess water will escape through the valve, thereby reducing the pressure in the system.
- Air vent. The device removes excess air from the system.If the thermoregulation system fails, then when the liquid boils, excess air will appear in the boiler, which will automatically escape through the air vent;
- Pressure gauge. A device that allows you to control and change the pressure in the system. Typically, the optimal pressure is 1.5 atmospheres, but the figure may be different - it usually depends on the parameters of the boiler.
The closed system is considered the most modern solution due to the automation of some processes.
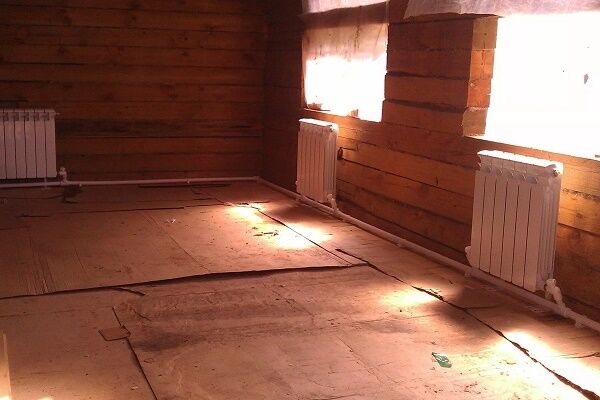
Application of vertical schemes
Vertical installation schemes of "Leningradka" are used in two-story houses with a small area.By analogy, they can be of an open or closed type, represented by circuits with forced circulation and gravity flow.
We have given systems with a circulation pump above. Let's consider a vertical scheme with closed-type natural circulation.

It is quite difficult to implement a scheme with natural circulation. Here the pipeline is mounted in the upper part of the wall at a certain angle in the direction of water movement. The coolant flows from the boiler into the expansion tank, from where it moves under pressure through pipes and radiators.
For efficient operation of the system, the boiler must be located below the installation level of the radiators.
The scheme may also provide for the possibility of removing radiator batteries without stopping the heating system by installing bypasses with needle valves and ball valves on the pipeline.
Comparison of gravity and pump systems
There is an opinion that organizing a gravity heating system allows you to save on a circulation pump.
To organize the natural movement of the coolant along the circuit, it is necessary to correctly calculate the angles of inclination, diameter and length of the pipes, which is not easy to do. Moreover, a gravity system can operate smoothly and efficiently only in small one-story rooms; in other houses, its operation can cause a number of problems.
Another disadvantage of gravity flow is that its organization requires pipes with a diameter larger than when constructing forced heating circuits. They cost more and spoil the interior.

The room must have a basement for the boiler, since the heat source must be located below the level of the radiators. Also, to organize gravity flow, you will need a well-equipped and insulated attic on which the expansion tank will be mounted.
The problem with any gravity flow in a two-story house is that the radiators on the second floor heat up more than on the first. Installing balancing valves and bypasses will help partially solve this problem, but not significantly.
Moreover, the introduction of additional equipment leads to an increase in the price of the system itself, and its operation may remain unstable.
The most rational solution to the issue of the difference in the temperature of the coolant leaving the boiler and reaching distant devices on the ground floor is to install radiators with an increased number of sections.
Increasing the heat transfer area in this way makes it possible to practically equalize the heating characteristics at different tiers of the system.
Gravity-flowing “Leningradka” is not suitable for mansard-type houses, because it is possible to position the pipe evenly only in a house with a full roof. Also, the system cannot be implemented if people do not live in the house permanently.
Specifics of installation of the heating system
The Leningradka single-pipe system is complex in calculations and execution. To implement it into a home as an effective heating system, it is necessary to first make careful professional calculations.
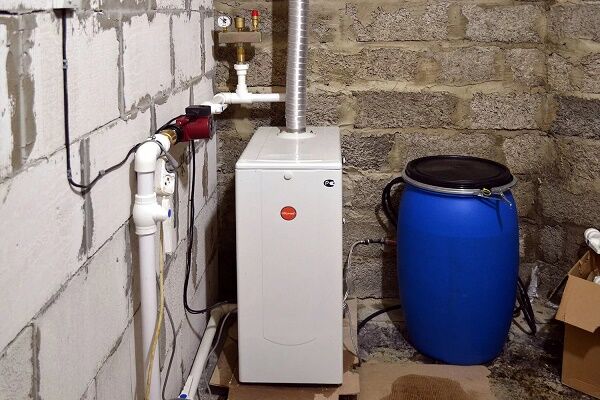
The main elements of the Leningradka system:
- boiler;
- pipeline metal or polypropylene (but not metal-plastic);
- radiator sections;
- expansion tank (for a closed system) or a tank with a valve (for an open one);
- tees.
You may also need circulation pump (for systems with forced movement of coolant).
To improve the capabilities of the system use:
- Ball Valves (there are 2 ball valves per radiator);
- bypasses with needle valve.
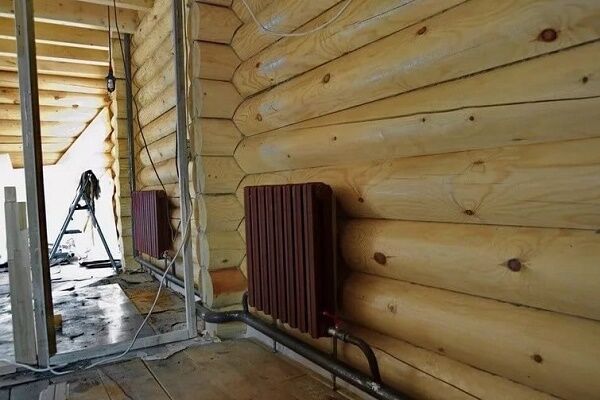
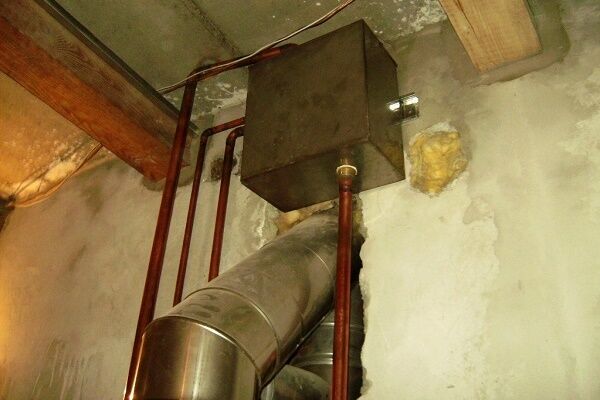
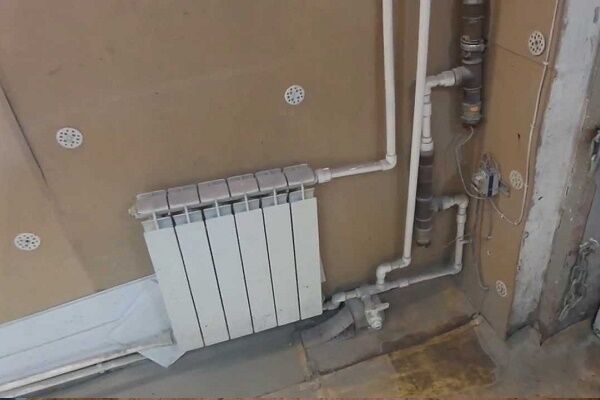
It should be noted that the main line of the system can be sharpened into the plane of the wall or located on top of this plane. If the pipe is in the wall, ceiling or floor, then it is important to ensure its thermal insulation with any material. This improves the heat transfer of the pipes, and the temperature drop in the last radiators will be minimal.

If the pipeline is installed in the plane of the floor, then the installation of the floor covering itself is carried out above the pipe. If the pipeline is laid on top of the floor, this will allow some changes in the construction of the system in the future.
The supply pipe and return line of circuits with natural coolant movement are usually mounted at an angle of 2 - 3 mm per linear meter in the direction of movement of water or other coolant in the system. The heating elements are installed at the same level. In schemes with artificial circulation, there is no need to maintain a slope.
Preparatory work for the premises
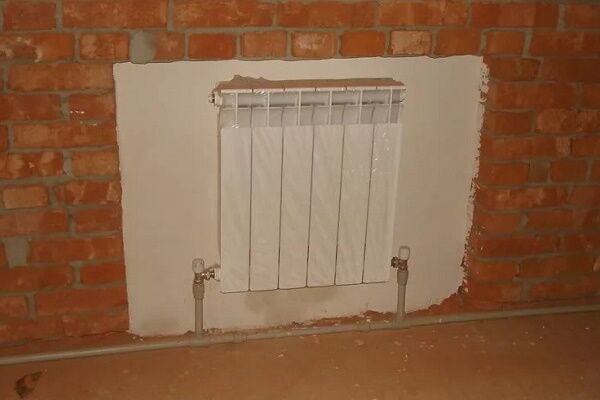
If the pipeline is hidden in building structures, then before installing the system, grooves are made around the perimeter in the places where the pipes will be located.
When chipping, microcracks form in the wall, through channels appear both outside and inside. This is fraught with the entry of cold street air and the formation of unwanted condensation on the pipe. As a result, heat loss from radiators and excessive gas consumption increase.
Therefore, when installing a pipeline in a wall, floor or ceiling, it is important to insulate the pipe with any heat-insulating material.
Selection of radiators and pipes
Polypropylene pipes are easy to install, but are not suitable for houses located in the Northern regions. Polypropylene melts at a temperature of +95°C, so the likelihood of pipe rupture increases at maximum heat transfer from the boiler.
It is advisable to use exclusively metal pipes, although their installation is accompanied by difficulties.

When choosing the pipe diameter, it is necessary to take into account the number of radiators. For 4-5 batteries, a line with a diameter of 25 mm and a bypass of 20 mm are suitable. For a circuit consisting of 6-8 radiators, a 32 mm main and a 25 mm bypass are used.
If the system involves gravity flow, then it is necessary to choose a line of 40 mm or higher. The more radiators are involved in the system, the larger the diameter of the pipes should be, otherwise it will be difficult to balance later.
It is also important to correctly calculate the number of radiator sections. The coolant entering the first radiator battery has the highest efficiency. It cools the water by at least 20 degrees. As a result, at the outlet, water with a temperature of 50 degrees is mixed with a substance with a temperature of +70 degrees.
As a result, coolant with a lower temperature will enter the second radiator. As it passes through each battery, the temperature of the media will drop lower and lower.
To compensate for heat loss and ensure the necessary heat transfer from each battery, it is necessary to increase the number of radiator sections. For the first radiator you need to take into account 100% of the power, for the second - 110%, for the third - 120%, etc.
When choosing heating radiators, we recommend following the tips given in this article.
Connection of heating elements and pipes
The bypass is built into the existing main and is manufactured separately with bends. The distance between the taps is taken into account with an error of 2 mm, so that when welding the corner valves with the American one, the radiator will fit.
The permissible play on an American pull-up is usually 1-2 mm. If you exceed this distance, it will go downhill and flow.To get the exact dimensions, you need to unscrew the corner valves in the radiator and measure the distance between the centers of the couplings.
Tees are welded or connected to the taps, one hole is allocated for the bypass. The second tee is taken by measurement - the distance between the central axes of the bends is measured, taking into account the size of the bypass fit on the tee.
Carrying out welding work
When welding, if the pipes are metal, it is important to avoid internal welding. If half the diameter of the pipe is closed, then the coolant under pressure will prefer to pass through a more spacious line. As a result, radiators may not receive enough heat.

When welding the bypass and the main pipe, you need to determine in advance which end needs to be welded first, since there are situations when, having welded one edge, it is impossible to insert a soldering iron from the second between the pipe and the tee.
After all the elements are ready, the radiators are hung using angle valves and combined couplings, a bypass with bends is placed in the groove, the length of the bends is measured, the excess is cut off, the combined couplings are removed and welded to the bends.
Final points of the work
Before starting the system, it is necessary to remove air from the pipeline and radiators using Mayevsky taps.
Also, after starting and checking all components and connections, it is important to balance the system - equalize the temperature in all radiators by adjusting the needle valve.
In vertical schemes, water is supplied from above through risers. The expansion tank should be located above the level of the radiators, and the pipeline is usually mounted in the wall.It is also important to introduce a forced circulation device into the system.
Advantages and disadvantages of the system
The main advantages of Leningradka are ease of installation, high efficiency, savings on consumables and installation (the groove is formed for one pipe or not done at all if an open type of installation is chosen).
Thanks to the introduction of bypasses, ball valves, and a control panel, it became possible to regulate the temperature in rooms without reducing the heat level in other rooms; replace or repair radiators without stopping the system.
The main disadvantage of the system is the complexity of calculations, the need for balancing, which often results in additional costs - installation of additional equipment, repair work, etc.
Conclusions and useful video on the topic
Educational video about the implementation schemes of the Leningradka system:
The heating system called “Leningradka” is a budget-effective solution for heating small houses.
If you have anything to add to the material presented or have any questions on the topic, please leave comments on the publication and share your personal experience of arranging Leningradka. The contact form is located in the lower block.


Due to the ease of installation and relative cheapness compared to other heating systems at the dacha, I decided to install “Leningradka.” My country house is small, one-story, even in winter we come there for the whole weekend, so this heating system suits me quite well. The only inconvenient point is that you cannot leave the country house unattended for a long time.
I wouldn’t even recommend a single-pipe for a country house.If you delve deeper into the question, most of its advantages are lost during operation. And now I’ll tell you why. It is not possible to adjust the supply temperature to the radiator. If the outermost device hits the room from the windward side, in winter, no matter how warm it is, it’s still a dud. Yes, I don’t argue, you can additionally install a balancing valve. Thermostats can be installed. But then the simplicity and low cost for which this system is most often chosen is lost.
Vladislav is smart, he understands systems!
The circuit is so-so... we made it, now we are suffering - out of 5 batteries, 3 do not heat up. Those next to the boiler heat, but the 3 farthest do not heat. Water rushes through the pipe, but does not go into the batteries. At least we should have time to redo it before the cold weather so that there is only one pipe, which goes straight into the battery and comes out at the other end of the battery. Otherwise, gas is burned in vain, and the batteries are cold.
The scheme is frankly bad, to put it mildly... It’s easier for water to chase in a circle - the law of conservation of energy is obvious. If we had known right away, we would have made a double-circuit one with an upper and lower pipe.
It was not done to you by a professional. I have been doing this on one- and two-story houses for 10 years now. Nobody complained. Everyone is feeling hot.
Why do I need a two-pipe system if I have 4 radiators? The first is in the inner small room, then two radiators in the hall and the last one in the corridor. I use thermostatic heads to control the temperature in the first and corridor radiators, that is, heat two radiators in one room. Do I need a two-pipe system?
So no one offers you to install a two-pipe heating system for four radiators.In this case, the costs are higher, but the practical benefits are not so much.
The article also deals exclusively with a single-pipe heating system. In particular, for four radiators, “Leningradka” is the best option. For six radiators this is already debatable, since at a temperature of the first radiator of 80°C, the outermost radiator in the system will warm up to only 45°C. What is the temperature ratio between the first and outer radiators you have? I'm guessing 80°C/45°C.
Here it is also very important to consider the distance between the radiators; if the room is stretched, then a single-pipe system may not be practical.
If there is no forced circulation, then it is better to make a two-pipe one. And it works more stable and, as a result, cheaper.
And the fact that there are different valves for the radiator and for the general circle and the temperature of each radiator can be adjusted
Gone are the days when “Leningrad” was chosen because of savings. Now it is chosen because of its ease of installation; It’s easier to “disguise” the wall or floor if there is an open pipe, then it’s easier to “disguise” it behind the baseboard or leave it outside, without compromising the interior. With the advent of various thermostats, valves, taps, it is possible to regulate the temperature in each room. The author has mistakes in almost all the photos. He himself talks about taps, American ones, bypasses, ease of installation, replacement, but in the photo the radiators are stupidly connected by welding or threading, where it is impossible to dismantle the radiator or replace it without a cutter and welding...
Please tell me, if we make two circuits in a two-story house (one circuit for each floor) and three radiators on each floor, will a one-pipe system be effective?
I did it myself 8 years ago, I don’t have any problems you’re talking about. There are 6 radiators in 6 sections. The temperature difference is 7 degrees between the first and last batteries. The house is warm.
Please indicate the internal diameter of the pipes from boiler to boiler and shut-off valves. Without a pump from the OAGV-11 boiler.
My question was for Alexander.
And we have 7 radiators and for some reason the expansion tank boils if you throw a full bucket into the stove