Installation and connection of an expansion tank in open and closed versions of heating systems
To provide the coolant with the opportunity to expand when heated, it is necessary to install an expansion tank in the heating system. This is a very important event.It will protect pipes and radiators from unnecessary loads and significantly increase the service life of the functional elements of the autonomous heating system.
We will talk about how the expansion tank works in open and closed circuits. We'll show you how to install it correctly in both versions of the system. In our article you will find a description of the technology for connecting this backup capacity and useful recommendations.
The content of the article:
Types and functions of heating expanders
An expansion tank is needed to compensate for the effect that an increase in the volume of coolant during heating has on the heating system. An additional container connected to the circuit becomes a storage place for the resulting excess water. When the temperature drops, part of the coolant leaves the tank and returns to the pipes.
The process is repeated with each heating and cooling cycle. If there was no such reservoir in the system, then when the water inside the pipes was heated, the pressure would increase and then decrease.
Such differences negatively affect the state of the system. They lead to leaks at the junctions of devices and pipes and can even cause equipment failure.

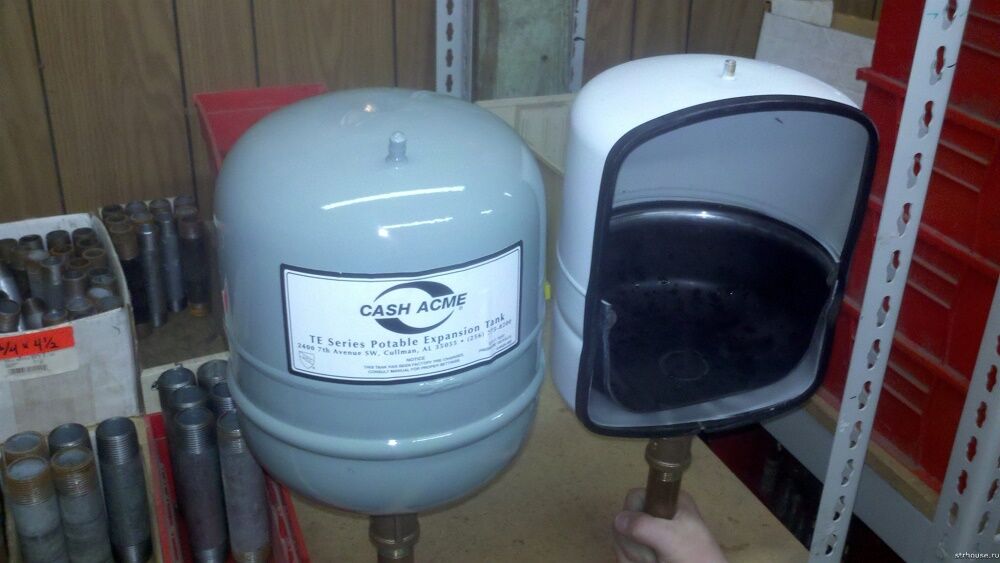
The expansion tank is selected depending on the characteristics of the heating system.For closed circuits, you need a special closed capsule with a membrane, and for open circuits, an unsealed container of a convenient configuration and the required size is suitable.
You should choose a membrane tank that is designed for contact with hot water. Typically, the body of such devices is painted red. You can make a container for installation in an open circuit yourself, for example, weld it from sheet metal. But it is important not only to choose the right device, but also to install it correctly.
Installation of membrane device
A hydraulic accumulator of this type is installed where there is a minimum probability of coolant turbulence, since a pump is used for normal circulation of water flow along the circuit.
Correct container position
When connecting the expansion tank to closed heating system It is imperative to take into account the location of the air chamber of the device.
The rubber membrane periodically stretches and then contracts. Due to this impact, microcracks appear on it over time, which gradually increase. After this, the membrane has to be replaced with a new one.

If the air chamber of such a tank remains at the bottom during installation, the pressure on the membrane will increase due to gravitational influence. Cracks will appear faster and repairs will be needed sooner.
It makes more sense to install the expansion tank in such a way that the compartment filled with air remains on top. This will extend the life of the device.
Features of choosing an installation location
There are a number of requirements that must be taken into account when installing a membrane expansion tank:
- It cannot be placed close to the wall.
- The device should be freely accessible for regular maintenance and necessary repairs.
- The wall-hung tank should not be positioned too high.
- A shut-off valve should be placed between the tank and the heating pipes, which will allow you to remove the device without completely draining the coolant from the system.
- When installing on a wall, the pipes connected to the expansion tank must also be attached to the wall in order to remove possible additional load from the tank pipe.
For a membrane device, the most suitable connection point is the return section of the line between the circulation pump and the boiler. Theoretically it is possible to put expansion tank and on the supply pipe, but high water temperatures will negatively affect the integrity of the membrane and its service life.

When using solid fuel equipment, such placement is also dangerous because steam can enter the container due to overheating. This will seriously disrupt the operation of the membrane and may even damage it.
In addition to the shut-off valve and the “American” connection, it is recommended to install an additional tee and tap when connecting, which will allow you to empty the expansion tank before disconnecting.
Setting up the device before use
Before installation or immediately after it, it is necessary to correctly configure the expansion tank, otherwise called an expansion tank. This is not difficult to do, but first you need to find out what pressure should be in the heating system. Let's say an acceptable value is 1.5 bar.
Now you need to measure the pressure inside the air part of the membrane tank. It should be less by about 0.2-0.3 bar. Measurements are carried out with a pressure gauge with a suitable gradation through the nipple connection, which is located on the tank body. If necessary, air is pumped into the compartment or excess air is vented.

The technical documentation usually indicates the operating pressure, which is set by the manufacturer at the factory. But practice shows that this is not always true. During storage and transportation, some air may escape from the compartment. You must take your own measurements.
If the pressure in the tank is not set correctly, this can lead to air leakage through the air removal device. This phenomenon causes a gradual cooling of the coolant in the tank. There is no need to pre-fill the membrane tank with coolant; simply fill the system.
Tank as additional capacity
Modern heating boiler models often already equipped with a built-in expansion tank. However, its characteristics do not always correspond to the requirements of a specific heating system. If the built-in tank is too small, you need to install an additional tank.
He will provide normal coolant pressure in system. This addition will also be relevant if the heating circuit configuration changes. For example, when a gravity system is converted into a circulation pump and the old pipes are left behind.
This is true for any systems with a significant volume of coolant, for example, in a two- or three-story cottage or where, in addition to radiators, there is a heated floor. If a boiler with a small built-in membrane tank is used, installing another tank is almost inevitable.
The expansion tank will also be appropriate when used indirect heating boiler. A relief valve, similar to that installed on electric boilers, will not be effective here; an expansomat is an adequate way out of the situation.
Connecting the expansion tank
The location for installing such a tank is chosen where the intake of excess coolant will be as efficient as possible.
When figuring out how to properly install an expansion tank in open heating system, you need to pay attention to three important points:
- select the highest point of the contour;
- place the tank directly above the heating boiler so that they can be connected by a vertical pipe;
- provide overflow in case of an accident.
The requirements are explained by the peculiarities of the functioning of gravity heating systems. The hot coolant moves from the boiler through the pipes and reaches the expansion tank, losing a significant part of the thermal energy.

The cooled water naturally flows through the pipes into the heat exchanger for new heating.The location of the tank at the highest point allows air bubbles trapped in the system to be removed from the coolant.
Calculate capacity tank for open systemgrowth. The total volume of coolant in the circuit is measured, 10% of this indicator will be the required figure. Most often, the expansion tank is installed in the attic.
This is especially convenient if you need a large capacity, because a significant amount of coolant may be required for normal operation of a gravity system. A small expansion tank can even be placed in the kitchen under the ceiling, if this allows it to be connected correctly to the heating boiler.

If the device had to be placed in the attic, you need to take care of its insulation. This is especially important if the attic is not heated. Although coolant and enters the tank already cooled, you should not neglect the opportunity to save part of the thermal energy. In the future, heating will require less time and fuel, which will significantly reduce heating costs.
To connect the expansion tank and overflow, you need to run two pipes into the boiler room. The overflow is usually connected to the sewer, but sometimes home owners decide to simply take the pipe outside, and an emergency discharge is made outside.

After the place for expansion tank installation Once its volume has been selected and calculated, you need to find and install a suitable container.Small tanks are mounted on the wall using brackets or clamps.
Large containers must be installed on the floor. There is no need to seal this tank hermetically, but you will still need a lid. It is necessary to protect the coolant from debris.
Some of the water from an open system evaporates, the lost volume must be replenished. The coolant is usually added to the open circuit through the expansion tank.
This point must be taken into account when choosing a place to install the device. It is not always convenient to carry water into the attic with a bucket. It is easier to provide in advance for the installation of a supply pipe that leads to the expansion tank.
Conclusions and useful video on the topic
Step-by-step demonstration of installing and connecting a membrane tank to a heating system:
Interesting tips for installing an expansion tank in an open system:
A regular expansion tank, like a membrane accumulator, is not too difficult to install. This does not require special skills or tools. But it is necessary to strictly comply with the requirements related to the characteristics of the heating system for which such installation is being carried out.
Would you like to talk about how you installed the expansion tank with your own hands? Do you have useful information that can help website visitors with self-installation? Please write comments, ask questions and post photos related to the topic of the article in the block below.


