How to make a gate for a private house from a metal profile: drawings + step-by-step manufacturing instructions.
Are you faced with the question of choosing a gate for your site, but the prices for ready-made solutions are not at all encouraging? And although the market offers many interesting options, even metal profile structures cost a lot, don’t they? I would like the new gate to be of high quality, to look stylish and not to cost exorbitantly.
To get the desired result, we suggest making a gate for a private house from a metal profile with your own hands. It is not difficult and you do not need any special technical education for this. It is enough to know how to use welding and tools. We will tell you in detail how to make a gate yourself in this article, look at each step step by step, and provide instructions with visual photos and video instructions.
The content of the article:
Advantages of gates made of metal profiles
When faced with the problem of purchasing or replacing old gates with new ones, it is not always easy to find what you want, and even at an affordable price. Therefore, assembling a metal profile gate with your own hands will be an excellent solution in such a situation.
The main advantages of such gates:
- strength and reliability of the materials from which they will be made;
- appearance - it’s easy to think through the design of the structure so that it fits into the environment and harmonizes well with the house;
- reasonable price (the cost of purchased gates is much more expensive).
The advantages of homemade gates are very obvious, and with proper preparation, the assembly and installation process will not take much time.
Step-by-step assembly instructions
First of all, you have to choose a place on the site to install the gate, decide on the size and design. To do this, we take a tape measure, a pencil, a notepad in our hands, and go to the site.
You need to know exactly where the future gate will be located, as well as its exact dimensions. Please note that in order for the car to pass easily, you need to take into account the height and width, taking into account the mirrors and, preferably, design the gate with additional space. We measure the distance and write it down.
This is a responsible step, because further, if you suddenly change your mind, calculate the distance incorrectly, or want to make any changes, it will be very problematic to do so

Step #1 - choosing a gate design
Before starting work, you need to decide on the choice of gate design so that it is optimally suited to perform the functions assigned to it.
Advantages of the swing option
Swing gates are perhaps the simplest and most popular design. An obvious advantage is the low cost of materials for assembly. It is quite possible to make such gates yourself without unnecessary problems and additional skills. They will also be quite durable and last a long time, practically not requiring any special care.
The design dimensions, choice of material and color can be easily selected at your discretion, taking into account all your wishes and whims.

When opening the gate, a large space is required, which in some cases is a big disadvantage.
In addition, such a structure will be mounted on special pillars, which will have to be installed at a great depth and concreted at the base so that the gate holds tightly and lasts a long time. You can also equip with automation.
Folding design option
In another way, these gates are called “accordion”, because when opened they resemble this musical instrument. They are also a fairly simple option; you can easily make them yourself.
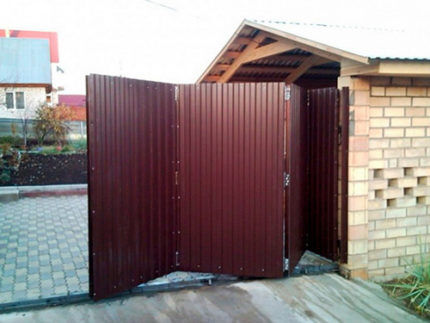
Assembling such gates will not be difficult; moreover, unlike swing gates, they significantly save space when opening.
However, there is one significant drawback - this type of gate is rarely installed outdoors, since snow and dirt getting into the mechanism complicate its operation.
Pros and cons of sliding gates
These gates are great space savers, work well and last a long time, however, a large opening will be required to allow for rollback.

The only downside is that the manufacture of these gates will require more material and fittings, which will significantly increase their cost. In addition, the foundation will need to be poured.
There are several other types of gates (roller, automatic, lift-and-turn), but making them without special skills will be much more difficult.
Read more about types of gates for a private house we talked about in our other article.
Step #2 - creating a drawing
We choose a ready-made drawing or draw it ourselves. You can take a diagram from the Internet and adjust it to the size of your site. In this case, you need to take into account the place where there will be there is a gate, and also whether there will be a frame above the gate.
The crossbar is located above the gate and serves as an additional fastening that keeps the gate from sagging. The only downside of this frame is that large equipment cannot enter the yard. But in this case, there is a way out - you can make the crossbar removable, in which case it will keep the doors from sagging and can simply be removed at the right time.

The gate leaves should not fit tightly against each other in order to avoid problems with their blocking when snow freezes. You should also be sure to calculate the distance under the gate - they should not touch the surface.
In the drawing, draw in which direction the doors will open, so that you can then attach the hinges correctly.
Step #3 - selecting the necessary materials
Selection and procurement of materials:
- support pillars (pipes);
- concrete for concreting the base;
- metal profile - it is better to take sheets with a reserve, in case of mistakes or damage;
- frame material (wood or metal);
- screws, metal corners (for additional strengthening of the structure), etc.
All necessary materials are sold at any hardware store. The tools you will need are a welding machine, a building level, a tape measure, a pencil (marker), a notepad, grinder for slicing metal structures for assembling the frame, metal scissors, screwdriver.
Preparation and cutting of materials is carried out according to the dimensions given in the previously drawn up diagram.
Step #3 - installation of support pillars
We install pillars. The most important thing here is to strictly observe the markings and verticality. The depth to which the post or pipe is lowered must be sufficient to support the future gate. Optimally - 1-1.5 meters. Before installing a metal pole, it is recommended to pour sand (there should be a lot of it), it will serve as drainage for water.
The base must be concreted so that the soil washed away by rain does not contribute to the loosening of the pillars, which can cause the entire structure to warp. All defects are especially visible after winter, since the soil may not freeze evenly. This can also affect the distortion of the pillars and, accordingly, the entire structure, if the rules are neglected.
The pillars can be made of metal pipes, bricks, concrete. However, you need to remember that the support should not only fit well into the overall design, but be really very strong and withstand the weight of the gate.

Step #4 - assembling the gate frame
Next, we begin assembling the gate frame. The metal frame is reliable and durable.
For this job you will need electric welding machine and skills to use it.A screwdriver will also come in handy (screws and all necessary parts must be prepared in advance). You will need a grinder to cut pipes.
The frame (if it is a swing gate) is usually made in the form of equal rectangles, sometimes additionally fastened diagonally. It is important to correctly verify right angles, otherwise all the work will be useless.
The structure should be strong, but not too heavy, because any excess weight will fall on the pillars. Calculation of the weight of the frame and the load-bearing capabilities of the pillars must be carried out correctly.

Step #5 - attaching sheets to the frame
At this stage, we fasten the sheets to the frame with self-tapping screws. Welded electric rivets can also be used.
It is worth noting that profiled sheets come in different types. They vary in height, size and have their own name. The manufacturer's websites usually indicate the characteristics of the material, where and how they can be used.

When choosing a material, it is better to contact a specialist or study the characteristics of corrugated sheets yourself. You need to keep in mind the weather conditions in your region, precipitation, and whether the gate is subject to constant strong wind pressure. The choice of corrugated sheet thickness will depend on this.
It is better to choose the same color as the entire fence. This way the gate will look more aesthetically pleasing. Or you can paint the surface yourself, choosing your favorite shade or a specific color scheme.
Choosing a lock for gates and wickets
The mechanism for closing gates and wickets should not be overlooked. Locks can be built-in or attached separately.

It is best not to use simple hooks or soft metal locks. They are not reliable enough.
There are many different locks on the market today, but models with a sliding mechanism are especially popular.
Well, that's all - the gate is ready for use. And if you still have material left, you can immediately collect new corrugated fence.
Conclusions and useful video on the topic
Video instructions for assembling simple gates from metal profiles:
Making a gate yourself is a responsible task, but the result and the minimum amount of investment will fully justify the time spent. When performing work, you should approach each step carefully and as responsibly as possible, which will minimize the likelihood of errors.
Find out how to do DIY sliding gates from drawing to installation and maintenance.
And then gates made from metal profiles, made independently, will not only cost much less than purchased ones, but will also be ideal for your site and meet your requirements.
Have you already assembled a metal gate or are you just considering this option? If yes, then in the comments block you can share your personal experience with our other readers. Here you can also ask advice from our experts or ask questions to visitors who have experience making gates at home.


