Types of gates for a private home: nuances of choice + DIY installation steps
Owners of private houses, country cottages and summer cottages are interested in having their backyard areas protected.For this purpose, in addition to fences, gates are installed to enter the site. But the range of gates is rich and choosing the best option is quite difficult, isn’t it?
To cope with this task, you need to understand what types of gates exist for a private home, what function they perform, how reliable they are and how they fit into the surrounding exterior. This is exactly what we will talk about in our article. We will also consider how difficult it is to install a gate with your own hands. Let’s say right away that this task is completely doable and will not only give you pleasure from the work done, but will also save your family budget.
The content of the article:
Main types of home gates
Before entering the plot or house, guests see a gate through which they can enter the garden area. Their good appearance and modern constipation system evoke the respect of others.
If the gate has a beautiful decorative design, an aesthetic appearance, then this indicates the good taste of the owners.
When choosing a gate, you should definitely take into account: type of construction - lattice, fixed, combined; canvas material; opening method.
No. 1. By type of design
Depending on whether you want to completely isolate yourself from prying eyes, reliably protect your territory, or, conversely, present to the whole world what is going on behind your fence, you can divide gates into blind and lattice.
Blind gate type
As the name implies, such gates are completely closed. They are not only reliable from the point of view of the penetration of strangers into the territory, but also do not make it possible to see what is happening behind them.

Such designs provide an additional feeling of comfort and security.
Lattice design option
Through lattice models you can see the house and territory, but this does not mean that they are not capable of being good protection.
They have their advantages, for example, less windage. This is especially true for regions where there are strong winds. Since the area and weight of the gate is considerable, during strong gusts of wind they experience increased load. And the lattice design allows you to solve this problem.

Their disadvantage is transparency (through such gates the yard and the house are completely visible), they compensate for their lower cost. Also, their installation does not require a powerful foundation, since they weigh less than solid ones.
Combined gate type
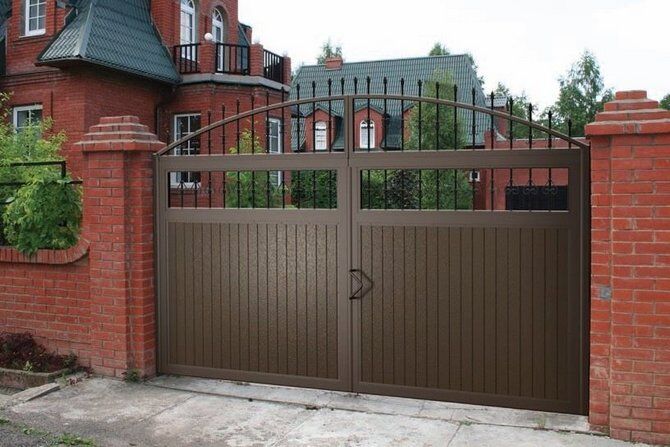
Often there are combined options, where the lower half is tightly closed, and the top is made in the form of a lattice. The windage of combined gates is reduced.
Depending on the owner’s wishes, the upper part can be small and make the structure visually lighter. In other cases, the canvas is sheathed tightly only at the bottom, leaving the rest of the area for lattice design. Such gates always look harmonious and can be combined with any type of fencing.
No. 2. By type of material
You can often find metal gates. First of all, this is the frame itself; metal is also chosen for the cladding. This is understandable, since metal gates are durable and have a long service life. You can make such gates yourself if you have experience in welding metal structures, and a variety of welding machines are now on sale.
You can make a metal welded structure - a frame, and make the doors themselves from sandwich panels, use corrugated sheet, metal sheets, make the gate from forged elements or, a more economical option, welded. It all depends on the budget and the overall design of the house and fencing.
Wooden structures are very simple, you can easily make them yourself, the material has less weight than metal. In order for such gates to last as long as possible, they must be treated with a protective coating at the manufacturing stage.
No. 3. By opening method
Gates may differ in the type of opening/closing.
Swing gate types
The most popular type of opening is swing gates. Their design is simple and therefore reliable. They are easy to use, do not require special care, and the price of such models is low.
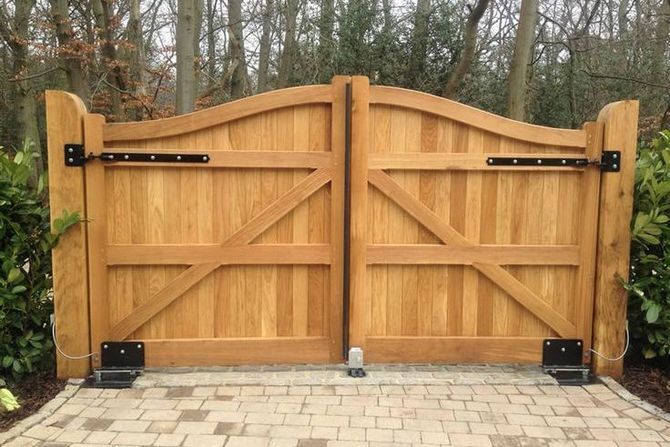
There are designs with one large and another small door, which is used as a gate. On the one hand, this option is convenient - there is no need to make a gate separately.
On the other hand, the second canvas will experience heavy loads from the wind, and the support will experience heavy loads from weight.Over time, the weight may cause distortions in the canvas. The advantage of this option is that only the large sash can be equipped with an electric drive for opening. It must be of a size suitable for a passenger car. If it is necessary to let large vehicles through, the gate opens manually.
The sashes, opening in one or opposite directions, are mounted on reliable racks. The doors themselves consist of rigid frames made from metal corners or from a profile pipe (square).
A wide variety of materials can be used for cladding, from boards to corrugated sheets. You can open the gate manually or make it automatic with remote control.
The swing design has one drawback: the sashes require additional area in the opening direction. If the entrance to the site is wide and it is possible to make a gate so that it opens outwards, then there will be no problems. Most often, entrances to the territory do not have much space, which means this area, equal to half the width of the opening, will need to be allocated inside the territory. And most automatic electric drives are made so that they open inward.
There should be no rise in the ground level in the direction of opening the doors, otherwise it will be necessary to remove excess soil for the free passage of the doors.
More about the nuances installation of swing gates we talked about automation in our other article.
Sliding type of construction
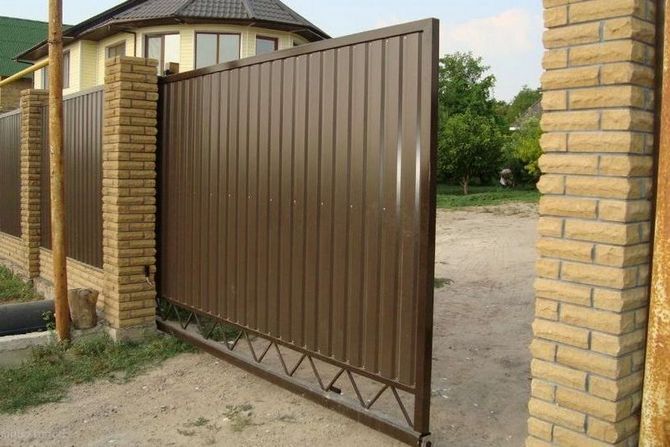
Expensive electric drives, if you are going to install them on your gates, are needed for a swing type of gate, one for each leaf, but for a sliding system you will need only one.This is one of the advantages of this design. There is no need to clear the area of snow in winter in front of such gates. They are very easy to maintain.
The main reason for choosing a sliding system is the lack of space for swinging the sash. But sliding gates also need space when opening. In the direction of rollback, a length equal to almost one and a half lengths of the opening is required. Such structures cannot be installed in narrow areas.
Sliding gates may also differ in the method of fastening. Most models have a bottom console mount. Options with a top hanging mount are less common, as it is more bulky, limits the height of travel and is expensive, although reliable in operation.The cantilever mount has neither an upper crossbar nor a lower rail, which is very important, since it is not in danger of becoming clogged with dirt or snow. The beam along which the rollers move can have three mounting options: at the top, in the middle, at the bottom.
As with the installation of swing gates, the width of the passage must be taken into account. The narrower the driveway, the wider the passage opening will have to be made so that the car can freely enter when turning.
Sectional door design
The sectional door option can often be found in garages, but they are also installed at the entrance to the territory. The structure consists of several sections, they are connected to each other by loops. Moving along the guides, the sections fold at the top. These gates operate using an electric drive.
Roller type gate
This type is also popular when installed in a garage, but is also found at the entrance to the territory, especially when the entrance is covered. The lamellas that make up the door panels are screwed onto a shaft placed above the opening.
These gates, just like sectional ones, are characterized by a low level of security. Such models can be chosen only if there is no area for swing doors and there is no room for rollback.
Folding and lifting
Folding gates consist of several sections. Depending on their number, they can be divided into book-shaped or accordion-shaped doors. Due to the complexity of the design and unreliability, they are installed extremely rarely.
Even more rarely, you can find lifting gates, when the entire gate leaf rises vertically or like a barrier.
Instructions for installing sliding gates
Let's consider the option of manufacturing and installing sliding gates. Let us immediately note that such gates are more difficult to manufacture and install than swing gates. To make the frame and leaf of the gate, then install the sliding structure, you need skills in working with welding machine.
Stage #1 - making the gate leaf
For this type of gate, you need to ensure good rigidity of the panel. Since it will bear a high load from its own weight and from the wind.
Before you start making the frame, all its elements and the guide should be cleaned of rust. This can be done with a grinder with a metal brush attachment. Then you need to degrease and apply an anti-corrosion primer.
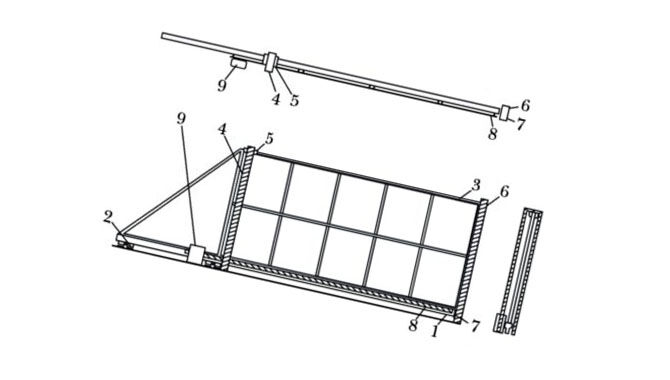
From a profile pipe you need to weld a rectangular frame the same size as the opening. First, a guide in the form of a rail with the open part downwards is welded to the lower profile, using clamps at a distance of 20 cm.
Next, the vertical frame elements and the top crossbar are welded. A counterweight in the shape of a triangle is welded to the end of the frame, and stiffening elements are added in the form of vertical pipes and sections at an angle of 45 degrees (or placed diagonally in the form of a cross).
Welding seams are also treated with a wire brush and coated with a primer; at this stage the frame can be painted with a special paint for exterior use. Next, the frame should be sheathed with wood, corrugated board, sheet steel or other material.
Stage #2 - installation of pillars and foundation
To install sliding gates you will need: a guide metal profile, a support with rollers, a plateau with rollers, neutralizing lateral rolling, an end roller, a plug for the ends of the console, catchers and door leaf retainers.
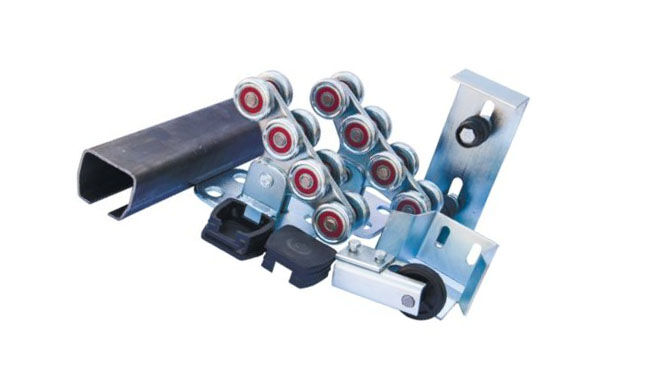
The type of guide is of great importance. It is responsible for the operation of the gate and is subject to heavy load.
When choosing it you need to take as a basis:
- type - blind or lattice gates;
- gate size;
- canvas weight.
To ensure unhindered movement of the gate along the fence, a straight fence, no trees or bushes along the route, and a flat ground surface are required.
As already mentioned, to roll back you will need a length one and a half times greater than the size of the opening.For example, the opening is 4.5 m, then the rollback length should be 11.25 m.
The installation of gates should begin with the installation of supporting pillars. They can be made from square metal pipes 100 x 100 mm, concrete or brick pillars. For wooden gates, you can take timber from hardwood. The wood is pre-stressed treat with antiseptic.
It is necessary to dig holes under the brick pillars to the depth of freezing. When pouring the foundation, it is necessary to use reinforcement. To attach the gate post, you should release reinforcement or a metal corner in the post for mounting the door leaf.
Blind gate structures also require the installation of two support pillars, especially for openings larger than 4.5 m. The height of the supports from the road base to the top of the gate is 5 cm. We place the support pillars in the foundation pit, fastening them to a reinforcement frame, which is made as described below.
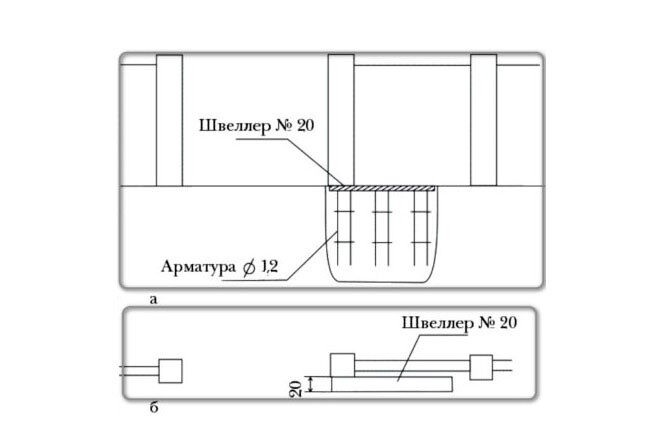
In the direction of rolling back the canvas along the fence, we dig a hole for the foundation. Its depth should be 100 - 120 cm, its length should be half the opening, its width should be up to 40 cm. A reinforcement cage will be needed for the foundation. We place the frame structure in the hole, directing the reinforcement down.
We set the surface of the channel horizontally and strictly in the direction of the line of movement of the gate. The structure should be secured sideways to the pole.
Concrete is poured flush with the upper plane of the channel.The concrete ripening time is 28 days, but if the timing does not allow, then it is advisable to wait at least one week, only after that you can begin installing the gate.
Stage #3 - installing the gate in the opening
Along the line of movement of the gate at a height of 20 cm, we pull the cord from the counter post to the end of the concrete foundation base.

From the extreme border of the opening along the surface of the mortgage, measuring 15 cm, mark the point where the rollers begin to support. To determine the location of the second roller support, you need to take the length of the gate along with the console, subtract 10 cm. We put the result obtained from the counter post towards the opening and along the surface of the mortgage - this will become the starting point of the second roller platform.
We assemble the rollers and place them in profile, moving them towards the middle of the canvas. The roller supports should be placed on the surface of the channel at the marked points, and the door leaf should be positioned along the cord close to it.
The second roller support is secured by welding. We move the gate leaf towards the opening to the end point. We check and level the gate. We secure the first platform with the rollers by welding.
To attach the roller supports to the channel, we remove the gate, and the supports themselves are contour welded to the surface of the channel. We remount the roller supports on the adjusting platforms, and place the gate on the supports. Having installed the gate closed and using a level, we align the adjustment panels with a wrench.
To adjust the direction of the supports in the profile, you need to loosen the top nuts securing the supports to the plateau. The gate needs to be opened and closed several times.The supports will be placed in the profile as needed.
When ease of movement of the gate has been achieved, the nuts can be tightened and again checked for smooth sliding along the guide. If the running of the blade becomes worse, loosen the nuts again. It is important to eliminate existing distortions in the supports.
We insert the end roller into the end of the profile and fasten it to the bolts. Since it simultaneously acts as an end stop when closing the gate manually, to ensure reliable fastening, we spot weld its cover to the profile.
On the opposite side, insert a plug into the end of the profile.
When installing the upper bracket that guides the movement of the door leaf, we place it so that the rollers fit around the top of the gate. The mounting location should be directed towards the support post. We fasten the bracket so that the roller surface is aligned with the protective plate. After fixing, there should be a gap of one or two millimeters between the protective plate and the roller.
A channel is attached to the counter post, which is placed tightly to the fence support. It is needed to close the gap between the gate and the post - its side planes should cover the end of the canvas. When closed, the canvas should not reach the back wall of the channel of the return post by 1.5-2 cm.
To automate the process of closing and opening gates, you need to purchase a special device and install it.
We place the upper and lower catchers on the channel plane. With the web closed, we place the catcher under the support end roller, trying to align it with it at the same level or lower the supporting part of the catcher a little lower.
We place the upper catcher opposite the protective corners at the end of the gate so that they are pressed against the catcher brackets.
Conclusions and useful video on the topic
To clearly illustrate the instructions for installing gates, we suggest watching thematic videos. Video on installation of sliding gates in the form of diagrams.
Video on installation of sliding gates in practice.
Manufacturing and installation of sliding gates.
It is not difficult to choose the right gate design for your site if you take into account all the factors: the width of the passage, the availability of space for opening, the compatibility of materials with the fence, the conditions for ensuring the protection of the territory and the appropriate cost. And you can save money if you make and install the gates yourself.
Do you have any questions about the types of gates or the nuances of installing a sliding structure? Ask our experts - the feedback form is located below. If you have personal experience installing gates, please share it with our readers. Also here you can attach original photos of the gates you installed yourself.


Hanging