How to connect a built-in gas oven: detailed instructions with useful tips
Built-in household appliances are an integral part of our daily lives.And it became popular due to the fact that it allows you to save space in the working area, looks much more attractive than outdated free-standing equipment, and according to technical data, it often outperforms it.
Innovations have not spared ovens, so beloved by housewives for their ability to prepare delicious and healthy dishes. Let's look at how to connect a built-in gas oven in order to comply with installation standards and not harm the equipment. In fact, this is no more difficult than installing a traditional autonomous stove, but some nuances are very important - we will dwell on them separately.
The content of the article:
What do you need to know before installation?
Even if you are well versed in the regulatory documents and can carry out all the installation work yourself, the final point in the connection process will be set by a gas service employee.
It is he who will check the connections for the possibility of leakage, make sure that the oven is connected correctly and is in good working order, and then issue a permit.

During preparation and installation, we advise you to strictly follow the manufacturer’s recommendations set out in the instructions and regulatory requirements SNiP 42-01-2002, acting instead of SNiP 2.04.08-87.
Remember that compliance with the regulations is the safety of your family, so take seriously any activities related to the installation of gas appliances.
Here are a few rules that will help you take into account the standards and carry out work on connecting a gas built-in oven so that it becomes comfortable for use in the future:
- The shorter the distance from the oven to the gas pipe, the better. The length of the hose should not exceed 4 m, ideally 1.5-2 m.
- The oven is connected to the pipe only with a flexible connection - a hose that complies with GOST standards.
- The auto-ignition system requires a power connection. A separate socket with grounding and a 16A RCD is required.
- To ensure air exchange in the required volume, good ventilation is necessary - you may have to install forced ventilation.
- To prevent gas from penetrating into living spaces, all connections must be sealed.
Sooner or later you'll have to do it replacing the gas hose, shut-off valve or some parts of the oven, so provide in advance free access to all significant gas supply nodes.

It is undesirable for electrical wiring and plumbing to be in close proximity to a gas pipe or supply line - the distance between them should not be less than 20 cm.
Preparation: Power and Ventilation
Not a single gas worker will sign an inspection report unless he is convinced that the ventilation shaft is working well and that the socket is correctly installed, so we recommend that you resolve issues of air exchange and power supply in advance.

All gas ovens can be divided into two categories: with and without a power cable. If the power cord comes from the rear of the unit, it requires an outlet. If not, then you can find the terminals for installing the wire under the cover of the junction box - in the same place, on the rear panel.

When connecting a gas or electric oven, do not use extension cords, filters for multiple outlets, or tees. The same rule applies here - the shorter the cord and the fewer connections, the better.
The oven is a powerful household appliance and therefore requires the installation of a separate RCD at 16 A. If you are simultaneously replacing wiring and assembling an electrical panel, be sure to leave one place for it on the DIN rail in the kitchen appliances group.
There are no big difficulties with ventilation either. Usually it is provided by open vents and valves for ventilation on one side and ventilation ducts and shafts on the other. Productive kitchen hood is welcome, since during cooking it is it that cleans the air from vapors and combustion products.

If the hood cannot cope or the ventilation does not meet the requirements, then a fan is installed in the shaft opening or a plastic channel leading to the same shaft, which forcibly removes the exhaust air outside.
Tips for choosing a gas hose
Simple in essence and not requiring special skill, but a very important moment - connecting a gas oven to the pipe that supplies fuel to the apartment or house. It is important here to choose the right supply hose and to tightly connect it to the oven and pipe.

When calling a specialist, you can ask what gas hose better to choose.
Today in stores you can find products of different materials:
- inexpensive rubber-fabric eyeliners with a service life of up to 5 years;
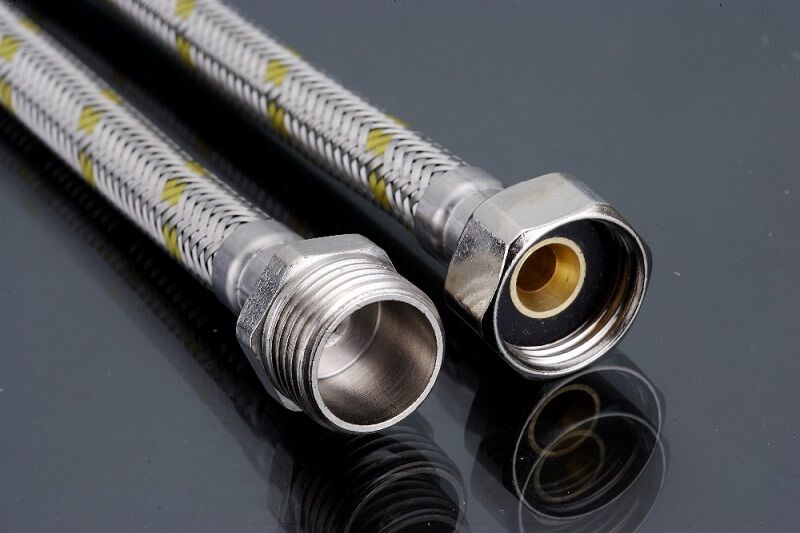
- rubber hoses with metal braiding, reliable and ready for installation;
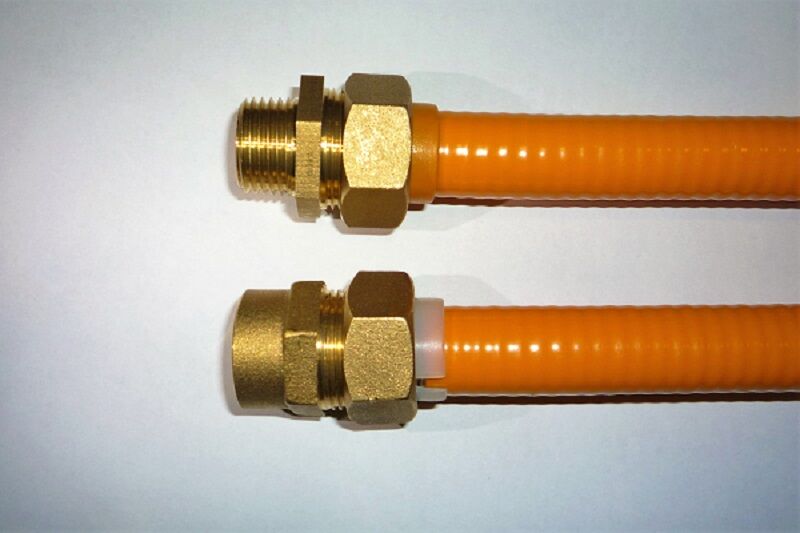
- double-layer PVC reinforced hoses;
- bellows tubes.
They may also offer an oxygen hose - it seems durable and reliable, but don’t agree. These products are already prohibited for use for a number of reasons, and one of them is relevant specifically for the kitchen. The hose material is destroyed when grease gets in, and this is the possibility of a gas leak with all the tragic consequences.
Some tips for choosing:
Along with the hose, do not forget to buy a dielectric for the gas pipe and a shut-off valve - if it is not already installed. Please note that to install the tap you will have to shut off the main line, that is, call a gas service worker.
Gas oven installation instructions
The entire installation process can be divided into 3 parts: the 1st is the continuation of preparation, the second is the direct installation of the built-in oven, the 3rd is connecting the oven to the gas supply line. Let’s sort everything out in detail so that there are as few questions as possible on the topic of how to properly install and connect an oven to gas in a residential area.
Stage #1 – unpacking and studying the instructions
Many people neglect the first stage, although the serviceability of the equipment is one of the conditions for its proper functioning in the future.
To ensure that the oven is ready for installation, unpack it and check it from all sides, namely:
- The front side on which the control panel and oven door are located - there should be no scratches, cracks, dents, or stains on them. It is not recommended to remove the protective film before installation is complete.
- The back wall, where on visible parts or hidden under covers there are elements for connecting the unit to electricity and gas.
- Internal surfaces located behind the door.
- Protruding elements are mechanical handles for adjusting power and setting modes, and a door handle.
Then take the technical passport and check the equipment: baking sheets, grates, grill equipment, installation and mounting kit.
The installation kit consists of a pair of guides and several self-tapping screws with washers. Don’t be surprised – installation of modern equipment does not require a large number of fasteners.

After making sure that everything is in order and in place, you can start connecting the hose, wires and installing the cabinet body into the niche - usually these activities occur simultaneously.
Stage #2 – preparing a niche for installation
The dimensions of the ovens are standard, as are the kitchen units, but you need to make sure that the dimensions of the prepared niche and the cabinet match. To do this, insert the oven into the niche - it should fit tightly, but with a small gap for mounting on the guides.

According to the drawing, the oven is installed either directly on the bottom of the niche, or on guides attached to the sides or on the top panel - according to the manufacturer’s recommendation. The final touch is to secure the housing with self-tapping screws so that it does not lose stability during operation.
The electrical wire and hose are connected even before the housing is finally fixed.
Stage #3 – connection and testing
Tools and materials may be required:
- screwdriver;
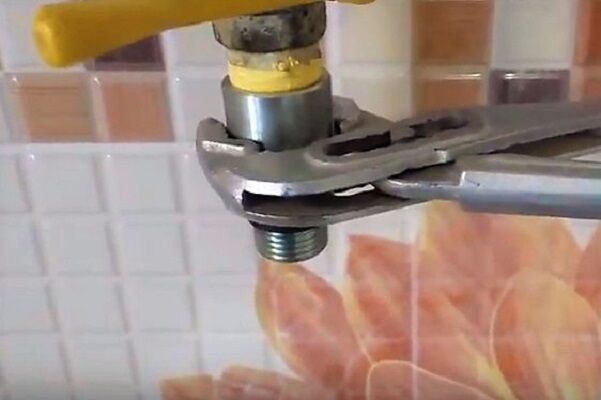
- gas key;
- adjustable wrench;
- fum tape;
- soap solution.
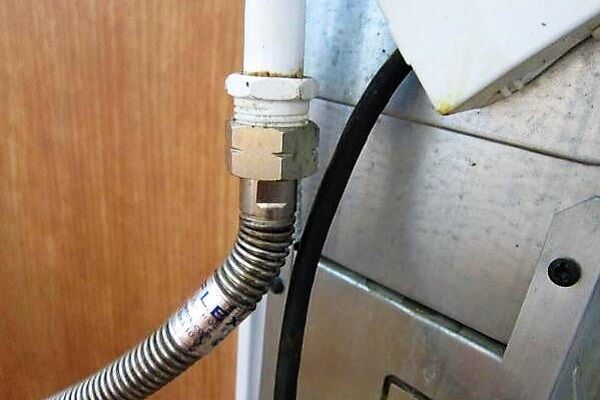
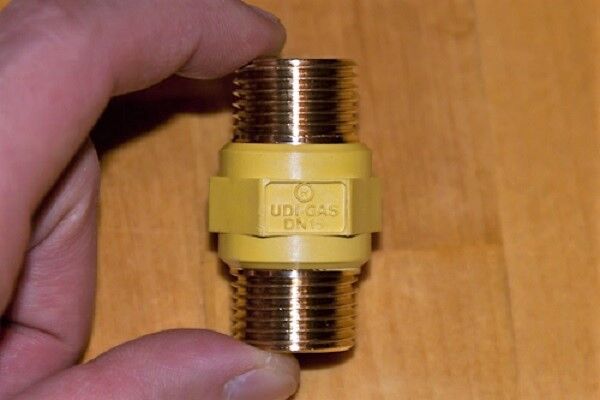
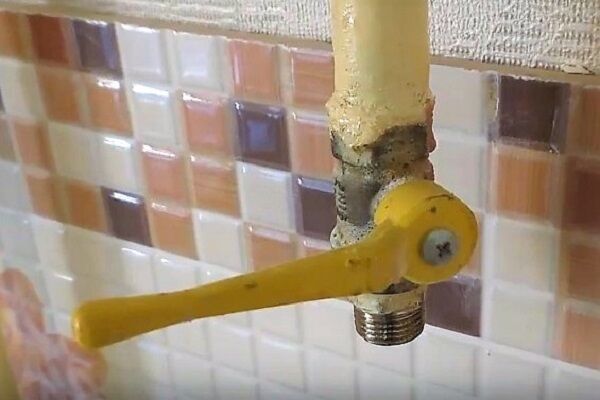
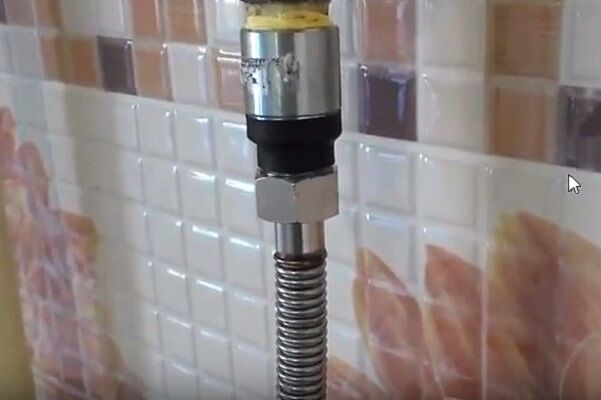
According to the standards, for oven installation A separate pipe outlet with an installed tap is required to cut off the gas supply in the event of repairs or an accident. The liner is connected through a dielectric insert, which provides additional protection.
How to install the dielectric correctly - in the photo gallery:
The other end of the hose is connected to the oven. Please note that the length of the hose should be sufficient for free connection at a time when the unit is not yet inserted into the niche - that is, the liner must be long enough. This is one of the features of installing built-in equipment.
Testing is carried out in the old “old-fashioned” way: cover the connection with a soap solution and supply gas. If there are no bubbles at the junction, it means the connection was successful.

Otherwise, you will have to do a more thorough sealing of the joint or still wait for a master and entrust him with this work. After connecting the gas, you can switch electrical wires or simply insert the cabinet plug into a pre-installed socket.
The last step is to install the already connected oven into the cabinet, tighten the fasteners and do one more final test.
Conclusions and useful video on the topic
Video #1. Tips from a user who connected the oven himself:
Video #2. Installation recommendations from manufacturer Hans:
Video #3. About the connection procedure:
And the last recommendation: be sure to work together with a gas service representative.If the connection goes past Gorgaz and an accident occurs that results in damage to health or property damage, you will face significant fines.
Sanctions are also possible during the next scheduled inspection - if the installation of new connected equipment is not recorded and documented. Act according to the law and your safety is guaranteed!
Please write comments, ask questions and post photos on the topic of the article in the form below. Tell us about your own experience in connecting a gas oven. It is possible that the technological subtleties of the process you know will be very useful to site visitors.


