Connecting an electric stove: instructions for installing and connecting the stove yourself
Free-standing electric stoves, despite the popularity of built-in kitchen appliances, still remain in demand. They are cheaper, but at the same time they are not inferior to integrated units in terms of technical characteristics and design. And installation takes little time and does not require special preparation.
Correct installation and compliance with operating requirements are the conditions for long-term service, so homeowners often call a technician from a service organization or simply an electrician they know. But you can save a lot of money by doing everything yourself. Do you agree?
But what is needed for this and how to do it correctly? We will help you figure out the task - in our article we will describe in detail how to connect an electric stove on your own. We will also analyze the nuances of choosing wiring and protective equipment, consider grounding methods and connection diagrams. This information may be useful to you not only when installing the stove, but also in the future, during repairs or replacement of equipment.
The content of the article:
Electric stove connection diagrams
First, let's look at the general rules. An electric stove is a powerful household equipment that consumes 40-50 A of current, so a separate electrical circuit is allocated for it.It connects two points: the circuit breaker in the apartment/house electrical panel and the socket/terminal block of the device.
In practice, 3 types of network connections are used:
- traditional socket/plug method;
- connecting wires to a terminal box in the wall;
- direct terminal connection on the back wall of the plate.
If the kitchen already has a pre-installed power socket, powered by a separate machine, they usually use it. This is more familiar, and if repairs are necessary, the device can be quickly turned off without leaving the kitchen.
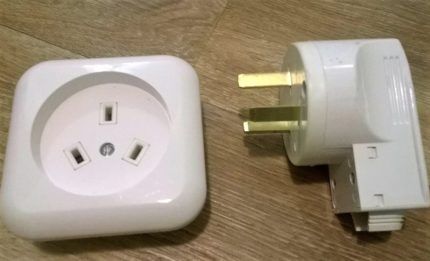
But often a direct terminal connection is used. It is considered safer and more reliable. The disadvantage of a non-socket connection is that you will have to disconnect the stove from the network each time at the electrical panel.
The connection diagram depends on the number of phases involved. Domestic equipment is designed for 1- or 3-phase connection, but we propose to analyze all three possible options, including 2-phase.
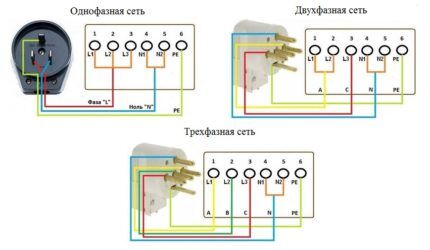
To connect the terminals of the plate with the conductors, jumpers made of copper wire are used. Modern equipment is usually equipped with the necessary parts for connection.
In the single-phase method, the phase is connected to terminals 1, 2 or 3, all of them are connected to each other by jumpers.Zero goes to 4 or 5, which are also connected, and ground goes to terminal 6.
From the diagram it is easy to understand how other types of connections are made. There will be no problems finding the diagrams - they can be found in the technical documentation for the electric stove or on a plate attached near the terminal block on the back wall.
Requirements for circuit breaker and wiring
Before proceeding with the connection, you should find out whether the wiring corresponds to the potential load and whether a separate circuit breaker is installed in the electrical panel. If there are no elements for installation or they do not match the nominal value, we recommend purchasing them in advance along with the stove.
Powerful electrical appliances are not only allocated a separate line, but also have individual double protection: ideally, this is a set RCD + circuit breaker.
Instead of this pair, to save space in the shield, they often use difavtomat.
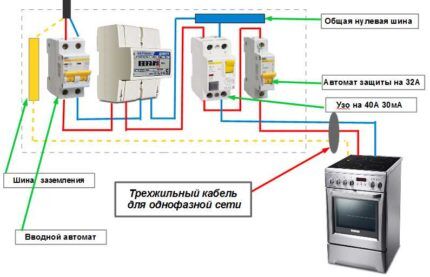
When purchasing a machine, the decisive criterion is the rating, which is chosen based on the maximum value of current consumed. Usually this is 40-50 A, but it is better to clarify the technical data in the stove’s passport. We recommend that you read more about rules for choosing a machine.
To guarantee safety, the nominal value is selected upwards - this way, when operating at maximum loads, the protection will not be constantly triggered. Let's assume that the maximum current consumption is about 45 A, therefore, a 50 A circuit breaker is needed.
For selection of RCD the principle is the same - in the direction of increase, that is, paired with a 50 A machine, they put a 63 A RCD.
WITH choice of wires There are no particular difficulties either.Aluminum cable is not suitable - it is better not to use it at all for home electrical wiring. This is unsafe, and its characteristics are inferior to its copper counterpart. Therefore, we settle on a copper wire with a cross-section corresponding to the power and current consumption.
If during the preparatory work you still have to buy wires, you need to focus on the power parameters of the stove:
- 3-5 kW – wire cross-section 2.5 mm²;
- 5-7.5 kW – 4 mm²;
- 7.5-10 kW – 6 mm².
For a three-phase network, a 5-core wire of 2.5 mm² is used.
If you have not yet decided which model of stove you will buy, but have already started replacing the wiring, you can safely buy VVGng 4 mm² wire - if the distance from the stove to the panel is no more than 12 m, and VVGng 6 mm² - if the electrical panel is further away. Modern stoves and ovens are quite powerful, so you can’t go wrong.
Now let’s figure out in what order it is better to perform all the actions.
Step-by-step connection guide
The easiest way to install is when everything is ready: the power circuit is connected to a separate machine, and in the kitchen, in a convenient place, an outlet is installed or wires are prepared for direct connection. Everything complies with the standards and requirements, all that remains is to connect the wires according to the diagram.
But in practice, we encounter different situations: in an old apartment, when installing new powerful equipment, it is often necessary to change all the wiring; in a new home, the sockets are inconveniently located. Therefore, let's consider the possible options.
Step #1 - choosing an installation location
For the stove, you need to choose a site for “permanent residence”, since it is unlikely that you will move it to another place. This is usually decided during the process of ordering or purchasing a kitchen set.
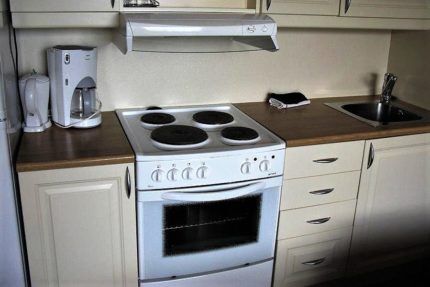
Taking into account safety requirements, the base under the slab must be strong and stable. There is no need to take any separate measures for thermal insulation or protection of walls - modern devices are maximally protected from various risks.
If your new apartment already has a power outlet, try to keep the stove as close to it as possible. Short wires and the absence of extension cords are also one of the safety conditions.
Step #2 - calculations and work planning
It’s better to plan all stages of the work in advance to understand how much time it will take to prepare. You may have to completely change the wiring, and at the same time make cosmetic repairs - you just have to start.

In apartment buildings, it is prohibited to independently form or supplement electrical panels, so to install a separate machine, agree in advance with an electrician from the service company. He will also tell you which device is best to buy.
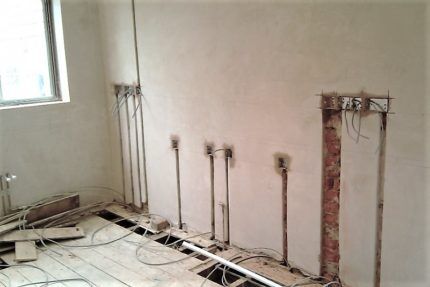
Please note that internal wiring installation – the process is long and labor-intensive.You have to look for a special tool or hire workers to pierce the walls. All these nuances must be taken into account before starting work.
The following steps assume that the wiring is ok.
Step #3 - installing a circuit breaker
Having bought a machine, first find the best place for it on the DIN rail. It is more convenient to do this if you have a separate electrical panel that is not combined with the neighbors’ panels, which is typical for older houses.
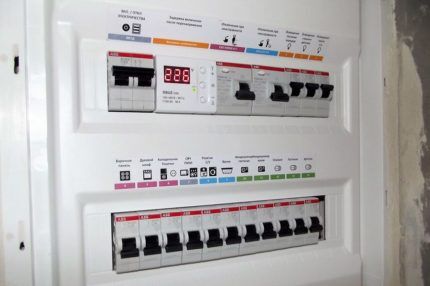
If you do have to do the installation yourself, first of all, protect yourself - turn off the power supply.
After securing the device to the DIN rail, fasten the wires one by one. At first clean up supply phase conductor, bring it to the upper clamp terminal and press it with a screw. Be careful not to get any insulation into the clamp. Then fix the neutral conductor and ground on the corresponding tires.
Step #4 - if you need a flexible wire
A simpler connection is hidden, when the power wire is directly connected to the terminals on the plate. But we will analyze a more complicated method, with the installation of a flexible wire with a plug, so that you can use the outlet and, if necessary, turn off the stove right in the kitchen.
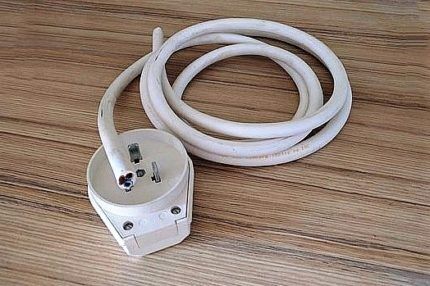
Some manufacturers care about their customers, so they complete the devices with plugs and connection diagrams.
Power plugs have a collapsible and clear design. To connect the wires, first unscrew the fixing screws, remove the cover with the contact pins, and remove the fixing strip.
Find three terminals: ground is usually located at the top or bottom, and on the sides are neutral and ground. To understand how to distribute the wires, test the outlet into which you will insert the plug.
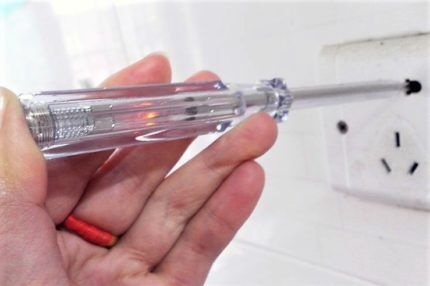
When connecting wires to the terminals, you need to match the phase of the socket with the phase of the plug so that they coincide when turned on. Once you figure this out, you can connect the conductors. Remove the insulation from the cable by about 5 cm and insert it into the plug body.
Also strip the conductors a couple of centimeters. It is better to crimp the ends of stranded wires with lugs. If this is not possible, you can twist it and wrap it around the contacts.
All that remains is to secure the wires in the appropriate terminals, and then replace the plug cover with pins. The wire for the stove is ready, all that remains is to fix it on the body.
Step #5 - connecting wires according to the diagram
For proper connection, select the desired circuit. If you own a city apartment, you will need a diagram for a 1-phase network.
Where is the wire connection location? On the back wall of the stove there is a small niche covered with a lid. The rectangular metal cover is held on by several screws or a latch. We remove the cover and find the terminal blocks.
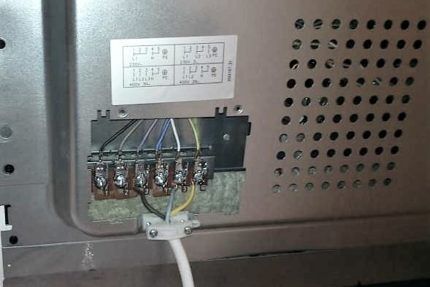
We connect the terminals with jumpers according to the selected diagram, distribute the conductors of the flexible cord among the terminals, insert them into the clamps and twist them. If the wires are multi-core, we recommend pre-crimping them with special terminal lugs. Simple twisting and winding are unprotected and dangerous.
The bolts need to be tightened so that the contact is as tight as possible. This will protect the wires from accidental sparks and burning.
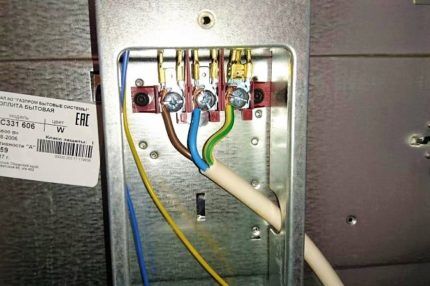
After connecting all the conductors to the terminals, screw the cover into place, and secure the wire so that it does not dangle with a special clamp - a plastic device located nearby.
Step #6 - performance testing
Before turning on the machine, make sure that all connections are securely fastened. Then plug the machine and the plug into the outlet one by one. Try using auto ignition. If the flame lights up, all connections are made correctly.
If the stove does not work, there is no contact somewhere. You will have to double-check all connections, including the electrical panel, plug and terminals on the electric stove. Perhaps the wires are mixed up or not all are connected.
We recommend that upon completion of the work, if you completed it entirely yourself, you still invite an electrician. You can start using the stove only after professional approval - then you will be 100% sure that everything was done correctly.
Conclusions and useful video on the topic
Detailed instructions with explanations + soldering of wires:
How to correctly connect a plug to a wire - clearly and comprehensively:
As you can see, connecting an electric stove has its own difficulties, but if you know the necessary information, you can do it yourself. Of course, the main help is technical documentation - connection diagrams and manufacturer’s recommendations for choosing devices.
Now you have knowledge that can be useful when repairing or replacing equipment. Do not forget that to connect, you must check the wiring characteristics and install automatic protection.
If you know interesting and useful nuances of installing an electric stove, join the discussion below in the comments. Write down what difficulties you encountered when connecting your model, and what mistakes you managed to avoid.


step 4... two lands and a zero? brilliant!