Connecting a motion sensor for lighting with a switch: diagram and step-by-step instructions
Smart electronics for home use are characterized by devices called “motion sensors.”A new type of switching devices designed for light sources can show greater functionality compared to traditional designs.
For example, connecting a motion sensor for lighting with or without a switch increases the comfort of using the lighting device and helps save energy resources. What kind of devices are these – motion sensors? We suggest you sort things out in order.
In the article, we examined the operating principle of various motion sensors, outlined the features of their application, and also provided practical advice on choosing a wiring diagram, installing and commissioning the device.
The content of the article:
Technical Definition of Motion Intelligence
Automation is steadily and consistently covering the household sphere. Manual control of almost any type of household appliance is confidently reduced to a minimum. The appearance of motion sensors is another confirmation of this.
These devices (usually miniature) are designed and manufactured by different companies in different designs. However, the principle of operation of all existing modifications has a common basis - the effect of radiation of waves of different types.
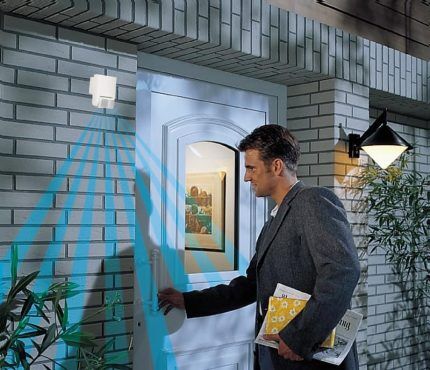
Currently, the following technologies are widely used:
- acoustic;
- optical;
- radio wave.
Based on the practice of using a particular technology for the production of a specific type of system, the result of production is structures of various types.
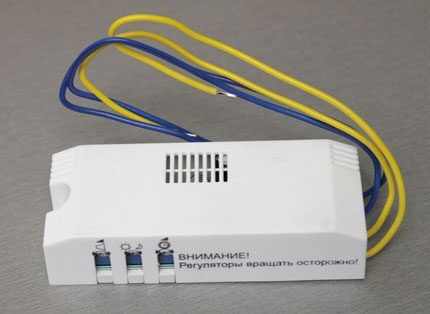
In particular, motion controllers are widely used in various fields of activity:
- ultrasonic;
- microwave;
- photovoltaic;
- infrared;
- tomographic.
In addition, one more remarkable structural detail should be noted.
Dividing motion sensors into groups
All existing traffic control devices are conventionally divided into three groups:
- active devices;
- passive devices;
- combined devices.
Some differ from others in their technological features.
Active devices - designs are usually made according to the scheme of transceiver devices, through which the operating signal is emitted and perceived as reflected from objects.
Passive type structures usually work by receiving signal waves from the outside world. That is, only the reception technique works here.
Combined sensors, respectively, are made taking into account the two marked options.
The lion's share of the entire available range falls on infrared sensors, which, from the point of view of design features, belong to the category of passive devices.This is the most affordable and cost-effective equipment for household use.
Operating principle of infrared devices
Analysis of thermal radiation is the basis of the operation of this type of devices designed to control the movement of people. For this purpose, a highly sensitive sensor is integrated into the design of the device.
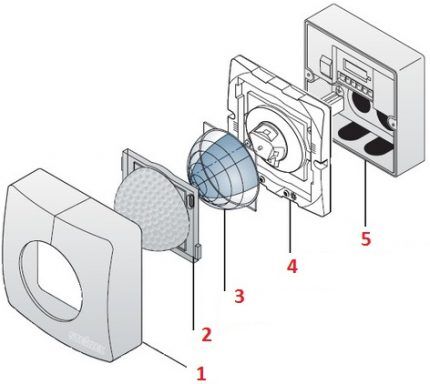
The element reacts to thermal background radiation (from a person), sends a signal to an electronic comparison circuit, where the moment of operation is determined. The sensitivity of the sensor is enhanced by a special lens installed in the path of thermal waves.
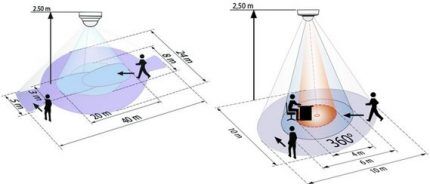
The designs of modern motion sensors are equipped with multi-element lens systems. This solution makes it possible to cover large areas controlled by sensors. For example, one infrared sensor installed at a height of 4 m from the floor level is capable of monitoring movement over an area of 20-25 m2.
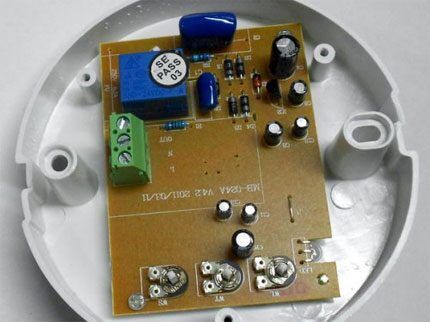
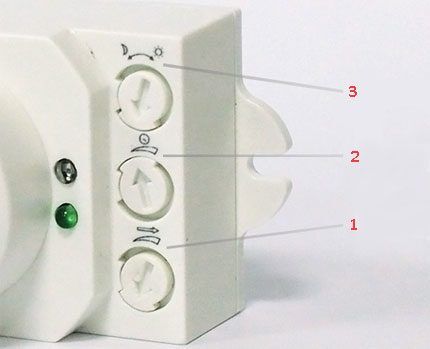
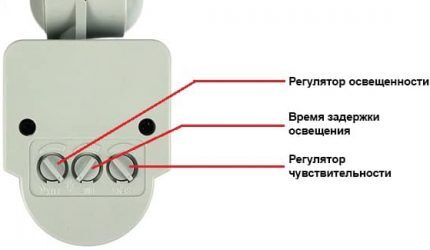
Each individual device is equipped with a tuning electronic module. Using special regulators (variable resistors or similar elements), the sensitivity level and duration of action are set. By adjusting the sensitivity level, the performance of the device in certain lighting conditions is determined.
And the time setting system sets the time limits for resetting the active action (returning the device to tracking mode). This limit can range from 1 second to 60 minutes.
There are also motion sensors with a design that supports the function of adjusting the brightness of lamps. These devices can be configured to smoothly change brightness immediately after closing the circuit, and turn on the lighting with a certain delay.
How to connect a device to a lighting circuit
Motion sensors with automatic lighting control function are typically ceiling mounted. The devices are designed for surface mounting. However, motion control devices are no less often mounted on walls.
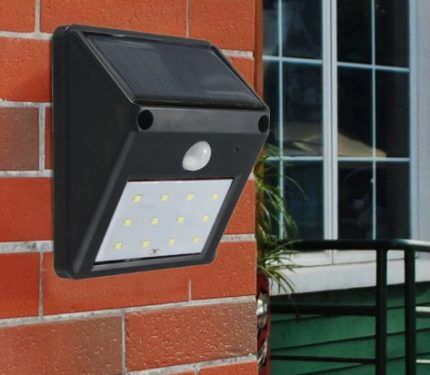
Traditional installation locations are small premises: residential apartments, offices, auxiliary premises.
It should be emphasized that connecting motion sensors is possible not only for the purpose of switching light devices. These same devices are convenient for switching ventilation, heating and other systems from one mode to another.
Connection of devices is permitted under normal environmental conditions. The devices can only be used inside closed rooms. Meanwhile, the protection class of these devices complies with the EN 60669-2-1 standard.
Recommendations for choosing an installation scheme
The optimal height for installing traffic control devices is considered to be 2.5 m. If this condition is met, the radius of the sensitivity zone will be at least 3.5 m. Most urban and private residential buildings have rooms with exactly this height.
Installation work must be performed by persons who have professional skills in working with electrical (electronic) equipment. All installation operations are permissible only when the power line is de-energized at the installation site.
Circuit solutions for installation may vary depending on user needs. A scheme for connecting lighting devices through a motion sensor paired with a conventional switch is often used.
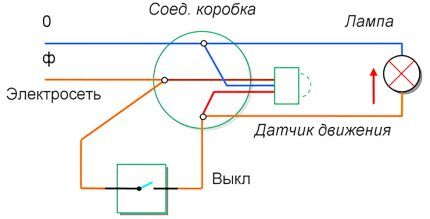
Let's look at this option with a step-by-step installation.
Installing a motion sensor with a switch
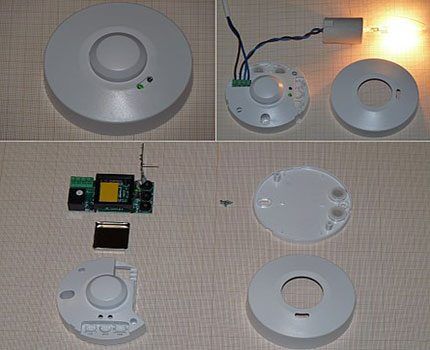
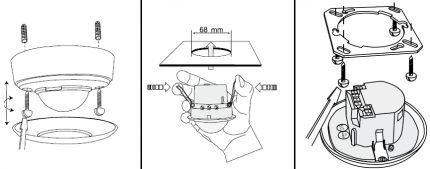
The first step the user usually chooses the method of eyeliner power cable to the motion sensor body. The sensor housing must first be opened. It is easy to disassemble the case. Use a slotted screwdriver to lightly pry the edge of the base at the latch location.
Two cable connection options are allowed:
- rear entry - as a rule, it is used for hidden wiring, the end of which is brought out through a hole in the ceiling;
- lateral brought in from the side - is used for external cable routing.
In any case, it is necessary to remove the temporary plug from the existing inlet.
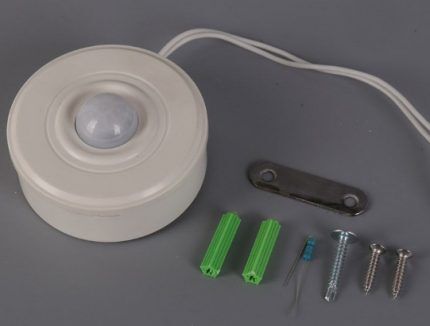
Second step – connecting cable conductors to their destination. The destination is the terminal points marked on the device body with the corresponding symbols (L, N, L1). Depending on the device manufacturer and device configuration, symbols may differ.
Step three involves installing a motion sensor - directly attaching the device to the ceiling. There are holes for fastening on the base body of the device. Fastening is made through these holes.
If the ceiling is concrete, the fastening points should first be marked, drilled, and provided with dowels. Having completed the attachment to the ceiling, fasten the lid to the base of the device and wipe the entire structure with a soft rag.
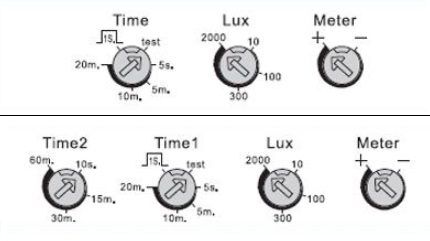
Step four – setting up the device, the essence of which is to set the required values on the service potentiometers.
The classic design of the devices is usually accompanied by three service potentiometers:
- delay time (Time);
- brightness (Lux);
- sensitivity (Meter).
The first potentiometer can be used to set the required shutdown delay parameters (that is, after the lamp lights up, it will go out only after the specified time has elapsed).
The second is to set the lighting mode (the minimum value for turning on in complete darkness). Potentiometer three sets the degree of sensitivity to movement.Typically, sensitivity is initially set to a minimum.
Fifth step installations - testing the motion sensor. To perform this action, you should use the corresponding function (Test), which is activated by setting the potentiometer (Time) to the position being tested (Test). By setting the potentiometer at this mark, the system is connected to the mains voltage.
After applying current to the line, wait at least 1 minute. This time is necessary for the device to initialize and enter operating mode. Testing of the device can be performed without connecting lighting devices. Control of switching on or off is indicated by an LED located on the front panel.
In the test mode of the sensor, you need to activate movement within the sensitivity zone. If motion is detected by the sensor, the control LED on the front panel should light up for a short time (2-3 seconds). Rotate the sensitivity potentiometer (Meter) to adjust the desired level.
Installation and configuration of any other devices of a similar class (infrared) are carried out in a similar way or with minor corrections. Some differences can usually be observed in devices designed to connect several load channels.
As part of such structures, additional regulators can be installed and the number of terminals per connection can be increased.
On our website there is a selection of articles devoted to the selection, installation and use of motion sensors for lighting. We advise you to read:
- Lamps with a motion sensor: how they work, how to connect + TOP best manufacturers
- How to connect a motion sensor to a light bulb: step-by-step instructions
Conclusions and useful video on the topic
This small video guide clearly demonstrates how connection operations are carried out for some modifications of devices. It makes sense to look at it to improve your practice.
Review video on the topic of using microwave sensors. These modern modifications are characterized by a high level of “flair” and reliable operation as part of smart home systems.
To complete the review, you should add information on the technical requirements for devices such as motion sensors.
Thus, the load capacity of devices usually does not exceed 1 kW, and the maximum switching current is no more than 10A. The devices are designed to operate in alternating current networks with a frequency of 50-60 Hz at a nominal voltage of 230 V.
These basic parameters must be kept in mind before connecting sensors to solve specific problems.
Share with readers your experience of connecting and using motion sensors. Please leave comments, ask questions about the topic of the article and participate in discussions - the feedback form is located below.


I first came across motion sensors for lighting when I was living with my mother. They were installed on each floor on a common staircase.True, the light was dim, but the sensor was very sensitive to range, and the light turned on quite quickly. The management company solved two problems at once - unscrewing light bulbs and saving general house electricity. After such innovations, we installed a similar sensor in the apartment in the kitchen and in the hallway.
Our apartment is small, but the lights in every room of the apartment were practically never turned off. It was not possible to come to an agreement with my family about the need to save electricity and turn off the lights. We installed motion sensors for lighting in some places in the apartment (hallway and bathroom with kitchen). Now there are no quarrels on this topic; a kilowatt “burns up” less per month than before.