How to install a socket in drywall: installation rules and tips for installing a socket box
Drywall sheets (GKL) are the fastest, cheapest and easiest way to straighten crooked walls and change the layout of a room.They are used as a finishing material for cosmetic repairs and as the main wall material for zoning space.
When performing repair work using gypsum plasterboards, there is often a need to replace electrical wiring and add new energy consumption points. Some manipulations can be performed independently, for example, installing sockets. Agree, this skill will be useful to any home handyman. Do you doubt your abilities?
We will help you achieve your plans. The article provides all the necessary information about choosing the optimal location for the outlet and determining the appropriate wire, identifies safety rules and describes acceptable wiring layouts.
In addition, we have prepared step-by-step instructions with photo materials that clearly demonstrate how to install a socket in drywall yourself. Understanding the algorithm of actions and following the described technology will help you avoid mistakes and set up a new power point in your apartment or house.
The content of the article:
Preparatory work before installation
Installing a socket on drywall requires little preparation. This includes choosing the location, brand of wire and its size, laying the wiring at the right point and, first of all, measures related to safety precautions.
Only after completing these steps can you begin installing the socket box and the socket itself.
Safety precautions when working with electric current
The first thing you should know when starting any electrical installation work, even something as simple as installing an outlet in a plasterboard wall, is safety precautions.

Safety rules will help you not to feel the effects of electric current.
In fact there are few of them:
- Never begin electrical installation work until you are sure that the network is de-energized.
- Use tools with insulated handles (plastic, rubber, wood). If this is not the case, wrap the handle of the existing one with several layers of electrical tape.
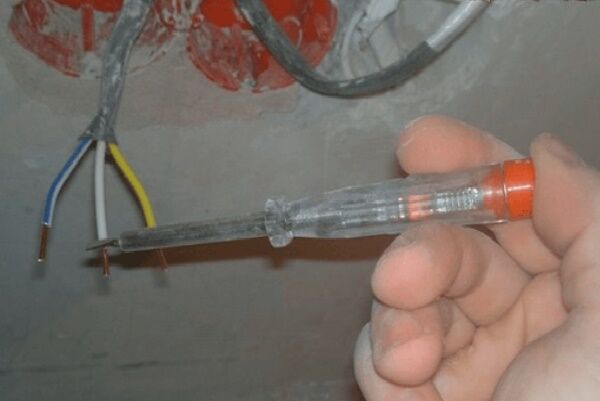
- Have an indicator screwdriver with you. Before reaching into the outlet, check it for voltage with an indicator.
- Do not use broken, repaired, or soldered sockets or their parts. Materials must be new and of proper quality.
- Select the correct wire cross-section.
If you follow these basic rules, your work will be safe.
How to choose a location to install an outlet
In fact, choosing where to place the outlet is not so simple. There is no need to focus only on accepted standards. According to European standards, the ideal height of the outlet is 30 cm from the floor level.
This arrangement is quite convenient, but there are exceptions to electrical appliances, for example:
- fridge;
- washing machine;
- TV;
- boiler;
- air conditioner.
These appliances require a different height to connect to electricity.Therefore, when planning repairs and electrical installation work, it is important to first think about where large household appliances will be located and where there will be public sockets. This way you won't have to run an extension chain to the air conditioner.
It is better to install a special one under the washing machine waterproof socket with a lid at a height of 100 cm. The same model is suitable for a water heater. Electricity and high humidity are a dangerous combination, and such protection will make the use of household appliances safer.

Many refrigerators are equipped with a connection cord that is too short and require a power outlet at a height of 60-120 cm.
All kitchen appliances that are used from time to time and placed on the work surface should be connected at table level. It will be strange to pull the wire of an electric kettle or blender to a low socket at a height of 15 centimeters.
LCD TV requires special attention. If it will be located on a plasterboard wall, you need to decide in advance on the exact mounting location. The outlet should be hidden behind the screen, as should the unsightly black power cord.
Agree, it doesn’t look very aesthetically pleasing to have a TV on a bracket from which a wire runs down or to the side to the socket.

The remaining universal electrical connection points should be located in areas where they will not be blocked by furniture, such as a closet.
Think through to the smallest detail what will be used where, distribute power points, select switches and sockets. This will allow you to count the number of single, double or triple power outlets.
How to choose wire markings
The main requirement for hidden wiring under drywall is fire safety.
For this use:
- fire-resistant boxes;
- corrugated sleeve;
- non-flammable pipes;
- special wire in double insulation.
The wire or protective pipe is attached to the wall using special clips. Where necessary install distribution boxes. The height of the distribution boxes above the floor level is 20-25 cm.

According to marking, the following cables are most often used:
- NYM;
- VVGng - non-flammable;
- PVS.
NYM cable arrange power wiring to an electric oven, a powerful water heater, an apartment electrical panel. Copper conductors insulated with chalk-filled rubber will prevent fire from spreading.
VVGng cable most often the remaining sockets are connected. Its insulation is made of polyvinyl chloride, as is the sheath connecting the individual cores. The marking “ng” means “non-flammable”, which means it can be safely used when installing sockets in drywall.

PVS – flat multicore cable.Often used in hidden wiring, it is not inferior to other types of wires in terms of safety. Polyvinyl chloride insulation and shell are fire resistant.
Square cable cross-section you need to choose based on the load. Ideally, you need to estimate the current that will be consumed by an electrical appliance connected to a specific outlet. Then, according to the table, select the required diameter of the wire core.
However, in practice, any household appliance can be connected to the outlet without restrictions, and it must withstand the load. According to standards, for apartment wiring, 4 squares (4 mm2) of copper wire are sufficient, that is, the diameter should be 2.26 mm. If the cable is multi-core, the area of each core is summed up and the total cross-section is obtained.
Rules for laying wires behind drywall
Before installing sockets, you need to lay a cable connecting the electrical panel to each connector. This is done in advance, even at the stage of finishing the walls or erecting partitions, since after the drywall is screwed in, it will be impossible to lay hidden wiring.
There are 2 types of situations here:
- A regular wall is covered with plasterboard. In this case, the electrical cable is laid along the wall.
- Construction of partitions from gypsum plasterboard and metal profiles. The cable is laid on the first installed sheet of drywall, before sewing up the structure on the other side. It is important to maintain parallelism here.
You can save on the wire and lay it along the shortest path, that is, at an angle, diagonally, and generally in a free order. Why is it better not to use this method?

When making renovations, you probably thought about everything. But after a few years, you may need to install an additional switch, change the location of wall lights, or hang a picture on the wall, after all.
And that's when haphazardly installed wiring can become a serious problem. After all, a drill or hammer drill can easily damage a hidden cable and create a short circuit.
To avoid such surprises, we recommend placing the wiring parallel to the floor, adding a few right angle turns. It’s better to document the layout diagram: draw a plan, a drawing, or just take a photo on your phone.
So, after a few years, you will be able to drill into walls anywhere without any problems or fears without consequences for the electrical wiring.
Installing a socket box in drywall
To install a socket on a plasterboard wall, you need to choose the right socket and install it. First, find out how a special installation box for drywall differs from a standard installation box for concrete. After this, you should install it correctly.
Installing a socket in a plasterboard wall involves a number of standard steps:
Installation box design
Drywall is a universal building material for finishing walls and building partitions. It can be moisture resistant (for the kitchen and bathroom) and ordinary wall - for other rooms.
The sheets are thin, fragile, and cannot be compared with concrete or brick walls. Because of this, a reasonable question arises: how is the socket installed in such a thin material?

This is done using an installation box. For drywall, special socket boxes are produced with a special method of fixation. They look like a plastic glass.There are 4 screws on the front side. Two of them are located above the others. They are needed to directly fix the metal frame of the socket itself.

Those that are slightly lower are responsible for installing the socket boxes in the drywall. At the bottom of the installation box there are special fixing mounting tabs. Their position is adjusted by these two screws.
When you turn the screw, the foot is pressed more and more against the sheet of drywall. This mechanism ensures that the socket box is firmly installed and ensures that the socket will not fall out of the wall at the first opportunity.
The bottom of the installation box is equipped with blanks for holes for wires of different diameters and configurations. Depending on the method of connecting the cable to the glass and its thickness, cut a suitable hole using a knife. At this stage, the socket box is completely ready for installation.
What's the best way to cut a hole?
In addition to the glass itself and pre-installed electrical wiring, you will need:
- electric drill;
- drill bit attachment;
- roulette;
- hacksaw;
- pencil.
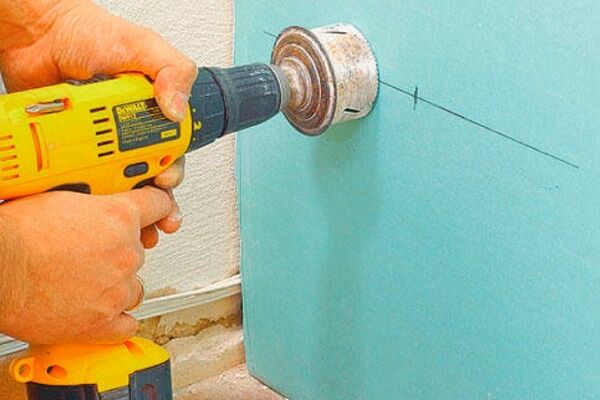
First of all, you need to draw a mark on a sheet of drywall where the center of the socket box will be located. To accurately mark the point, draw a cross. If the rosette is double, mark the centers of all glasses at once. In this case, the required number of points are marked on one horizontal line at a distance of 72 mm.

The diameter of the standard socket box is 68 mm. A special attachment for a drill is a real salvation for a craftsman who has to install large quantities of sockets and switches in drywall.
This bit already has the required diameter and is easily installed in any electric drill.

If you do not have a crown of the required diameter, you will have to make do with improvised materials. Then you need to draw a circle slightly larger than the installation box for the outlet and cut it out in the drywall using a hacksaw or utility knife. It will most likely not be possible to do this carefully.

The second method is to use a thin drill bit. Many small holes are drilled along the contour of the drawn circle until the resulting drywall circle falls out. This is faster than using a utility knife, but you still won’t get a smooth, beautiful edge.
Electrical outlet installation procedure
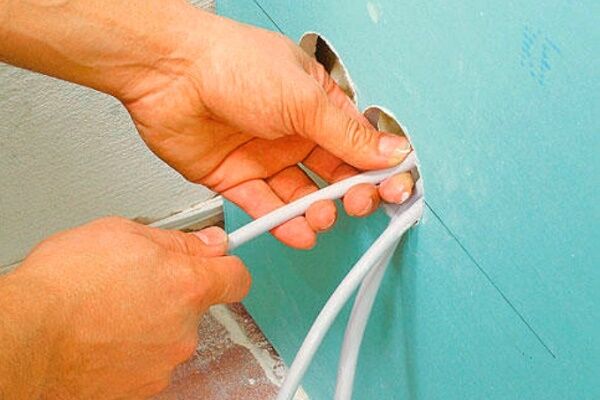
Installing sockets in drywall begins with mounting box. Route the wires through the cut hole, place the socket box in the socket in the drywall and secure it using the fixing tabs. To do this, tighten the corresponding bolts until they stop.

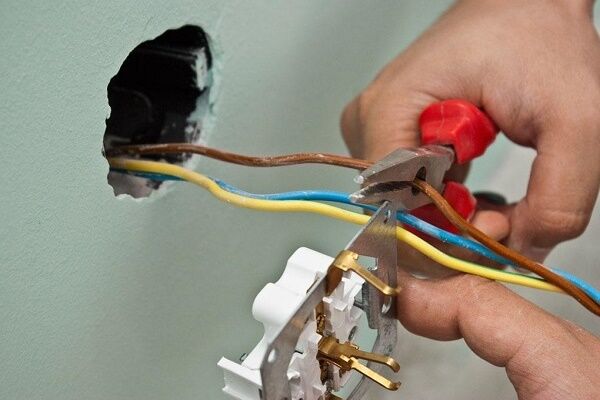
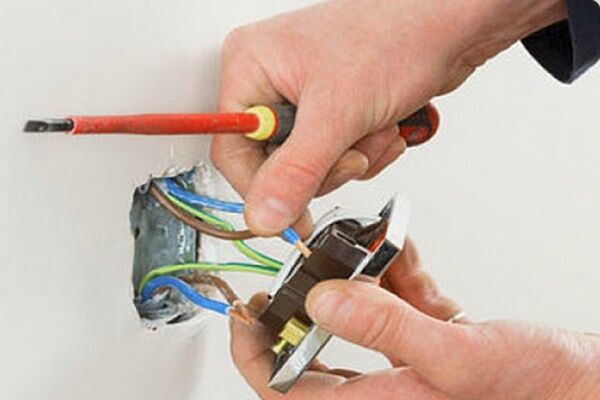
Take the outlet and remove the plastic cover. To do this, use a screwdriver to unscrew the central bolt. In the device of a standard socket for hidden wiring, you will see terminals. They need to be loosened a little to be able to connect to them stripped cable ends.
Tighten the terminals well after connecting to the wires. Poor contact can cause the wiring to heat up.

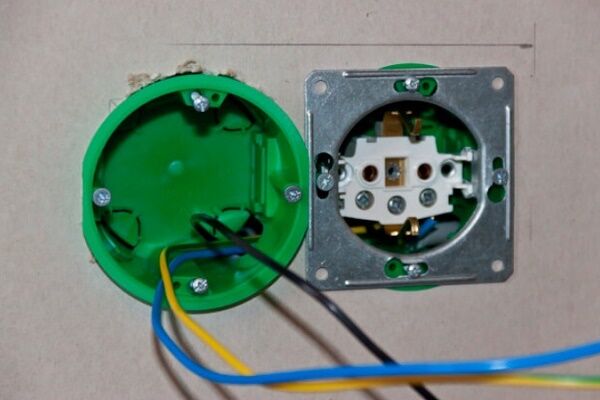
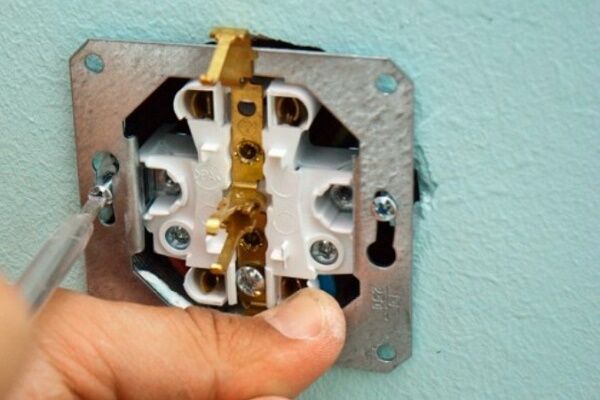
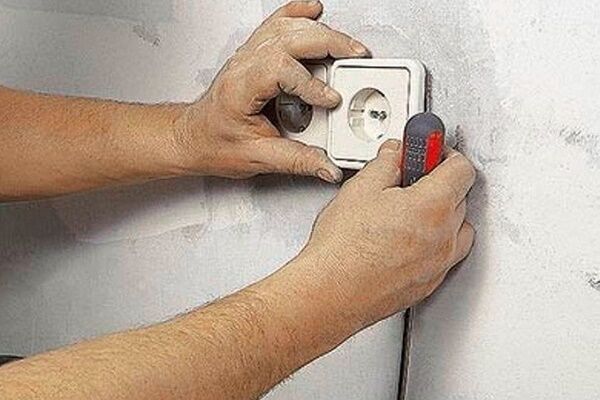
Now the socket can be inserted into the socket box. Fastening is carried out with mounting bolts of the installation box. When the main part of the socket is in place, you can cover it with a plastic cover by inserting the central bolt into the hole.
Mounting the overhead model on the wall
Sometimes, instead of the usual socket with hidden wiring, overhead sockets are used. They do not require making holes in the walls or installing socket boxes. And the wiring itself does not pass under the drywall, but from above.
This method is not very aesthetic. The overhead socket is bulky, cables running along the walls do not add harmony to the room. But in some cases this is justified, for example, when the distance between the sheet of drywall and the concrete wall is too small (less than 45 mm), and there is no hammer drill.

In this case, special fireproof cables in a durable non-flammable sheath are used. They can also be placed in a corrugated sleeve.
The wiring is attached to the wall with clips, and the socket is simply screwed onto the drywall using screws, like an overlay. Another advantage of this arrangement is that you can change the location of electrical appliances and sockets along with them at any time.
Conclusions and useful video on the topic
If you don’t fully understand the process of installing a socket on drywall, it’s better to play it safe and read the step-by-step instructions again, but in video format. This way you will learn the basic installation steps and understand exactly what to cut, where to attach and screw.
Installing a socket on a plasterboard wall:
Installing a socket on a plasterboard partition:
Surface-mounted socket installation technology:
Installing an electrical outlet on drywall is one of the most common electrical installation tasks that novice craftsmen encounter when renovating an apartment or house.
By following all safety rules, following step-by-step instructions and taking into account the subtleties and secrets shared by professional electricians, this work will not become a stumbling block for you.
Do you have experience installing a socket in a plasterboard wall? Or want to ask questions on the topic? Please comment on the post and participate in discussions. The feedback block is located below.


Installing sockets in a sheet of drywall is perhaps the easiest task you will encounter when installing home electrical wiring. The cable is easily installed in the space between the real wall and the plasterboard panel. The hole for the socket can be easily made in any convenient place, and even without the use of a hammer drill. The socket boxes are easily mounted into the hole and firmly fixed. The only thing is not to screw up the hole, since it won’t be possible to seal it like in a concrete wall.
Despite how easy it is to install such sockets in drywall, I would not recommend using standard fixation methods. The fact is that the drywall itself is quite fragile and as a result, over time, the socket may begin to wobble and cause more damage to the drywall itself. Naturally, it is better to additionally drill the socket to the wall. By the way, all modern guards have holes for such fixation.
Hello. If the method of fastening the gypsum board is frame-based, then you can create an additional frame-retainer in the form of wooden planks in the place where the socket box is attached.
The only thing is that you need to know the location of the outlet in advance in order to mark it during installation, otherwise tapping the gypsum board in search of it will be problematic.