How to connect a fan with a humidity sensor: details of connection and installation + selection rules
Condensation, high humidity, unpleasant odors and fungus on the walls are problems that arise in the absence of ventilation in the bathroom and toilet. Agree that the seams between the tiles, blackened by mold, will ruin the look of any room. In addition, such proximity is harmful to health. Therefore, many homeowners install forced ventilation by installing fans. The most functional models are equipped with various sensors and timers.
In this article we will talk about exactly such devices - equipped with a hygrostat. We will look in detail at why you should install an exhaust device and what to look for when purchasing a duct fan. We will also tell you in detail how to connect a fan with a humidity sensor and share working diagrams.
The content of the article:
Why install a fan in the bathroom?
Apartment buildings have ventilation shafts. They are designed to provide air exchange. As practice shows, such structures are rarely maintained. Therefore, exhaust air from the room is poorly removed.
According to regulations, the outflow of moist air from the room must be at least 25 m3/hour.The influx of fresh air is carried out through fresh air ventilation or through valves that are mounted in the windows And walls.
Disturbances in the microclimate in the room can lead not only to the appearance of fungus, but also to damage household appliances and furniture: the washing machine rusts, the surface of chipboard cabinets is deformed, and metal parts of plumbing fixtures deteriorate.
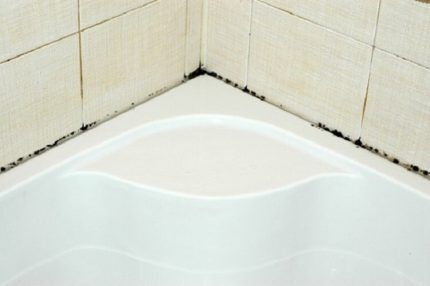
It is recommended to install an exhaust device even if there is a window in the room. Because it is not able to fully ensure the removal of excess moisture. After prolonged ventilation, only the adjacent walls become dry, while condensation remains on the rest. And in winter, you won’t be able to keep the window open for a long time.
Exhaust fans functions:
- elimination of excess moisture;
- improved air circulation;
- removal of unpleasant odors;
- temperature regulation.
Thanks to a working hood, there will always be clean and fresh air in the bathroom and toilet.
Features of exhaust fans
Several modifications of exhaust fans are available. They come with cords, with timers, motion sensors, mode switches, etc.
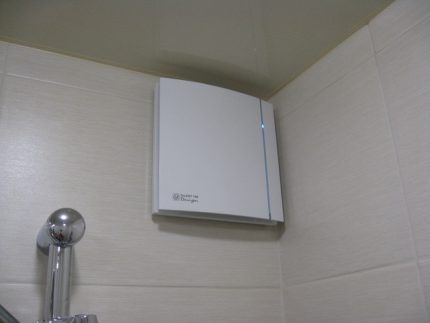
The most effective models are those with a humidity sensor - they turn on automatically when the humidity level in the room rises. Manufacturers of exhaust systems have released such “smart” variations of fans to increase the level of user comfort - after all, after taking a shower, you may forget to manually turn the fan on or off.
How does a fan with a humidity sensor work?
Now let's talk about how the humidity sensor installed in the exhaust fan works. The internal structure and operating principle of such devices are practically no different from standard exhaust devices. When the engine turns on, the blades begin to spin. This sets the air in motion and draws it, along with drops of moisture, into the hood.
The hood with a sensor can be mounted on a ceiling or wall ventilation shaft. The body and parts of the product are made of waterproof materials. Electrical parts have high-quality insulation.
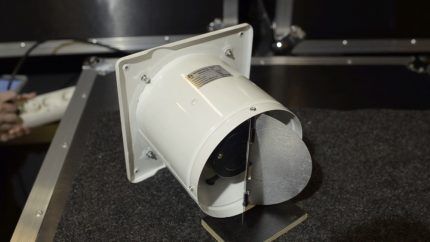
The humidity sensor in the fan can operate either on a timer or automatically. In the second case, the exhaust system turns on when the humidity level in the room exceeds the norm.

In general, a humidity sensor or hygrostat in a fan is a special element that allows you to measure the level of humidity in the air and start the exhaust device without human intervention. And all this thanks to the high sensitivity of the sensor to condensate. It works on the principle of a thermostat; ventilation is turned on only when the humidity is above 40%.
Exhaust systems with a built-in hygrostat are ideal for installation in bathrooms, laundry drying rooms, and toilets. Can be used as basement ventilation in private homes.
Types of built-in humidity sensors
Models of axial duct fans are usually equipped with humidity sensors. A small board is mounted in the product body. The hygrostat has two limits: upper and lower.
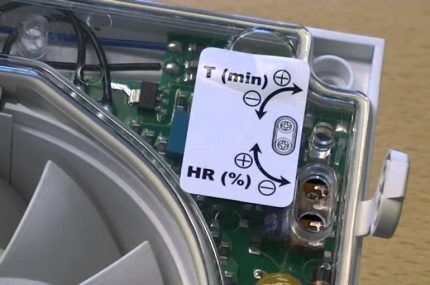
Some variations are set from the factory and cannot be adjusted. On the rest, the response range can be set independently.
Types of sensors:
- Resistive – when the humidity level changes, the product changes resistance and starts the fan motor.
- Dielectric – has a capacitor in its design. When the humidity between the plates of the product increases, the dielectric constant of the medium changes.
- Thermistor – an improved analogue of a resistive sensor. Has increased accuracy.
- Optic – determines the humidity concentration by air transparency.
- Mechanical – when there is more moisture in the room, the length of the material from which the sensor is made changes.
When the humidity level reaches the programmed values in the sensor, the relay is activated. It closes the electrical circuit of the engine and the fan begins to spin.
Tips for buying a fan with a hygrostat
A high-quality bathroom exhaust fan should be silent, have high performance, water protection and match the interior of the room. Variants with interesting designs and original designs of front grilles and panels are now being produced. Therefore, choosing an exhaust device for any style of bathroom decoration is not so difficult.
Best suited for use in the bathroom or toilet duct fans. They are installed in the air duct. The blades of the products are made of metal or durable plastic. The design is not afraid of exposure to moisture, as well as caustic chemicals.
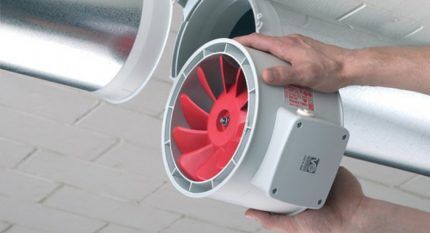
A duct fan should be selected taking into account the parameters of the room and the diameter of the air duct. To select the performance of a product, first determine the volume of the room: to do this, multiply the width, length, and height of the room. The resulting value is multiplied by the standard air exchange rate.
The standard air exchange rate for showers and bathrooms is 7-9. If the room is used by several people, you should take the maximum value. Example: room volume 22.5 m3 *9 (air exchange rate) = 202.5 m3. In this case, you should buy a duct fan with a capacity of over 202.5 m3.
Channel systems also differ in other parameters: electric motor power, noise level, blade rotation speed, etc. Products are available in different colors, as well as types of decorative grilles.
Fans with a check valve are quite popular for installation in the bathroom. We recommend that you read top ten offers On the market.
Installation of a fan with a humidity sensor
An exhaust system with a humidity sensor is mounted similarly to a simple fan. Only the device connection diagram may differ. Be sure to look at the fan installation instructions. Typically, manufacturers provide the correct connection diagram in the passport.
The exhaust product should be installed when the mains voltage is removed. Before installation, you need to prepare the exhaust shaft and check it for passage and blockages.
Stage #1 - checking natural ventilation
Before connecting the exhaust system, the ventilation shaft must be cleaned of debris, dust and cobwebs removed. Next, check the permeability of the air duct using a burning match, lighter or sheet of paper.
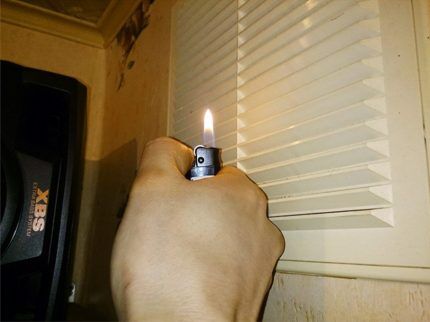
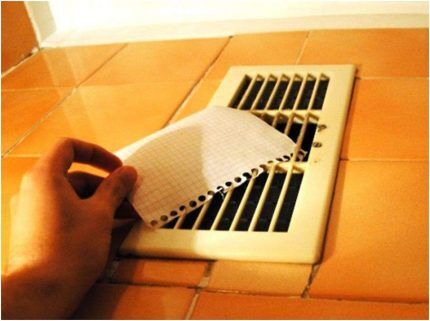
If there is little or no air flow, you need to find the blockage and clean the exhaust system. If you cannot detect the blockage yourself, you can contact special services, they will will clean the mine.
Before installing the fan, you need to make sure that fresh air enters the bathroom or toilet. It can enter the room through windows or cracks under doors. If the room is completely sealed (solid windows, no gaps between the door panels), you need to install special grilles in the door.
Stage #2 - choosing a fan connection diagram
To connect a fan in a bathroom or toilet, several connection schemes can be used. They differ from each other in the way they supply power to the exhaust device.
It is better to lay the wiring under the hood during repairs in order to hide it in the wall. If this is not possible, you can disguise the cable using a decorative box or special covers.
The exhaust system is connected to the mains using a separate switch, to the light switch or through a sensor.
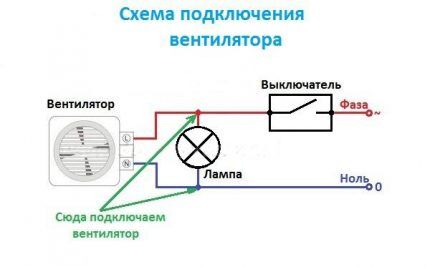
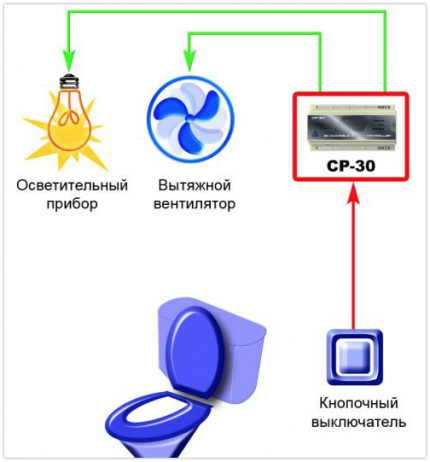
These connection methods are not suitable for exhaust devices with a hygrostat.
There is a special circuit for turning on a duct fan using a humidity sensor.
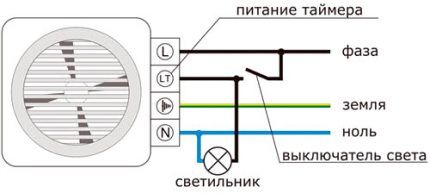
Connecting a fan with a sensor or timer is not difficult if you read the instructions and do everything according to the diagram.The product is connected to a 220 V network through the terminal box located under the fan cover.
Connecting wires to terminals:
- LT – a cable with a phase coming from an external switch;
- N - zero;
- L - wire with phase.
The product is connected via three wires - all terminals are labeled. The exhaust system can be connected to a lighting lamp. The fan will start working when voltage is applied to the terminal marked LT (the light is turned on). The shutdown occurs 2-30 minutes after the lamp is turned off.
A fan with a humidity sensor can turn on automatically when the humidity in the room exceeds the level set on the hygrometer. When there is less moisture, the product will work for some more time using the delay timer and turn off on its own.
Stage #3 - installing the fan in the duct
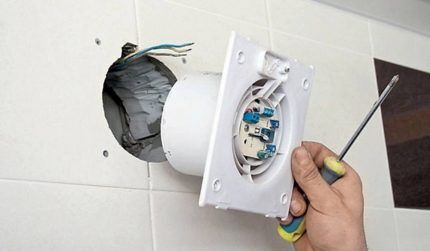
Before installing the fan in the shaft, you need to make sure that all wires are connected. The decorative grille must be removed from the air duct. You can connect the device to the power supply through the terminal box.
Fix the exhaust device using self-tapping screws. First, holes are drilled in the wall for the dowels. Then install the fan and tighten the screws. In rooms with ceramic tile walls, it is difficult to make holes accurately. Therefore, the ventilation system is secured using construction sealant.
Stage #4 - checking that the fan is working correctly
After installing the fan with a hygrostat, you need to check how it works. To do this, close the door in the bathroom and turn on the hot shower for a while.
Hot water creates steam in the room and becomes damp. In such conditions (60-90% humidity) the fan should automatically start. Next, you need to wait for the ventilation system to draw moist air into the shaft. If the device is connected correctly, the device will turn off when the humidity level reaches the lower limit set on the hygrometer.
Conclusions and useful video on the topic
Visual instructions for installing a duct exhaust fan are shown in the video below:
Old exhaust systems, which have not seen repair or maintenance for years, are not able to provide a normal microclimate in the bathroom. Homeowners are forced to install forced ventilation. The best option for apartments and private houses is to install a duct fan.
Particularly popular are models with a built-in humidity sensor. They work for a long time and turn on automatically when the humidity level in the room goes off scale. Using the connection diagrams for such devices discussed above and the features of their installation, you can install an exhaust fan with your own hands.
Are you using a fan with a humidity sensor? Share your experience with other visitors to our site, tell us about the significant disadvantages of the device discovered during operation, participate in discussions - the comment form is located below.


What regulatory act regulates the installation of forced ventilation in a bathroom where fungus forms?