How to disassemble a Samsung vacuum cleaner: typical breakdowns + detailed instructions on disassembling the vacuum cleaner
A broken home vacuum cleaner can dramatically change your plans, ruin your mood, and even reduce your family budget.However, you shouldn’t immediately jump on the bandwagon and go looking for a more reliable replacement. You can try to repair the unit at home. This solution to the problem will save a considerable amount, don’t you agree?
Let's find out how to disassemble a Samsung vacuum cleaner in order to independently return it to functionality. The design of many cleaning units is similar, so the proposed instructions can also be used when repairing models from other manufacturers. The main thing is to act carefully and without haste.
The content of the article:
Minor faults and their elimination
If the vacuum cleaner begins to act strangely - to perform its functions incorrectly, to make loud noise, to vibrate - it needs help.
Most often, the cause of the malfunction is the cleaning process itself: the dust bag is completely filled or one of the filters is clogged with debris.
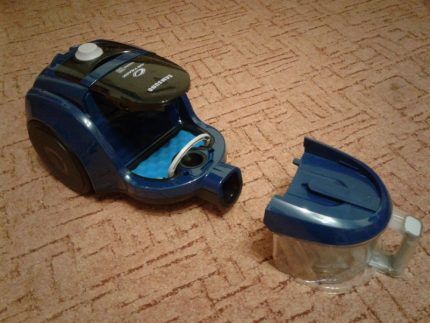
Some vacuum cleaners are easy to disassemble, while others require certain knowledge. To avoid mistakes, we recommend that you often look at the instructions, which are equipped with diagrams and tips.
Often repair the vacuum cleaner You can do it on your own, but if you are not good at repairing equipment, it is better to take the device to a service center, to specialists.
Problem #1 - suction power has dropped sharply
If you notice that dust is poorly absorbed, and small debris remains completely untouched on the floor, you will have to find out the reason through partial disassembly. First you need to make sure that everything is in order with the pipe, hose and brush.
Procedure:
- disconnect the hose from the vacuum cleaner;
- separate the pipe from the hose;
- remove the nozzle;
- carefully inspect each part;
- try to blow out the pipe and hose.
If a large object (a plastic bag, a sock, a sheet of paper) gets into one of the elements, you need to carefully remove it, then reassemble it in the reverse order and try to start the device.
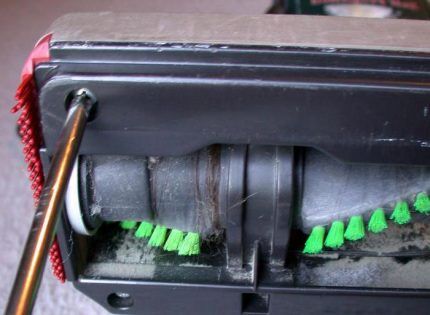
Sometimes the traction weakens simply because you accidentally touched the power regulator and set it to minimum. Be sure to check it before any disassembly. Another reason for weakening traction is hose breakage.
Problem #2 - the vacuum cleaner filters are clogged
Unusual sound, weak traction, stoppage of operation - the consequences of clogged filters. For devices with a fill indicator, this can also be determined by the red light coming on. Modern devices provide everything to ensure that filters can be accessed quickly and easily.
Usually there are two main elements that need to be cleaned - a plastic cyclone filter (a transparent reservoir with compartments) and a sponge enclosed in a plastic container. But sometimes it is necessary to replace the HEPA filter, and for washing units - additional engine protection.
Photo tips for disassembly, cleaning and replacement:
As you can see, disassembling a Samsung vacuum cleaner to clean the filters is simple and quick. The elements are washed in warm water with a non-aggressive detergent. Then they need to be dried and reassembled.
Problem #3 - the device does not turn on
The standard test when the device is not working is to plug it into the network. Make sure the power cord is plugged into the outlet and the power control button is set to the correct setting.
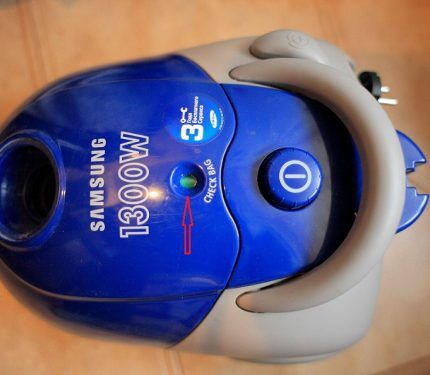
If the indication does not work and the vacuum cleaner does not make noise, most likely the motor will have to be repaired or replaced. But problems with the board are also possible, so disassembling the case is necessary in any case.
Step-by-step instructions for complete disassembly
Partial disassembly is performed when replacing or cleaning filters, but in order to remove the engine, it is necessary to disassemble the device completely.We offer detailed photographic disassembly instructions that will help you cope with the repair of the Samsung vacuum cleaner yourself.
Stage #1 - we diagnose the breakdown
When you use one device for a long time, you can perfectly imagine how it behaves during operation.
An experienced user does not need to look at the bag or tank full indicator; it even determines by sound when it is time to empty the dust container or filters. Consequently, he will also determine the fact of a malfunction by the unusual behavior of the assistant.
If an overfilled vacuum cleaner begins to hum or hiss, then a mechanism with a broken motor or board makes intermittent sounds, begins to “spit” dust, smells like burnt wires, or simply does not respond to being plugged in.
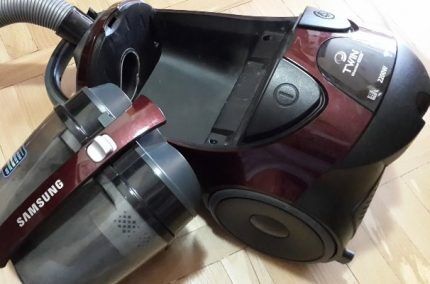
If you doubt the serviceability of the vacuum cleaner, you can try to disassemble it. This is a simple procedure that does not require special knowledge or special skills. As instructions, you can use videos or photo instructions from craftsmen, carefully filmed by them and posted on the Internet.
Stage #2 - selecting tools and materials
To disassemble the vacuum cleaner body, you do not need to purchase a special tool. Most likely, a pair of screwdrivers, Phillips and slotted, which can be found in the household of any city dweller or rural resident, will come in handy.
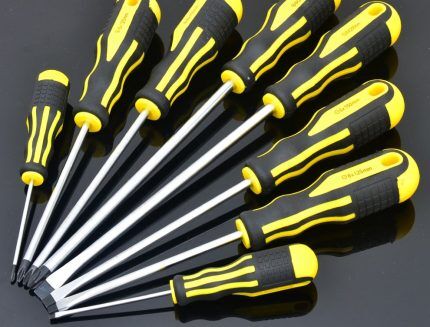
No tools are required to disassemble the filters as this is a regular maintenance procedure. You just have to manually remove the covers or open the plastic boxes.
On some models, to change the HEPA filter, you need to remove the rear grille by unscrewing 2-4 screws, also using a screwdriver.
But if manipulations with the motor, board elements, and wires are to be done, the following tools and materials may be required:
- pliers;
- file;
- awl;
- sandpaper;
- vice;
- construction knife;
- spare connectors and wiring.
Small parts are inexpensive, but a faulty engine requires replacement - an average of 1,650-2,600 rubles.
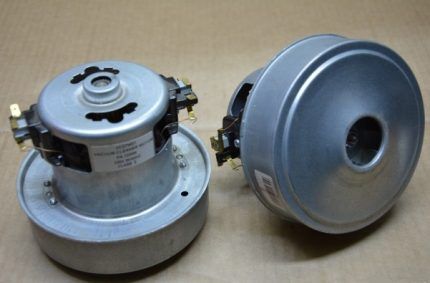
Instead of an expensive original part, you can look for an alternative mechanism, but you should pay attention to the materials from which it is made.
Stage #3 - disassemble the vacuum cleaner body
It often happens that during the process of disassembling the device there is a problem, that is, the cause of the breakdown is not necessarily a failed engine. The thermal relay connector may have come loose or there may be damage on the board.
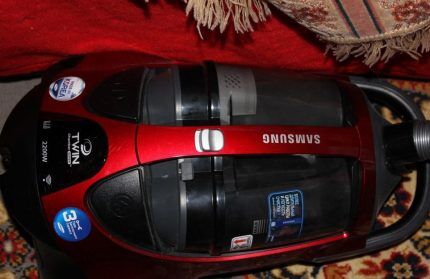
All actions can be performed by an untrained person, since disassembling this model requires attention, accuracy and the ability to use screwdrivers - flat and Phillips.
Step-by-step instruction:
The disassembly process can be stopped at this point. If you are sure that the engine is really broken, then you need to take the damaged part to a service center to buy a sample or order a new one.
But if you think that you can restore the engine yourself, then we offer instructions for subsequent disassembly.
Stage #4 - we repair the engine
Engines are different, so there is no guarantee that you will be able to disassemble the unit and find a breakdown. As a last resort, take the broken mechanism to a repair shop for replacement. But if you have already had repair experience, then you can hope for a positive outcome of the operation.
After repair we carry out testing. To do this, connect the tester terminals to the crimped wire and call. Finally, you can crimp the plug covering the impeller and clean the insides of the engine.
After reassembly, it becomes clear how successful the repair was. In this case, the reason was a broken wire that was in plain sight.
Impeller imbalance or bearing failure also often occur. But there are cases when the technicians never find the fault, then the only way out is to replace the entire part. Sometimes it makes more sense pick up a new vacuum cleanerthan spending money on expensive spare parts.
Conclusions and useful video on the topic
The vacuum cleaner hummed - we disassemble the engine down to the impeller:
Complete disassembly and cleaning of the device:
Photo and video instructions help out when you urgently need to repair a vacuum cleaner, but there is no service center nearby or there is simply not enough money. As you have already seen, disassembling a Samsung vacuum cleaner is not at all difficult. If you have the desire and time, you can perform some procedures yourself, without the involvement of specialists.
Have you ever had to repair a vacuum cleaner yourself? Please tell us what the specifics were in disassembling the unit, and whether you were able to repair the equipment. We are waiting for your comments, questions and advice on repairs - the contact form is located below.


Yes, the brush needs to be disassembled and cleaned periodically, especially since on Samsung it is quite easy to disassemble.It often happens that people simply do not know about the presence of a HEPA filter and find out about it only when they begin to feel an unpleasant odor when the vacuum cleaner is running and a decrease in traction. According to the instructions, it should be changed every six months to a year, but in reality they can be used much longer, simply by washing them periodically.