Do-it-yourself repair of Samsung vacuum cleaners: common causes of malfunctions + how to eliminate them
Thanks to household appliances, home owners gain complete comfort.Using the same vacuum cleaners significantly reduces the physical effort spent on cleaning. Meanwhile, even super-reliable equipment, for example from Samsung, does not last forever, which says one thing: someday the time comes for repair or replacement.
However, convenient and practical units quickly make users get used to working with them. Therefore, most of their owners prefer to restore their devices to their functionality rather than buy new ones. We will tell you what repairs of Samsung vacuum cleaners can be successfully carried out with your own hands.
The content of the article:
Is it possible to fix a vacuum cleaner yourself?
Most of the models of household cleaning appliances from the Korean company are represented by designs that are relatively simple in technical terms. Accordingly, in most cases, repairing such products is also quite simple.
Obviously, the complexity of repair work is completely related to a specific unit or part. Thus, fixing a small break in a corrugated hose is much easier than replacing a broken electric motor bearing.
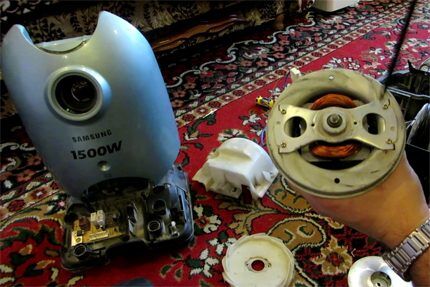
Let's look at common malfunctions of Korean-made household vacuum cleaners and possible ways to eliminate such defects at home. It is logical to note: with all due respect to service workshops, the amount of payment for repairs in the service often approaches the cost of a new vacuum cleaner.
Minor defects of vacuum cleaners
Minor defects usually do not cause global malfunction of the device. The Samsung vacuum cleaner continues to work, but the technical parameters no longer correspond to exemplary values.
As a result, the traction force decreases and at the same time the power consumption of the equipment increases. Accordingly, the quality of cleaning decreases, but most importantly, the risks of more serious defects increase.
Therefore, minor faults should not be ignored. On the contrary, they should be eliminated as soon as possible.
Classic defects of this kind for Samsung vacuum cleaners:
- reduction in HEPA filter efficiency;
- clogging of the cyclone filter mesh;
- blocking of the brush turbine by foreign objects;
- blocking wheel rotation by foreign elements;
- clogging of the rod tube;
- rupture of the corrugated hose.
Let's look at each individual group of defects in more detail.
Problem #1 - reduced filter efficiency
As a rule, all existing models of harvesting technology from Samsung equipped with reusable filter components. That is, after each cleaning, the owner of the device removes the filters, washes them, blows them out and returns them to their place. The cycle is repeated.
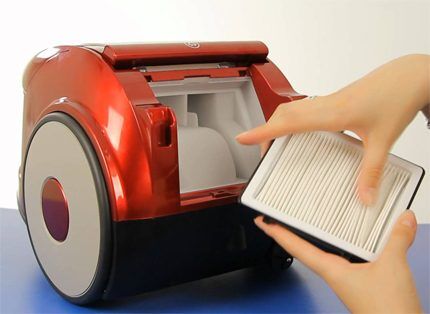
However, the filter material cannot be thoroughly cleaned. With each cleaning, the pores of the material become more and more clogged with microscopic particles. Finally, the moment comes when the filter loses its air transmission efficiency to 50% or less. This is already a limit that violates the technological principle of operation of the vacuum cleaner.
The motor continues to operate at full power, but resistance on the suction and discharge sides increases the load. Currents increase, the winding and, accordingly, the parts of the electric motor become very hot. If you continue to operate the equipment in this condition, the day is not far off when the motor will simply jam or burn out.
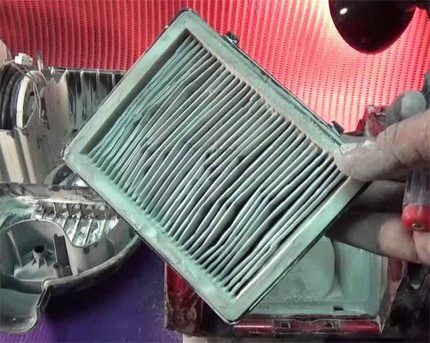
Which exit? Of course, complete replacement of filter elements at all stages, including the HEPA filter. Typically, any type of filter material (foam rubber, porous sponge, siprone) is available commercially.
Problem #2 - a worn-out HEPA filter
It’s a little more complicated with the HEPA material, but you can find a way out here too.That is, the user just needs to buy a suitable material, cut out the elements of the required size and use them to replace the material that has lost its performance.
Installing a homemade version of the HEPA filter is somewhat more difficult. You will need to carefully open the double mesh frame (usually the frame is made of plastic) to remove the replacement filter material.
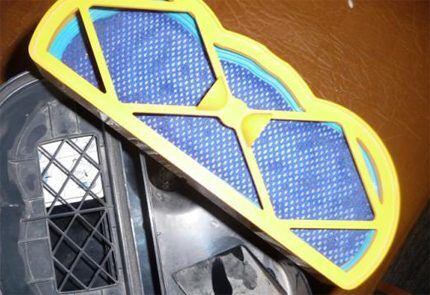
It is necessary to cut around the perimeter with a sharp stationery knife the area where the two plates meet, and then, with a little force, divide the frame into two parts. Next, replace the HEPA sheet with a new one and re-glue the frame-holder.
The same applies to the mesh filter and the motor protection filter, which are used in cyclone models.
Both the first and second filters become densely clogged with dirt, by the way, due to the fault of users who violate the regime of filling the container above the specified mark. There are cases of clogging of the rod tube. Blockages are removed by cleaning.
Problem #3 - rupture of the corrugated hose
The accessory connecting the vacuum cleaner inlet and the rod tube with the working nozzle, a corrugated soft hose, is damaged at the points of soft folds due to wear of the material or as a result of loads applied to this point.
Traditional points of damage are the joints of the hose with the lock pipe or with the rod tube pipe.
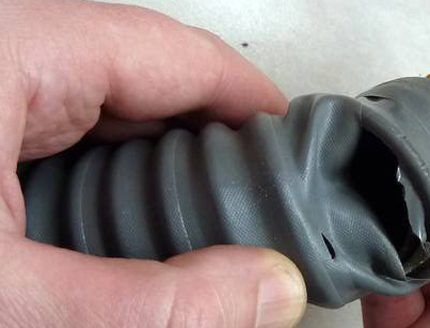
The repair process in such cases is not particularly difficult. It is enough to cut off the hose a little further from the point of the break and carefully remove the remains from the inside of the pipe (the factory fastening is glued).
The inside of the pipe usually has a thread exactly for the hose coil. Using this thread, the cut hose is simply screwed into the pipe and the repair can be considered complete. Practice has shown that there is no need for any additional fastenings using glue.
If a rip has formed in the central part of the corrugated hose (or, for example, you need to extend the accessory), in such cases it is convenient to use a piece of a rubber tube from a bicycle tire.
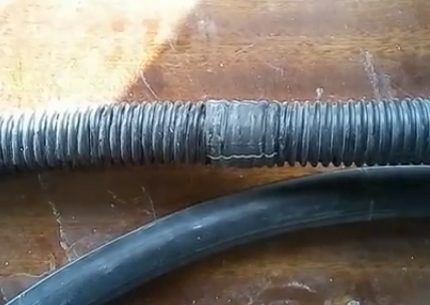
In terms of size and tight fit, this material is ideal. First, the parts of the hose are cut and glued, and then a rubber coupling from a bicycle tire is pulled over the created joint. A coupling 30-40 mm wide also “sits” on the glue.
Detailed process replacing a vacuum cleaner hose is described in an article in which each step is thoroughly analyzed and recommendations are given.
Problem #4 - blocking the movement of mechanisms
These malfunctions are inherent in mechanisms such as the brush turbine, as well as (occasionally) the wheel chassis. Both units have rotating parts - shafts, gears, rings. During cleaning, hair, threads and even thin small metal wires inevitably get into the area of these nodes.
These pieces of debris wrap around the shafts of gears, rings, and wheels and, over time, accumulate in such large quantities that they completely block rotational motion.

Such moments also affect the operation of the vacuum cleaner, increase the load on the engine, and force the user to increase the traction force on the corrugated hose, which is damaged in places of folds.
In this condition, the first step is to unblock the movement of the nodes. The turbo brush must be disassembled (the manufacturer provides for disassembly) and the internal area must be thoroughly cleaned.
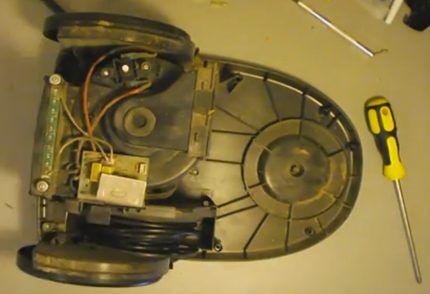
To access the inside of the large wheels of the vacuum cleaner, you will have to remove the housing by unscrewing several screws from the bottom. Both actions are quite accessible to do with your own hands.
Serious damage to Samsung vacuum cleaners
Repairing serious defects usually requires the intervention of certified technicians. However, here too some of the faults can be repaired yourself. For example, the owner can easily replace a damaged power switch himself.
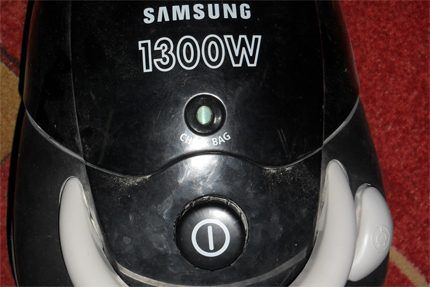
No. 1 - power button and power cable
A faulty power switch prevents the device from being turned on, or the operating mode is not locked when turned on. In the first case, the reaction when the button is activated is zero.
In the second case, the vacuum cleaner starts when the button is pressed, but immediately turns off when the user releases the button.
The functionality of the power switch can be easily checked with a tester - an electromechanical device. A non-working button does not create contact between the terminals in any position.
A non-latching button creates contact only in the pressed position. By connecting the tester probes to the button terminals, you can check the functionality of all positions.
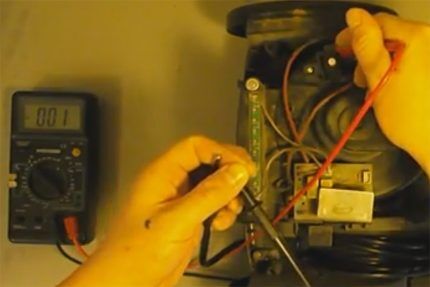
Along with the network switching, the power cable of the vacuum cleaner may also be faulty. The power cord is checked with the same tester.
Checking the power cord also involves power socket testing, which the owner uses, including the vacuum cleaner in operation.
No. 2 - air suction power regulator
Many Samsung models are equipped with a suction power control module. Essentially, this module is a regulator of the rotation speed of the electric motor shaft installed inside the vacuum cleaner. The module is an electronic circuit (relatively simple) based on thyristors.
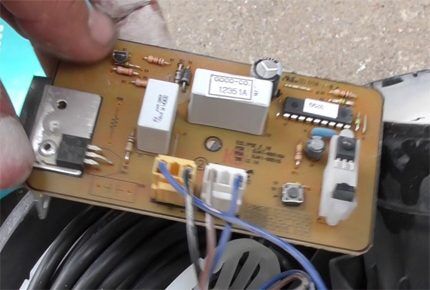
A module malfunction—usually a thyristor failure—results in either the inability to start the vacuum cleaner or a complete inability to regulate the performance of the device. In any case it is required disassembling the vacuum cleaner, dismantling the regulation module and replacing failed components.
Here it is quite problematic to work with your own hands without certain skills, for example, the ability to distinguish a resistor from a capacitor or the ability to hold a soldering iron in your hands. However, if desired, these qualities of an electronics engineer are not difficult to master.
No. 3 - electric motor of a household vacuum cleaner
A complex malfunction, of course, is considered to be the failure of the electric motor of the vacuum cleaner. As a rule, the designs of modern household appliances produced under the Samsung brand use axial-type motors with a rotation speed of up to 20,000 rpm.
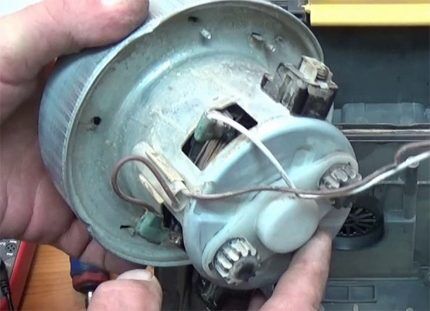
Rotation at such a high frequency is accompanied by significant loads on the support bearings. Therefore, one of the common malfunctions of Samsung vacuum cleaners is defective bearings. This is usually accompanied by increased operating noise of the device, sometimes very loud.
The job of replacing vacuum cleaner bearings with your own hands is difficult, but quite doable. However, initially you will have to disassemble the entire contents of the structure of the harvesting equipment in order to get to the motor.
Of course, during the process of disassembling the vacuum cleaner, it is recommended to record the sequence of installation of parts, writing it down on paper, or you can take pictures with a smartphone.
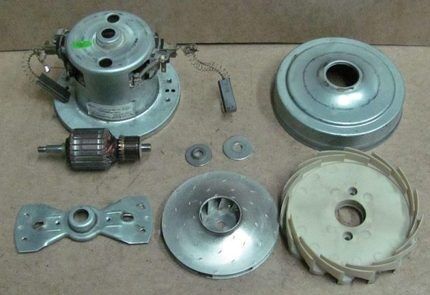
On a dismantled engine, you will need to remove the contact brushes and impeller casing. This process is relatively simple.
Contact brushes are usually secured with one screw and can be easily removed from their mounting niches. On the impeller casing (outer half), you need to carefully bend the four rolling points and, using some force, pull off the casing.
The most difficult process is unscrewing the nut that secures the impeller to the motor shaft.
Craftsmen with experience in performing vacuum cleaner repair, different methods are used for these purposes:
- clamp the engine manifold with wooden blocks;
- wrap an insulated wire around the collector;
- cut a groove along the end of the shaft.
As a result, the impeller can be removed. Next - a “matter of technology” - the shaft is removed by traction force, and the defective bearings are replaced. Then reassemble in reverse order.
Electrical defects in motors - breakage, winding short circuit between turns, commutator burnout - are relatively rare phenomena, but they also occur. In such cases, the electric motor is usually replaced with a different (new) copy.
Conclusions and useful video on the topic
On the topic of repairing corrugated hoses, you can watch a video where the author talks about all the nuances of this operation, which is simple for the home craftsman:
The method of cutting a groove along the end of the shaft when disassembling the motor from a vacuum cleaner is discussed in detail in the following video:
As it turns out, minor breakdowns are easy to fix at home. Moreover, it is not necessary to have knowledge of electromechanics and experience in repair work - most problems disappear after cleaning or replacing individual elements and accessories, such as filters, brushes, pipes.
If your vacuum cleaner has a more serious problem related to the motor or microcircuit, and you do not understand these issues at all, then it will be easier to contact the service department to provide qualified services.
Moreover, Samsung brand equipment provides free service during the warranty period.
Would you like to tell us how you restored the functionality of a Samsung vacuum cleaner with your own hands? Do you have valuable information on the topic of the article that is worth sharing with site visitors? Please write comments in the block form below, ask questions and post photos.


This happened to me: the corrugated hose of the vacuum cleaner broke right next to the handle. I did not repair the hole, but simply shortened the hose by ten centimeters, removing the damaged area. It’s easy to do—press the plug with a screwdriver, unscrew the coupling from the hose and cut off the damaged piece. For reliability, you can apply glue and, in the reverse order, tighten the coupling and attach it to the handle. As a result, a whole hose, albeit ten centimeters shorter.
What should you do if the hose of the vacuum cleaner contracts when starting up? The filters are fine, the hose is not clogged.
Hello. If the hose contracts, then theoretically the suction draft is good. Try disconnecting the hose.Does a vacuum cleaner without a hose suck up dirt? If yes, clean the tube again, inspect it, the hose, and the place where it connects to the device. Also test how the vacuum cleaner works with the vacuum flap on the hose open/closed.
By the way, the vacuum cleaner nozzle could also become clogged.
How to repair cordless vacuum cleaners? Google is silent about this...
Hello) Why don’t you ask Yandex... or YouTube))
Is it really a malfunction, all that is described above? Already, a torn hose can be discussed as a malfunction.
Here's a riddle for you all and for me: the vacuum cleaner turns off during operation and after a while it starts working on its own. The cords, the current collector on the drum... everything is in order and lubricated. The adjustment board is soldered and in good working order. This behavior occurs when plugged into any outlet.
A bit similar to what happened to me. The vacuum cleaner turned off during operation. Well, it seemed like the load was greater, I thought it might have burned out. But I tried to clarify where the current goes. I opened the lid, pressed the button under it, and it started up like a darling. I glued a 1.5mm washer onto the button post and increased its height. I closed the lid and it works without pressing the button. Reduced the height of the blotch a little and closed the lid again. He stood there for a while and turned on. I pressed the button and it turned off. I also reduced the stain - everything is ok, like new. Maybe it was worn out, or sagged inside from overheating, who knows.
I deeply apologize for the T9 mode - there is a type of error in the text. I hope everyone understood the meaning.
What should you do if the vacuum cleaner turns on and off by itself (the motor), which could be a problem?
When turned on, the Samsung 1800w vacuum cleaner drives dust through the rear filter, what should I do?
something got into the hose. how to unscrew it
Hello, tell me, while cleaning, a hose broke and while I noticed and turned off the vacuum cleaner, it turned off and that’s it. Then I let it cool down and tried to start it again, but without success. What could this be and what should I do?
Hello, during work the vacuum cleaner began to hum strongly, there was a smell and small torn aluminum plates fell out of it. What to do and what it is