How to make a simple brick grill with your own hands: diagrams, drawings, photos
In any country house or dacha there is a secluded place where the owners grill kebabs or bake vegetables over coals, treating guests to freshly prepared harvest from the garden beds. You can do all this on a steel or folding box, buy an inexpensive Chinese hearth, but it is best to build a grill out of brick. This will not only add credibility to the hosts in the eyes of the guests, but will also make cooking meat safer and more convenient.
The content of the article:
Schemes, drawings of simple brick barbecues and how to make them yourself
There are many designs of barbecues and ovens. Moreover, every amateur believes that he should develop his own barbecue project. Sometimes homemade projects even without drawings turn out to be successful. But they are huge in size, expensive, construction costs are considerable, plus they are designed for a decent consumption of firewood.
Therefore, before you make the first version of the barbecue with your own hands, you need to think carefully about what exactly is needed and important for a brick building. As practice shows, the most successful are simple and small ovens of a universal type.
What are the options:
- Make a simple stationary grill.
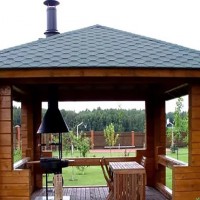
- A small barbecue with a hood or chimney, if you plan to place the stove somewhere inside the summer kitchen or in a gazebo.
- Build a barbecue with a sink for washing hands and a chimney.
As a rule, nothing else is needed to cook meat and vegetables.All other elements, cauldron, grill, pizza oven, are already too much. Such projects are chosen mainly for a summer kitchen and an open terrace of a small cafe for permanent use. In this case, the costs will be justified.
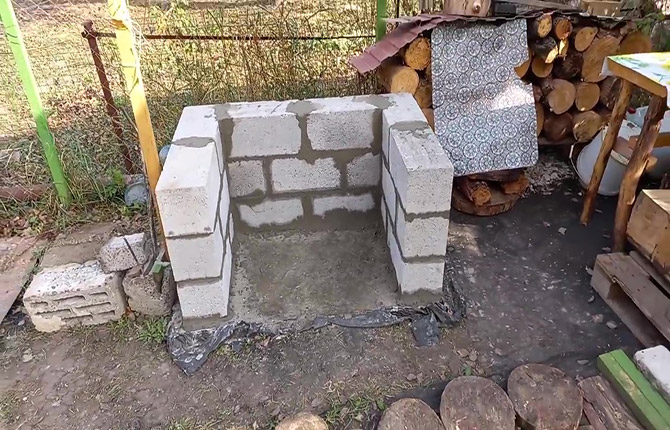
Simple brick grill
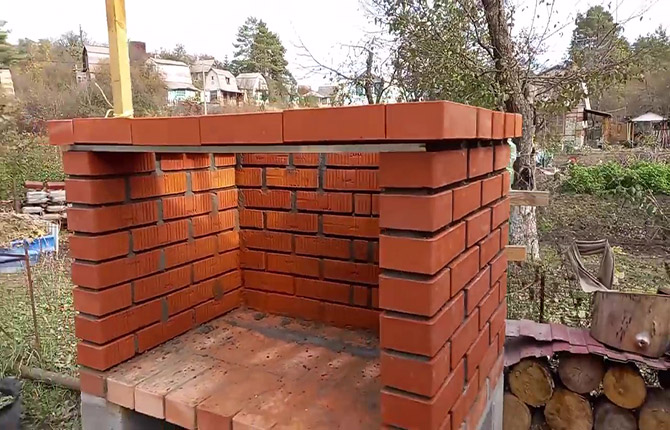
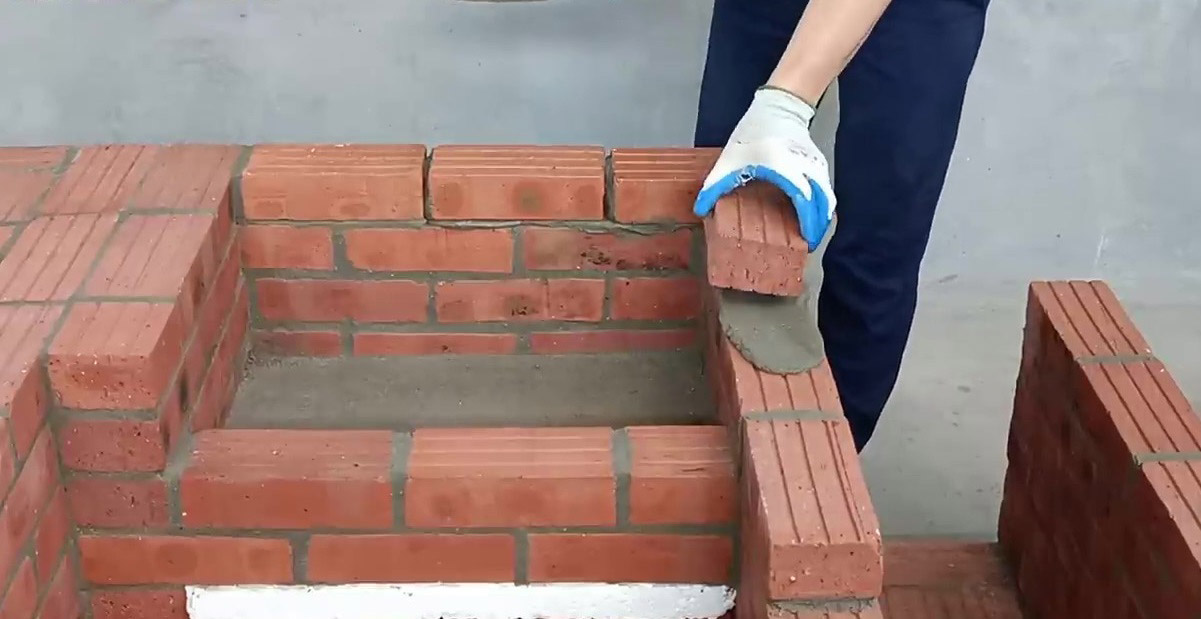
This option can be built with your own hands in just a few hours, even without preparation. The base for the barbecue can be laid out of old stove, burnt brick or ordinary sand-cement, paving, clinker, in general, any tile with a thickness of 50 mm and dimensions of 300x300 mm. There is no point in making a foundation out of concrete.
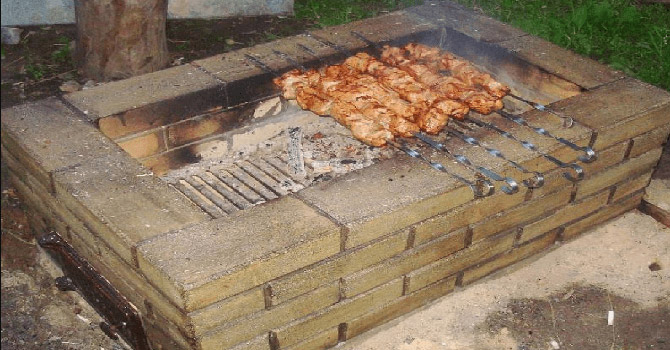
The box is made of brick with interlocking rows. There are 5 rows in total. The brick is laid using cement-lime mortar. After laying out the base and the second row, a steel partition plate is laid on the brick to form the ash pit space. The barbecue does not have a firebox as such, nor does it have a hood (chimney pipe). Therefore, if guests are delayed, then the coals in the grill can be covered with a metal sheet, leaving only a small gap on the side of the outer brick. The coals will not burn out, but will smolder.
Despite their unsightly appearance, the simplest brick barbecues are very popular due to their simplified assembly.
But such a hearth has an obvious drawback. In order to control the process of preparing shish kebabs or barbecue, you need to constantly sit nearby on a low bench. Or stand bent over.Therefore, most barbecue projects involve installing a hot zone with coals at a height of at least 70-90 cm. This scheme is considered more comfortable.
A simple grill from a ready-made kit
Many manufacturing companies that produce garden and dacha equipment have long established the production of ready-made sets for barbecue or barbecue. The owner only needs to lay the brick with his own hands according to step-by-step instructions, and all other accessories are already included in the set of parts for the barbecue.
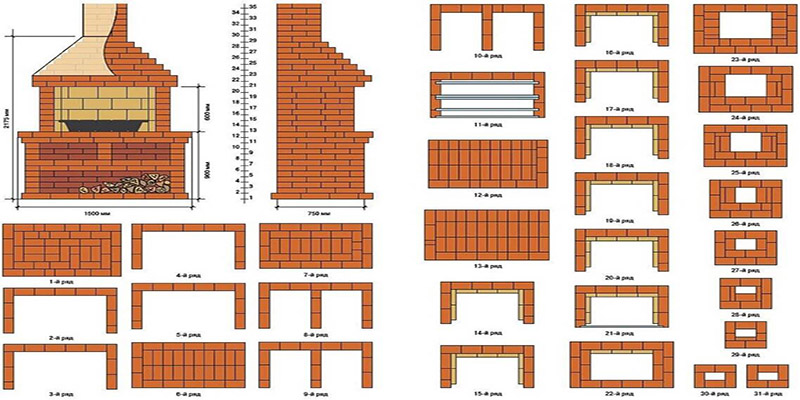
The traditional design of an open barbecue of a simple form involves laying out at least two, or even three additional rows with ledges. A grate, steel box or brazier with coals rests on them.
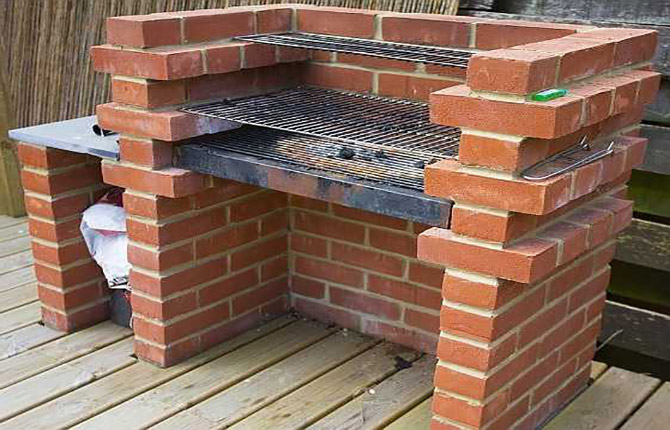
The first step is to lay out a paper template on the site; it is included in the kit. At the same time, you can try on the size of the charcoal tray.
Using the template, you can transfer the dimensions of the base of the future barbecue onto the concrete (slab). It is recommended to use hollow lightweight brick, but in fact you can build from any.
For bricklaying, a ready-made cement-clay mortar with the addition of a plasticizer is used; it can be replaced with liquid soap.
Support hooks are laid out in the seam in pairs, on opposite walls. It is recommended to do this on the 3rd row of bricks, as well as on the 7th and 9th.
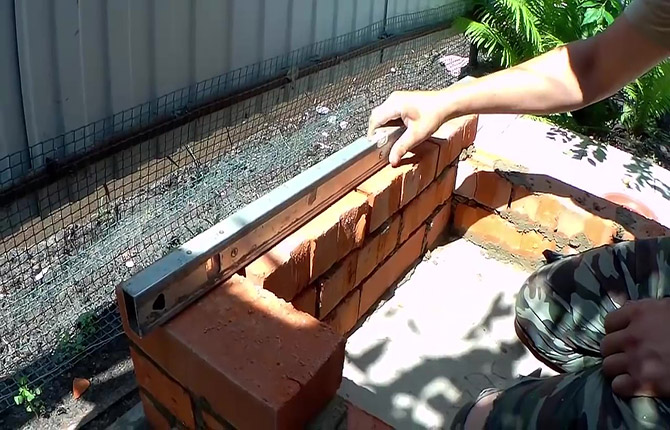
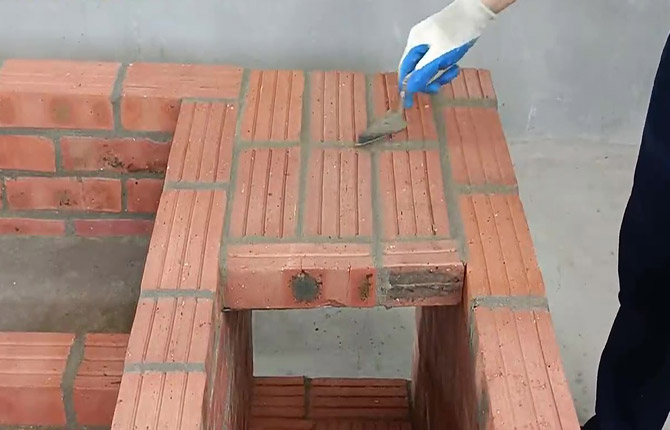
Due to the fact that the brick is hollow, and the mortar is laid twice or three times more than usual, the strength of the walls of the barbecue is great.The only requirement is that after laying the bricks, each row must be checked with a building level and tamped with a trowel so that the grill turns out smooth and beautiful.
Upon completion of laying the brick, you need to embroider the external seams to make the grill look beautiful. Some craftsmen recommend opening the building with varnish (to make it easier to remove smoke), but in practice almost no one does this. Although the varnish, in addition to decorative functions, also performs protective functions - it closes the pores and prevents moisture from penetrating inside the walls of the barbecue.
Simple barbecue with adjustable hood
Many craftsmen, when planning a barbecue, grill, or barbecue layout, completely forget that they somehow need to deal with smoke. For some reason, it is believed that if the grill is located outside, then a small canopy over the brazier will be enough so that rain and wind do not interfere. But practice shows that even the simplest fryer needs a hood if the body height is more than one meter.
The hood does not have to be made of brick. Moreover, sometimes it is impossible to make it from this material. Especially if it is a design with a wall and side screens. Some models, especially those laid without a foundation, simply will not withstand the additional load if, for example, the hood is made of brick.
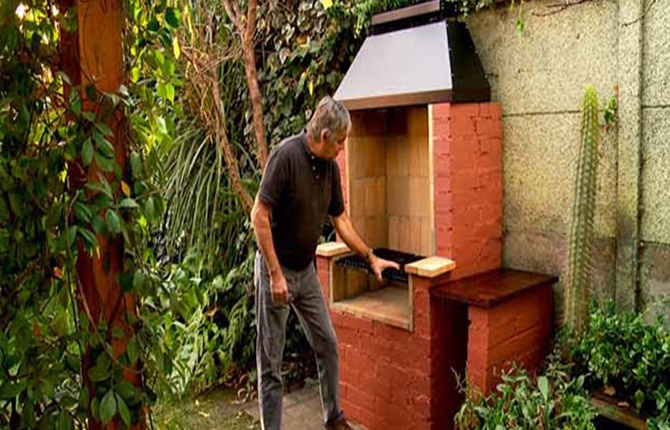
In such cases, it is better to make a simple barbecue with your own hands with a protective cap made of thin sheet steel. To secure the box, you will need to weld a frame of steel pipes, as in the drawing.
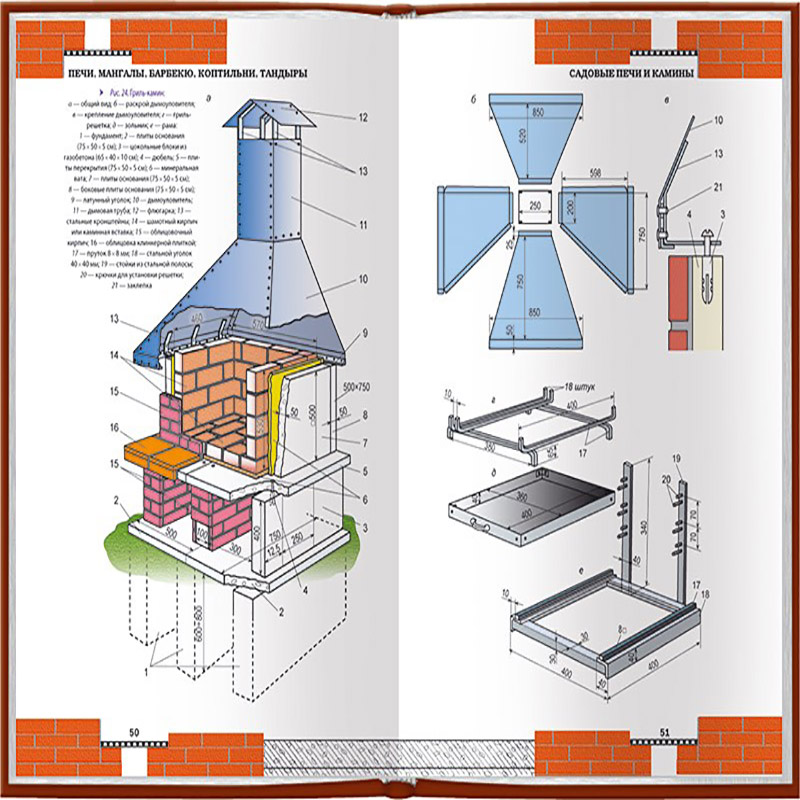
Simple barbecue with hood
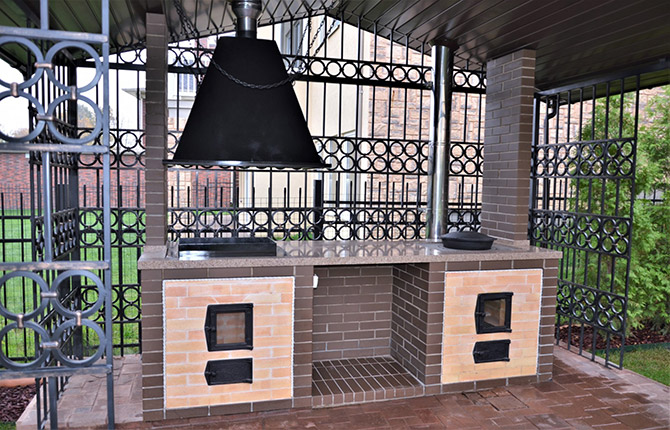
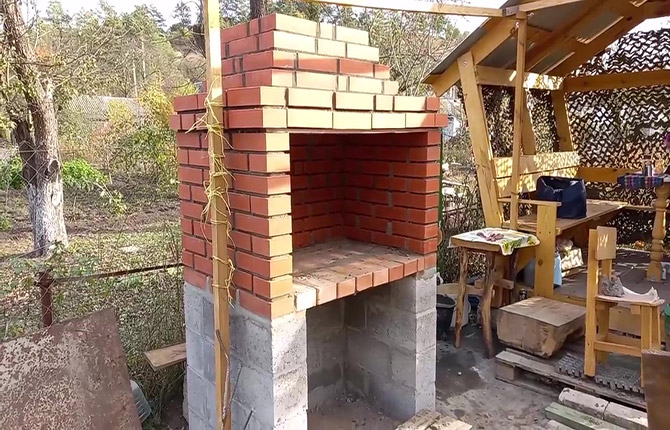
Below we will consider an option without a chimney pipe (although one can be installed), but with a hood lined with a cone of hollow brick. More precisely, the entire structure is made of a lightweight type of this material.This is important, since the total weight of the building depends on it. This means that the lower part of the barbecue - the table - can be laid out of brick according to the traditional “box” pattern.
But the most important thing is that when using hollow bricks there is no particular need to pour a massive foundation. It will be enough to make cushions from crushed stone and a small screed from concrete.
This option is simpler and does not require the cost of additional brick purchases. But the top part, base plate, sides and barbecue hood will need to be laid out of brick.
There are two options for laying out a barbecue with a hood - with a built-in hood and a regular dome made of brick on a cone.
Option with embedded cap
The simplest case of arranging a mounted hood over a fireplace was discussed above. But not everyone likes the appearance of a brick grill with a metal hood mounted on top. Although there are options that are quite interesting in design.
Therefore, for those for whom it is important to preserve the natural brick appearance of the barbecue, you can use an unusual technique. The hood of the hood is covered with bricks. That is, externally this part of the barbecue looks made of brick, but in fact inside there is a steel cap made of galvanized or painted steel, which is lined with brick.
This barbecue project uses additional thermal insulation of the walls in the form of fireclay tiles. Why was this done? The design of the barbecue is planned with a ash pit, an ash pit and a grate. The air flow is quite strong, so the temperature in the fireplace rises to 800-1000OC. This makes it possible to burn even relatively damp wood on coals.
If you don’t use grate bars built into the table and abandon the blower, then you can do without fireclay bricks. Still, you have to cook meat over an open fire, and fireclay contains a huge amount of heavy metal oxides.
But it is imperative to protect the walls and hood made of hollow bricks, especially if you cook meat on the grill in winter. The fire produces a huge amount of hot water vapor, which easily penetrates the thickness of the brick mass. And of all brands of brick, hollow brick is the most porous, therefore it is easily destroyed when water condensate freezes.
A simple grill with a brick hood
First of all you need to make a small base. You can get by with a cushion of crushed stone, but it is more profitable to fill in a small screed. The slab will contain stones, scraps of steel wire, and remnants of mesh. It is enough to dig a hole on the bayonet of a shovel, lay down film, stone and wire, and fill it all with M100 concrete. In a couple of days it will be possible to build a table of foam concrete under the fireplace.
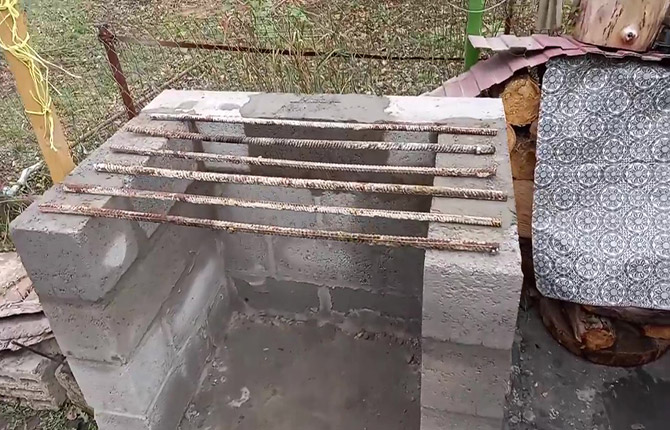
Now we need to solve the problem of how to assemble a slab under the fireplace of the barbecue. The simplest solution is to lay several 18-20 mm reinforcement bars.
A couple of sheets of metal 2-3 mm thick are laid on top of the reinforcement, and you can lay out bricks and make a slab.
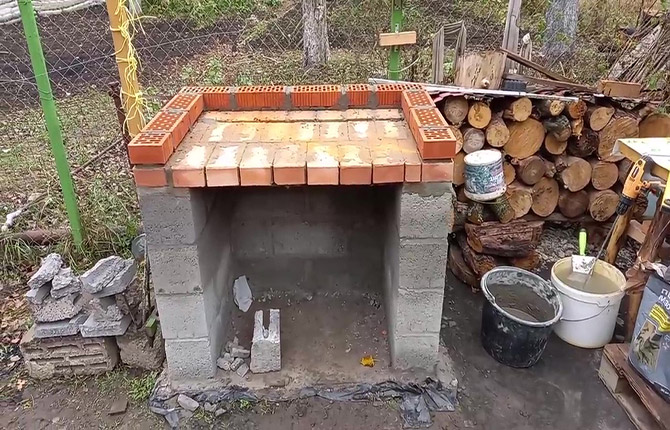
It is imperative to control the level of the masonry so that there are no blockages at the edges. The barbecue box took 8 rows of hollow bricks of a normal module.
In order to lay out the front row of bricks, you need to first secure a steel corner with a 40-50 mm shelf. The masonry will go on top of the metal support. If the inside of the barbecue is planned to be lined with fireclay, then the same corners need to be sewn from the inside along the top and bottom rows of the masonry walls. The chamotte will stand on the corners without adhesion to the main masonry. This will relieve the wall, plus an air gap will form.
Budget barbecue with chimney
One of the options for choosing a site is in the courtyard of a private house. Usually the site is already paved with tiles at the time construction begins. There is no need to remove it. It is enough to apply a cement-sand screed on top, and in a couple of days you can begin construction. A screed is needed to level the base.
The grill is built entirely from solid red brick (molded, not pressed). In order for the masonry to turn out with bandaging of the seams, the first row begins with half a brick. Then the second row will start with a whole stone.
On the ninth row of masonry you need to form a slab.To form the crossbar, two paired steel angles are laid on opposite walls.
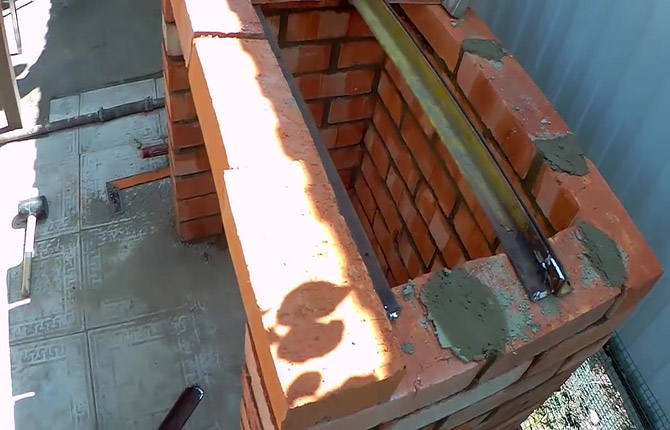
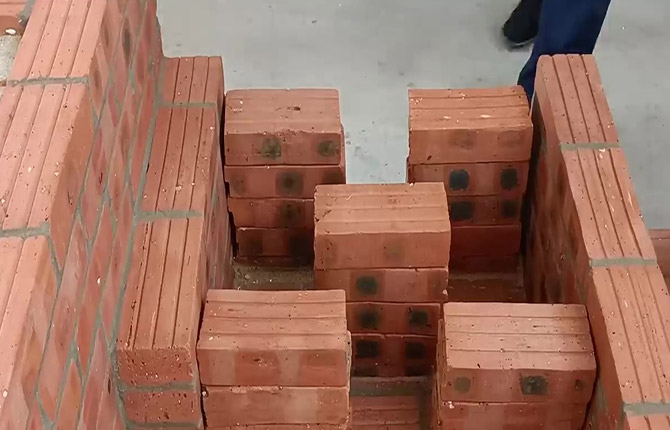
Next, you need to create a niche for the grill.
Now you can lay out the walls to their full height. From the slab to the base of the chimney you need to lay 9 rows of brickwork. The lintel between the walls is also laid out on steel corners.
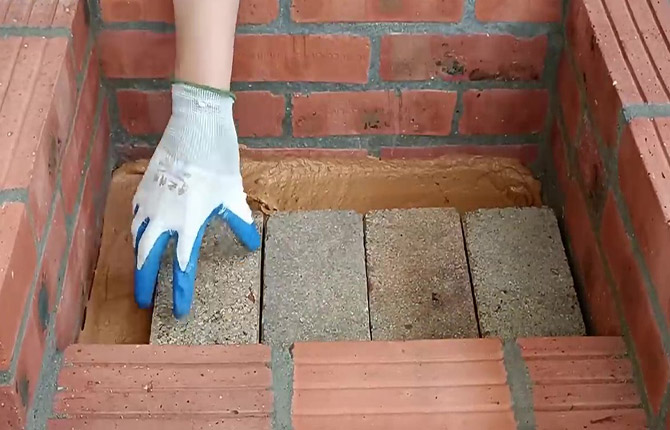
Now the most important thing - you need to lay out protective lining inside the barbecue. You can use fireclay, but it is expensive, and the temperature inside is not so high. It is permissible to make protection from ordinary brick, but it must be selected material of good quality, without cracks or defects.
Protective masonry is made in a quarter of a brick using a masonry mixture for fireplaces. Moreover, there should be a gap of 5-10 mm between the walls of the grill and the protection. Thanks to the gap, the protective lining will not break the outer walls of the barbecue when expanding due to heating.
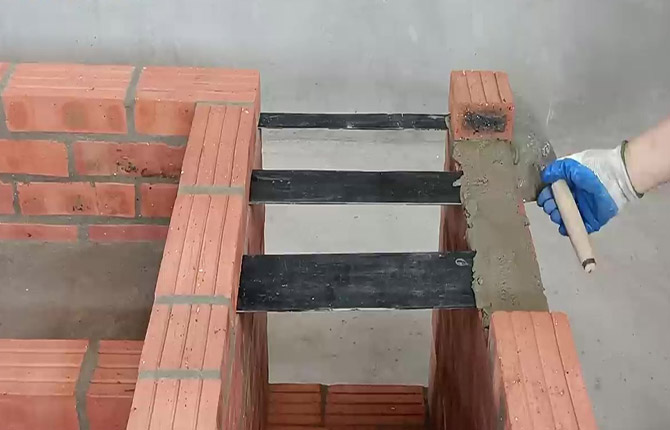
On the second row of internal masonry, steel plates are placed in the seam; a steel frame-holder for skewers with kebabs or a barbecue grill will rest on them.
The internal masonry is completed by laying the brick in an arch. The material can be laid out on a strip with a cross section of 5x50 mm bent in an arc. It is needed until the masonry mortar sets.
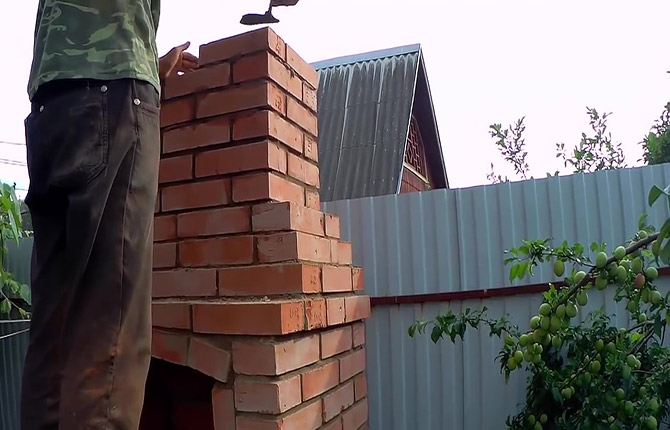
Barbecue grill with chimney and sink
Grill-combines are especially popular. This is no longer a fireplace for frying meat on skewers.This is practically an open-air summer kitchen. Such barbecues are usually built in gazebos on a ready-made foundation.
You can choose a project with a high chimney, but, as practice shows, building such a grill-combine is difficult and expensive. It is more convenient to install a regular prefabricated metal chimney pipe in the stove, and install a hood for ventilation. Moreover, it can be easily mounted on the roof beams of the canopy.
Construction begins with markings. It is applied directly to the concrete floor of the gazebo, and you can immediately lay out the brick. In this case, it is a solid, molding M200.
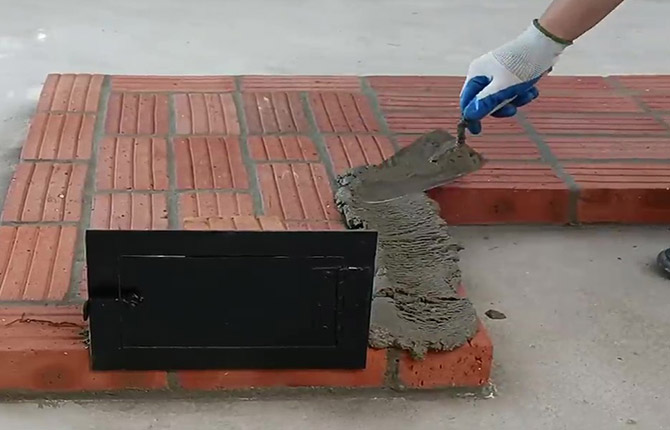
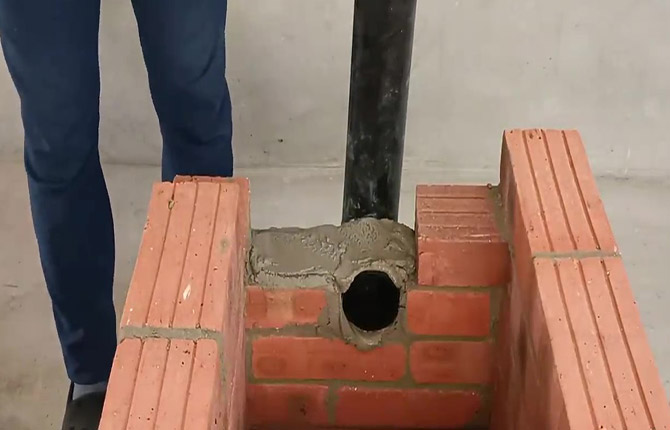
It is not yet secured, but upon completion of the construction of the barbecue-harvester, the pipe will need to be secured with a clamp.
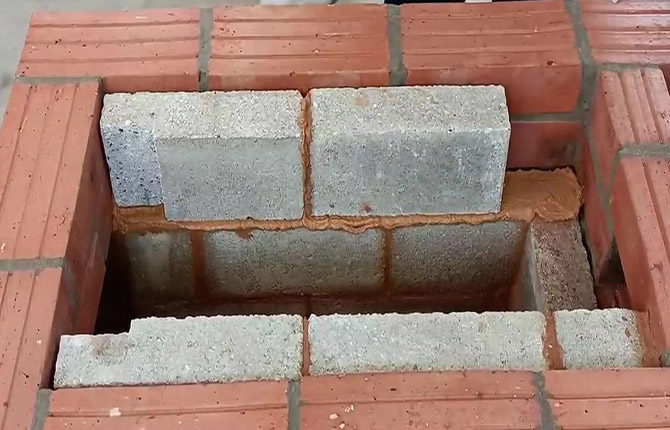
A sheet of foam plastic 4-5 cm thick is laid on top, the dimensions are selected according to the dimensions of the future slab. 2 rows of bricks are laid on top of the foam plastic, a grid of reinforcing bars is laid and the space is filled with masonry mortar.
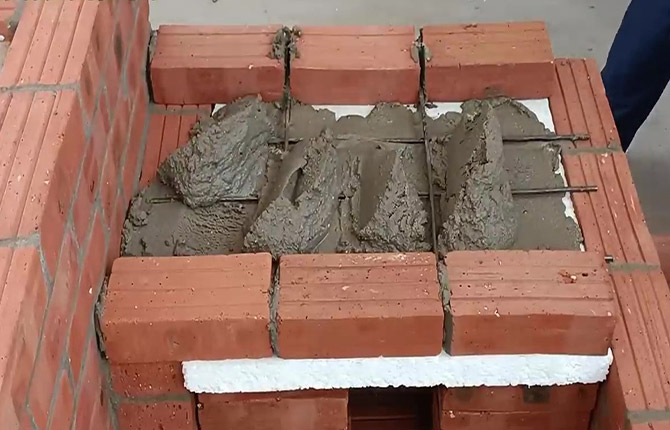
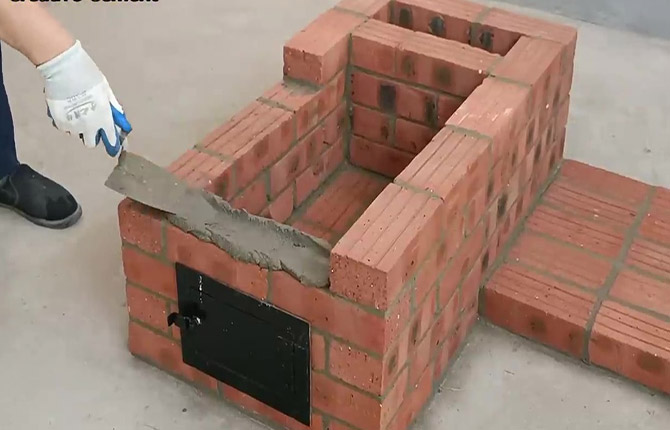
Now you need to make a compartment for washing. The walls of the box for installing the sink are laid out of brick in the same sequence as for the stove. On the penultimate row, 3 steel strips are laid in blocks.
In fact, almost all composite, multifunctional structures are built without an additional holding frame over the coals. This is done intentionally to maintain the versatility of the roaster. Many barbecue owners have several replaceable grill attachments. With their help, you can brew coffee, tea, broth (it will be faster than on the stove), bake vegetables and, of course, fry meat on skewers.
A large oven with a stove is often used for cooking in a kitchen utensil.
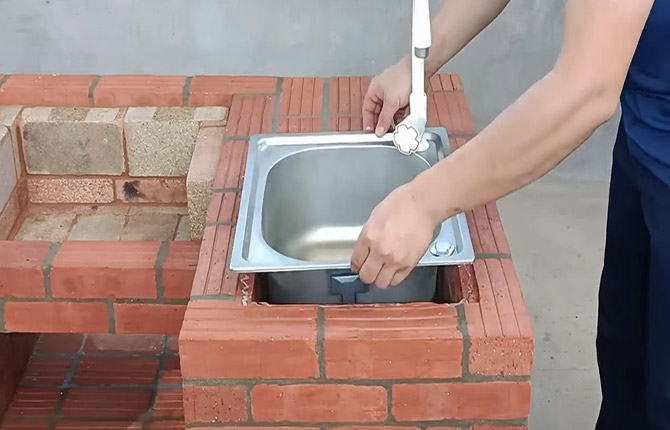
To connect water in a summer cottage, you have to use a remote tank with a pump. The sewerage system is connected either to a portable container, or a pipe is laid to a drainage ditch (septic tank).
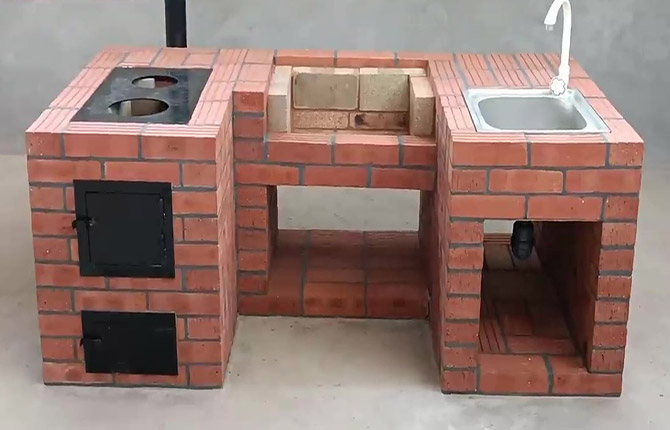
The design of the grill combine is such that it can also work outdoors. An additional chimney pipe allows the stove to function almost autonomously, regardless of whether there is a canopy over the combine or not. You just need to make additional fastening. For example, if a barbecue is built in the backyard under the wall of the dacha, then the pipe can be fixed using metal dowels - clamps driven into the masonry of the house.
Typically, such structures are laid on the back side with a screen wall, 1.5-1.8 m high. A brick screen can also be used to fix a steel chimney pipe. Its windage is small, so even a couple of fastenings will be enough.
Building a brick grill with your own hands is not easy if you don’t have at least minimal experience working with stone. Even when constructing a relatively simple structure, you must adhere to the instructions and recommendations for laying bricks on mortar. Most problems arise not because of a failed design, but because of poor quality masonry.
Tell us about your experience in building barbecues - what projects, in your opinion, can be considered the most successful for a novice mason-builder?


We remove the fireclay from the grill immediately, instead of it the metal is 3 mm stainless steel, and we line the hearth in the lower part where the fire is. Why - fry the first couple of dozen kebabs without any problems, then the fireclay will absorb the burning smell. It is impossible to remove or wash, so only stainless steel.
You also need to sew up the ceiling of the hood, you can use metal or simply plaster it with an aluminous solution. Otherwise the brick will fall down.
Everyone builds like this, and nothing, no one died.