How to integrate a dishwasher into a finished kitchen: installation options + work order
Complex installation of a new kitchen unit with a set of equipment is an ideal, but not always possible solution. It happens that a dishwasher is bought later, and there is no special cabinet for its installation. What needs to be done to ensure that the long-awaited acquisition successfully fits into the furniture module?
You will learn everything about how to integrate a dishwasher into a finished kitchen from our article. We will talk about which equipment layout options have been tested in practice. Do-it-yourselfers will find a detailed step-by-step guide here.
The content of the article:
Dishwasher installation conditions
Before purchasing and installing a dishwasher, you need to find a suitable place for it.
The easiest way is with free-standing units - even a piece of free space on the floor or table is enough for them. But what to do when you have planned buy built-in model, which can be hidden behind a decorative panel?
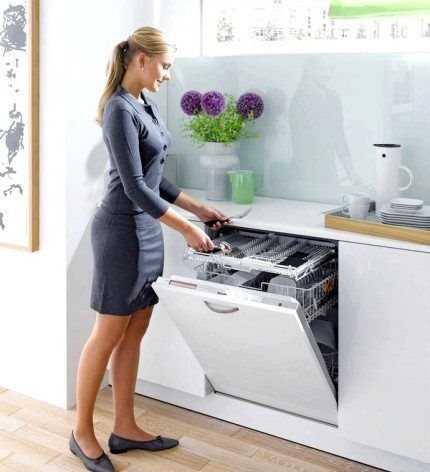
You need to arm yourself with a construction tape and check which cabinets are suitable for installing a PMM. Finding out the sizes of dishwashers is easy - information is posted on the official websites of stores that sell household appliances.
When making machines, manufacturers are guided by human height and furniture sizes, and accordingly adapt their models to uniform standards.
For example, most dishwashers from well-known brands have a width of 60 cm (more precisely, 598 mm) or 45 cm (448 mm). 45-centimeter models are called narrow, and they have more options for embedding in a finished kitchen.
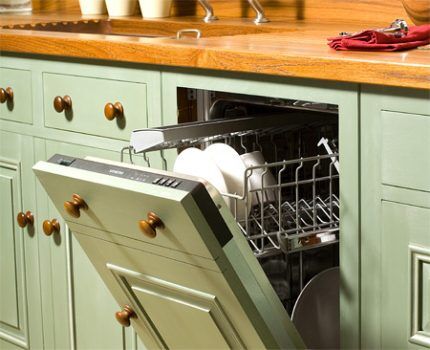
Narrow models usually have a height of 815 mm to 875 mm, which is equal to the standard height of kitchen tables and cabinets. If the set is made to order, the level of the countertops may be lowered for technical reasons, for example, a pipe is in the way, etc. Therefore, accuracy is needed when measuring - just one extra centimeter can be decisive.
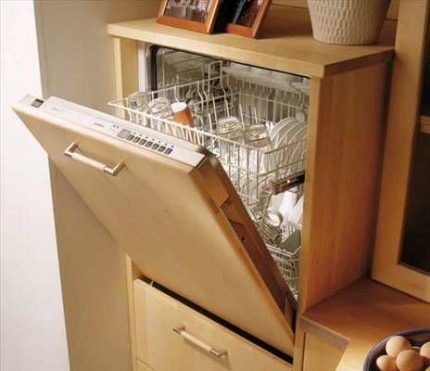
The depth of the machines is 550 mm. During installation, a few centimeters remain for comfortable connection of hoses and wires so that they are not pinched. There is a category of compact cars that differ from full-size ones in height. For ease of use, they are usually built into the upper modules.
If you have found a cabinet that is suitable in size, do not forget to take into account the location of communications:
- cold water pipes;
- sewer pipe;
- free power line with socket.
An additional electrical cable can be laid if necessary, but it is hardly possible to move pipes in a ready-made kitchen, so the installation location of the machine is usually chosen next to the sink - this is where the main water supply and drainage units are located.
If at least one of the conditions is not met, for example, there is no suitable module or there is no access to communications, then you will have to postpone the purchase of a built-in dishwasher or think about remodeling the kitchen.
Possible embedding options
A cabinet for embedding a PMM may look different. We suggest considering several popular options that are convenient for installation.
Each type of installation is associated with difficulties. To minimize them, it is important to comply with the above conditions and requirements specified by the manufacturer in the instructions.We offer several recommendations for installing a dishwasher in different places.
Solution #1 - built into a closet
If there is a cupboard with a width of more than 45 cm next to the sink, then it can be used to install a dishwasher. The advantage of installation close to communications is the ability to integrate machine hoses into an already installed system under the sink.
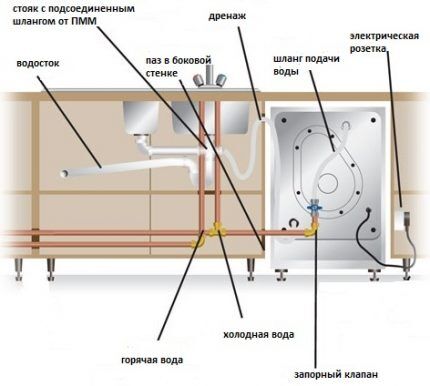
You will have to remove the shelves and back wall from the cabinet, and, if necessary, the bottom panel. The built-in housing must be brought into a strictly vertical position; for this, adjustable legs are used.
Then you need to take turns connect the car to communications: sewerage, water supply and power supply. If necessary, an additional water seal with a drain pipe should be installed.
The decorative front panel, which is attached to the machine door, is usually assembled from removed cabinet doors or ordered additionally. Partially built-in models do not need to be decorated, so their installation is a little easier.
Solution #2 - installation in a separate module
If there are no free cabinets for new equipment, but there is enough space in the kitchen, you can order a separate module, but you need to install it near the communication nodes.
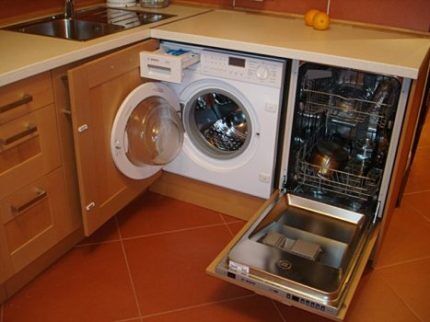
It is important to level and secure the unit so that it does not vibrate during operation or move the cabinet. Hoses and pipes are laid along the wall, but they are easier to access.To get to the communications, you don’t have to dismantle the car, but simply move the cabinet away from the wall.
If the dishwasher is installed under a common kitchen countertop, it must be removed for maintenance, since otherwise the hose connections cannot be reached.
Solution #3 - installation in a niche
If the kitchen has a niche for installing a microwave, oven or other small equipment, it can also be used to install a dishwasher. Dimensions of the compact model along with drawings can be found in the installation instructions.
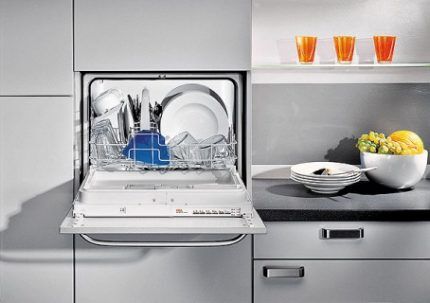
Built-in compact models should not be confused with freestanding models. The latter do not have to be placed in a niche - any horizontal surface is suitable for their installation. So that the dishwasher is not conspicuous and is hidden like the rest of the equipment, the front part is covered with a decorative overlay in the style of a facade.
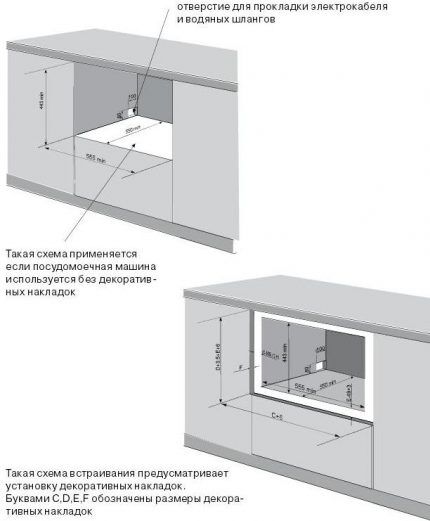
It’s easier to find a place for a compact model, but don’t forget that a mini-machine is not able to serve a large family.
Solution #4 - if embedding is not suitable
What to do if there is absolutely no space in the kitchen to install a built-in model? It remains to consider free-standing options, the design of which does not require special installation.
They can simply be installed on the floor, countertop or niche, leveled, and then connected.
There are still ways to fulfill your own dream of installing a built-in dishwasher - facade installation for a free-standing model, a complete refurbishment of the kitchen unit, with possible repairs or relocation of communications. It is more expensive and requires not only financial investments, but also time.
Installation procedure for the built-in model
The dishwasher installation algorithm is described in the instructions provided by the manufacturer. Usually it consists of several stages, the first of which is preparatory.
In advance you need to purchase some parts for connecting to the pipes, take care of the socket arrangement, prepare a tool - a screwdriver, a screwdriver, a hammer, as well as flax or fume tape for plumbing connections, sealant, double tape.
Step 1 – checking the PMM equipment
In addition to the dishwasher, the kit usually contains templates for installing decorative trims, fastening tools, a protective rubber apron, gaskets, and hoses.
To make sure everything is in place, you need to find a list of components and check the presence of each of them. If something is missing, you will have to buy more.
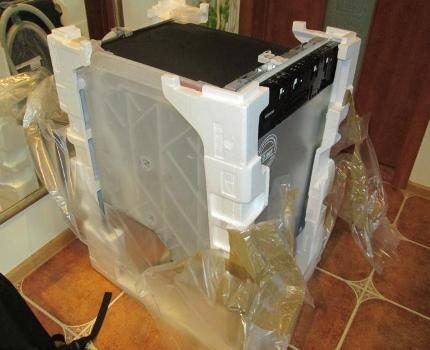
Be sure to check if there are installation instructions in Russian. Famous manufacturers duplicate the description of the installation process on official websites in special sections.
Step 2 - installation in place
Before you begin installing the built-in model, you need to make sure that the cabinet is the right size and that there are holes in its walls for hoses.
Procedure:
- place the machine opposite the niche for embedding;
- pull the drain and inlet hoses through the holes to the connection points, and the power cord towards the outlet;
- carefully push the machine body into the place intended for it and make sure that the length of the hoses suits you;
- pull out the machine and prepare it for installation - carry out the manipulations described in the instructions: glue a vapor barrier film to the inside of the tabletop, attach sealing tapes to the edges, install a mounting plate, damping elements, etc.;
- adjust the height of the legs so that the body stands strictly vertical, check the distance to the walls of the niche with a tape measure;
- Attach noise protection to the bottom part, if included.
Next, you can begin installing decorative overlays. So that they do not differ from the kitchen facade, you can take the removed cabinet door and the panel from the drawer and fix them one by one on the car door, having previously processed and adjusted them to size.
Some tips for installing homemade trims.
Usually, to attach decorative overlays, the machine is equipped with long self-tapping screws - they need to be inserted in place of the short ones, which were screwed in initially. When the dishwasher is completely installed, all that remains is to connect the communications and test.
Step 3 - connection to the sewer
This is the easiest and fastest stage. The connection is made in one of two ways:
- insert the drain hose directly into the cuff of the sewer pipe outlet;
- connect the hose to the sink drain system.
The first option is possible if the sewer pipe has a free additional hole, which is located under the sink or not far from it.
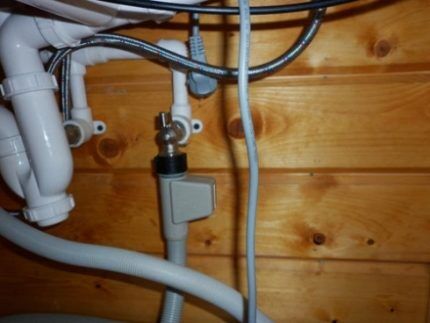
For tapping into a pipe, a ¾-inch tee is usually used. If the hose is installed in a siphon, it is better to purchase a special model with an outlet.
Step 4 - connection to the water supply
Even if the model involves connecting to hot and cold water, in Russia it is recommended to supply only cold water. This is due to the impossibility of adjusting the temperature of hot water and the lack of special filters.
Installing a filter for cold water supply is mandatory, otherwise the equipment will quickly fail.
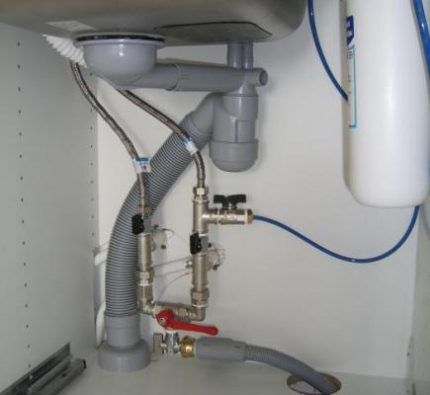
It is better to leave the places of threaded connections detachable, but seal them with fum tape or linen thread. Sealant is used as a last resort; people usually do without it.
Step 5 - Connect to Power
The standard length of the dishwasher power cord is one and a half meters. Therefore, the distance to a separate outlet should be no more than 1.5 m.
It is not recommended to use a filter or extension cord - for the operation of powerful kitchen appliances, according to the rules, separate supply lines must be carefully laid.
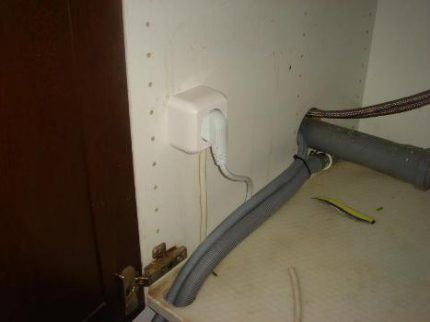
To install a separate line, you will need a VVGng copper wire of 2-2.5 mm, circuit breaker 16 A and grounded socket.
During dishwasher installationduring repairs or maintenance, the power supply must be interrupted. To do this, a separate power line serving the kitchen is turned off at the electrical panel.And if there is no such thing, then they turn off the power to the entire apartment/house.
After installing the dishwasher, it is necessary to check the operation - connect the power supply and activate the machine in test mode to prepare for first launch.
Installing appliances in a finished kitchen is not fundamentally different from conventional installation, but difficulties may arise with connecting communications.
Conclusions and useful video on the topic
Tips for installing and replacing decorative panels:
Recommendations for connecting to sewerage and water supply:
The rules for connecting a dishwasher yourself are given in the following video:
The equipment and documentary support require the owners to install the dishwasher themselves. However, the owners of a new car do not always have enough skills or knowledge to install it themselves.
If you doubt your own skills, it is better to seek help in integrating a dishwasher into a kitchen set and connecting it to a service center or a trusted private trader.
Would you like to tell us about how you installed your dishwasher or your neighbor’s unit into the kitchen module? Do you have useful information on the topic of the article that is worth sharing with site visitors? Please write comments, ask questions, post photos in the block below.


A built-in dishwasher is a good option for a small kitchen. Plus, the decorative panel gives a more attractive appearance, which is important for designer kitchens. Of course, you need to calculate everything in size in advance. The easiest and most convenient way is, of course, to build it into a closet. We did this in our kitchen and it turned out very well.
It is clear that the easiest way is to calculate everything in advance, but this is not always the case. We have a small finished kitchen that needs to be built in with a dishwasher. Apparently, you will have to buy some compact model for the sink.