DIY bathtub painting using epoxy enamel and liquid acrylic
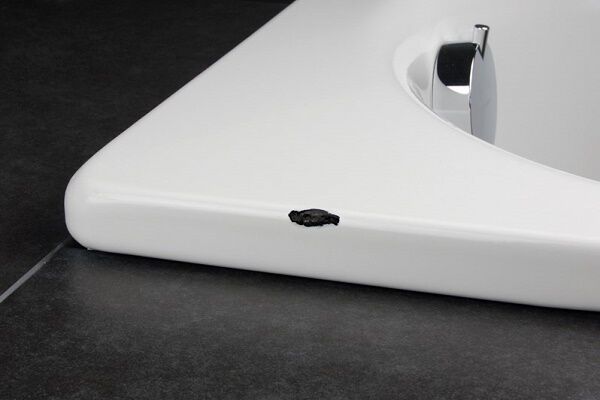
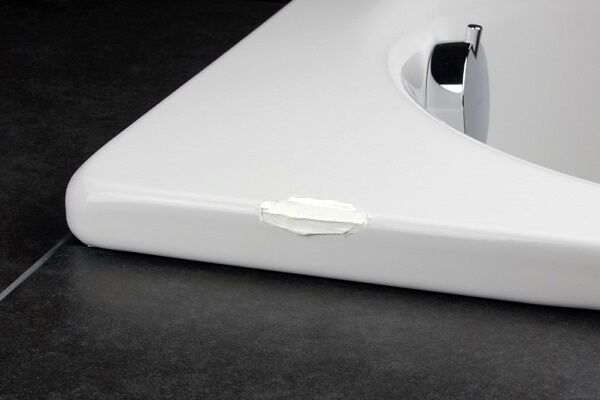
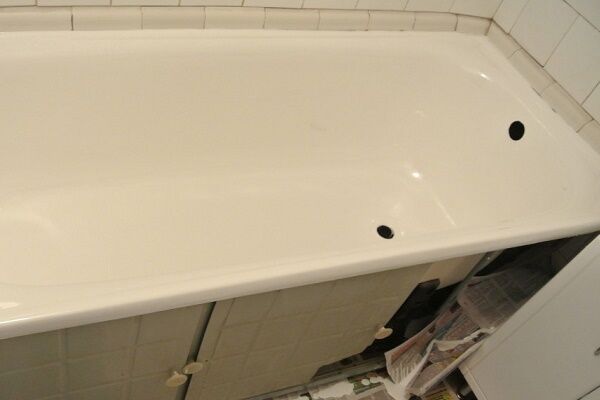
A ruined bathtub is quite common. As time passes, chips, dirt, and even streaks of rust appear on the enamel surface.Complete replacement of such plumbing fixtures is a troublesome and expensive task. Painting a bathtub yourself will cost much less, and you should familiarize yourself with the specifics of its implementation. Do you agree?
We will tell you how to do this work using epoxy enamel or liquid acrylic. The article we presented describes in detail the process of preparing plumbing fixtures and the technology of applying a new coating to its surface. With our advice, you can successfully update your bathtub yourself.
The content of the article:
General procedure
Restoring a bathtub is not an easy task. It will take several days, and possibly several weeks, to complete the entire complex of work.
In addition to tools and materials, you need to prepare a set of protective clothing and protective equipment. The repair composition has an unpleasant odor and, when drying, releases volatile substances that are hazardous to health.
It is necessary to protect the respiratory organs with a respirator with a high protection class. As an alternative, you can use any model of gas mask. Those with sensitive eyes also need good safety glasses.

To restore the bathtub coating, it is necessary to perform a number of operations:
- Empty the bathroom of all things that can be removed.
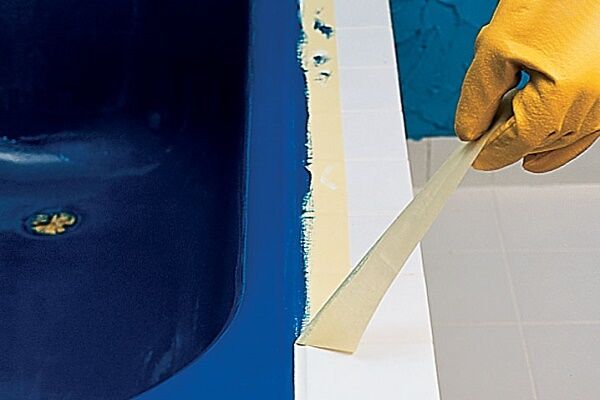
- Cover all fixed plumbing fixtures with protective film and carefully secure the covering with tape or masking tape.
- Clean the surface of the old enamel to remove dirt and give the base a uniform roughness.
- If necessary, restore deep damage to the surface.
- Dust the cleaned surface and degrease it.
- Apply a layer of enamel or acrylic.
- Wait for the restored surface to dry.
During the work, it is necessary to dismantle the drain and overflow piping. But the bathtub will have to be filled with water, so you will have to connect the bathtub to the sewer and then disconnect it again several times. You cannot use the bathroom during renovation to avoid accidentally getting dirt onto the surface. This rule is relevant at almost all stages of repair.
Due to the pungent odor, it is recommended to intensively ventilate the room while the repaired surface is drying. We are talking not only about the bathroom, but about the entire apartment or house. Therefore, it is better to resettle family members during the renovation: to the country, to friends, on vacation, etc.
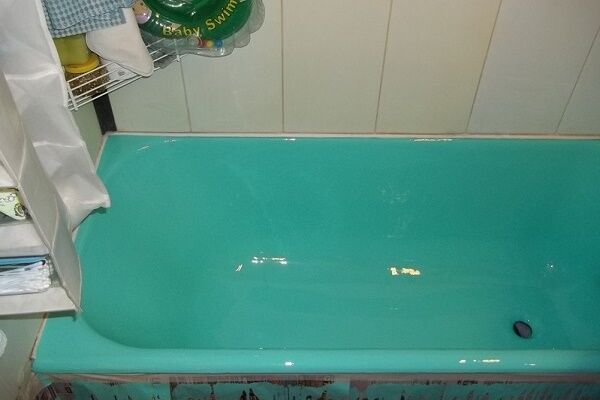
Difficult choice: enamel or acrylic?
These materials differ in composition, method of preparation, and application technology. Enamel based on epoxy resin has been known longer: it has been used for about two decades, therefore, there are fewer pitfalls when working with this composition. Liquid acrylic is new to the construction market, but it already has ardent fans.
The acrylic composition is more difficult to prepare for application, but the repair process itself is relatively simple. First, you need to accurately maintain the ratio of acrylic base and liquid hardener. The consistency of these components is very different, so the mixing process can be difficult.
With epoxy enamel the opposite is true. It is not so demanding on the exact observance of proportions; the presence of special substances that can improve the quality of the coating is allowed. But the surface treatment process requires a more careful approach.
It is worth considering that acrylic compounds are usually more expensive than epoxy enamels. Experienced craftsmen recommend that beginners in the business of restoring bathtubs opt for acrylic. It is better to work with epoxy composition for those who already have experience using enamels.
Subtleties of choosing enamel to restore the decorative and performance qualities of the bathtub are given in the article, the contents of which we recommend that you familiarize yourself with.
In any case, when preparing the repair composition, you should strictly follow the manufacturer’s instructions, since this is an important point that will certainly affect the final result of the repair work. If the repair technology is followed at each stage, then the new coating, both enamel and acrylic, will last about two decades.
The processes for applying acrylic and epoxy enamel have similar and different steps. Let's look at the example of pouring an acrylic composition to understand the essence of the action.
After completing the full range of preparatory work, we begin to apply acrylic enamel to the surface of the plumbing fixtures.
Preparing the base for repairs
Proper preparation of the bathtub surface for restoration is one of the most important aspects of this process. Even small, unnoticeable flaws at this stage can negatively affect the final result.
During preparation, it is necessary to solve the following tasks:
- remove dirt, rust stains, etc. from the bathtub;
- give the surface a uniform fine roughness;
- clean the base from any dust that has appeared;
- completely degrease the surface.
Thermal deformation is the main reason for compromising the integrity of the finished coating.These processes occur during drying of the coating due to the difference in the size of microroughnesses created on the surface of the base during pre-treatment.
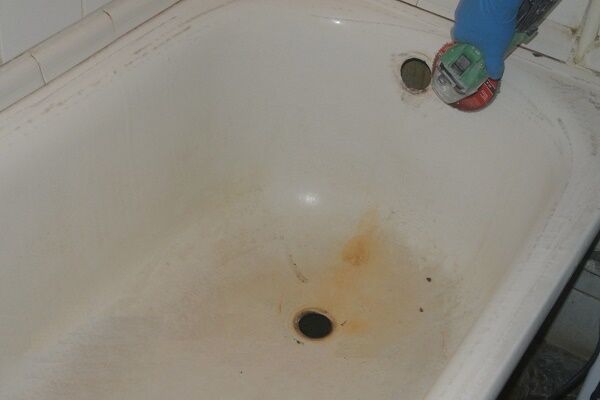
Removal of contaminants from the surface of the bathtub is carried out using active detergents. Pemolux, powdered oxalic acid or another similar product will do. The powder is poured onto the bottom of the bath and a small amount of water is added to it to obtain a paste-like composition.
With the ten best cleaning products for removing stains from the surface of the bathtub read the article, completely devoted to this issue.
Using a sponge or brush, spread this mixture over the surface of the bath and leave for about 10-15 minutes. It is best to use a new sponge, since the old one may still have some slight grease on it, which will complicate surface preparation.
After this, the cleaning composition must be washed off the walls of the bathtub and filled to the brim with hot water. The water is left for another 15-20 minutes and then flushed down the drain.When working with a cleaning agent, the bathroom should be ventilated, and the skin and respiratory tract should be protected with personal protective equipment.

This advice is especially relevant if oxalic acid or another equally dangerous agent is used as a cleaner. After this, you can begin cleaning the surface with abrasives. Traditionally, rust and stains are removed with coarse sandpaper and then treated with finer abrasives.
This way, cleaning the surface is faster and more efficient, but this is the wrong way when working with bath enamels. With this processing method, microroughnesses of different sizes are formed on the surface, although this difference cannot be determined visually or tactilely.

When applying a coating to an uneven surface created in this way, the repair compound will not fill all the depressions. During drying, these microvoids will create excess stress, which will subsequently cause deformation of the coating.
To properly sand the surface of a bathtub under enamel, it is recommended to arm yourself with No. 1 sandpaper and a lot of patience. The work will go much slower, but the bumps will be almost the same size. This will have a positive effect on the drying process of the coating and will significantly improve its quality.

All places where there are streaks of rust must be sanded especially carefully. Of course, unsightly stains under a layer of thick enamel or acrylic will be reliably hidden. But the presence of iron oxide residues on the surface will disrupt the microrelief created during processing with abrasives.
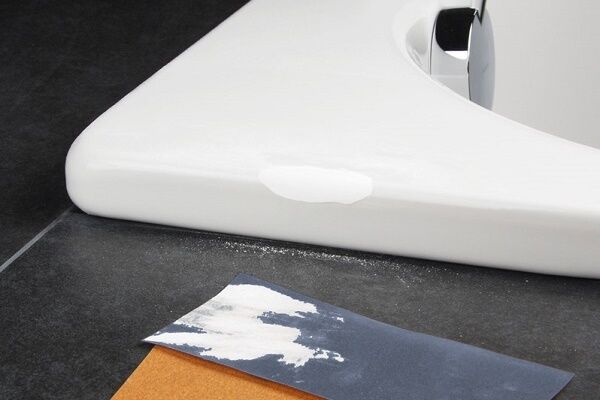
As a result, there will be places where the likelihood of cracking of the coating is very high. In the presence of severe contamination, complete removal of the old enamel in such places is allowed, up to the exposure of the metal base.
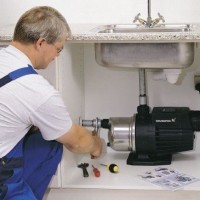
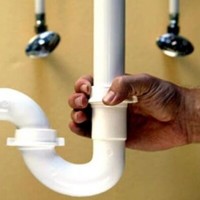
After cleaning the surface, you need to perform one more operation: dismantle the drain and overflow. The resulting surface must also be cleaned. A drill with Durex is suitable here. The treatment is carried out until the contaminants disappear and the surface acquires the required dullness.
It’s easy to check the quality of the treatment: run your fingernail across the surface, it shouldn’t slip. Particularly meticulous craftsmen inspect the surface using an LED flashlight and re-clean areas that give shine.

Now you need to remove the dust that has accumulated inside the bathtub, and also degrease the work surface. At this stage, you will have to restore the drain piping and dismantle it again.
The following recommendation must be followed: do not touch the work surface with your hands.Installation/dismantling of the drain is carried out using tools (tweezers, pliers, etc.), it is better to prepare them in advance.
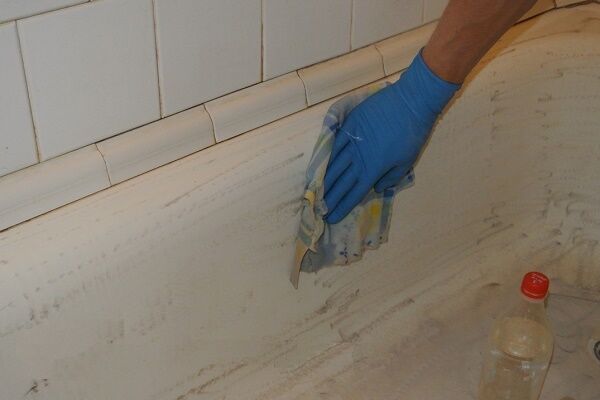
First, the bulk of the dust from the bath is removed with a vacuum cleaner. After this, wipe the surface with a clean rag soaked in solvent until no dirt remains on the rag. Upon completion of the entire cycle of coating work bathtub trim will have to be restored.
Now you need to close the drain hole and pour approximately 500-1000 ml of active acid-based detergent, for example Sanox, into the bath. Alkaline cleaners are not acceptable at this stage. The composition is thoroughly rubbed over the surface of the bath using another new sponge. The bathtub, rubbed with an acidic cleaner, is left for about an hour and a half.

After this, the bath is filled with water to the brim and kept in this form for another hour and a half. If everything is done correctly, the bath itself will heat up noticeably. If its surface feels barely warm, it means that the amount of acid cleaner is not enough; you need to pour about another liter of this product into the water.
You can drain the water only after the working surface has cooled down. After this, you need to rinse the bathroom with water two or three more times: draw water, wait an hour and a half, drain, etc. If the situation allows, washing it five times won’t hurt.
The quality of degreasing is checked as follows: wipe the surface with a rag soaked in solvent; it should remain clean. Then a hose with a shower head is connected to the tap and the walls of the bath are watered. If the water flows down in a layer and not in drops, then everything is in order.
Now the surface needs to be quickly and thoroughly dried with a hair dryer. Quickly, because dirt can get into the dry bath from above, and this is unacceptable. At this point, the preparation of the bathtub for coating can be considered complete.
Epoxy enamel application
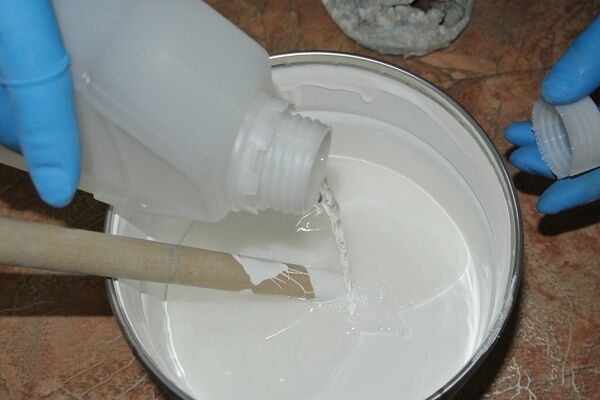
First you need to prepare the composition, i.e. mix the base and hardener. In a delicate matter painting bathtubs with enamel First of all, you should follow the instructions supplied with the product by the manufacturer. But there are a couple of general nuances that experienced craftsmen consider important.

For example, you should not immediately prepare the entire volume of epoxy enamel contained in the package, since over time the properties of the composition deteriorate, and its “lifetime” in finished form is short. An inexperienced master may not have time to use the entire volume in the allotted time.
The quality of the coating will be significantly higher if you prepare and apply epoxy enamel in separate portions of approximately 250 ml. Both the base and hardener must first be divided into separate portions so that they can be mixed as needed.
When preparing epoxy enamel, it is recommended to add dibutyl phthalate to the finished mixture. This is a plasticizer that will improve the plastic properties of epoxy enamel. In everyday life, dibutyl phthalate is used to repel mosquitoes, as well as when working with fiberglass compounds.
The amount of additive should not exceed 5% of the total volume of epoxy enamel. It is often recommended to warm the base before mixing the composition. Experts recommend using a water bath for this.
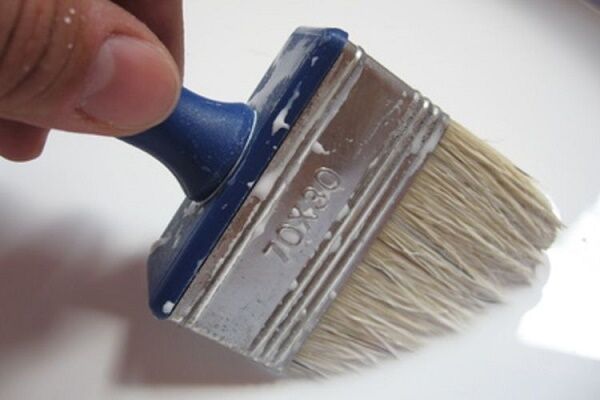
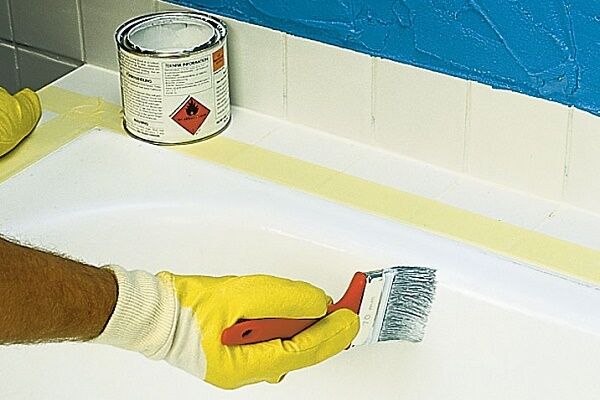
While painting, touching the surface or enamel with your hands is strictly not recommended. Therefore, you should prepare tweezers in advance. Hairs may come out of the brush used to do the work and remain on the surface of the enamel. They should be removed immediately and only with tweezers.
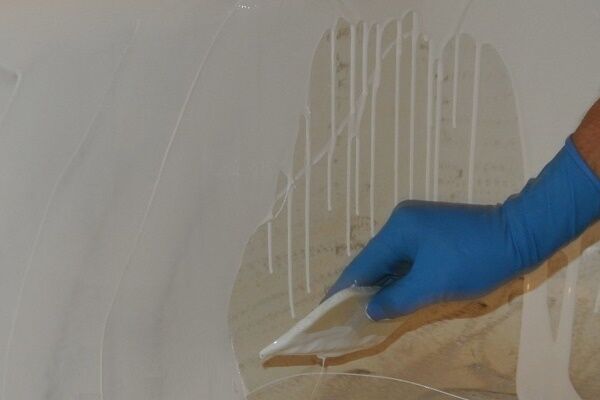
Technology bath staining looks like this: generously put more enamel on the brush and apply it in a continuous stroke from the bottom up. Then, with the same brush, the enamel is distributed to the sides of the first stroke. The next stroke is done in the same way: from the bottom to the top edge.
The distance between the vertical stripes should be such that when the enamel is distributed to the sides, the individual sections overlap by approximately half. After the first primer coat of enamel is applied, you need to wait for it to dry, usually about 15-20 minutes.
After this, you can apply a second layer. The technology for applying it is the same: from the bottom up and rub to the sides. Experienced craftsmen also recommend observing the order of processing individual areas, i.e. start applying the second layer in the same place as the first, and then move in the same direction.
This will ensure the desired drying speed and optimal internal structure of the coating. About a quarter of an hour after applying the epoxy enamel, it is necessary to check the surface for drips and sagging. They are removed by gently moving the brush upward.
Sagging in the drain-overflow area can be left until completely dry. It will be more convenient to cut them off with a knife later. It should be taken into account that the total thickness of the bathtub coating will become slightly larger. Therefore, it may be necessary to replace old gaskets with new ones or adjust the trim differently.
Complete drying of the surface usually lasts from three days to a week, after which the bath can be used as usual.Of course, the above information, for example, about the drying time of the coating, must be checked with the instructions prepared for the specific epoxy enamel.
Bathtub treatment with liquid acrylic
Unlike epoxy enamel, liquid acrylic is not divided into portions, but is mixed all at once. The lifespan of the finished substance is about an hour and a half, but this is quite enough to paint the entire surface of the bathtub with acrylic. It is very important to mix the ingredients correctly; there is no need to rush.

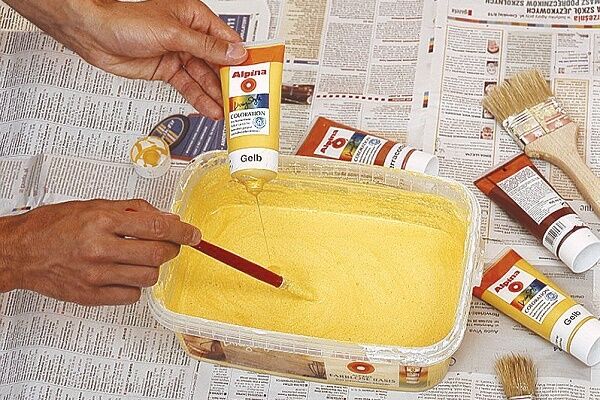
Plasticizer should not be added to liquid acrylic in any form. It is permissible to introduce a special dye in an amount of 3-5% of the total volume of the finished composition. The coloring component gives the composition a color tint. When dosed correctly, it does not impair the strength of the acrylic coating.

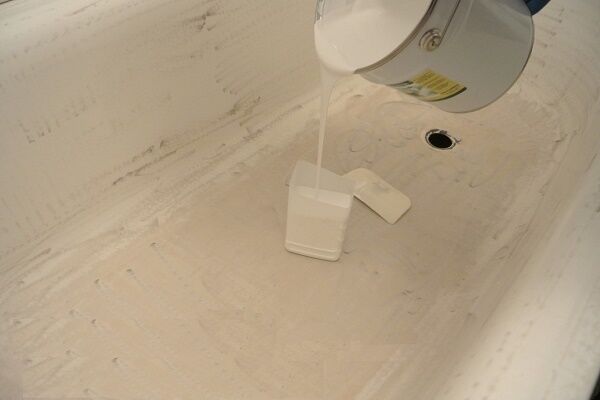
Some experts recommend using a brush or roller to apply the composition, but most often the composition is simply poured onto the prepared surface. With a brush or trowel, you can only push the composition a little if you need, for example, to completely fill the rounded top of the side, but without auxiliary tools this is not possible.
Before pouring liquid acrylic The drain and overflow fittings must be dismantled. Some of the composition may spill out through the drain hole; this is completely normal.To collect excess acrylic, place an unnecessary container under the drain, for example, a cut-off plastic bottle or a half-liter glass jar.

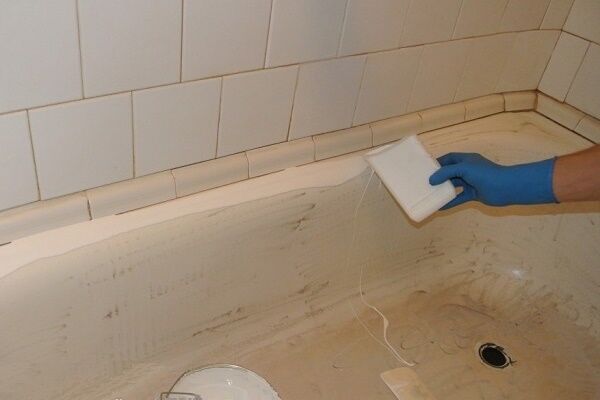
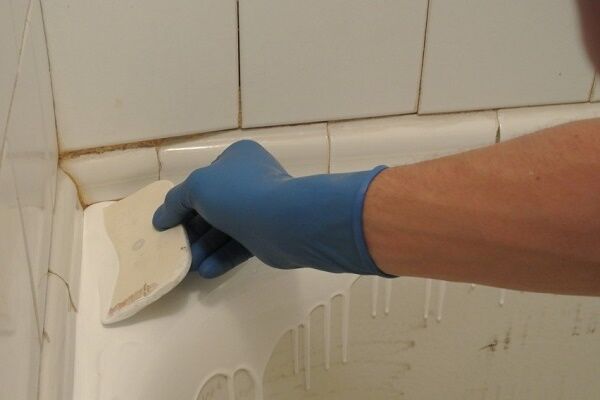
Start pouring acrylic from the top of the side. When the stream reaches approximately the middle of the height of the bath, the container with liquid acrylic begins to be smoothly moved to the side until the entire upper part of the rim has been processed. Filling should continue, but now the composition must be poured from the middle of the side to the bottom, thus making another circle around the perimeter of the bath.
After this, the bath is simply left to dry completely. The acrylic will be evenly distributed over its surface and harden, forming a durable surface. Now you need to remove the container with excess acrylic from under the drain hole and restore the drain-overflow piping. The sagging is carefully cut off with a knife.
He will introduce you to methods for eliminating typical problems of a cast iron bathtub. next article, which details all the characteristic damage and options for dealing with them.
Conclusions and useful video on the topic
Practical recommendations for restoring a bathtub coating using epoxy enamel are presented in the following video:
Useful information on using PlastAll liquid acrylic is contained in this video:
Restoring a bathtub coating using epoxy enamel or liquid acrylic cannot be called simple or easy. To get a truly reliable result, you should carefully prepare the surface, and then strictly follow the technology of work and the conditions for their implementation.
Tell us about how you restored the enamel of your own bathtub. It is possible that you know an effective method of repairing plumbing that is not listed in the article. Please write comments in the block below, share useful information and photos on the topic.


We have an old cast iron bathtub that looks stale. There is no rust, but there are stains on the surface that cannot be cleaned with any detergents. At first they just wanted to buy a new one, but then they decided to try to restore this one. I would like to do this with acrylic. But the only question that plagues me is how long will acrylic last on the bathtub? How long does applied acrylic last? And can a surface coated with acrylic be cleaned with powder or does it require some kind of careful care?
The acrylic coating does not last long, we already renewed it after 5 years. And yes, it is very delicate, not only cannot it be treated with aggressive cleaning agents, but in general it must be handled very carefully. For example, you can’t put anything heavy in the bathtub (like a bench for a disabled person) - first you need to lay a rubber mat. If you have the opportunity to replace the bathtub, then change it.
Hello. If you believe the reviews, it can last 10 years with careful use.
For cleaning, it is best to use soft rags and sponges, specialized products that do not contain abrasives, alkali, acids, or ammonia.