Do-it-yourself bidet installation: specifics of installation and connection to communications
A bidet is an extremely useful and convenient plumbing fixture.And if one of the members has special needs due to health problems, such a device is simply irreplaceable. But the cost of this type of plumbing is not within the reach of every family budget.
Fortunately, installing a bidet is a relatively simple procedure that even a novice plumber can handle. We will tell you in what sequence this work is performed, what standards and requirements the contractor must comply with. As an alternative, the article describes the installation of a bidet cover.
The content of the article:
What types of bidets are there?
A bidet is a sanitary ware designed for personal hygiene. Externally, the device is very similar to a regular toilet, but technically it is a low-hanging washbasin.
It is also connected to the sewer, but instead of a tank there is a faucet or fountain. There are floor-standing bidet models and a hanging version. The first ones are mounted on the floor, and the second ones are hung on the wall.
When choosing a bidet, you should take into account not only the method of its installation, but also other design features. For example, the mixer can be either a regular two-valve or a single lever with a ball mechanism. The latter is considered more convenient.
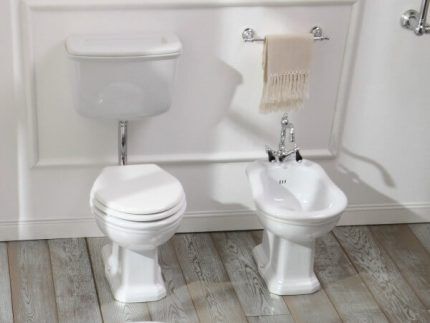
The spout is designed in such a way that the water stream can be directed upward at a suitable angle. In some models there is no spout at all; water flows from the bottom of the bowl like a small fountain, the direction of which can also be adjusted.The design of the product should be chosen in accordance with the style of the plumbing that is already in the bathroom.
There are retro models of modern bidets, and products made in the trendy high-tech style. It is equally important to take into account the size of the plumbing fixture, especially if we are talking about a small bathroom. There should be some space around the bidet so that it is convenient for the bathroom visitor to use it.
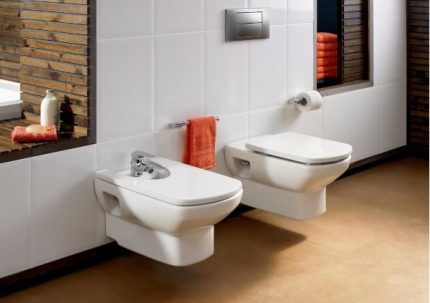
Wall-mounted models look very compact, but to install them you should use a special installation, which should be placed in a niche behind the bowl, or behind a special false panel. To accurately take into account all these points, you should carefully measure with a tape measure both the space intended for installing the bidet and the device itself.
An excellent alternative to free-standing bidets is an intelligent toilet, which practically combines the functions of both types of plumbing fixtures in one housing:
Installation of the floor model
So, the location has been chosen and the plumbing has been purchased. Before installation, you need to check the equipment of the device again and also make sure that the product is intact. Chips and cracks on the bowl are unacceptable, even if they are hidden after installation.
For installation you may need the following set of tools:
- drill and/or hammer drill;
- drills for working on concrete and ceramic bases;
- set of wrenches;
- adjustable wrench;
- material for sealing threaded connections;
- a silicone-based sealing compound intended for use in conditions of high humidity, etc.
When figuring out how to install a floor-standing bidet model, you need to choose the right installation location. In this case, you need to accurately measure the distance from the device to the connection point to the water supply and sewerage system.
The bowl is placed on the base and the places where the fasteners will be mounted are marked on it. Then holes are made in these places, the diameter of which corresponds to the size of the plastic dowels.
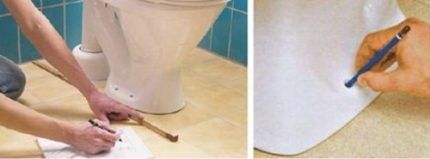
To drill ceramic tiles, it is recommended to use a special drill bit. The dowels are placed in the holes, the bowl is placed on top and secured with fastening bolts.In this case, rubber gaskets are used so as not to damage the ceramic surface of the product.
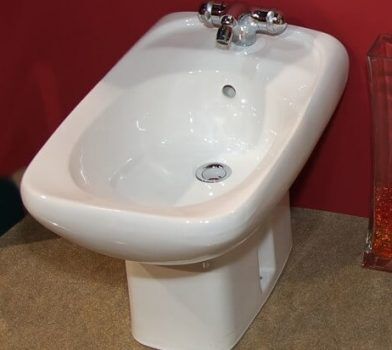
The force when tightening the bolts must be moderate, otherwise the ceramics may simply crack. But do not tighten the fasteners too loosely so that the position of the bowl is secure. For additional fixation of the product to the floor, use silicone sealant, which is used to coat the gap between the lower edge of the bidet and the floor.
Now you can go to install a mixer. Depending on the model, it is mounted either on the side of the bowl or on the wall. Typically, the manufacturer supplies detailed instructions with the mixer, as well as all the necessary fasteners. You should check the presence of these elements when purchasing a bidet.
To install a wall-mounted faucet, you may need to chisel the wall next to which the bidet is installed. It is better to perform these works before installing the bowl, so as not to damage it during the formation of the recess. Simultaneously with markings for fasteners, markings are also made on the wall for the mixer.
Then the bowl is removed and a hole is made in the wall. After this, the floor surface must be cleaned of any debris that has formed, and then holes must be drilled for fastening the bowl. With a mixer that is installed on the side of the bidet, everything is simpler; a special hole is usually already provided for it.
The mixer is installed in the desired location using a rubber gasket and secured with a clamping nut, which must be carefully tightened with an adjustable wrench.After this, cold and hot water are supplied to the device; it is important not to confuse the valves or inlets, depending on the mixer model.
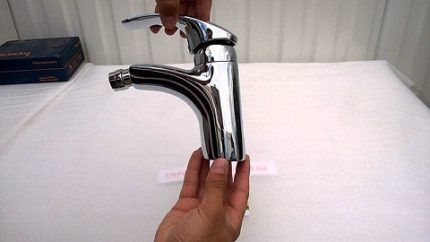
To connect a bidet to a water supply, a flexible hose in a metal braid is usually used. It is important that these hoses are not too long, creating unnecessary loops. But it’s even worse if the flexible line is too short and is in a stretched state. This is an unacceptable mistake when installing a bidet.
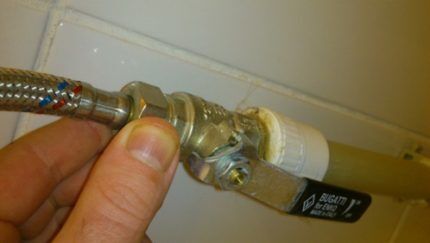
To connect hoses to cold and hot water pipes, you will need to cut in or install tees. It is recommended to install shut-off valves in front of these tees to be able to shut off the water flowing to the bidet. If you need to repair the product, you will not have to shut off the entire apartment water supply.
Connection to the plumbing system is usually made using threaded connections. Each such connection must be carefully sealed using linen thread, FUM tape or other suitable material.
This is where new plumbers make two mistakes: using too much or too little caulking. If the material protrudes slightly outward after screwing the thread, its quantity can be considered optimal.
All that remains is to connect the bidet to the sewer system. Be sure to install a siphon. You will also need a rubber adapter cuff and corrugation. First, a siphon should be installed at the exit of the bidet.
In this case, a special rubber gasket is used. Almost all bidet models are equipped with an overflow protection device. During installation, it is necessary to ensure the integrity and proper operation of this unit.
Then a corrugation is attached to the siphon. Its second end is mounted to the sewer pipe, and the rubber cuff serves to seal this connection. At this point, the installation of the floor bidet can be considered complete. You should turn on the water and check all connections for leaks.
Features of installing a hanging device
Installation of a compact suspended model begins with the installation of the installation, to which the device itself is then attached. In this case, the weight of the device is distributed both on the frame and on the wall to which it will be attached. Often the partition between the bathroom and the toilet is made of lightweight materials, for example, plasterboard and profiles.
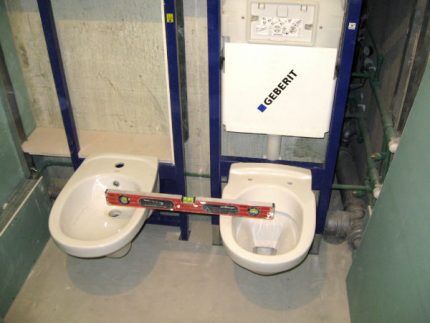
It is not recommended to attach the installation to such a wall, since it may simply collapse under the weight of the plumbing. Most often, a small niche is made in the wall for the frame. Such a recess should be slightly higher and deeper than the dimensions of the structure for which it is intended. If the bathroom already has a ready-made niche of suitable dimensions, you can use it.
It also happens that for some reason it is impossible to create a niche. In this case, the installation is simply mounted against the wall and then hidden behind a false panel, for example, made of plasterboard, to give the structure a complete and aesthetic appearance.
Before installing the installation, cold and hot water pipes, as well as a sewer pipe, should be brought to the installation site. The outputs of these elements must also remain accessible for further connection of the bidet.
The frame is supplied unassembled and must first be assembled according to the manufacturer's instructions. At this stage, it is usually possible to adjust the height of the bowl so that the device is comfortable to use.
After this, the installation is fixed to the floor and wall using fasteners. First, markings are made, then holes are drilled, after which the frame is fixed in the correct position.
After assembling the frame, the attachment points are marked and the optimal height of the support frame and load-bearing parts are selected:
During the process of assembling and installing the frame, you should regularly use a building level. Misalignment in the position of the installation elements will lead to incorrect positioning of the bidet and may soon lead to incorrect operation of the device and its breakdown.
If the installation needs to be dismantled for repairs, the cost of fixing the problem can be very high.
If the frame is installed correctly relative to the horizontal and vertical, you can trim and decorate the niche in which it is located. Of course, there should be elements left on the outside on which the bidet bowl will be suspended. These are special long pins that are inserted into the corresponding holes on the frame and fixed to the wall.
When hanging a bowl on metal studs, a rubber gasket is usually used to protect the ceramic from damage. An alternative to rubber can be a layer of sealant.
It must be applied to the surface of the fasteners, then wait until the composition dries. After this, you can hang and secure the bowl. However, using a rubber gasket is considered more reliable and convenient.
After installation for wall-mounted bidet installed, the wall is decorated, but the connections for sewerage and water supply must remain outside.
The bowl, suspended on studs, is fixed with clamping nuts, which should be carefully tightened so as not to damage the ceramic surface of the sanitary ware.
Further installation of the bidet is carried out in approximately the same way as when installing a floor-standing model. First, install the faucet, then connect hot and cold water using flexible hoses.
The requirements for sealing all threaded connections remain the same as when installing any other plumbing fixtures: sealing is mandatory. It is recommended to perform this even in cases where gaskets are used.
Connecting a mounted bidet to the sewer system is also done only through a siphon. A rubber adapter cuff is placed between the siphon and the sewer hole. Now you need to turn on the water and check the operation of all components, make sure there are no leaks. If everything is in order, you can perform the necessary finishing work.
Something about the bidet lid
If there is absolutely no space to install a bidet, but you really need to use this benefit of civilization, it makes sense to consider the option of purchasing a bidet lid or bidet attachments. This is an electronic device that looks very similar to a toilet lid, but is equipped with a number of additional functions.
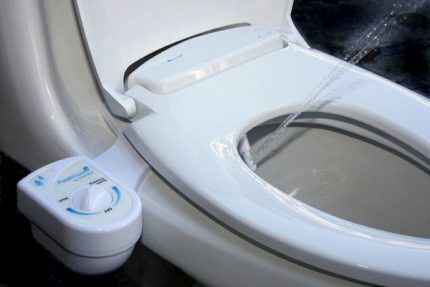
The bidet lid is installed directly on the toilet. This device must be supplied with water and power. Of course, there is no need to connect to a sewer. Electronic devices equipped with a microprocessor and control panel, with which you can set the appropriate temperature and water pressure.
Such products are also equipped with a function of blowing warm air, the temperature of which can be set at an acceptable level. Control is carried out remotely using a remote control. Some models have water filter and purification of incoming air.
Among other useful options, it makes sense to note:
- automated supply of liquid soap;
- antibacterial seat coating;
- various modes of jet supply (massage, pulsation, etc.);
- presence of air freshener;
- heated seat;
- presence of a timer;
- automatic nozzle cleaning system, etc.
High-quality bidet covers are very convenient to use; they are in no way inferior to traditional versions of this plumbing device, while making it possible to solve the problem of lack of space for an additional device.
Such an electronic device requires mandatory grounding. It is recommended to connect a separate cable from the panel to power the bidet lid, and also install a residual current device.
Instead of a full bidet lids you can use its simplified version - a bidet pad, the installation of which is much easier than the stationary version of this type of plumbing.
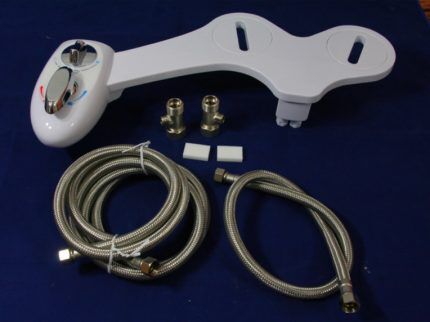
The procedure for installing and fastening the cover is as follows:
A very simple alternative to a bidet is a hygienic shower with a small watering can. It is connected to the hot and cold water pipes through a mixer, and a watering can with a hose of suitable length is hung next to the toilet.Of course, this is not as convenient as a traditional bidet or an electronic equivalent in the form of a lid, but this option will be relatively cheap.
Conclusions and useful video on the topic
Detailed instructions for installing a floor-standing bidet model can be found here:
This video clearly demonstrates how to install a wall-mounted bidet:
An overview of the operation and installation of the electronic bidet cover is shown in this video:
To paraphrase the classics, we can say that a bidet is not a luxury, but a necessary hygiene product. Installing the device is not that difficult, you just need to follow the instructions exactly and follow the basic rules for installing plumbing fixtures.
Please write comments in the block below. Tell us about how the bidet was installed in your country house or city apartment. Ask questions, share useful information, leave posts with your opinion and photos on the topic of the article.


I really like hanging bidets, they look prettier and take up minimal space. Hanging models are as easy to use as floor-standing ones, but installing such a structure requires experience and a lot of time, labor and consumables. But the effort expended is worth the result, because in this way the bathroom visually becomes larger and does not look overloaded with plumbing fixtures.
Installing a bidet is no more difficult than installing a toilet; minor difficulties may arise only with the faucet; I think most men could do it themselves. But you still need to connect it to the pipeline. Even if it’s just a hose, but for this you need to make an insert into the pipe, and it’s better to entrust this to a plumber.This is especially true for apartments where the riser is common to all 9 floors.
In our house, a bidet was installed in one apartment so that in the neighboring apartments there was only hot water in both risers. Is this a plumber's mistake?