Toilet lid repair: common breakdowns and how to fix them
Plumbing fixtures today are often equipped with technically advanced devices that simplify operation and increase comfort.These include a toilet lid with a built-in microlift. Is not it?
But due to natural wear and tear of parts and incorrect operation, the system tends to fail. Of course, you can entrust the repair of the toilet lid to plumbers, but in order to save time and money, you can do it yourself. Moreover, in practice it is quite simple to implement.
In this article we will understand the operating principle of a microlift, consider the main types of breakdowns and tell you what is needed to fix them. For clarity, the article contains photo and video materials that reflect the essence of the issue.
The content of the article:
Microlift - what kind of device?
The main purpose of the mirolift is to ensure a smooth lowering of the lid to prevent it from falling onto the glazed surface of the sanitaryware with a loud popping sound. Such devices appeared on the market a long time ago and have already gained popularity among connoisseurs of comfort.
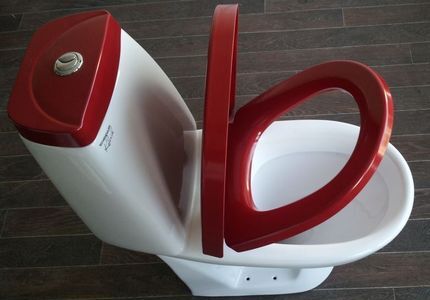
The operating principle of a microlift is functionally very similar to a door closer, but only made in miniature, which is why it is often called a “smooth lowering device.”
The installed device helps solve three problems at once:
- prevents the lid from falling;
- prevents the spread of unpleasant odors;
- eliminates the formation of cracks and chips on the decorative coating of plumbing fixtures.
This seemingly simple product contains a solution that significantly simplifies the use of plumbing fixtures and increases comfort. Due to the fact that the mechanism operates silently, it is not audible when using plumbing fixtures even at night, when everyone in the household is sleeping.
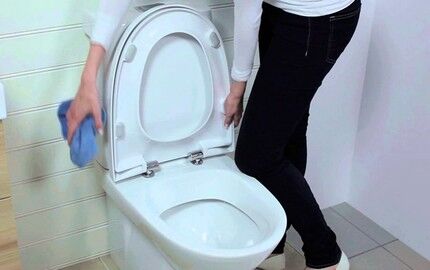
On sale there are both budget options and more expensive ones installed on intelligent electronic toilets. Mechanisms from the expensive category are equipped with a presence sensor, which automatically lifts the lid when a person approaches, and returns it to its original position after using the toilet.
Design features of the device
The microlift is sold together with the toilet lid, but it can also be purchased separately. Covers equipped with closers are made of plastic or its modern version - duroplast. Although this polymer looks like plastic in appearance, its quality characteristics are closer to ceramics.
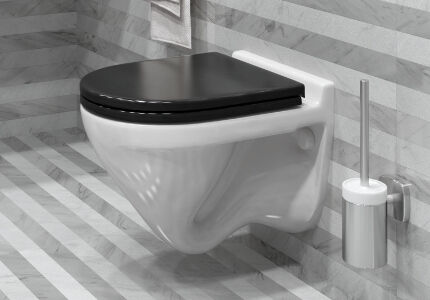
Fix the device to the toilet in a rigid manner. The main structural elements of the microlift:
- Stock, securely fixing the rigid plastic installation.
- Spring to balance the weight of the structure.
- Articulated micro-lift mechanism, providing a change in the position of the cover.
In more expensive functional systems, the basis of the mechanism is not springs and rods, but pistons and cylinders. Structures of this type are classified as non-removable.
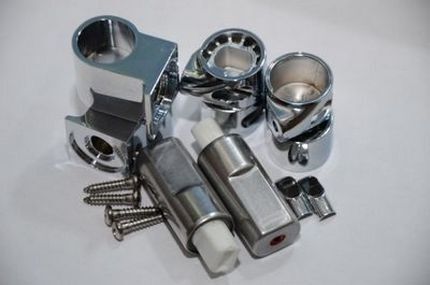
Functional systems, in which seats and covers are supplemented with a built-in microlift, are produced by many manufacturers of sanitary equipment. If desired, you can purchase and install a universal system, which includes, in addition to the microlift, other devices.
They are capable of providing several functions at once:
- adjusting the temperature of incoming water;
- possibility of seat heating;
- high-quality washing, enema and massage;
- extraction of unpleasant odors followed by deodorization.
Many models are often equipped with a convenient self-cleaning function, thereby minimizing the participation of household members in the process of using the plumbing fixture. The presence of a microlift is just one way to make your living conditions more comfortable.
Main causes of breakdowns
Closer systems produced by leading manufacturers are renowned for their high quality. But natural wear and tear of functional elements and incorrect operation of a “smart” device lead to disruptions in the operation of the system.
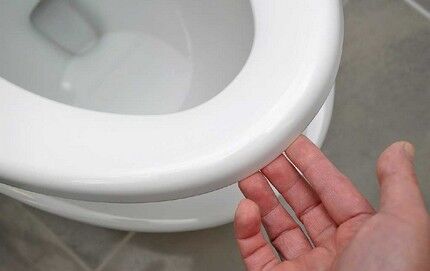
The causes of malfunctions in most cases are attempts to manually close the lid “out of habit.” The mechanism's built-in spring is designed for gradual compression.If physical force is used, the mechanical impact disables the device.
The easiest way to solve the problem is to completely replace the cover with a new one, since reinstalling damaged mechanisms is not always advisable. But still, in order to save on expenses, you can repair a broken toilet lid microlift on your own, by trying to disassemble the device and replace its failed elements.
Toilet closer repair
If the microlift breaks down, it is better to contact specialists with the proper experience. They will help determine the cause and type of malfunction, and will also professionally make a replacement and fully restore the functionality of the “smart” system.
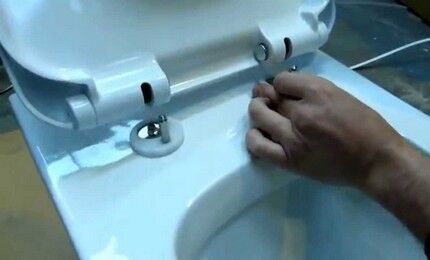
This is especially true if you have to deal with a design that is equipped with several additional functions at once.
Replacing failed bolts
The most common malfunction that can be fixed on your own is broken fastening bolts.
Work to eliminate the defect is carried out in the following sequence:
- Dismantling the device (you can take the installation instructions and repeat the steps, but in reverse order).
- Replacing broken bolts, on the reverse side, screwed with nuts that connect the back of the cover to the elevator mechanism.
- System assembly, carried out in the reverse order with strict adherence to the installation of each part in its original place.
The nuts are screwed onto the plastic bolts from the underside of the toilet. The work is carried out carefully so as not to damage the fasteners.
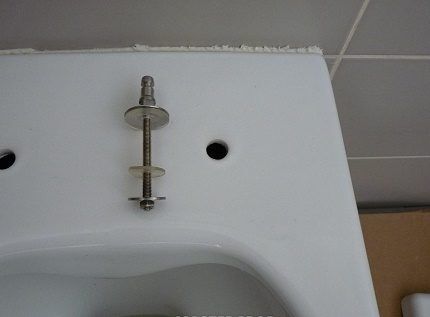
If it is necessary to dismantle the seat, it is convenient to unscrew the holders manually or using pliers.
Tightening up loose supports
To tighten one of the metal supports securing the seat cover to the toilet body, you need to remove the caps on each leg of the fastener. They are equipped with hexagon holes, although some models do not have holes in these caps.
After this, all that remains is to remove the seat and cover without making excessive efforts.To do this, when open, simply gently lift it up.
The metal fasteners move freely in the holes, so to adjust the position of the lid relative to the tank, you just need to move them slightly forward or back, and then carefully tighten the caps or fastening nuts. In this case, the microlifts themselves do not need to be disassembled.
Elimination of other breakdowns
There are situations when, for some reason, the toilet lid itself breaks. If you wish, you can try to glue it together. “Liquid nails” do an excellent job with this task. If cracks have formed on the plastic seat, they can be eliminated using dichloroethane or acetone.
To do this, drop a little liquid onto the accident site and join the edges, fixing the lid in a stationary position for several minutes. If the cause of the failure is the accumulation of lubricant, which is a viscous and transparent substance, then to eliminate the defect you need to carefully remove it.

Is the problem caused by a broken spring? In this case, it will not be possible to repair it so that the device works fully. Most microlifts are non-separable structures, and it is almost impossible to select a spring that is suitable in length and diameter.
Problems with the stock are also unlikely to be corrected on your own. It would be great if you can find a similar failed mechanism in which the rod is functioning properly. In other cases, the only correct way out of the situation is to replace the structure with a new one.
Option for lid reanimation with microlift
In most cases, it will not be possible to restore the functionality of a seat microlift with a lid, but the plumbing fixture itself can still serve. True, it will not close smoothly. The following photo selection will help you get acquainted with the repair operations:
We've stocked up on everything we need to carry out the repair, now let's take a hair dryer, a drilling machine and a screwdriver to get to work:
Now you can safely begin the final assembly and fastening of the convenient device to the toilet:
How to install a bidet cover or electronic lid with bidet functions and microlift, you will read in one of the popular articles on our website.
Replacing the seat cover
One of the significant reasons for fatal mechanism failure is the wrong choice of model and errors during its installation.
Therefore, when purchasing a new cover, you should be guided by the following rules:
- take into account the dimensions of the plumbing fixtures;
- pay attention to the shape and configuration of the toilet;
- give preference to products from trusted manufacturers.
The seats on sale with a lid are suitable for toilets of any design: floor-standing, side-mounted, wall-hung. Works on installing a new device are produced in a standard manner.
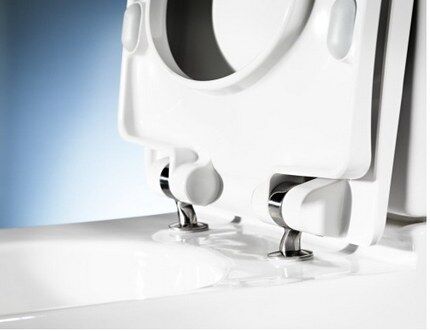
To replace a broken cover with a closer with a new one, you will need a set of tools:
- hacksaw;
- pliers;
- socket wrench.
The materials you will also need are silicone or oil to process dried elements. Ideally, it is better to use a special lubricant that, penetrating into the cracks, freezes the rust.
Traditionally, the lid with the toilet seat is secured with two bolts. But in some models a metal pin may be used instead.To dismantle you just need to lower/raise the cover and then unscrew the pins.
If the cover has been used for quite a long period, there is a high probability that the bolts have become clogged, and the fastening points have become coated and “fused” to the body.
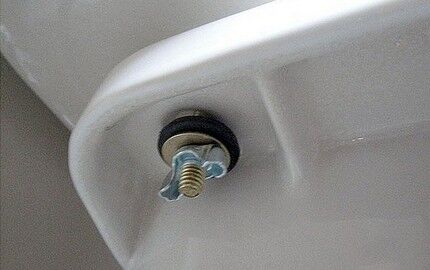
Using pliers, carefully, trying not to damage the decorative surface of the toilet, unscrew the clamp and bolts. To protect your plumbing from possible damage when working with pliers, it is better to cover the surface with rags or pieces of cardboard.
You should not neglect this recommendation, otherwise if you make the slightest mistake you will have to change not only the lid, but also the toilet. Will familiarize you with the rules for installing this plumbing fixture next article, the contents of which we advise you to familiarize yourself with.
As a last resort, if the processing did not give the desired result and the plastic bolts do not give in, they can be sawed with a hacksaw or cut off with a hot knife blade. There is no need to worry that melted plastic will stain your plumbing fixtures. After hardening, it will not be difficult to remove from the surface.
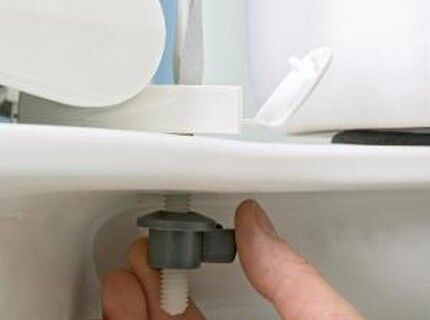
Installation of the new cover is carried out in the following sequence:
- Rubber inserts are inserted into the new seat cover. They provide a soft fit of the product to the seat.
- Fasteners are installed in the holes on the toilet. They are screwed using rubberized seals.
- Fix the cover to the seat using metal or plastic bolts.
- The structure is centered and the seat is checked for fixation strength.
Since the key reason for mechanism failure may be the incorrect position of the lid and seat, it is important to accurately adjust the lid when installing the structure
An important point: adjustment and alignment are carried out at the stage when the fixing nuts are just attached, but not yet firmly tightened.
If installing a cover with a microlift is somewhat alarming due to the complexity and often impossibility of repair, we recommend that you familiarize yourself with the nuances of choosing a conventional toilet seats. It is possible that the advantages of the traditional option will outweigh the disadvantages of the new product.
Conclusions and useful video on the topic
To consolidate your knowledge and better imagine the process of repairing and installing a toilet lid, we offer useful and interesting videos.
Video #1. Toilet mounting repair:
Video #2. How to install the system correctly:
In the future, in order to reduce the risk of premature failure, it is important to periodically check the position of the device and adjust it during operation. And remember: a seat with an elevator device is a “smart” mechanism that requires careful handling.
If you have any questions or want to share your own experience in repairing or altering a seat with a microlift, please write comments. You can leave a post with your opinion, ask a question and post a photo on the topic of the article in the block below.


I’m buying a third toilet lid, the bolt on the fastening mechanism doesn’t fit because it’s too short.The fact is that the store simply does not sell the same bolts; it is probably much easier to change a toilet than to find a suitable tire with the appropriate bolts for fixing.
Hello. Once, the bolts for attaching the toilet lid were stolen from me (well, apparently the problem was urgent) and I ordered the necessary fasteners from an online store. Try this option.
Svetlana, your problem can be solved in an elementary way.... I encountered the same problem myself..... in the store you need to buy thread extensions and bolts... first a plastic wing is screwed onto the purchased bolt, then a simple nut to fix the extension, then the extension itself and then connected through the toilet to the lid fastener ……the whole work takes 3-4 minutes and there is no effort, everything is done manually….
My fetish is expensive plumbing. We recently changed the toilets in a country house and apartment - they installed Spanish and French ones (I don’t know if it’s appropriate to write the names of the companies here). Both toilets have expensive lift seats. Delighted - plus this is necessary, since premium toilets are made of more capricious material. They must be handled very carefully so as not to be damaged by the lid. I’ll copy parts of the text for myself—or rather, for my husband. Tightening loose supports and replacing failed bolts! It will come in handy!
When the seat and the lid are lowered at the same time, the microlift works perfectly... but one lid lowers it... it stays in place.. what could be the reason?
The fact is that there are two microlifts: on the left and on the right. If the seat microlift is working, but the lids are not, then by lowering the lid and the seat at the same time, you force the lid to “ride” on the seat microlift.
Are you not Aquarius by zodiac sign? So many useless words, I'm tired of reading.
What glue can be used to reliably glue a seat from Duroplast?
The seat itself lowers slowly, the microlift works well, but the lid lowers very quickly, what is the reason?
There are two microlifts on the toilet: left and right. One for the lid, one for the seat. In your case, the lid microlift is faulty.
Svetlana, in your case there are two microlifts, one for the seat and the other for the lid. what's on the cover is probably faulty.
My lid lowering microlift failed, or rather a Vaseline-like substance leaked out of one of the two microlifts. Please help. find this “liquid” or at least tell me what this mass is called (brand). Then my “crazy hands” will do their job.
PMS-600, you can use brake lubricant
When purchasing the toilet, the seat and lid were already installed on the toilet. The quick release didn't work (or I was afraid to use force and break it). After 3 years, the fastenings came loose and the structure began to “ride” around the toilet. In the end, the cover and seat were detached from the fastenings so that the microlift itself remained on the rod. It is impossible to remove it from the rod. With grief, they unscrewed everything. We don’t know what to do now