How to replace a toilet: step-by-step instructions on how to replace a toilet with your own hands
Plumbing in the bathroom breaks down quite often. There may be many reasons for this, but the outcome is always the same - the equipment must be replaced.This is where the main question arises: how to replace a toilet with your own hands efficiently and without unnecessary movements?
Good preparation is the key to successful work. Get the necessary set of tools, related materials and detailed instructions for beginners. By following the recommendations outlined in the article and taking into account possible mistakes, you will be able to cope with replacing the toilet yourself.
The content of the article:
How do you know when it's time to change the toilet?
At first glance, the wording may seem strange. Anyone understands that the toilet needs to be replaced when it is out of order. But in fact, most problems associated with malfunctions of the sewer system and the toilet in particular can be eliminated without replacing the plumbing.
The most common problems that occur are:
- leaking from the tank;
- flows from under the bowl;
- cracks on ceramics;
- unpleasant smell from the sewer.
If water is constantly leaking from your tank, this is a serious reason to think about it. This wasteful use of water contradicts the modern trend of protecting the environment and saving natural resources. If the tank drips onto the floor and you are tired of replacing basins, but all pipe connections are normal, most likely the culprit is a chip or crack.
In this case, you can only temporarily solve the problem, but replacing the toilet should be done as soon as possible. But if water from the tank flows down the wall of the bowl into the sewer, good news, most likely there is no need to change the plumbing.
The cause of this malfunction is often a leaky valve. Luckily, the entire interior of the cistern is sold separately and can simply be replaced.
Plumbing faience and porcelain are fragile materials that are not resistant to sudden temperature changes. The enamel can become covered with a network of cracks, which not only spoil the aesthetic appearance, but also threaten to destroy the entire product.
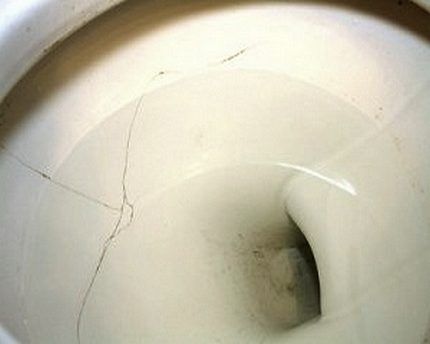
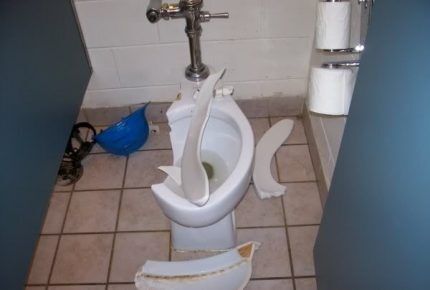
If cracks or chips appear on the toilet, try to replace it as soon as possible. You never know at what point ceramics will not hold up and will burst under the weight of a person, exposure to water, or simply from internal stress.
It’s good if someone is nearby at this moment and can quickly eliminate the consequences of the disaster, otherwise you can count on the upcoming repairs in the toilet of the neighbors below.
Unpleasant sewer smell in the toilet - another bad sign. This is often caused by improper placement of pipes when wastewater is retained in the sewer system. But if you are convinced that everything is in order with the pipeline and you can be sure that the earthenware is clean, look for the reason in the destruction of the glossy coating of the ceramics.
If the enamel has corroded and porous sanitaryware begins to come into contact with dirty drains, it will soon begin to absorb and absorb unpleasant odors. It is no longer possible to remove them; such destruction is an irreversible process. Here you cannot do without a complete replacement of plumbing.
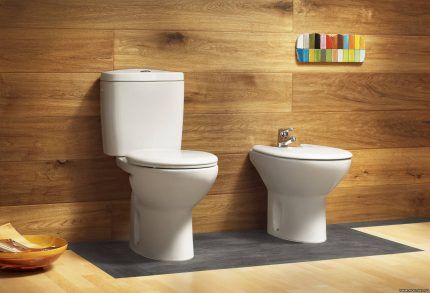
Another reason to change the toilet is renovation of the toilet. Few people want to leave the old plumbing when completely redesigning their bathroom. This is certainly a pleasant occasion.
New models of plumbing appear regularly, and it is difficult to keep up with fashion. Whether you choose a classic model or an unusual piece from a fashion catalog, the replacement will be carried out according to the same principle.
What should you prepare in advance?
Before you replace an old toilet with your own hands, you need to prepare for the work. You need to think through everything especially carefully if the replacement is carried out in a toilet that continues to be used. In this situation, you need to replace the plumbing quickly, and without proper organization this is impossible.
Choose the appropriate model, prepare all the necessary tools and supplies, and then you can get to work.
Choosing the type of new toilet
The most important thing is to buy a new toilet. Then, depending on your choice, a set of tools and materials for replacement will be selected.
The following types are distinguished:
- floor;
- hanging.
Floor models. Such bowls are more common and their choice is very wide. Replacing an old floor-standing toilet with a new one is the most common story. There are floor monoblock type models, “compact”, separate bowl and tank, as well as with a hidden drain system.
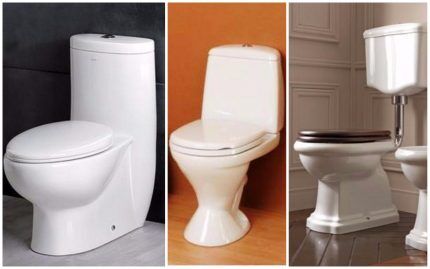
A monoblock is a product that combines both a bowl and a tank. A compact toilet is when the tank and bowl are supplied as a set and are connected during installation. This is the most popular option in our plumbing products market.
The retro model, when the tank is located under the ceiling and connected to the toilet by a pipeline, and to flush it you need to “pull the string,” is becoming less and less common. It looks good in an interior of the appropriate style.
Modern version - hidden drain system. To replace a regular toilet with this one, you will need to build a false wall, behind which the cistern with the installation system will be hidden. Externally, such models look very neat; only the drain button is located on the wall, and all communications are hidden.
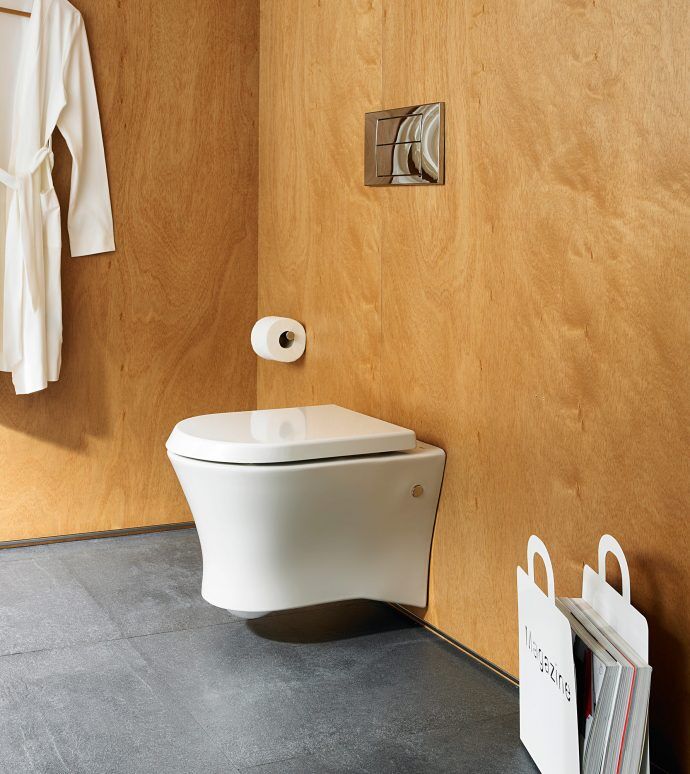
Hanging bowls. Such toilets are not installed on the floor; they are hung on special anchor bolts on the wall. This leaves free space under the bowl that can be put to good use.
And from a hygienic point of view, this design wins. Cleaning the floor under a wall-mounted toilet is easy, but dirt often collects around the floor-mounted toilet.
Another detail that is important to consider when replacing a toilet with your own hands is the direction of release.
There are 3 varieties:
- release at an angle;
- straight;
- vertical.
A popular option is direct horizontal release.The toilet is connected to the sewer pipe at the same level. Oblique release was used in Soviet multi-story construction, but is still found today.
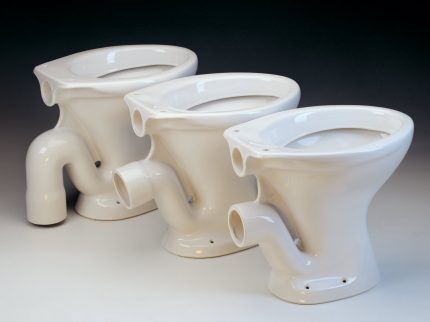
But devices with vertical drainage are installed more often in America and China. The convenience lies in the fact that the toilet can be placed at any point; communications are provided inside the interfloor ceiling. With us this is possible in private homes.
Practical tips for choosing a toilet are outlined in this article.
A set of necessary tools for work
The set of plumbing tools for replacing an old toilet is standard. Depending on the condition of the old equipment that will have to be dismantled and the sewer pipes, as well as the chosen method of attaching the new plumbing fixture, the set of tools needed may vary slightly.
Prepare the following necessary items:
- perforator;
- adjustable wrench;
- screwdriver;
- a hacksaw or grinder;
- sealant gun;
- hammer and chisel;
- rubber spatula;
- building level;
- personal protective equipment - goggles, gloves.
A hammer drill will be needed to knock out holes in the concrete for the dowels on which the new toilet will be attached. Work on connecting the water supply is carried out using an adjustable wrench. To tighten the screws, you will need a flat-head or Phillips screwdriver, and to seal the joints, you will need a gun for a can of sealant.
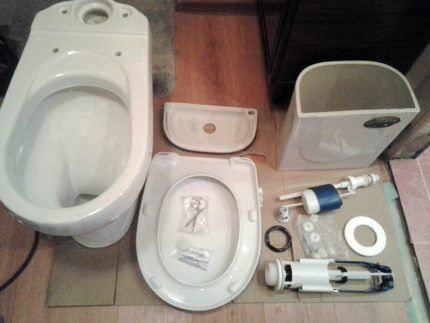
A hammer and chisel may come in handy if the equipment was connected to an old Soviet cast iron sewer riser. To ensure that the bowl is level, use a building level.
Read the article: The best hammers of 2023.
List of required materials
In addition to a set of tools for replacing a toilet with your own hands, you need to purchase additional materials that will be needed during installation:
- sealant;
- corrugation for connection to the riser;
- pipe for connecting to the water supply;
- FUM tape;
- tap;
- mounting kit
In any plumbing issue, the moment of sealing is the most important. Any gap or loose connection threatens leakage.
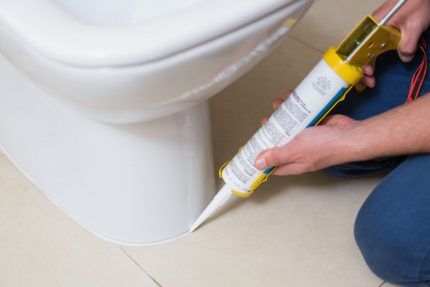
To connect a plumbing fixture to the sewer, you need to buy a special plastic corrugated pipe. This is convenient because the pipe is flexible and fits in most cases. It can be bent to any position, stretched and compressed.
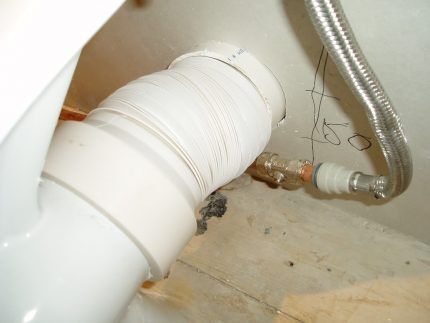
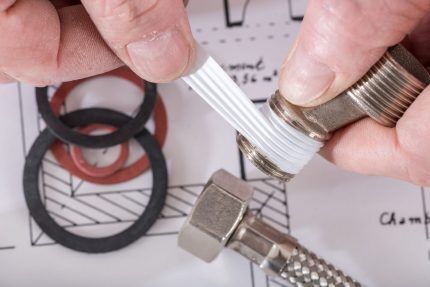
To seal the joints, use sealing tape or tow - the old fashioned way. The mounting kit for replacing a toilet includes dowels, screws, bolts, washers, nuts, plugs for connecting all components and installation. Don't be alarmed if something is missing, you can buy it all separately.
Removing an old toilet
To replace an old toilet with a new one, you must first equipment dismantling. If the plumbing is not too old, most likely there will be no problems with dismantling.
It’s another matter if the plumbing is actually very old, and the sewer pipes are cast iron, Soviet-style. This is where you have to work hard. But first things first.
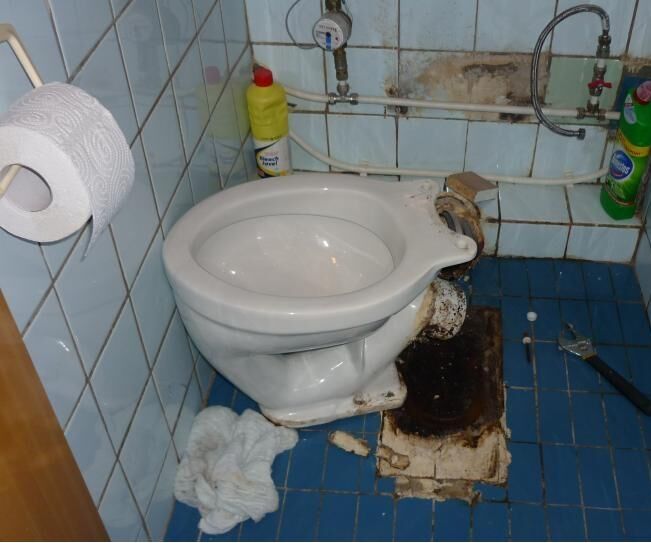
If everything is not so bad, and the toilet is not that old, replacing it will be easier:
- Shut off the water supply. Drain the water from the tank.
- Prepare a bucket and rags.
- Disconnect the tank by unscrewing the bolts from below.
- Remove the corrugation or plastic eccentric that connects the bowl outlet to the sewer.
- Remove any remaining water from the bowl using a regular sponge.
- Look at the fasteners on the sides of the base. There should be 2 or 4 of them. Unscrew them with a wrench.
- Use a knife to remove the silicone sealant from under the base.
- Remove the bowl from the tile.
In the last century, they tried to make repairs “for centuries”, thoroughly. And plumbing installation was no exception.
You can often find toilets in apartments mounted on mortar, embedded in a screed, wrapped with rags at the base and covered with several layers of paint. In this case, the connection with the pipe is covered with a thick layer of cement. Now it seems funny, until you personally encounter the replacement of such a rarity.
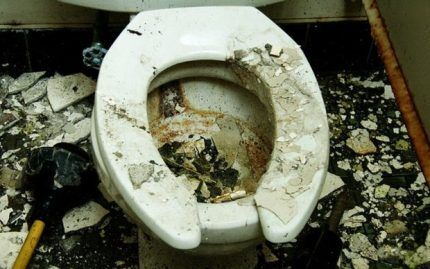
If you don’t mind the ceramics, you can dismantle it in parts. This is where a hammer and chisel come in handy.Tap the area where the bowl meets the pipe while rocking the mount.
If it doesn’t give in, hit the neck of the toilet more boldly, it will crack. Now it can be removed. Just don’t hit the cast iron pipe with a hammer, it is also very fragile and can crack.
Installing a new plumbing fixture: what do you need to consider?
When the old toilet has been successfully removed, it's time to replace the plumbing with new ones. The installation process differs depending on the type of model selected. Installation of a bowl with floor mounting and a wall-mounted model with a hidden tank is carried out using different methods.
Step-by-step installation instructions will help you complete this DIY task.
Compact toilet - step-by-step installation master class
In order to replace an old toilet with a floor-standing “compact” type, if the installation will be carried out on a tiled floor, follow our recommendations:
- Decide on the location of the new toilet. Place the bowl in the toilet without fastening, try to sit on it, try on several options.
- Once you have decided on the exact location, outline the base with a washable marker. Mark the mounting locations with a marker.
- Put plumbing fixtures aside. All the necessary marks remained on the floor. Take a drill with a 12-gauge drill bit and drill holes in the tiles. It is better to beat concrete with a hammer drill with a No. 12 drill. Insert dowels into the holes.
- Take a corrugation or cuff with which you will connect the outlet to the sewer. Install it in place, covering the joint with sealant.
- Place the new corrugated toilet in the correct position. Insert the bolts into the mounting lugs and screw them in using an adjustable wrench. Do not overdo it so as not to squeeze or crack the ceramic.
- Connect the toilet to the sewer. Treat all joints with silicone.
- Place the tank on the bowl. Connect the elements with bolts.
- You can connect the device to a water supply.
Check all joints and threaded connections for leaks. If everything is fine, you can start using the plumbing.
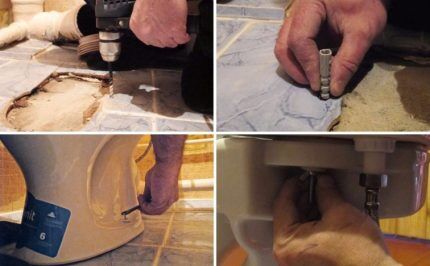
It is easier to replace such a floor-standing toilet than to describe the process in words. Modern models are designed so that the floor covering will not be damaged.
The following photo selection will present the step-by-step process of installing a compact toilet:
After successful completion of the preparatory work, we proceed to fastening and connecting important plumbing fixtures:
Features of installing toilets with different types of outlet are described in these articles:
- How to install a toilet with an oblique outlet: detailed technical instructions
- Toilet with vertical outlet: how it works and works, pros and cons, step-by-step installation instructions
Installation: hanging bowl and hidden tank
Replacing a regular toilet with a wall-hung one with a hidden cistern is much more difficult than the previous option. Here we not only replace equipment, but also repair the floor covering, and build a false wall with subsequent finishing with tiles or other materials.
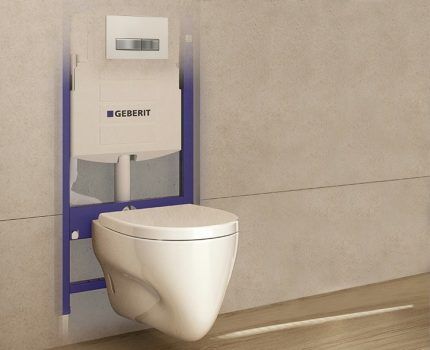
A detailed description of how to change a regular toilet to a wall-mounted one:
- Mark the installation location. A 110 mm sewer pipe and a water supply are connected to the selected area.
- Try on the purchased installation (rigid frame for installation). Decide on the height. Standard placement is 450 mm from the floor to the seat and 100 mm from the floor to the bottom edge of the bowl.
- Use a marker to mark the mounting points to the floor and wall so that they align exactly with the mounting holes.
- Use a hammer drill to drill holes and install the frame. Make sure the installation is correct using a level.
- Connect the water to the cistern.
- The installation kit includes a plan for cutting a sheet of drywall to cover the installation area. Attach drywall to the metal profile and directly to the installation. It is better to use moisture-resistant materials.
- Customize the finish to your liking.
- It's time to replace the toilet bowl itself. Connect it to a sewer corrugation to connect to the pipe. Don't forget the sealant.
- Screw the bowl directly to the installation frame through the tiles and drywall using pins.
- Connect the device to the sewer and cistern.
Despite the fact that replacing a toilet with a wall-mounted one will take more time, it is worth it, because such plumbing looks expensive and stylish.
Installing an electronic toilet, complemented by automatic hygiene functions, is similar to the process of attaching and connecting a simple plumbing fixture, but still has its own nuances:
How to avoid common mistakes?
Replacing a toilet in a toilet with your own hands and not making mistakes is difficult, especially when you have little or no experience working with plumbing. We have collected a number of the most common plumbing mistakes that novice craftsmen make when replacing toilets.
This list will help you avoid unpleasant surprises during the installation process.
Rule #1. To prevent water from stagnating in the sewer, it is imperative to maintain a slope. The building codes say a slope of 3-5% towards the riser. If you decide not only to replace the toilet, but also to move it to a new place, do not forget about this rule.
When you move the bowl 1 m further from the riser, it needs to be raised by 3-5 cm. And so on for every meter. Then there will be no problems with drains.
Rule #2. Some people rush to change the toilet at the very beginning of the toilet renovation. This should be avoided if possible. The reason is that faience plumbing is very fragile and during further construction work in the toilet there is too great a risk of damaging it. Change ceramics last.
Rule #3. If your bathroom has a bidet, the wall hung toilet should be flush with its top edge. Then the plumbing looks harmonious and is more convenient to use.
Rule #4. Replacement of sewer pipes must be accompanied by the installation of inspections. Access to inspection hatches the walls should always be free, fortunately there are aesthetic doors for sale for these purposes.
These rules cannot be neglected, otherwise during routine repairs or an emergency you may find yourself in an extremely uncomfortable position.
Conclusions and useful video on the topic
The video clearly shows what the toilet looks like after dismantling the old toilet using a hammer. The author of the video installs a new bowl in place of the old one and connects it to a cast iron pipe.
Visual aid for installing a toilet on the installation:
Instructions for those who plan to replace their plumbing fixtures with new floor-mounted ones. An example of installation on a tiled floor is shown:
Changing a toilet without the help of a professional is a rather risky undertaking. There is a possibility of ruining the tiles on the floor or, in the worst case, breaking the ceramics. But if you are one of those who are not afraid of difficulties and are confident in their abilities, get to work. The main thing is to take your time and strictly follow the instructions.
Do you have practical knowledge of replacing a toilet? Share your accumulated knowledge or ask questions about the selection, dismantling and installation of plumbing fixtures. The comment form is located below.


Changing the toilet yourself if you don’t even have an idea about it is very difficult, but possible. You just need to provide for all the nuances and stock up on tools. And if you are not afraid of ruining the tiles, then go for it. In general, there is nothing complicated here: we dismantle the old toilet, remember at what angle the corrugation was. Then, slowly, thinking through each step, we install a new bowl and fasten it (no need to embed it in the floor). Well, then the drain tank, check the correct connection and connect the water.
To ensure that the replacement of the toilet takes place with minimal discomfort (a specific piece of plumbing, after all), be sure to think about how you will cover the sewer pipe while dismantling the old one and installing the new toilet. Many people don’t even realize what a huge service the water in the “leg” of the toilet, scientifically called a water seal, provides them. And only when they find themselves without it do they begin to understand its full value)
In general, the rule “hurry and make people laugh” also applies here, so I would advise you to still find time for the normal installation procedure. And there is no need to try to do everything hastily. For example, if the toilet is placed on cement mortar, then it cannot be used for at least a day. And you can’t even install a tank on it, so that the bowl doesn’t deviate from its original, leveled position and freezes like that.