How to make a heater with your own hands: instructions for making a homemade device
During the cold season, the need for heat especially increases.But not every owner has the opportunity to purchase a factory-made heater. There is nothing difficult about assembling a heater with your own hands.
We bring to your attention four options for creating a heating device from improvised means that will perfectly cope with the task assigned to it. We have described in detail the process of making homemade products. Described the principle of operation and features of operation.
We have included diagrams, photo compilations and video instructions for step-by-step guides.
The content of the article:
Devices for local heating
The simplest models of homemade heaters are designed for local heating. Their maximum heating temperature is about 40°C.
For the most part, home-made heating devices are radiating devices that operate on the principle IR heaters and electric radiators. They are connected to a single-phase network with 220 V, traditional for household objects. Those who want to make their own devices need knowledge in the field of electrical engineering and electrical installation.
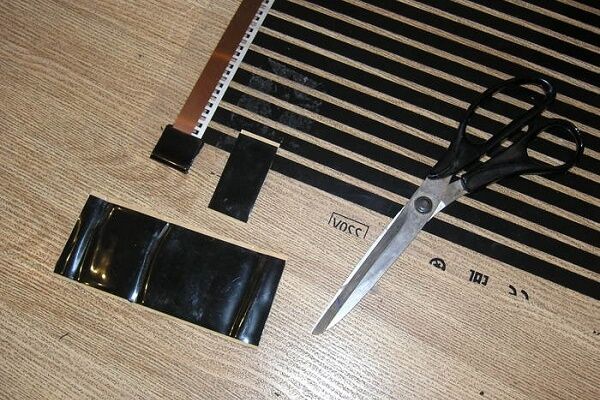
Option 1. Homemade compact thermal film
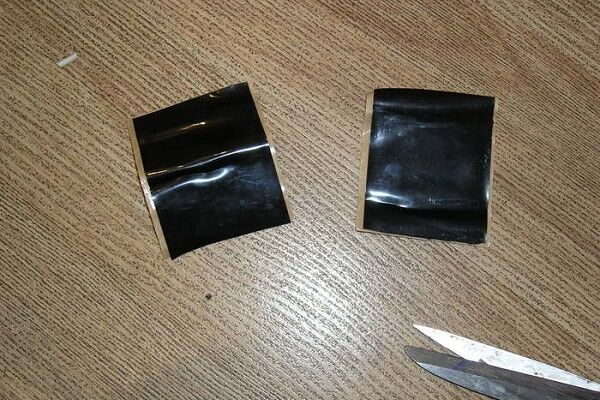
The heater will be based on two pieces of glass. These are identical rectangles measuring 4x6 cm.
The length and width of the heater's working area may vary. The main thing is that the area of each glass is about 25 square centimeters.
To create such a homemade heater you will also need:
- copper two-core cable;
- multimeter;
- paraffin candle;
- wooden block;
- pliers;
- sealant; epoxy adhesive;
- cotton napkin;
- hygiene sticks.
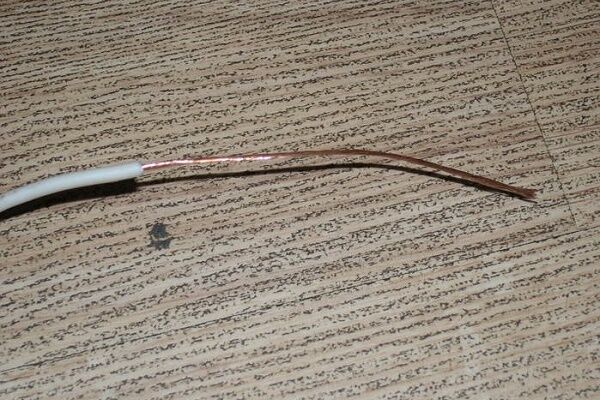
Before starting work, the cable must be equipped with a plug.

First of all, clean the glass blanks, removing dust and remaining dirt with a napkin, degrease and dry thoroughly. The cleaned workpieces are cooled. This is necessary so that during subsequent firing the carbon deposits better on the surface.
Light a candle placed in a candlestick. And then, one by one, grab each glass piece by the corner with pliers and carefully move it over the candle so that the glass becomes covered with soot.It is necessary to achieve uniform deposition of carbon deposits on the entire surface of the glass; the burned part will act as a conductive element.
Manipulations with the candle will have to be interrupted periodically in order to allow the heated glass to cool slightly.

After the workpieces have cooled, the edges of each of them are cleaned. To do this, using hygiene sticks along the perimeter contour, remove 5 millimeters from the edge.
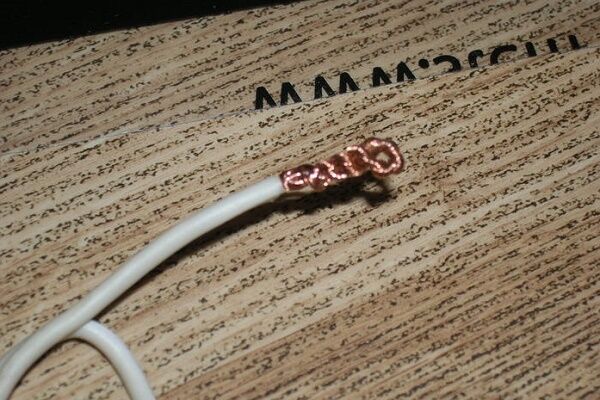
Glue is evenly applied to the burned part, which will act as a conductive element, and a pre-prepared piece of foil is placed on top of it. The strips will serve as the terminals needed to connect the wires.
The same actions are performed with the other half. Both parts are connected. To ensure the tightness of the device, the joints are treated with sealant, covering the end around the entire perimeter.

In order to calculate the power of the device, it is necessary to measure the resistance of the carbon coating using a tester. The multimeter probes are applied to the hanging “tails” of aluminum foil. The obtained data is used in calculations using the formula:
N=I2 x R,
Where "N" – power, "I" is the current strength, and "R" - resistance.
The power should not exceed the permissible values of 1.2 W. If the resistance exceeds 120 ohms, in order to reduce it, it is necessary to make the carbon layer a little thicker.The following rule applies here: the more soot, the lower the electrical resistance.
If the parameters are within normal limits, proceed to the final stage of assembly. To do this, the cleaned edges of the workpieces are smeared with glue, and the free ends of the foil sections are folded and glued to one of the sides.

A structure assembled from glass and foil is installed on a wooden platform and the device is connected to a 12-volt source.
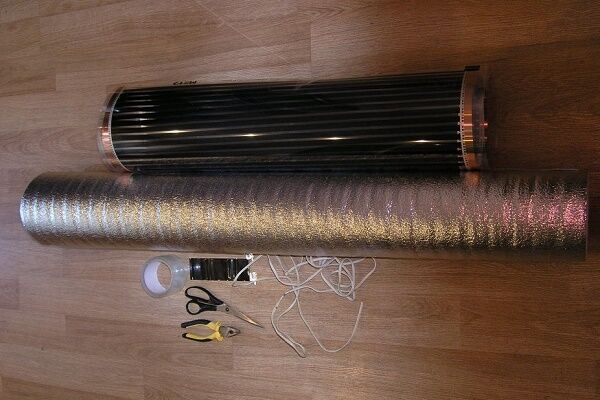
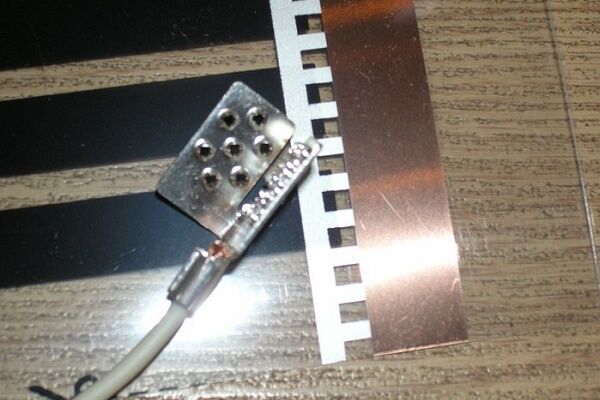
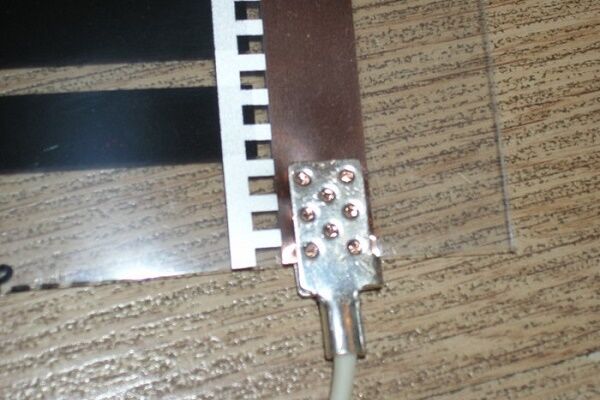
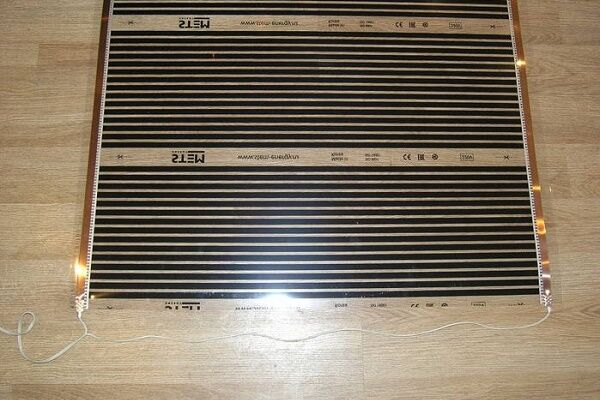
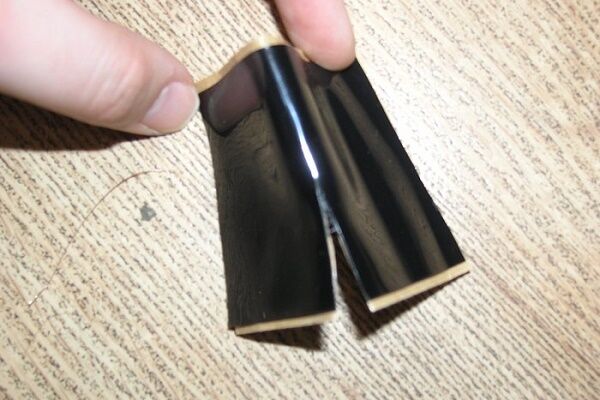
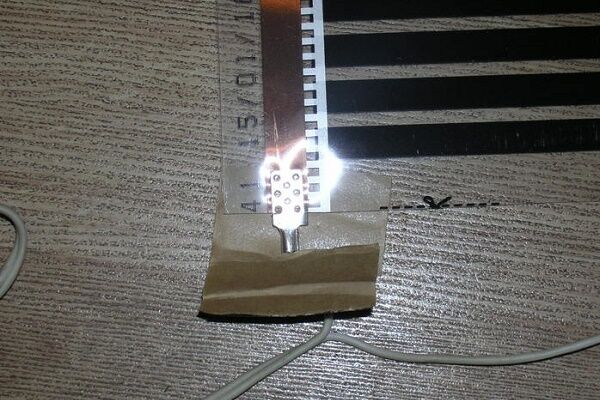
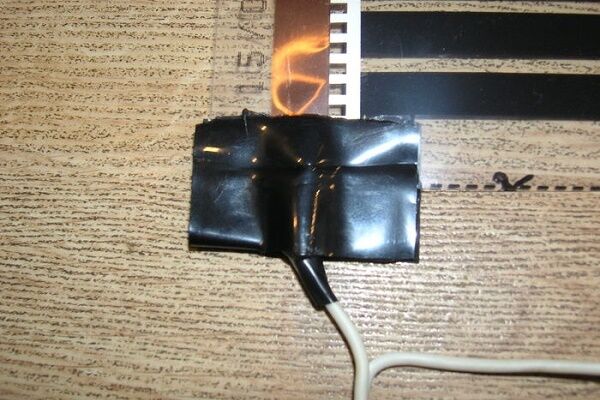
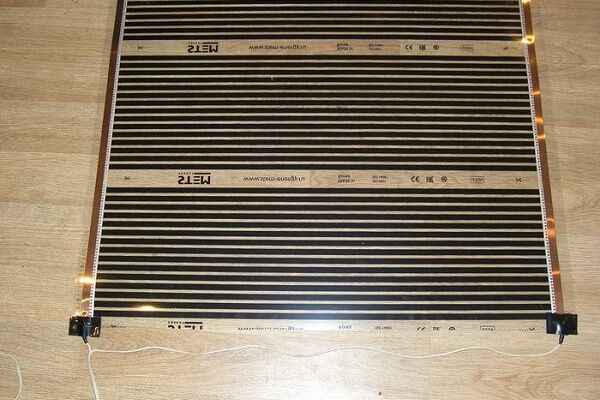
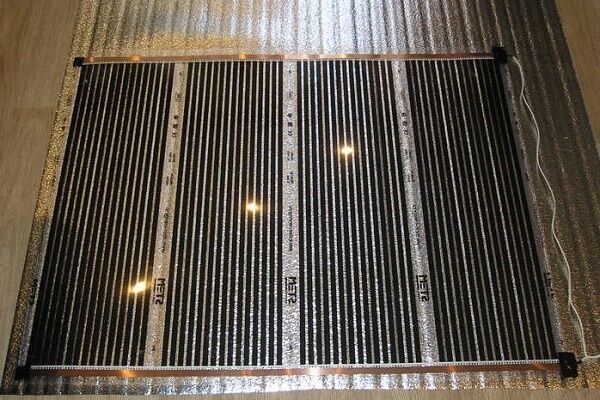
Option #2. Heating panel from the remains of the infrared floor
If, after installing an infrared heating floor, there are scraps of film left over, you should safely use them to make a wall heater, for example, for a summer house or garage.

Infrared film consumes less energy than other heating electrical devices. For a small room of approximately 2×2 m, 1 m is enough film carbon system.
Now you need to carefully insulate everything so that the film does not spark at the contacts and does not create any threats during its own operation.
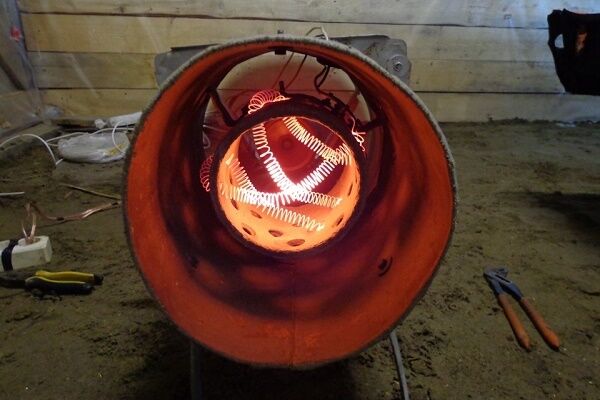
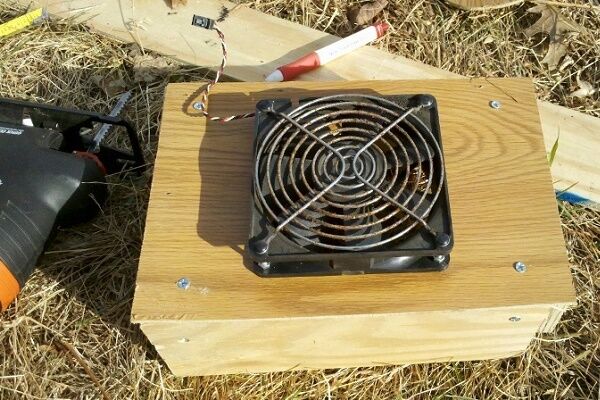
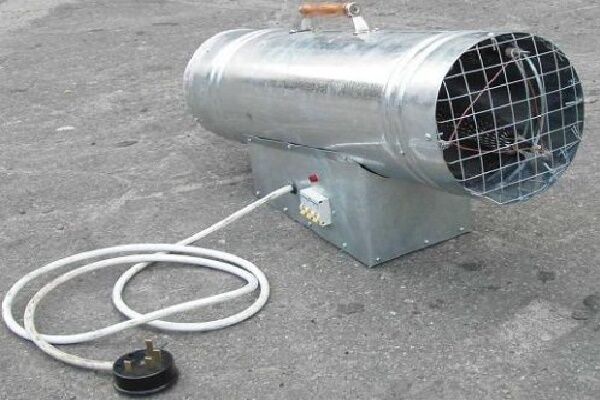
Option #3. Fan heater made from improvised means
We offer another affordable way to make a homemade device for local heating, which is based on the operating principle fan heater. It will take no more than two hours to make. The main advantage of such a device is the ease of manufacture and availability of the necessary materials.
The disadvantages of the design include the fact that during the heating process it will burn oxygen, and in some cases even smell like burning.

In addition to the tin can, to assemble the heating structure you need to prepare:
- 12 Volt transformer;
- diode bridge;
- nichrome wire with a cross section of 1 mm2;
- fan;
- hammer drill with a thin drill;
- soldering iron;
- computer fan.
It is necessary to pre-cut two blanks from the PCB, the size of which corresponds to the dimensions of the selected can. To connect the device to the network and switch modes, you will also need an electrical cord and a push-button switch.
First of all, remove the foil from a piece of PCB and cut out the inside so that it looks like a frame.

The ends of the nichrome wire are buried in the holes made. The “tails” of electrical wires, stripped of insulation, are soldered to the free ends of the wire placed under the frame.
The current density in nichrome electrical spirals in contact with air is about 12-18 A/mm2. Depending on the degree of heating, their color saturation will change from dark burgundy to bright red. The temperature of the outer surface of the emitter does not exceed 70 degrees.

A diode rectifier and a small-sized 12 V transformer are needed to power the cooler.
To be able to regulate the temperature, it is worth considering the option of installing at least two separated spirals. In addition, by connecting the spirals in parallel, if one burns out, the others will not be affected.
The main thing when assembling the structure is that the wound spirals do not touch any parts other than the textolite frame.
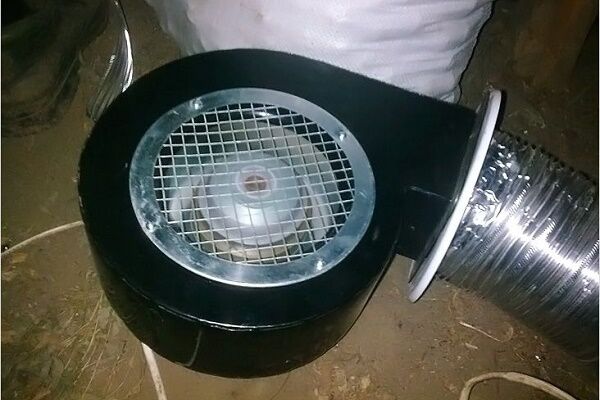
The fan is mounted in the can using a bracket in the form of a U-shaped metal part, secured with a bolt. The current will heat the turns of the wire, and the fan will blow the structure with a warm stream of air.

To ensure free access of air, 20-30 holes with a diameter of 1.5-2 mm are drilled in the lid and walls of the jar. The assembled device is directly connected to a 220V network and its functionality is checked. For safety reasons, the radiating surface can be covered with a protective mesh.
This fan heater is suitable for heating a small room. Just like industrial fan heater models, it will warm up the middle of the room in just a few minutes, without wasting precious heat on heat loss that passes through the walls.
Those who want to make their own garage heater using improvised materials will find a lot of useful information in another popular article our site.
Homemade low-power devices
The models described above are suitable only for local heating.To heat a room, you need to build a more powerful heater, the manufacturing technology of which will be discussed below.
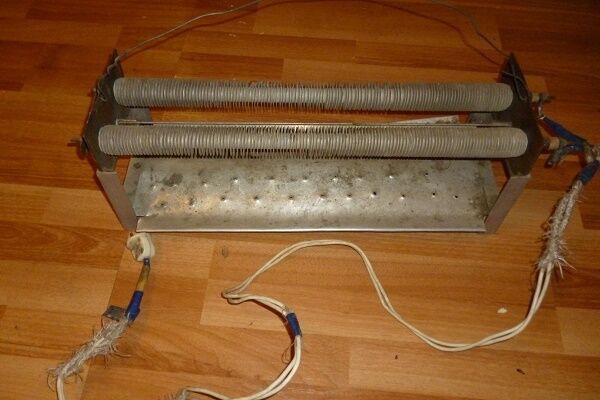
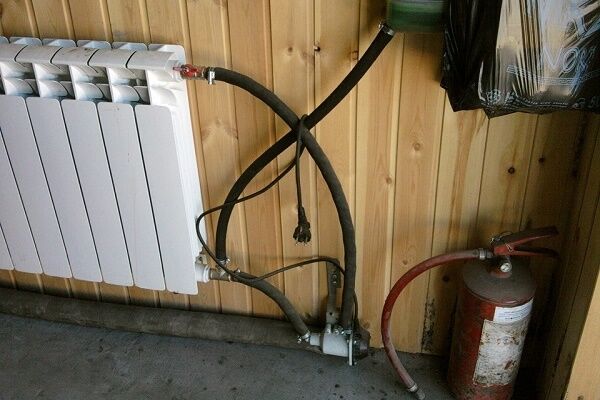
Option 1. Creating an oil device
Made with your own hands oil heater has high efficiency and is also quite functional and safe. The principle of operation of the device is based on the fact that a heating element located inside the housing heats up the oil located near it, as a result of which the convection movement of flows is activated.

To ensure smooth power adjustment, the device is equipped with a rheostat or discrete switches. To automate the process, a thermostat and a rollover sensor are additionally installed.
To make an oil heater you need to prepare in advance:
- Heating element with a power of 1 kW (for a room with an area of 10 square meters);
- durable and sealed housing, the design of which completely eliminates liquid leakage;
- clean and heat-resistant technical oil is taken at the rate of 85% of the total volume of the housing;
- control and automation devices are selected in accordance with the total power load of the device.
An important point when purchasing a cartridge tent, do not forget to check that it comes with silicone gaskets or their analogues made of oil-heat-gasoline-resistant rubber.
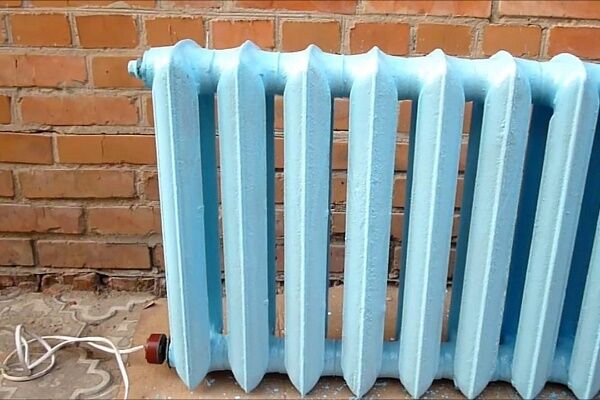
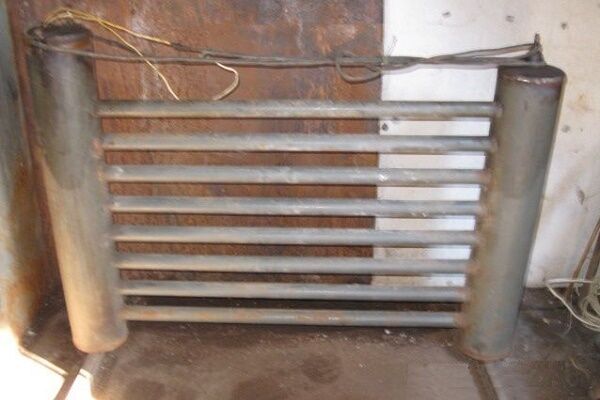
In order not to deal with welding, you can use a dismantled heating register, dismantled due to modernization of the public building system.
The design, which is impressive in size, will require the construction of a platform. It can be made from channels or steel angles.When drawing up a diagram, the frames are based on the capacity of the container and the height of the product.

Difficulty may arise at the stage of welding elements. After all, to perform the work you need to have the appropriate skills. The first step is to cut the profile pipe into pieces of a given length. Rectangular frames are assembled from them.
A hole is cut out in the corner of the structure to accommodate the heating element. At the highest point of the radiator, a hole is cut out to allow oil to be filled and equipped with a fitting with an external thread, on top of which a cap is installed.

When assembling the structure, you should pay attention to a number of points:
- It is better to place the heating element in the side or bottom of the structure, fixing it with bolted connections. This solution will ensure better oil circulation. Under no circumstances should it come into contact with the body.
- To activate the process of natural convection of liquid, add a pump and electric drive to the design. To fix the pump to the container, you need to weld small metal plates.
- Do not forget to provide openings equipped with valves to allow emergency pressure relief by draining the oil. The pumps are located at the bottom of the radiator in the corners.
- To ensure the durability of the structure, preventing the development of electrocorrosion, take into account the compatibility of the body metal and the heating element. Due to the potential difference between metals, you should not combine ordinary steel or aluminum with copper.
- Be sure to ground the heater.
The structure is not completely filled with oil, but only 85%. This is necessary so that the 15% allocated to air serves as a buffer zone when the oil expands due to increased temperature.
After checking the tightness of the holes, all that remains is to connect the heating element, install the housing and pour oil inside. To increase the mobility of the structure, it can be equipped with wheels and additional fastening elements.
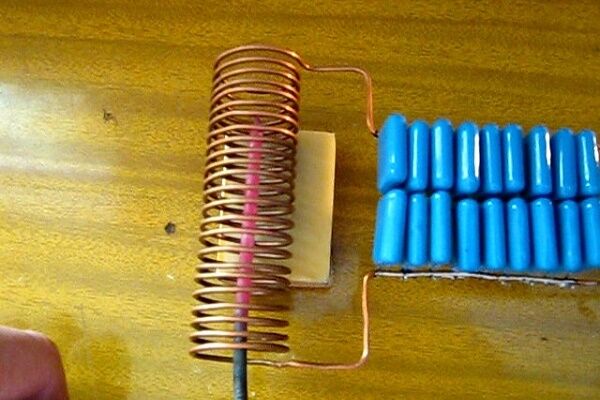
Option #2. Making an infrared device
The undeniable advantage of such a device is that the generated thermal energy is released in the form infrared radiation. Thanks to this, a heater created on the basis of a carbon element warms up not only the air, but also people and objects located in the infrared radiation zone.
The basis of such a device, created according to the type factory-made heaters, will be two plastic blanks, the area of each of which is about 1 square. Fine-grained graphite powder will be applied to them, the structure somewhat reminiscent of flour.

To make an effectively working IR heater with your own hands, you also need to prepare:
- two copper terminals;
- epoxy adhesive;
- wooden blanks for the frame.
As in previous options, you will need an electrical cord equipped with a plug.
Graphite powder can be “mined” from used batteries. To obtain the required heater power, experienced craftsmen recommend introducing up to two volumes of carbon filler. The finished product produces a thick and viscous mixture, which is quite difficult to apply with a thin film. To simplify the task, use a narrow spatula.

Sequence of actions:
- Graphite is mixed with epoxy glue in a ratio of 1:1.5 or 1:2.
- Place the plastic blank on the work surface, smooth side down.
- The finished mixture is spread in a thin layer on plastic, forming a zigzag pattern.
- Place a second sheet of plastic on top of the laid out pattern.
- The second plate is prepared using the same technology. Both workpieces are pressed tightly and wait until the adhesive composition hardens.
- Terminals are fixed to the blanks on opposite sides of the graphite conductor, following the diagram presented above.
- The stripped ends of the electrical cable are connected to the terminals.
- Connect the device to the network and check the functionality of the system.
Measuring the conductor resistance and calculating the power of the assembled device is performed following the technology described above.
The resistance parameter is affected by the amount of graphite in the mass. To increase the resistance of the conductor, you need to increase the dose of graphite in the composition.
To increase the rigidity of the structure, the device can be framed with a wooden frame. To improve the design, add a simple thermostat.
Conclusions and useful video on the topic
Video #1. Overview of the spiral heater manufacturing option:
Video #2. Homemade infrared heater with a power of 1 kW:
We considered only a few options for making heaters from improvised materials. In fact, there are a great many of them. If you wish, you can design and manufacture such a device yourself. And your reward will be the desired warmth in inclement weather.
Do you want to offer your own version of making a heater? Do you have any questions or useful information for us and site visitors? Please leave comments in the block below.


You'll have to tinker to make the first two heaters. Yes, it seems like nothing complicated, but it will take a lot of trouble, and the effect is insignificant. I had to assemble a heater similar to the described oil radiator more than once in my life. Only instead of oil they poured ordinary water and inserted heating elements. But with oil this is already a problem. After all, transformer oil is very expensive. And we need a lot of it here. It is probably not much more expensive to buy an industrial heater. In addition, homemade devices are unsafe.
Homemade is different from homemade. Some handy person will make a heater that is not inferior to the factory model in terms of efficiency and safety.
As for the oil, you can fill it with mineral motor oil with a viscosity of 20W50.Or gear oil standard G-4. Synthetic is also possible, but it has a lower viscosity and because of this the heater will operate much more noisily. In terms of money, all these methods are significantly cheaper than transformer oil.
But in fact, even with transformer oil it’s not that expensive. You don’t need a barrel of it, but 5-10 liters, depending on the size of the heater.
Yes, some homemade products would have to work hard. But this is a cool device made from a tin can, really made from scrap materials. In general, these are all temporary options when there is no money/opportunity to buy a normal one. Of course, this will do for the first time, but then it’s better to spend money and install a real one from the store. Although for a summer cottage, even a homemade one can work!
Guys, if you are looking for adventure on your own, you can experiment with batteries, extracting graphite (I can recommend pencils, charcoal), making conductive substrates, just don’t plug them in anywhere! I’m telling you this as a fireman. Buy a regular oil heater if it’s cold at home and you don’t need to heat the dacha.
“The power should not exceed the permissible values of 1.2 W. If the resistance exceeds 120 ohms, in order to reduce it, it is necessary to make the carbon layer a little thicker. The following rule applies here: the more soot, the lower the electrical resistance.”
The thicker the soot layer, the less resistance. And if the resistance decreases, then the current increases. This means the power increases.