How a Russian stove works: design features and an overview of popular types of Russian stoves
When it comes to the heating system of a private home, many owners first of all remember such a traditional heat source as a Russian stove. This is a universal structure that does not require an electrical connection and performs the function of heating the house.
The hob, coupled with the crucible, completely replaces the stove and oven, therefore, it is also an excellent alternative to kitchen equipment for cooking. Let us dwell in more detail on the features and types of Russian stoves.
The content of the article:
Construction of a Russian stove
Once upon a time, an adobe or brick structure rose in almost every village house, since without it it was difficult to maintain heat during the cold period, and throughout the year to bake pies, prepare soups, porridges, vegetable and meat dishes.
The variety of stove designs is amazing: in addition to the traditional “beds” that used to be built in five-walled huts, there are structures with fireplaces, dryers, additional stoves and even hot water boilers. But they all have in common the presence of two fireboxes and a furnace for baking bread.
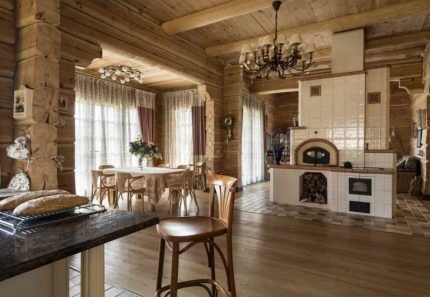
Purpose and main functions
One of the advantages of Russian stoves is their versatility.
Here is a list of just the main tasks that can be solved with the help of these useful structures:
- heating the entire house or individual rooms;
- cooking on the stove and in the crucible;
- drying herbs, mushrooms, berries, fruits;
- using a couch as a sleeping place;
- heating water for household needs;
- drying clothes;
- heating the samovar.
The construction of the stove is designed so that it heats the house. To do this, a brick structure is erected in the center of the building or positioned so that heat flows into adjacent rooms. If the building is small, then there is enough heat to ensure that the temperature in all rooms is comfortable for living.
For spacious houses, structures are built that are large in size or have additional heating parts - shields, boilers for heating water.
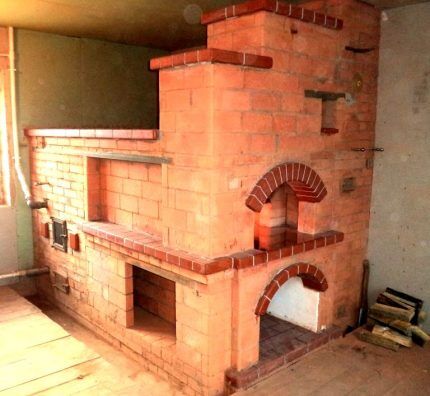
To save on fuel and make the home more comfortable, owners of buildings with stove heating carefully consider thermal insulation, since a lot of heat is lost through cracks in door and window openings, cold walls and floors.
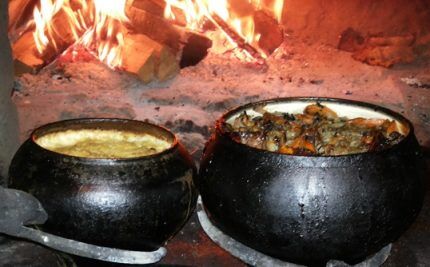
Thanks to this method of preparation, soups, porridges, roasts, and stews retain the beneficial properties of the products included in their composition.
Owners of Russian stoves often like to “warm the bones” on a stove bench - a wide horizontal surface that heats up during the combustion process and cools slowly.Thus, the bed remains warm until the morning. Dry heat is beneficial for people with certain diseases, such as joints or respiratory problems.
The oven is also used for household purposes - for example, for drying everything in the house. During construction, they think of small niches in which they used to put hats, mittens, and pants that were wet after a winter walk - by the morning they became dry and warm.
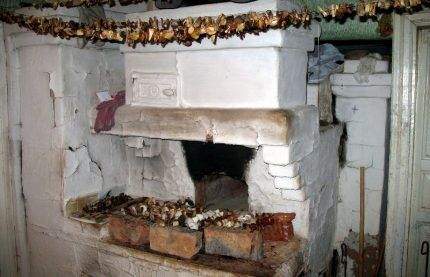
Often, sheds were built near the stove - wooden plank sheds that continued the bench and performed the same functions. Since the floors were under the ceiling, they were also always warm.
Design and masonry features
There are as many stove makers as there are stoves. Each master has his own secrets of selecting materials, masonry, and constructing a Russian stove. However, there are also common structural elements, without which the functioning of a heating structure is simply impossible.
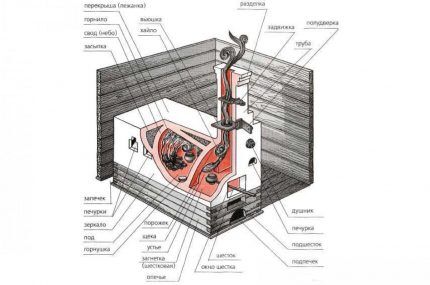
Depending on the design, the installation location is selected. Usually this is a well-lit area of sufficient area, located opposite the windows in the center or adjacent to one of the walls. Building in a corner was considered not the best option, since heating the building in this location is the least efficient.
The structure is built on a solid foundation and is protected from the wooden elements of the house by asbestos or non-combustible cladding.Felt insulation is also used, which is pre-soaked in a clay solution, laid in 3 layers and covered with galvanized or painted roofing steel.
Main details of the Russian stove:
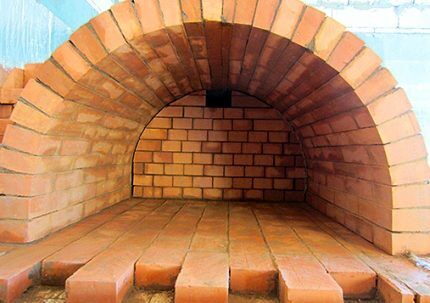
To ensure that the oven works efficiently, heats up well and retains heat longer, there are special secrets. One of them is the shape of the roof of the cooking chamber (semi-circular, barrel-shaped, etc.). Craftsmen make them flat or steep, often in the form of arches, reinforced with steel wire or ties made of metal slats.
In addition to the listed parts, the design of the oven contains stoves - small side recesses for drying food or things. Dimensions - no more than 20 cm in height and width, depth depends on the size of the walls.
In villages, but less and less often, you can still find stoves that were heated “black,” that is, they did not have such a structural element as a pipe. The smoke came out through the window of the pole and rose to the ceiling, from there it moved to the ventilation hole - the vestibule above the front door.
Subsequently, in order to increase the energy efficiency of heating, they began to use a special hole in the wall (fiber window), which made it possible to reduce heat loss.
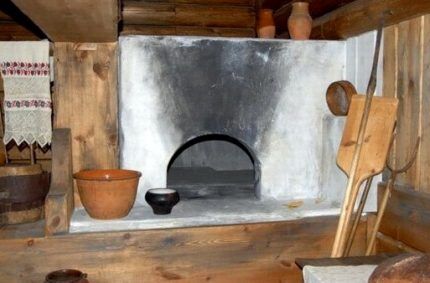
The “black” firebox caused a lot of inconvenience, and with the advent of the first stoves with a chimney, “smoking” devices, as they were also called, practically disappeared.
Variety of cladding and other designs
The outside of Russian stoves is faced in different ways: they are plastered and whitewashed, coated with clay, lined with tiles, tiles or wooden elements, and covered with hand painting.
It must be remembered that thick cladding retains heat and prevents it from spreading throughout the room, so if the hut needs to be well heated, the brick is simply covered with a clay-sand mixture - plaster. To give the structure a traditional look, the surface is painted with whitewash or special white paint.
Several interesting design options:
The design can be anything, it all depends on the material capabilities, imagination of the owner and the skills of the craftsman. However, we must remember that not all materials can withstand heat, and some - for example, granite and marble slabs - look too pretentious and simply do not fit into the concept of “folk” art.
Popular types of stoves
Over the centuries, the design of the Russian stove has been modified and improved. Some master engineers added new elements to increase heat transfer or speed up/slow down the burning process of wood. Knowing how a Russian stove works and works, you can make changes without losing its functionality.
Let's look at several modifications of the Russian stove, which are actively used in the construction of modern residential buildings.
Option #1 – simple
The main parts of the so-called simple oven are the cooking chamber, the oven and the pipe. Nothing superfluous, no additional elements that complicate the design.
This option is ideal for a seasonal country house, as it takes up little space and perfectly fulfills its purpose - it heats the room and helps prepare food.
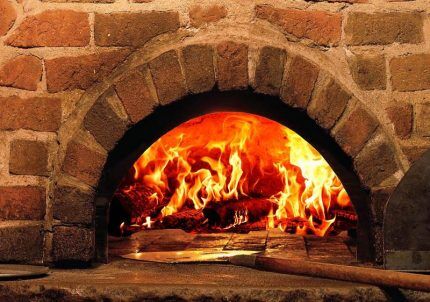
Food is prepared by placing the dishes also near the mouth. Nowadays bread is baked on baking sheets and in special forms, but previously it was simply “planted” with a spatula on a pre-cleaned and swept bottom.
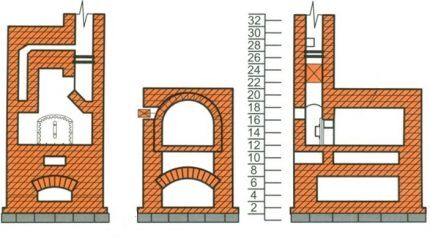
To increase the heating efficiency, the flues of the flood chambers are made separate and placed near the walls. You can also create a firebox in a fire pit, equipping it with a cast iron stove for quick cooking and heating of ready-made dishes.
To build a simple oven you will need approximately 1610 pieces of solid brick, about 70 buckets of masonry mortar on clay, a pair of smoke valves, a damper and a samovar.
Option #2 – adobe
The main difference between an adobe stove is the use of adobe - a clay solution prepared in a certain way. Brick is used only for laying pipes and hearths. One medium-sized oven will require about 3.5-3.6 m³ of well-mixed solution of the correct consistency.
One of the important indicators of clay composition is density. It’s easy to check the required level: you need to form a brick and place its central part on a stick. If it retains its shape and does not bend, the solution is mixed correctly.
Elements for masonry are prepared as follows: clay and sand are poured onto a flat surface in a layer of about 15 cm, then fragments of the required size (usually 20-25 cm wide) of a rectangular shape are cut out from the layer.In essence, you get homemade bricks.
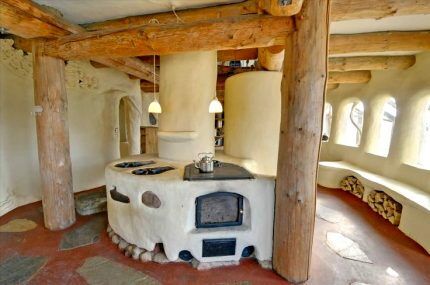
A common mistake made by beginner stove makers is using water to wet the bottom row. This weakens the solution and causes cracks to appear. During breaks, the top row is protected from drying out: covered with rags soaked in water and wrung out.
The erected stove is dried for about a week, then heated with dry wood. During the heating process, clay bricks release steam, and the “bricks” acquire the necessary structure. Only after 5-6 days the oven becomes ready for use.
Option #3 – “Teplushka”
There are several modifications of Teplushka stoves, which differ in size and minor design nuances.
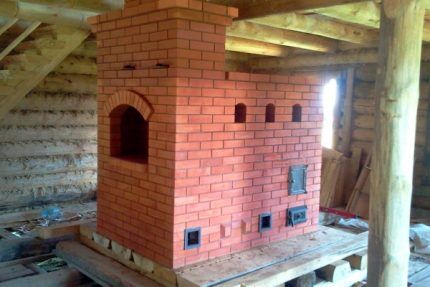
Another advantage is the variety of fuel used. In addition to traditional firewood, you can use coal, dung, straw briquettes, and pallets. If you compare any of the Teplushkas and a traditional Russian stove, then the first option requires much less fuel.
Cooking does not require much effort. You can start cooking it after the wood has burned out and store it warm for about another day. The combustion process takes a short period of time - from half an hour to an hour.
The two main structural elements are chambers: the lower (heating) is located under the hearth, in the oven, and the upper (cooking) is located at the level of the hearth.But the fire can be carried out in two ways - both through the furnace and through the lower heating chamber.
Oven models differ in size. For example, “Teplushka-2” without a stove, but with a small hot water boiler is 1.68 x 1.29 m, and “Teplushka-4” with a stove built into the hearth is 1.29 x 1.29 m.
Option #4 – “Housekeeper”
The name of the stove “Ekonomka” speaks for itself - the heating device is simple in design, compact and economical. Moreover, not only firewood with a low resin content is suitable for the firebox, but also any other types of solid fuel.
Main dimensions:
- length – 1.4 m
- width – 0.89 m;
- height to pipe level – 2.24 m;
- distance from floor level to pole – 0.77 m;
- the distance from the floor level to the bed is 1.4 m.
The design consists of two separate chambers: a heating chamber, which is located below, and a cooking chamber, raised above for ease of use.
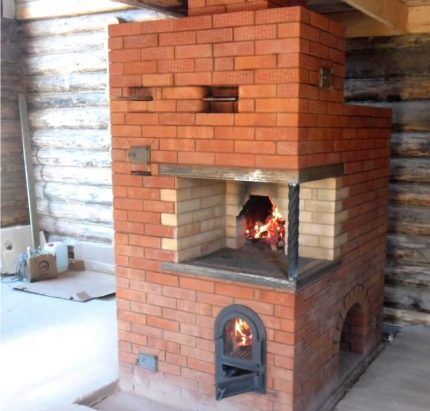
The stove is equipped with two fireboxes: one is usually located on the front side, the second on the right. The cast-iron stove is placed so that it covers both fireboxes at once, but the large burner should be located above the main one, and the small one - above the additional one.
It is not recommended to use both fireboxes at the same time. Typically, the large one is used in winter, for general heating, and the small one - in the warm season, for cooking. If one of the fireboxes is “idle,” all its doors (furnace, ash) must be closed to create draft.
The good thing about the “housekeeper” is that you can cook food on the hearth for a long time after heating. Even after 10-12 hours, the required temperature will be maintained in the furnace.
Option #5 – Potapov’s designs
V. A. Potapov focused on the two most effective modifications, differing in design:
- A rectangular stove 0.51x0.64x1.82 m with a heat output of 850 kcal/h per day with one firebox.
- A rectangular stove 1.16x0.64x1.89 m with a heat output of 2400 kcal/h per day with one firebox.
Distinctive features of the first option are the presence of a cooking chamber with a cast iron stove, an oven and a ventilation hole.
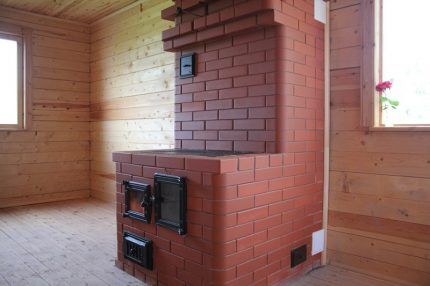
The number of views and gates can be different, their presence can be easily combined. To build this modification, 260 pieces of solid brick and approximately 12 buckets of clay mortar are required.
The second version of the stove is attractive because it runs on different types of solid fuel. But when using anthracite or coal during construction, the following nuances are taken into account: the grate is lowered below the usual row, and all heated parts of the chambers are made of refractory bricks. A total of 580 pieces of red brick and 20 buckets of clay mortar are required.
There is a simple way to increase the heat transfer of a structure: it is necessary to repeat the last rows, thereby increasing the height. If a ceiling is involved, then the ceiling above it must be plastered.
Option #6 – Volkov’s designs
I.F. Volkov improved the heating and cooking stove, which operates not only from firewood, but also from other types of solid fuel. Dimensions: 0.89x1.02x2.24 m. If the firebox is fired once a day, the daily heat transfer will be 2260 kcal/h.
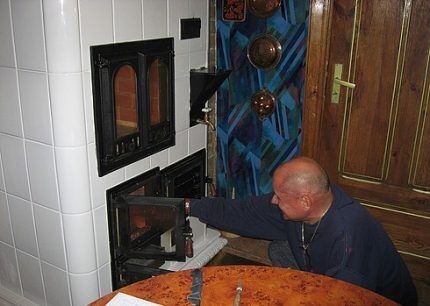
Both traditional heating methods are used: winter and summer. The movement of hot gases and heat distribution are controlled by valves. If you heat in the summer, the gases heat up both the stove, the oven, and the hot water box.
Construction requires approximately 520 red bricks and 20 buckets of mortar. The crucible will require approximately 50 kg of refractory clay.
Drying racks and doors can be made independently or purchased at a specialized store. Purchased cast iron products look more presentable and are an element of interior decor.
Option #7 – “Swedish” Buslaeva
The compact thin-walled stove by K. Ya Buslaev is loved by the owners of private houses for its good heat output, which with two fireboxes per day reaches 4500 kcal/h.
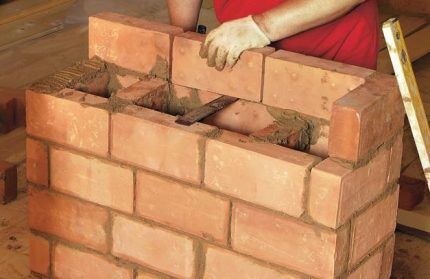
Necessary conditions for the construction of a heating device:
- pre-soaked brick;
- solid foundation;
- thin, high-quality seams.
Various types of solid fuel are suitable - coal, firewood, briquettes, pallets.
The cooking chamber has a special structure: to ensure the release of steam during cooking, it is equipped with a separate ventilation duct.
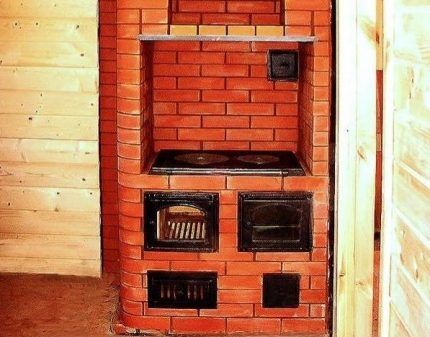
The firebox and cooking chamber are exposed to the most heat; accordingly, they are usually lined with refractory bricks.
For construction you need: 550 bricks, about 40 buckets of clay mortar, as well as doors (furnace, blower, for the cooking chamber), grate, view, oven box, cast-iron stove, valves.
Detailed lists of materials with sizes and orders of the presented types of Russian stoves can be found in specialized literature.
Conclusions and useful video on the topic
Traditions in the construction of furnaces:
Review of a Russian stove with lining:
Construction stages:
Starting the stove - first lighting:
The design of the internal parts of a Russian stove, decorative elements, additional extensions for effective heating, cooking and interior design - literally everything is important. This means that before constructing a heating device, it is necessary to think through every little detail - from the location to the materials used.
We do not recommend doing masonry on your own, especially for beginners. It is better to enlist the help of an experienced stove maker.


A modern analogue of the Russian stove is the TeplEco heater and the like micathermic devices. Although even without them it is now easy to find sauna stove and productive wood burning unit for heating the whole house.
Teploeko is an ordinary convector with low mass, not a replacement for a stove. For heating you need to have 100 W/m2 of continuous heating, i.e. 5 kW for a house of 50 m2. For a day - 120 kW/hour or approximately 600 rubles, for a month - 18 thousand rubles. That's all Teploeko! The stove is a real heat accumulator, but its thermal power should be the same as that of a convector, the only difference is the price of the energy carrier: electricity or firewood. Everything else is marketing!