Laying a stove with your own hands: a detailed guide + procedures with diagrams and drawings
A stove is a multifunctional, technically complex structure.Within its boundaries, fuel is processed, heat is produced and combustion products are removed to the outside. If you plan to lay a stove with your own hands, you must strictly follow the rules that have been proven in practice for centuries to guarantee the normal operation of the unit.
Those who want to know how to ideally build a brick stove will find detailed information on all the important issues that interest an independent craftsman. In the presented article, the technological specifics of the structure are presented in great detail, the main postulates of stove makers and significant nuances are scrupulously listed.
The information we provide will provide effective assistance in the construction of a brick kiln. All its components will perform their duties flawlessly, and the structure itself will last for many years without complaints. To help home craftsmen, we have selected sequence diagrams, photographs, and video recommendations.
The content of the article:
Structural components of brick stoves
Before you start building a stove, you should decide on its purpose. Heating, cooking and drying units have significant design differences that must initially be taken into account. There is also a reasonable difference in the procedures developed by stove makers for precise brick laying.
There are many stove designs that can be divided into groups according to their purpose:
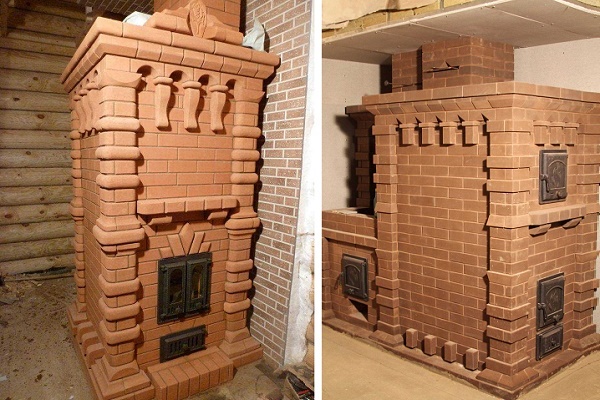
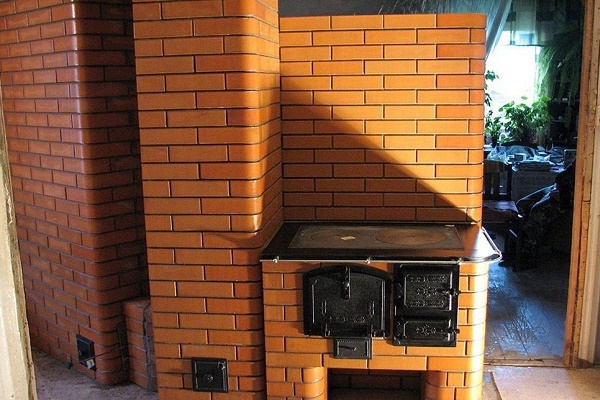
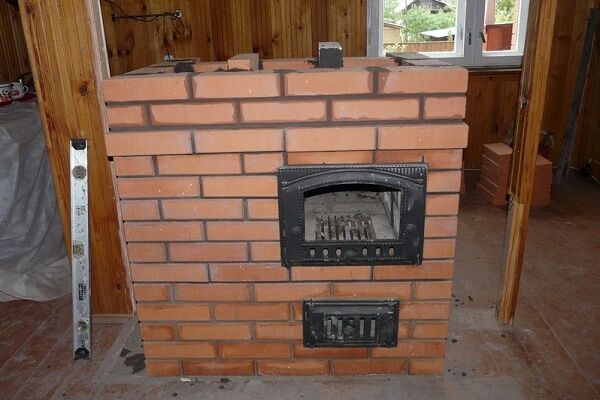
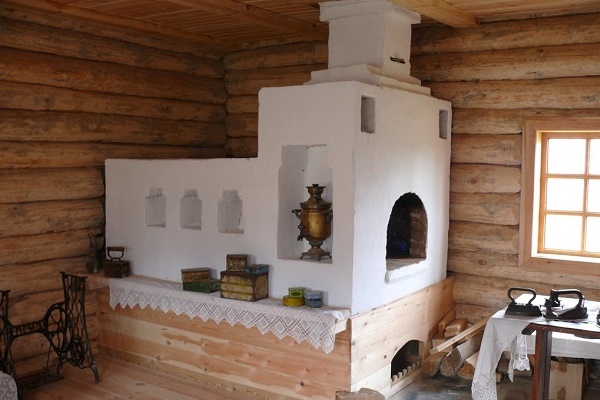
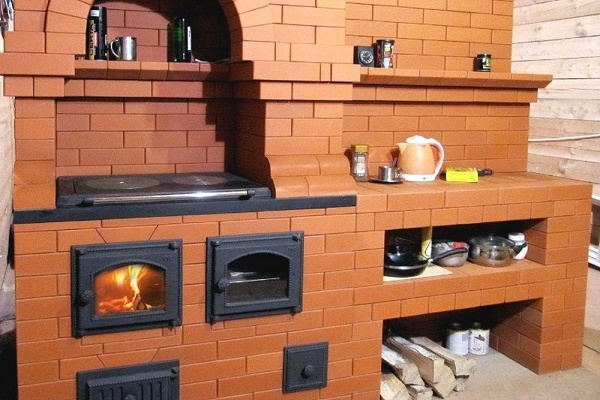
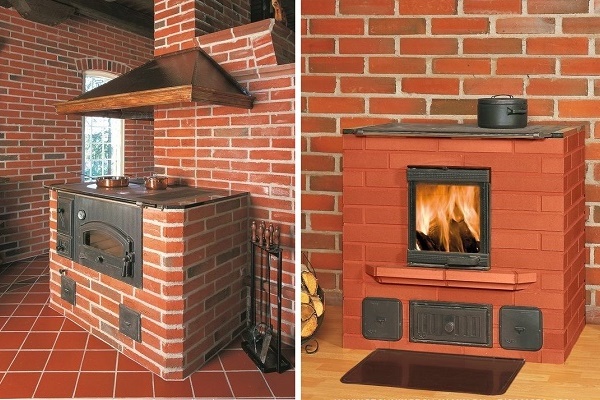
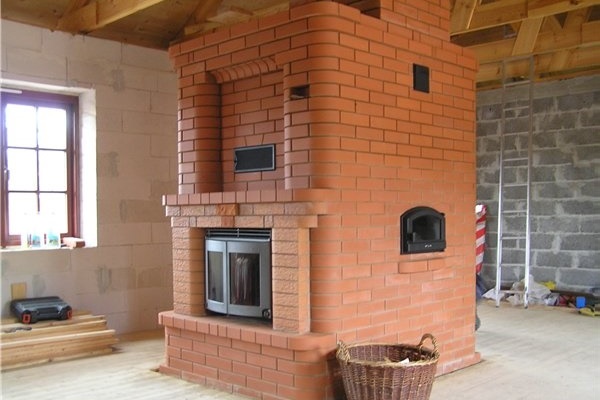
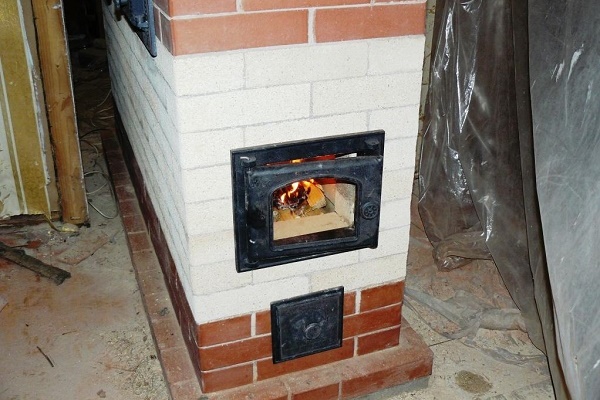
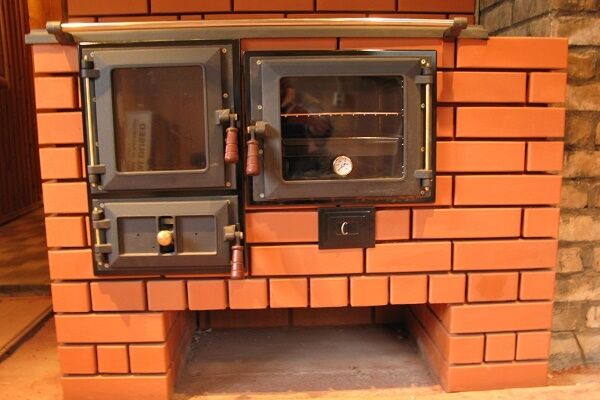
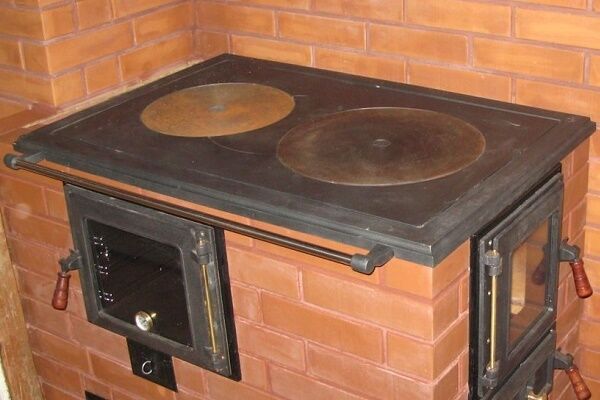
Country houses, as a rule, which do not have a connection to centralized heating networks, are mainly equipped with universal cooking and heating units. The back side of them is turned into the living quarters, the front side into the kitchen.On the front side there is usually a hob and the main stove appliances.
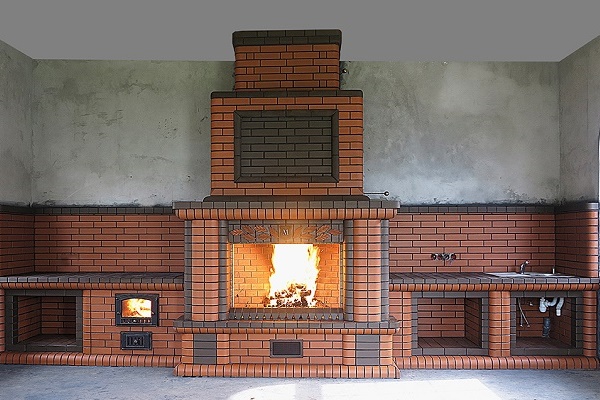
Let’s assume that we are interested in the universal option, the construction of which we will carefully examine. Like all types of stoves, it consists of a foundation, an array that includes a firebox with its associated appliances and air ducts, and a chimney.
Foundation: device features
The base on which the stove is to be installed is always constructed separately from the foundation of the house.
This fact is justified by a number of compelling reasons:
- A brick structure has an impressive weight; the soil subsidence under it will be much greater than under the walls of a house.
- The linear dimensions of a unit operating at high temperatures are unstable. The stoves are characterized by some movement, which is, in principle, contraindicated for the walls of the building.
- The separate location of the foundation provides a sufficient technological distance between the furnace and building structures, which ultimately prevents and reduces the likelihood of fire.
In addition, a furnace built on a separate foundation is easier to repair, easier to modernize and rebuild if necessary.
The foundation of the stove is made of rubble or brick, using lime or cement mortar as a connecting composition. In the construction of the foundation, the use of a clay mixture is prohibited, because it quickly collapses in soils that constantly have some moisture.

Moreover, the composition of the binder solution is selected depending on the degree of moisture of the underlying rocks. To construct a foundation in low-moisture soils, lime or lime-cement mortar is used; in wet soils, only cement mortars are used.
In plan, the foundation should be at least 5–7 cm larger than the stove on each side. The depth of its installation depends on the dimensions of the unit, on average it is 0.75 m. For one-story dachas, it is permissible to go only 0.5 m deep. A stove for a two-story house should stand on a foundation with a thickness of 1.0 m.
There is an article on our website where we examined in detail the process of arranging a brick stove for a summer cottage. More details - go to link.

When building a rubble foundation, it is not brought to the floor level, leaving 14 cm free. This free space is filled with two rows of bricks. The foundation, brought to the floor level, is covered with two layers of roofing felt or roofing felt for waterproofing. Instead of these insulating materials, a 2 cm layer of clay or a cement screed of the same thickness is often used.
Furnace mass: specifics of the structure
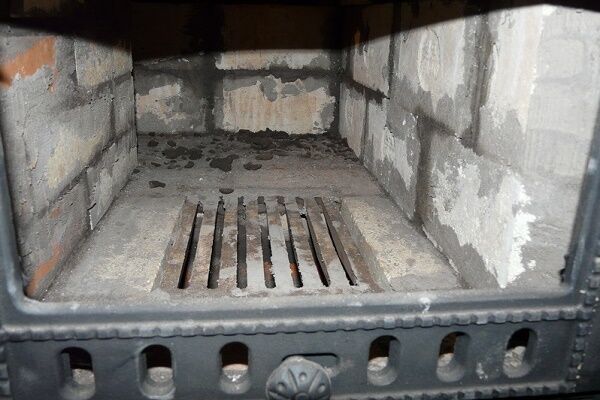
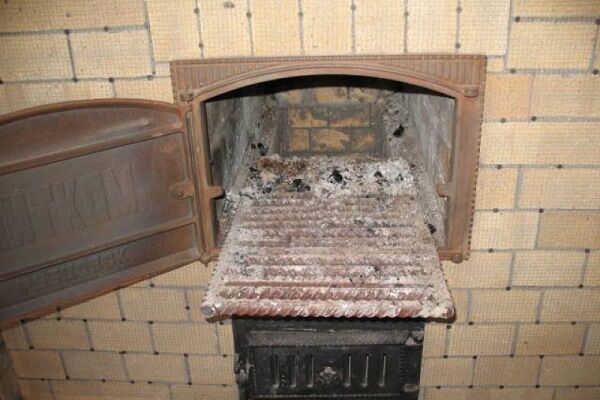
The main components of the stove array are the body, the firebox and the smoke circuits. Solid red brick is used in the masonry of the body and channels that hold smoke inside the stove to increase heat transfer. Lining, i.e. The internal lining of the firebox is made with refractory refractory bricks.
The housing with smoke circulation is placed on a clay-sand mortar. The lining uses a mixture of fireclay powder and refractory clay.They strive to minimize the thickness of the seams during laying. The maximum thickness in the masonry of the body and channels is considered to be 5 mm; in the lining of the firebox, seams should not exceed 2-3 cm.
Let us note right away that the furnace body and lining cannot be bandaged. These must be two separate structures, because they heat up to different temperature levels and expand accordingly in different ways.
For laying the furnace, you can purchase ready-made fireclay and clay-sand mixtures. True, you can prepare a solution of clay and sand yourself without any problems. The proportions of clay and sand in such a homemade composition are selected depending on the fat content of the clay, the proportions vary in the range from 1:0 to 1:3.
An important condition for ensuring the strength of the structure is compliance with the dressing of the seams. This rule will prevent the walls from collapsing. Before performing masonry work, red bricks are soaked for 10-15 minutes in a container of water so that they do not “draw” water from the “binding” solution; fire-resistant ones are simply wiped.
During laying, an independent stove maker should:
- Constantly check the horizontality of the row and check the diagonals. If there is even a slight deviation along the diagonals, this is already a signal to disassemble the upper rows and correct the error.
- Fill the joints completely with mortar. Regularly wipe the side of the structure with a rag and remove excess binder.
- Wipe the inside surface of the chimneys with a moistened wash brush. This is required to prevent the formation of roughness.
In order to ideally build a brick stove, as experienced stove makers do, you must first set each row dry. By trying on the position of the bricks without mortar, you can immediately see the errors. In addition, it is easier to mark and cut.

Without dry laying, it is allowed to lay only straight rows that do not affect structural parts, devices and smoke circulation.
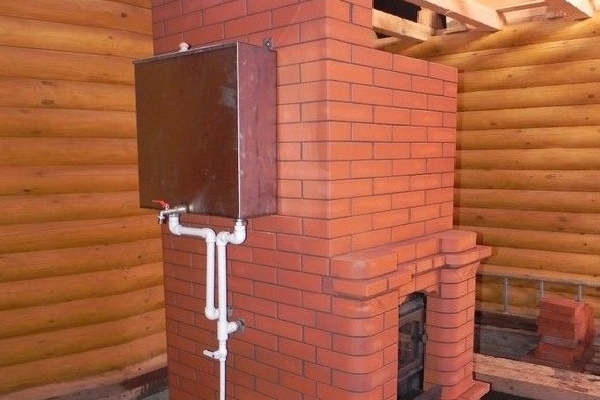
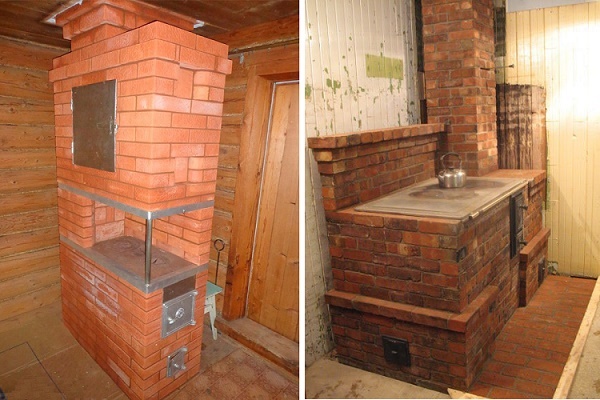
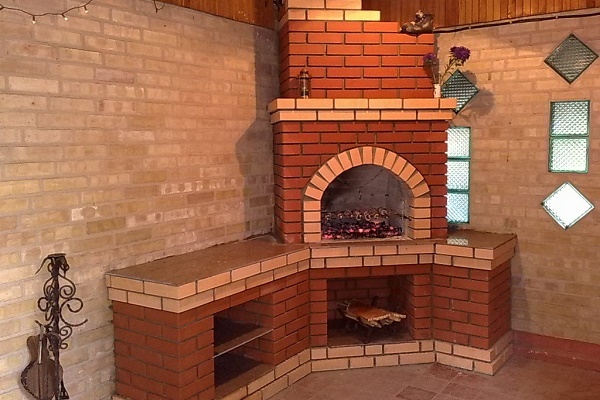
Pipe: options and construction rules
The smoke channels are made of solid red brick. To bind elements within the attic, lime or cement-lime mortar is used. The outer part of the pipe is built exclusively on cement mortar, because... clay is easily and quickly washed out by rainwater and dissolved by winter precipitation.
Based on the type of location, brick stove pipes are divided into three types:
- Mounted. The smoke channel is a direct continuation of the unit, rising directly above its body with smoke circulation.
- Indigenous. Such a pipe is placed on a separate foundation and connected to the stove with a sleeve laid out at the corners.
- Wall. These smoke exhaust channels are installed directly in the main walls located in the middle of the house.
Small stoves for country houses are built mainly with mounted pipes; they take up less useful space. The smoke channel must be exactly vertical and clearly consistent in cross-sectional size and height.
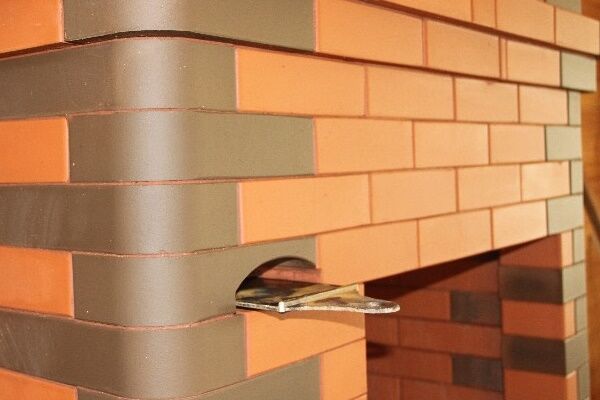
At the level where the pipe crosses the wooden floor, a groove is made, a widening that closes the opening, but is not adjacent to flammable materials. Tow or soft asbestos soaked in a clay solution is placed in the gap between the pipe and the ceiling.

When laying pipes over the brick roof, an otter is formed - a widening that protects against condensate flowing into the channel. Within the attic, the chimney is plastered and whitewashed so that leaks can be immediately determined by the cracks that appear in the whitewash.
A metal strip is placed on the constructed pipe. deflector – a metal cap on legs that protects against atmospheric water flowing into the channel. At the same time, this device extinguishes sparks, which is extremely necessary if the roof is made of flexible tiles or ondulin.
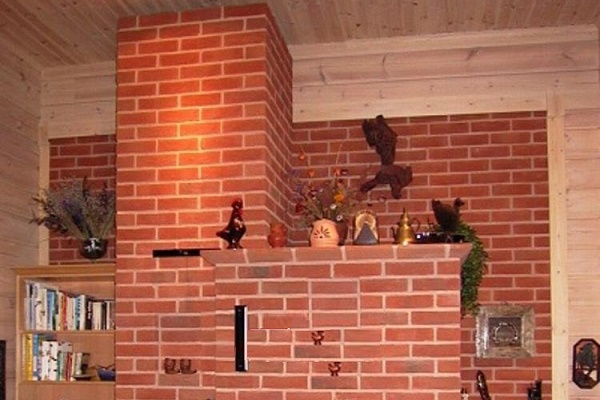
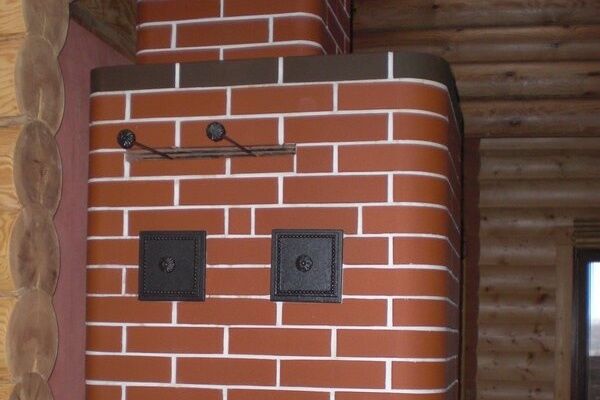
The nuances of finishing the stove
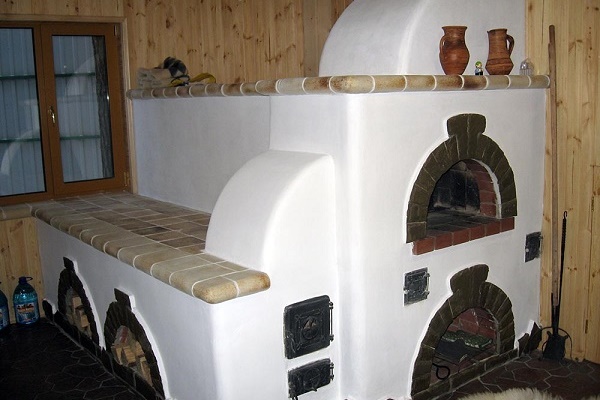
The walls of the stove, made of good brick, and even decorated on the outside, do not need to be finished: whitewashed and plastered. If there are no chips or cracks on the masonry elements, and the verticals and horizontals were observed during construction, the heating structure will still look great.
On stove masonry made of high-quality brick, it is enough to grout and carefully unstitch the seams. Without unnecessary finishing, the heating and cooking structure looks better.
If there are still complaints about the stove walls, there are defects on them, and the masonry is not ideal, then finishing is very necessary. Before finishing work, the outer surface is thoroughly mopped, rubbed with a piece of brick to improve adhesion, and then wait for it to dry.
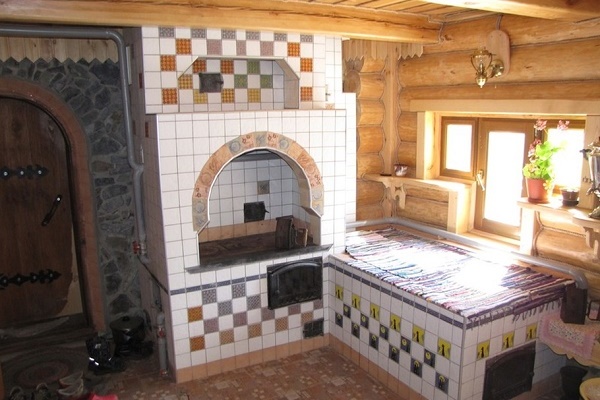
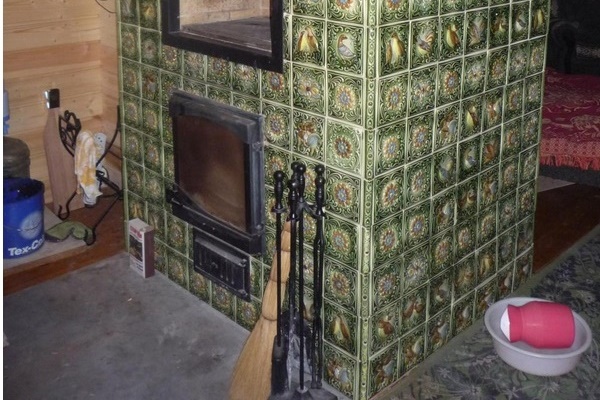
The dried unit can be plastered using the clay-sand mortar used in the masonry. To increase strength, it is possible to add 1% asbestos chips to the composition. Heating options for stoves are lined with tiles - this is the most reliable and gas-tight, but also the most labor-intensive type of finishing.
Possible complications for the stove maker
In a country house built according to a standard design, the location of the stove, the chimney outlet, and convenient places for maintenance and operation are usually provided in advance.It is much more difficult to install a heating and cooking unit in a house built according to an individual idea. It is even more difficult if the house has already been built.
It happens that after choosing what the owner thinks is a good location for the stove, and even after building the foundation, they suddenly discover that the chimney will cross the floor beam or rafter. What to do in such a situation?
The way out in this case involves two difficult and rather expensive options. In the first of them, you will have to sort out the ceiling and change the position of the beams and rafters, in the second, you will have to demolish and rebuild the foundation of the stove.
In order to eliminate such troubles, before marking and building the foundation in a built house, it is necessary to determine whether the chimney will not violate the integrity of existing structures. If it is possible and has access to beams that have not yet been sheathed, you need to use a plumb line to check the exact position of the components of the marked furnace.
If in a house you are building with your own hands, it is most convenient to place a brick oven in a place whose projection intersects the elements of the roofing system, it is better to move them. In general, of all the options, it is advisable to choose the one that will be easier and cheaper to implement.
When designing a stove and selecting a suitable model, the following rules should be taken into account:
Masonry of a simplified version of the Russian stove
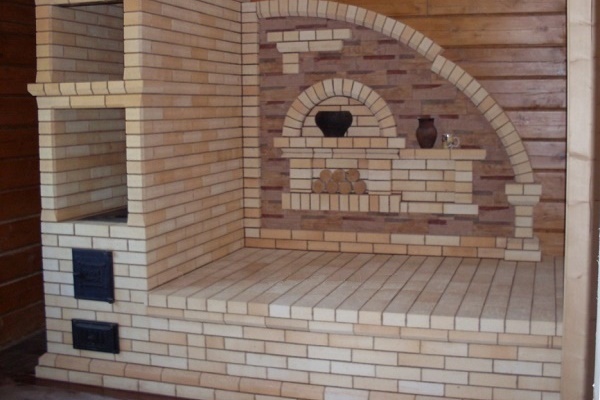
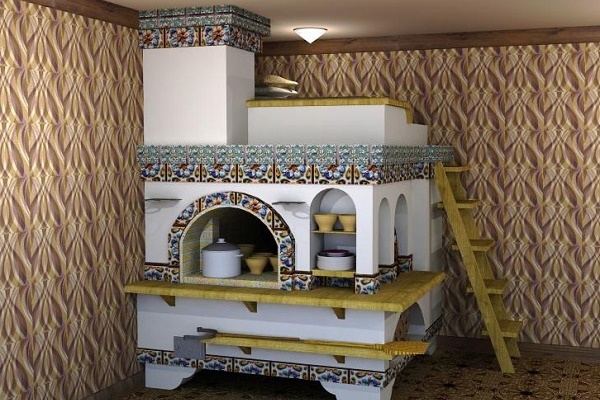
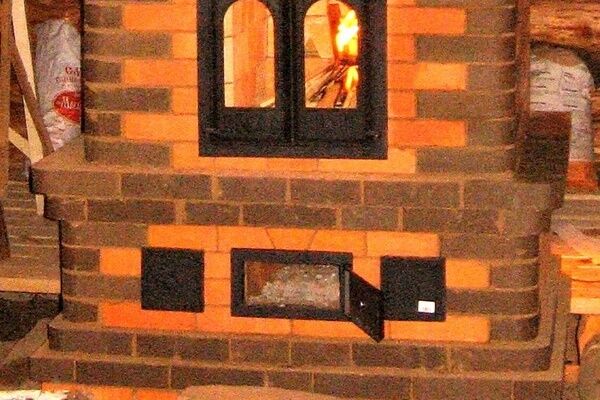
Let's look at a specific example of the specifics of building a simplified version of the Russian stove. Like all units in this category, it belongs to cooking and heating equipment, which means it is equipped with a cast-iron hob. It also has two fireboxes, which allows you to heat the room, cook delicious dishes and bake bread.
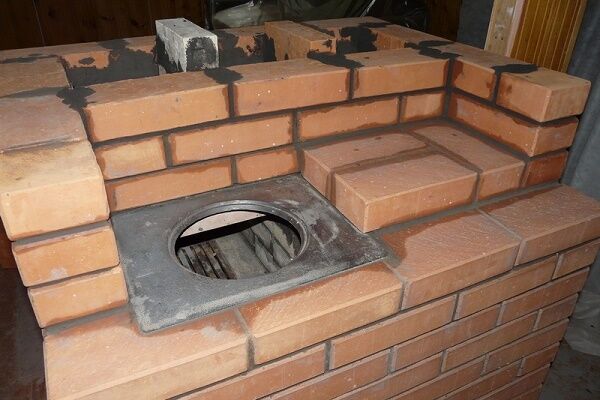
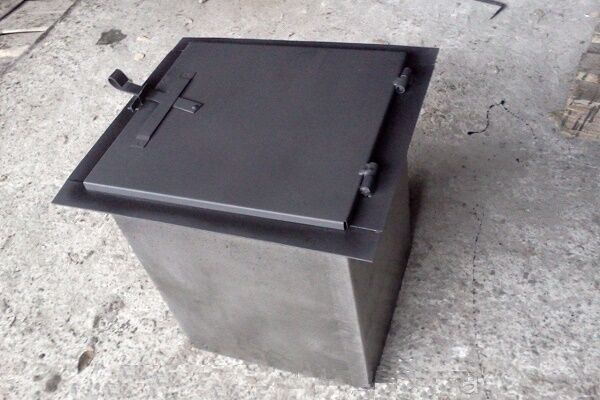
A special feature of this particular design is the presence of a specific ash collector located under the carbon dioxide exhaust.Ash is collected through a brick channel located under the grate. The ash container can be emptied from the street, so there will be no traditional furnace contamination in the house.
In order to move the metal box for collecting ash outside, a channel is installed in the foundation of the house, which is connected to the foundation of the stove. This structure should be located under the floor. From the outside, all this is covered with an insulated flap.

Unique furnace foundation design
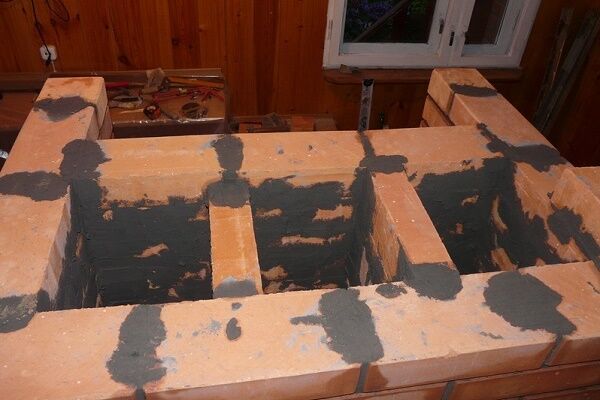
The foundation for this version of the stove is also special. It is built as follows. 85 cm of soil is selected for the foundation. The width of the pit should be convenient for constructing the foundation. The bottom of the excavation is covered with sand and compacted so that the resulting sand layer is 10 cm.
A metal case is installed on the leveled base, into which 4 rows of brickwork are laid in cement mortar. At a depth of 12 cm to the floor level, waterproofing is laid, from which a fume vent is constructed: a hollow foundation. This section of the structure is plastered so that cracks – places of gas leakage – can be immediately identified.
This solution allows you to close the chimney view immediately after the firebox, because carbon monoxide will be discharged into the hollow foundation without entering the premises. As a result, the thermal performance of the unit is significantly improved. Ash is removed periodically from a metal box put out onto the street to collect it.
The channel for extending the ash collector is constructed from brick simultaneously with the construction of the stove foundation.To form it, metal corners are installed. The channel is brought to a hole made at the same level in the foundation of the house.

Ordinal masonry in detail
The size of the simplified brick oven shown in the drawings in plan is 77x116 cm, which is equal to 3 bricks in width and 4.5 bricks in length. From the floor level, this stove is laid out in a metal frame welded from a corner, or in a solid tin case.

The diagram below shows 10 rows of stove masonry. After laying the 4th row, a metal corner is installed on the walls, which is required to form the channel. In the 5th row, the channel is overlapped over the corners.
Before laying the 7th row, a sheet of asbestos is laid. After laying the 7th row, the formed channel is sheathed with sheet metal.
The construction of the stove from rows 5 to 13 involves the construction of a carbon vent. In the 8th row, metal strips are again installed. In the 9th, 11th and 13th rows the brick is placed on its edge.

After laying the 14th row, the stove under construction is usually leveled with the floor, although it happens that in order to bring it to the floor level, it is necessary to lay another row. The floor around the stove is covered with sheet steel.
From the 15th row, i.e.from approximately field level, the brick structure is again placed in a metal case or a frame made from angle iron. In the 16th, a damper is installed, which is needed to drain and collect ash. The pediment of the stove above this damper will need to be sheathed with metal.
To fix the blower door, steel strips are placed in the 17th and 18th rows. In the 18th, the laying of the fume vent cover is carried out.
In the 19th row, corners are installed in the masonry on which the retractable grate will rest. Through it, the ash will be discharged through a channel into a metal box for collection.
The “under”, the base of the main firebox of a Russian stove, is made of heat-resistant brick. In the 20th row of the masonry, a metal frame is installed with a door designed for cleaning the stove. Metal strips are again placed above the 22nd row.
The 23rd row is laid with refractory bricks. On the back side of the unit, the masonry is made of 3 bricks placed on edge, and 1/8 of a brick installed flat.
Above the 23rd row, a cast iron hob is fixed, the dimensions of which are 71x41 cm. In this row, it is recommended to reinforce it with a steel strip. The 24th row is laid flat.
The masonry from the 25th row is again made from refractory bricks, which are placed on edge. Now they are installing a blind door with dimensions of 25x21 cm. It serves as a damper in a standard Russian stove.

In the left rear corner of the 26th row, bricks are placed on edge to form a chimney. All others in the specified row are laid flat, and the masonry is reinforced with steel strips. For bricks installed flat, the inner edge of the lower rib is trimmed off.
At the level of the 26th row there are metal sheets intended for baking bread. There should be 3 of them that can fit in the oven, taking into account the gaps between the walls of the unit and these baking sheets.
The length of the middle and right metal sheets is equal to the size of the stove. The left one is shorter by exactly the segment that was formed in the 26th row. To prevent the short left sheet from sagging, it is fixed in the far corner with a clamp to the middle baking sheet.
In the 27th row, all the bricks are laid flat. Before the construction of the 28th row, a stand of bricks is arranged in the compartment intended for baking bread. The ceiling will rest on it.
In the 28th row, the pediment part of the stove and the left rear corner, in which the chimney is formed, are made of bricks placed on edge. The front part of the unit is reinforced with a steel plate. The rest of the space is filled with bricks laid flat.
Then completely two rows, these are 29 and 30, are built from bricks installed on the edge. A cleaning hole is formed in the 31st row. As expected, this hole is also reinforced with a steel strip.
At the level of the 33rd row, lintels are made between the chimneys with bricks laid flat. They are lowered halfway relative to the bricks installed on the edge. In the 34th row there is a steam exhaust damper and a view. In this row, reinforcement is again carried out with a metal strip.

In the 35th row, again all the bricks are placed edgewise when laying the pediment part. All other bricks are laid flat. In the 36th and 37th rows, all elements are laid flat.To increase the cross-section of the chimney to optimize the movement of gases, the lower inner edge of the bricks of the 37th row is trimmed around it.
Afterwards they lay the pipe and assemble it from 5 bricks laid flat. It is connected by ligating with 31 rows. It should turn out that the 38th row is the penultimate one. The 39th row presses a sheet of asbestos to the ceiling. This is an insulating pad.
From the 39th row, a smoke channel is laid with arranged bricks. To speed up the construction process, it is permissible to use concrete or ceramic blocks.
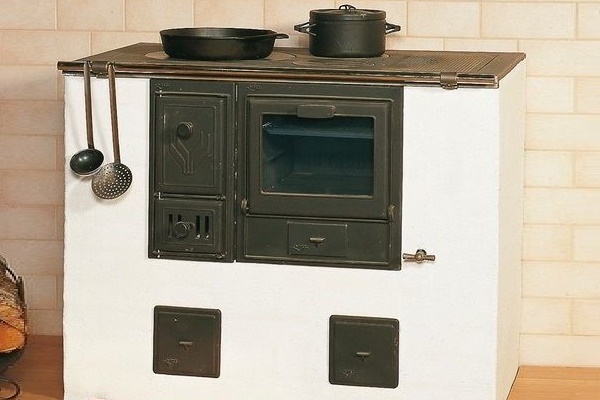
In the arrangement heating and cooking stoves Traditional metal utensils are used:
Furnace appliances are necessary for proper operation of the unit. With their help, the stove is quickly ignited, heat transfer is adjusted, technological holes are blocked, and the channels are cleaned of combustion products.
Conclusions and useful video on the topic
A visual demonstration of laying a brick stove will help you get familiar with the essence of the process:
Building a brick stove can hardly be called an easy task, but it is quite accessible for DIY. Guided by the manual and procedures we presented, you can build a perfectly functioning stove with your own hands. Information about the general rules for the construction of heating and cooking units will help control the work of hired stove builders.
If you have experience in laying brick ovens, please share it with our readers. Perhaps you know some subtleties that we did not mention in this material? Leave your comments in the contact block below.


In the old days, a good stove maker was worth his weight in gold; he was called to lay stoves in all the surrounding villages. What am I saying: laying a stove is a very difficult task.With a lot of nuances and important details. Of course, you can assemble some kind of stove yourself, but will it be good? In my opinion, in such a matter it is better to trust a professional who will do everything well. And it’s better to look for a person with recommendations, preferably from your friends or relatives.
Shagol, I agree with you, but only partly. If you understand the principles of circulation of flue gases, the properties of materials, and so on, you can easily lay out the stove yourself using a drawing from the Internet. Just remember that the slightest protrusion of a brick or the wrong choice of mortar consistency can be life-threatening during subsequent operation of the device or reduce its temporary operation. But in general, a person with “brains” who has studied stove heating engineering can easily install the device. “Russian stove makers” from generation to generation, now you won’t find a fire during the day. Most masters are self-taught.
I decided to repair the stove in a country house - 3 stove makers came according to the advertisement, the minimum price for work alone was 60-70 rubles.
It’s better to try it yourself, maybe it won’t turn out so beautifully, but I don’t have a cottage or a European-quality renovation...
If you want to do it well, do it yourself. This is true for all construction and repairs.
It’s amazing that the same articles from the Internet are thoughtlessly rewritten. I was especially amused by the separate foundation. At least clarify that we are talking about light buildings and country houses. Because capital foundations (slab and pile) for normal houses will support 3-4 such stoves, placed one on top of the other.
This is stated in the rules for the production of pipe and furnace works.
Chapter 3 section 5 paragraph 7.
A separate foundation for the stove is required. Since the oven tends to “play” due to large temperature differences.
One more thing. The above rules, Chapter 3, Section 5, Paragraph 23, state that “openings and chambers should be covered with brick overlays, lintels or vaults. The use of steel lintels to cover openings is not permitted.”
When the metal expands from heat, it will destroy the masonry.