Do-it-yourself gas bath stove: a guide to the design and installation of a gas stove
The tradition of visiting the bathhouse has existed since ancient times.Many people build a bathhouse in a private house, in outbuildings, in the country or outside the city. In order for you to want to return to the bathhouse time after time, it needs to be properly equipped and all communications must be installed.
One of the most important systems is heating. If you make a stove for a gas bath with your own hands, you can effectively heat this room. The market offers a large selection of various gas equipment. But purchasing it may be too expensive.
Why spend so much money on heating a bathhouse that you don’t visit very often? This problem is solved in a simple way. There are many different designs for homemade stoves, according to which you can assemble a high-quality device yourself at home.
The content of the article:
Preparing the bathhouse for installation of equipment
What kind of stove should I install? This is one of the first questions that the owner asks himself when he has the desire to build and install a gas stove for his favorite bathhouse with his own hands.
Any normal owner wants to ensure safe and comfortable operation of the devices they use. You can assemble a stove from a variety of materials: both expensive and cheaper.
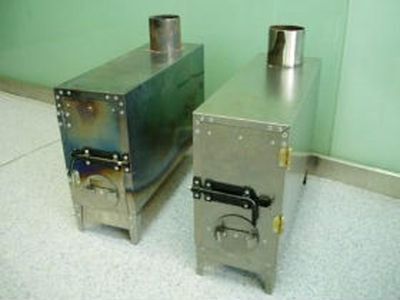
Most often, metal, stone or brick structures are assembled. This is due to high reliability, low financial costs for purchasing the necessary parts, ease of assembly and installation. At first it may seem like assembly is a complicated process, but in reality it is not.
Before gasifying the bathhouse, you need to make sure that it holds heat well. The room must be completely thermally insulated and insulated both outside and inside. Only in this case will heat loss be minimal, and the stove will perform its functions as efficiently as possible.
Choosing a location for installing a gas furnace
If the bathhouse has already been built and all that remains is to choose a convenient heating method, then you should choose a suitable gas stove design. On the other hand, you can choose the appropriate device option and slightly adjust the bath room during the installation process.
That is, it is advisable to initially select the future heating option and build the building in accordance with this choice.
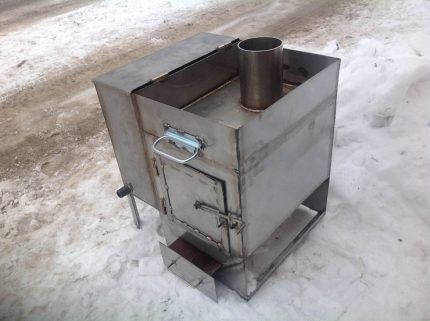
Installation and installation of a gas sauna stove is usually carried out in a steam room, in an adjacent washing room or partially in a relaxation room. The main task of the stove is to ensure complete heating of the entire bath structure and maintain a constant temperature.
To reduce heat loss, it is best to place a homemade gas stove in the center of the bathhouse. It has been established that if the heat source is not in direct contact with the walls, then there is a significant reduction in heat loss due to the thermal cap. Heat does not escape from the building through the walls.
Warm air circulates throughout the steam room. It rises from the center of the room to the ceiling, where it is reflected from the vapor barrier with a reflective layer and spreads over the entire area of the steam room.
This way you can steam indoors for as long as possible. However, it is not always convenient to install a gas stove directly in the center of the steam room.
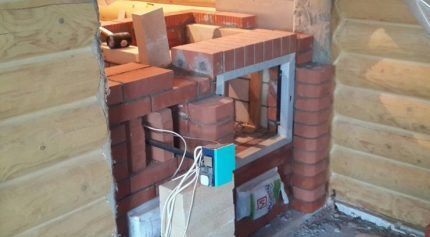
Choosing a furnace installation location from various options has its own advantages and disadvantages. If you install a homemade gas stove in a steam room, you will need to install an additional ventilation system.
This is due to accelerated oxygen consumption. The advantages of this installation method include the ability to regulate the temperature without leaving the steam room.
Installing a gas stove in a bathhouse with your own hands in a relaxation room provides the following advantages:
- There is no accelerated burning of oxygen, therefore, there is no need for increased ventilation of the room.
- The steam room does not occupy any useful space for visitors, therefore it can accommodate more people.
- The steam room will not be contaminated with fumes and other waste associated with the operation of the stove.
- Gas oveninstalled in an adjacent washing room or in a relaxation room, usually heats not only the steam room, but also all other rooms.
This type of installation will require additional manipulations such as creating holes in the wall leading to the steam room. However, if you plan for this type of installation in advance, you will not have to carry out any additional work.
Ensuring fire safety
In order to avoid negative consequences after installing a gas furnace, you should take care of fire safety.
All flammable and flammable materials or objects must be placed at some distance from the device. A half-meter distance will be enough. You should also maintain a distance of the stove from the wall in the range from 5 to 15 centimeters.
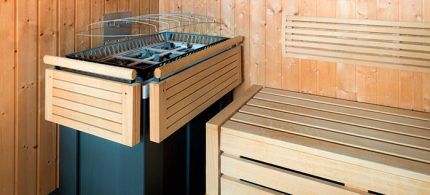
In the place where the homemade gas sauna stove is placed and installed, you should also lay out insulating sheets of refractory material or make brickwork.
It is also necessary to protect the ceiling with fire-resistant sheets with basalt cardboard or other material. It should be taken into account that the protection area should be approximately thirty percent larger than the dimensions of the oven.
It is recommended to position the structure in such a way that the door providing access to the burner opens towards the doorway, and the heater door opens towards the wall. In a room heated by gas, there must be a means to quickly extinguish the fire in case of fire. The dressing room should have at least one small window.
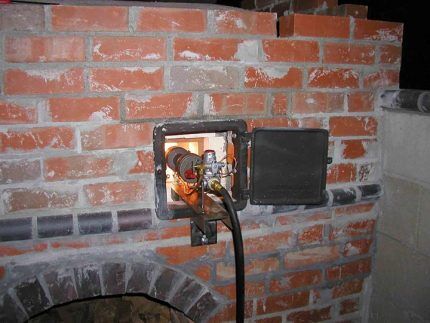
When building the walls of a sauna stove, it is worth using refractory bricks, and for laying the combustion chamber, bricks made from fireclay clay.
The masonry mortar is mixed from clay with the addition of sifted sand. For the foundation of the stove and the outer part of the chimney, cement is used in the solution instead of clay. To strengthen the base of the future furnace, you need to reinforce the foundation with reinforcement and use galvanized sheet to protect the floor in front of the door of the combustion chamber and the closed heater.
To equip a brick stove, you will need to purchase a grate, a combustion door and a blower door. Also, if you plan to install a gas-burning stove, then you should take care of the place where the solid fuel will be located so that moisture does not get on it.
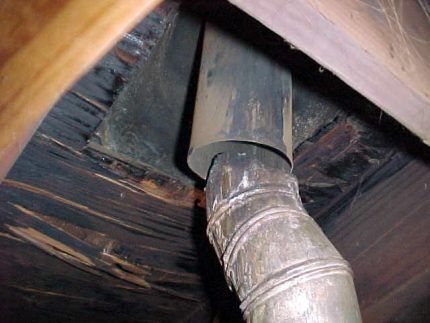
To ensure that the chimney from a gas stove lasts a long time, asbestos-cement or stainless steel pipes are used for its installation. The chimney height is usually planned at five meters above the burner level.
You will also need to provide water and gas supplies. Water can be supplied by connecting a water supply or from containers using a compressor.All options are used for gas supply: from connecting to the gas main and using a gas holder or cylinders.
Foundation for installing a stove
Depending on the weight of the future furnace, the necessary requirements for the surface on which it will stand change. It is most convenient to install metal homemade gas stoves on a flat concrete surface, previously covered with tiles, porcelain stoneware or other finishing material.
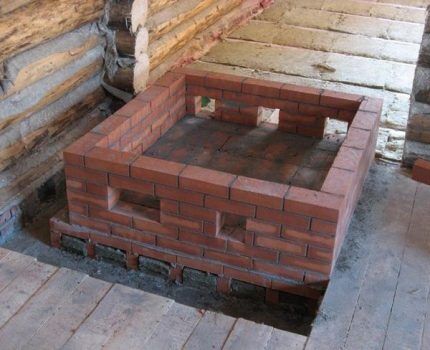
If the floor in the bathhouse is wooden, then it must be covered with fire-resistant flooring. When you plan to install a really large stove, weighing more than 700 kilograms, it is worth additionally pouring a concrete foundation. It is arranged separately from the bathhouse foundation.
Weight is calculated based on the sum of the following parameters:
- the weight of the gas stove itself;
- weight of stones;
- weight of filled water containers;
- weight of the chimney structure;
- the weight of the protective screen installed in front of the gas furnace.
In most cases, a concrete base is planned for installing a gas stove in a bathhouse.
The following nuances are highlighted when pouring concrete:
- the area of the foundation should be approximately 20 centimeters larger than the area of the furnace base around its circumference;
- the depth of the foundation under the stove must be no less than the depth of the foundation under the entire bathhouse;
- the shrinkage of the bathhouse and the stove should be independent, so there is no need to connect the foundation of the building and the foundation of the stove;
- the foundation of the furnace should not reach the floor level by about 20 centimeters; this cavity is filled with bricks.
So, taking into account all the recommendations, pouring the foundation will consist of the following steps. First, the pit is prepared. Then work is carried out on installing formwork and laying reinforcing mesh and other reinforcing materials.
Next, the concrete is poured directly. Fire-resistant material, roofing felt or roofing felt, is spread, and several rows of bricks are laid on it.
In order to install the stove on a wooden floor, you need to make sure that it is durable. After this, cover the tree with a fire-resistant coating: basalt cardboard and asbestos. A metal sheet, refractory brick, natural stone or porcelain stoneware is laid on top.
If the owner’s idea involves inserting a stove, it is necessary to line the space between the wooden wall and the stove, as well as the chimney path, with refractory materials or fireclay bricks. However, it is worth remembering that an air gap must be left between the stove and the fire protection. This space is usually filled with stone wool or basalt cardboard.
Features of homemade gas stoves
A gas stove differs from a wood stove in that it uses gas for kindling. Therefore, in such a device, instead of a window for storing firewood, a cavity for the burner is mounted. However, you can also make a gas-wood stove with your own hands.
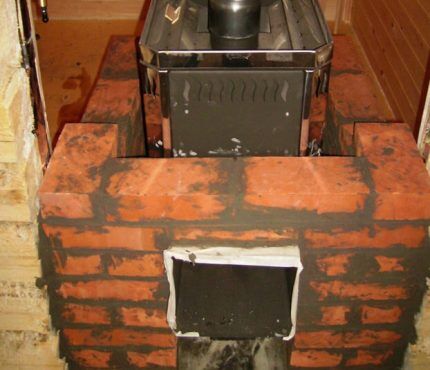
Most gas furnaces have the following design.A pressurized or atmospheric gas burner is mounted in the device body. Fuel is supplied through a sealed gas hose or pipe.
At the top homemade gas stove there is a closed heater or an open tray with stones that are heated by a burner, as well as a device that removes combustion products.
When assembling it yourself, be sure to take care of installing a thermostat and a fuse that cuts off the gas supply if the burner goes out. The gas chamber containing the combustible gas is usually located under a tray with stones.
The advantages of homemade gas stoves for baths include:
- compact size, because gas stoves do not have a firebox or ash pan;
- rapid heating to the required temperatures;
- economical resource consumption;
- there is no need for constant maintenance of the device;
- When installing a water tank, you can also heat the water.
The disadvantages include the need for a gas source. For example, if the bathhouse is located outside the city in a non-gasified area, some owners will have to buy gas cylinders or install mini gas holder. However, there is an advantage to this - there is no need to obtain permits.
It is worth remembering that when working with gas you must always follow safety precautions.
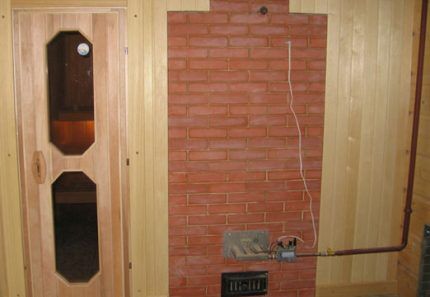
When installing an open combustion stove, it is necessary to design and install a ventilation system and chimney.Also, when oxygen is burned, the air becomes drier, so you need to take care of humidifying the air.
Gas sauna stove from a cylinder
To independently assemble a gas stove for a bath, you will need to collect and purchase the following materials:
- You need to buy an atmospheric burner at the construction market or in a store with gas equipment.
- Find an old but not rusty gas cylinder. A new cylinder, large-diameter pipe or sheet of metal with a thickness of 8 to 16 millimeters will also be suitable.
- For the base of the heater you will need thick metal, for example, a brake disc from a car. It will last for at least several years.
- A gas pipe with a diameter of 5 centimeters and a length of approximately 3 meters.
- A pipe with a diameter of 10 centimeters, which will be used to remove gases.
- Some copper or bronze elements to connect parts.
- Additionally, you will need to acquire the following tools: grinder, welding machine, drill, measuring instruments.
After assembling the complete set of tools, you need to use a grinder to cut off the outer part of the cylinder so that the cut diameter is equal to the external size of the brake disc. Then, using welding or a drill with bolts, you need to attach the disk to the cylinder.
The next step is preparing the air supply pipe. In a pipe with a diameter of 5 centimeters you need to drill about ten 5-mm holes.
A hole with a diameter of approximately 55 millimeters is also made at the bottom of the cylinder. The whole, that is, not drilled, part of the five-centimeter pipe should extend out of the cylinder by about two meters. It must be welded to the cylinder.
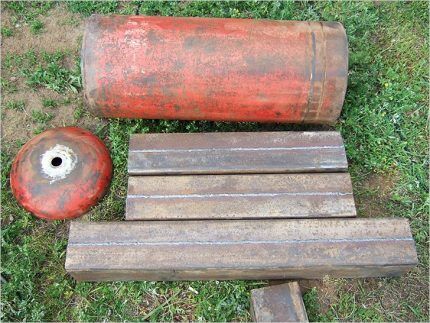
The pipe that will supply gas is welded in the same way. An adapter is attached to the second end of this pipe, with which you can connect the device to a gas pipe or gas cylinder.
A hole is cut out on the cylinder for the chimney and the corresponding pipe is welded. Using a grinder, a rectangular hole for the door is also cut. The hinges are welded and the door is hung directly on them. You also need to attach a handle to the door.
In this way, a simple model of a gas oven will be made. Gas is supplied through the pipe to the burner. The combustion process is started, depending on the burner, by piezo ignition or electric pulse.
Metal sauna stove
To achieve good steam in a bathhouse, you need a good brick oven. It will keep you warm for as long as possible. However, such a furnace requires a serious foundation. This requires additional money and time.
In order not to spend money on pouring the foundation, you can make a metal stove yourself. Creating such a furnace does not require an in-depth study of the circuits, and its effectiveness has been proven in practice.
Although a metal stove heats up quickly, it cools down just as quickly. This is its main drawback.
In order to assemble such a structure, you will need a metal container, sheets of metal or pipes of various diameters, a gas burner, an angle grinder, and a welding machine. Those who do not know how to use a welding machine can make a body from an ordinary pipe.This will not make the stove any worse.
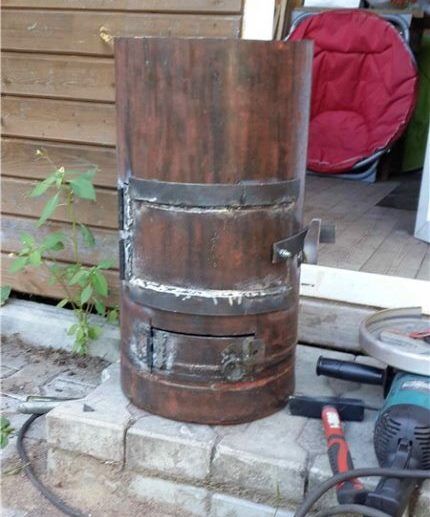
The result will be a stove about 80 centimeters wide and about one and a half meters high. A heater and platforms for installing a container with water are mounted on top. Thus, to create a steaming atmosphere in the steam room, you will need to pour water on the stones.
When drawing up a conditional drawing, you need to take into account the exact dimensions of all parts. Initially, you need to find a pipe or gas cylinder with a height of 180 centimeters and a diameter of 80 centimeters. In this case, the walls of the pipes must be quite thick - from 0.4 cm or more.
You will also need a metal sheet one centimeter thick, a steel rod with a diameter of one centimeter, cast iron or steel doors, a chimney pipe, a gas burner and a tap. All material can be purchased at a hardware store. You will also need tools: a grinder and a welding machine. You can rent them or borrow them from friends.
First of all, the base is prepared at the place where the metal stove will be installed. It needs to be made even and level. It is necessary to cover the foundation with fireproof material.
Two rows of refractory bricks are laid on top. Do not forget that the ceiling and all walls at a meter distance from the stove must be covered with fire-retardant material.
The manufacture of the furnace is carried out in several stages. First you need to cut the pipe into two parts with a grinder, one of which will be the furnace body, and the second will be used to heat the water barrel.
In the lower part of the first section of the pipe, a rectangular hole measuring 20x5 centimeters is made with a grinder. This method provides access to the gas burner.
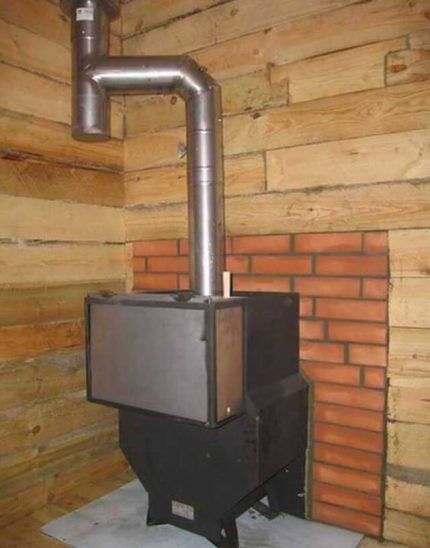
In the middle of the first section of pipe, another rectangular hole of the same dimensions is cut. The brackets on which the mesh will be held are welded. The mesh cells should be smaller than the size of the stones that will be laid on it.
A tap is welded at the bottom of the second pipe. Then the second piece of pipe is attached to the heater. In this case, it is necessary to check the seam for leaks. Next, you need to weld one door and hang the second on its hinges.
The pipe is insulated using refractory bricks or other material. After welding all the elements, the burner is installed and the stove is ready for use. It is worth remembering that a metal oven heats up to high temperatures, so it is imperative to cover all nearby surfaces with refractory material.
Assembling a gas stove for a sauna with your own hands is not difficult. To implement such an idea, you need to observe safety precautions and follow recommendations. Thanks to self-assembly, you can save a lot of money, and the efficiency of this design is not much inferior to store-bought models. Before you start assembling the stove, you need to carefully prepare the room.
Conclusions and useful video on the topic
Sauna stove made from a gas cylinder:
How to make a gas boiler for a sauna room:
The homemade gas stoves considered can operate directly from a gas pipeline or when connected to gas containers. When using gas cylinders, it is unlikely that you will need to obtain permits.
Remember that when working with gas devices you must always follow safety precautions. Be sure to install a fuse on your homemade structures!
Would you like to talk about how you built and installed a gas stove in your own bathhouse? Do you have useful information on the topic of the article? Please leave comments in the form below, post photos, and ask questions about things that interest you.


How safe are these homemade products? And is it necessary to somehow coordinate with the gas workers?
If you decide to make a sauna stove yourself, you can’t expect to receive official permission for installation from the gas service. The way this structure is structured is that no one will give you permission to install uncertified equipment. Therefore, you will need to certify your homemade product, as well as obtain permission for installation from the fire inspectorate.
If you comply with all these requirements, it will take a lot of time to obtain the appropriate permissions from all organizations. And even if we solve this issue “in a different way,” it will not be financially feasible, since it will be easier to buy a new stove.
Therefore, many do not contact official registration.But here it is worth clarifying that the project must still be developed and approved at a professional level. If there are any doubts, it is better to consult on any detail.