Aligning the walls according to the beacons - preparatory and main stages of work
Aligning the walls along the beacons is an integral stage of finishing work. The quality of the finish will depend on this.Therefore, you need to approach the procedure carefully, as it has some nuances. Although this is one of the simplest methods of preparing a wall for finishing, in order to achieve results, you must follow certain rules and recommendations of specialists.
The content of the article:
Preparatory work on the surface of the walls
At the initial stage, the surface is prepared for further work. If there is old plaster on the walls, it is better to remove it. This is especially true for old coatings that are poorly maintained. Applying a new layer of mortar to old plaster will further destroy the finish.
If necessary, you can leave only those areas that are well held on the structure. To check this, tap the old plaster with a hammer. Weak spots are immediately cleared at the preparatory stage.
Often the old coating is left in order to save mortar. This is especially true when it is necessary to apply a thick layer.
If beacons are installed on bare walls, then they must first be cleaned of any remaining mortar. This also applies to significant design defects. In the future, all this may interfere with the installation of beacons and the alignment of walls.
Clarifying the scope of work required before plastering the surface
Leveling the surface requires preparation. First, inspect the surface for depressions and dents.Defects are leveled with a solution to the required level. Elements that protrude are removed by combing. The result should be a smooth wall without any visible defects. The permissible level deviation does not exceed 1.2 cm.
The wall is checked for defects visually or using tools (devices). In the latter case, we are talking about a laser level or threads that are pulled along the structure. Self-tapping screws are screwed into the wall from above. Threads with plumb lines are tied to them. It is better to place them at the edges. A thread is pulled between the plumb lines. It should have knots that will allow it to be moved vertically.
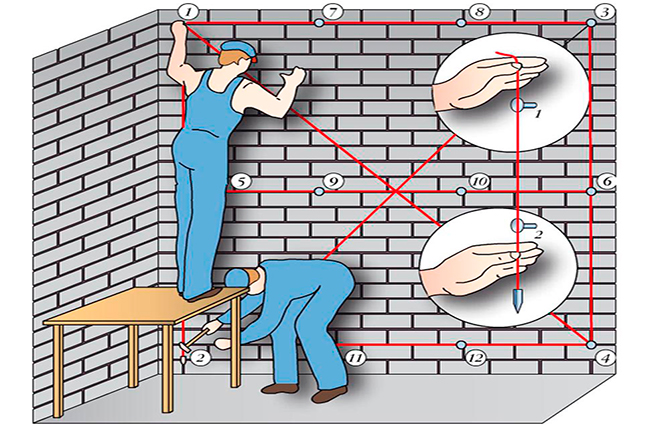
A laser level is a professional tool. Using it at home for repairs has some difficulties. The tool is not cheap and requires certain skills and knowledge to operate. The version with threads is suitable for home use. It does not require any costs and is quite effective.
Read the article: 14 Best Laser Levels: review, comparison of price and quality
Main stages of preliminary work
After all defects have been eliminated, they proceed to preliminary work. The wall surface is cleaned of dust and dirt. To do this, use an ordinary broom, which is found in any home, or a construction vacuum cleaner. Household appliances are not suitable for this task. Construction dust can damage the vacuum cleaner. Therefore, it is better to use professional construction models.
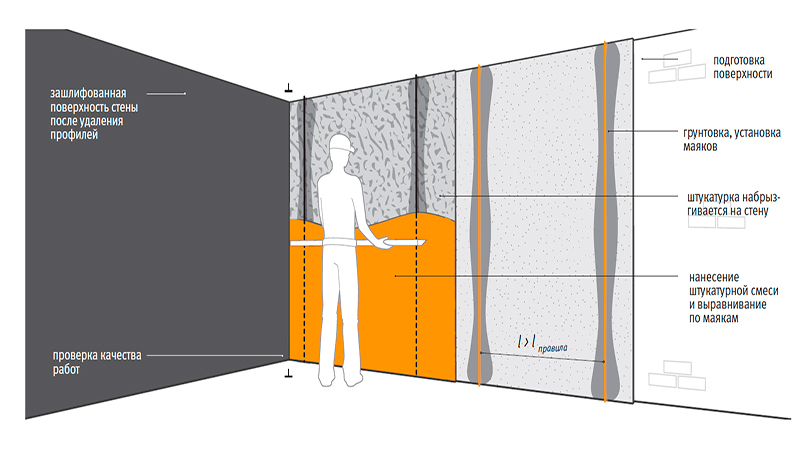
When the wall for leveling is cleared of contaminants, it is treated with a primer composition. The primer allows you to ensure reliable adhesion of the solution to the wall surface. It also protects the coating from mold and mildew.
Installation of reinforcing mesh is required when applying a thick layer of mortar.It is also used when leveling walls in the bathroom or kitchen. It improves strength plaster for further tiling. The mesh is secured using mortar or dowels.
Distribution of beacons on walls
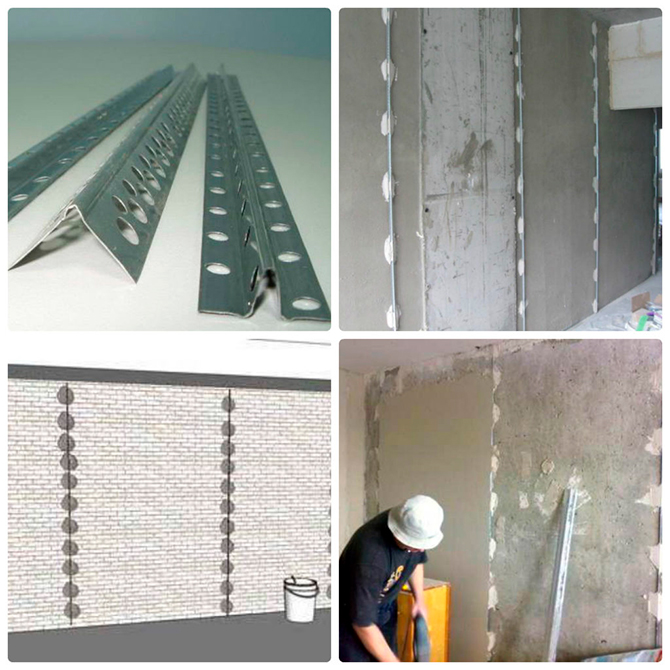
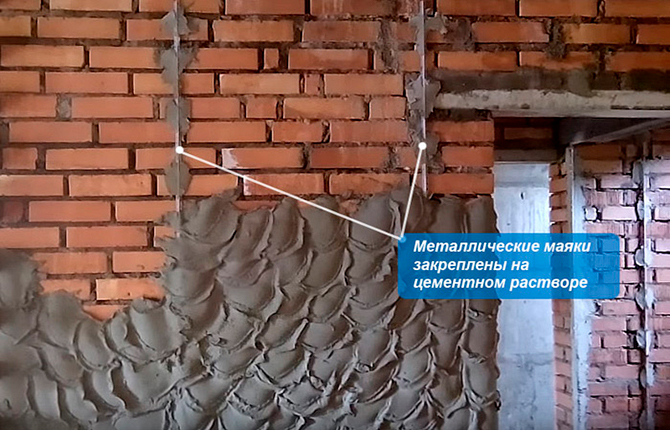
When the wall is ready for leveling, you can begin attaching the beacons. For this purpose, it is better to use a special profile, which is sold in a hardware store. It is not recommended to make beacons from gypsum or cement mortar, as there is a risk of poor-quality leveling.
The hardware store offers a large selection of beacons. When purchasing, it is worth considering the height and length of the walls. The profile is inexpensive. Therefore, it is recommended to buy several beacons for reserve. This will save you from unnecessary visits to the store if there is suddenly not enough material.
The distance between the beacons is determined by the length of the working tool - the rule. It will level the solution. The rule should be to smoothly glide along the beacons. Therefore, the distance between them needs to be made somewhat smaller than the length of the tool. It is recommended to tighten a screw at the top point of the wall and attach a plumb line to it. This will allow you to align the beacon vertically.
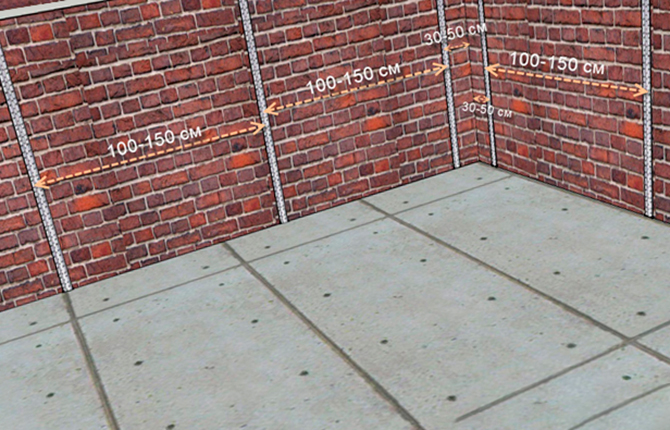
Installation of beacons begins with marking. They retreat 20-30 cm from the corner and make a mark. This is where the first profile will be located. Each subsequent one is mounted at a distance of 1-2 m. Again, it all depends on the length of the rule. First, it is worth dividing the length of the walls by the step between the beacons. This simple technique allows you to calculate their number.
The profile is fastened using two methods:
- For gypsum mortar. It sets quickly and holds the profile well. At the marking location, several cakes of material are applied along the height of the wall.When applying the solution, the thickness of the layer is taken into account. It should be enough to install the profile at the required distance from the surface of the structure.
- Mechanical fasteners. The beacons are fixed using self-tapping screws. To screw them into the wall, you must first make holes in it. The method is mainly used in cases where a small layer of plaster is required for leveling. After plastering, the screws can be easily removed, and the place where they are screwed in can be filled with cement mortar. The method is relevant when leveling concrete walls and structures that have a relatively flat surface.
When installing beacons, attention is paid to aligning them vertically. The quality of the final result will depend on this.
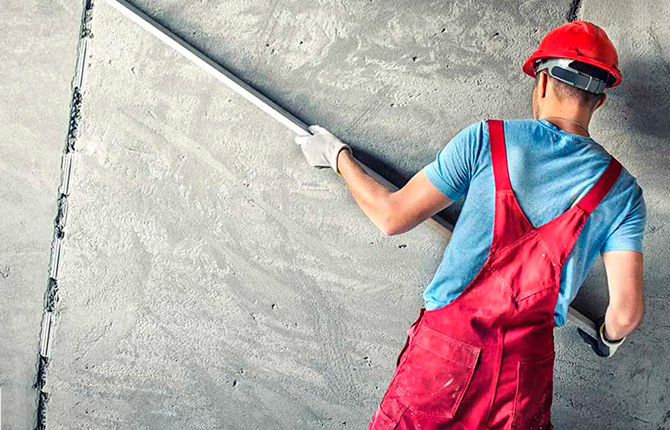
The process of plastering walls
Plastering is carried out in one or several stages. It all depends on the thickness of the applied layer. After mixing the solution, you can begin direct leveling:
- Applying a rough layer. If leveling requires applying a coating with a thickness of 15 mm or more, then plastering is carried out in two stages. First, apply a rough layer. It should not reach the beacons. The distance to them is about 1 cm. The solution is applied carefully.
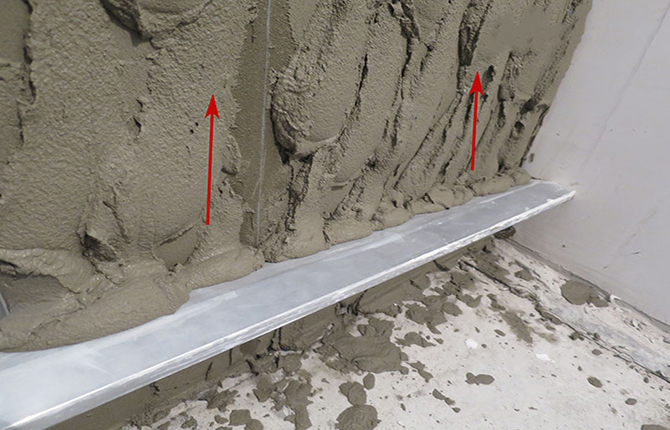
- Applying the second layer. The second stage begins after the first layer has dried. Working material is applied between the beacons so that it protrudes slightly. After this, it is pulled up. If necessary, the rule is swung to the sides. It should fit snugly to the beacons. Otherwise, it will be difficult to achieve a smooth surface.
- Aligning corners. When the solution has set, you can begin to level the corners. A trowel is used for this. It is suitable for working in hard-to-reach places.It is necessary to carefully apply the material and level it over the area. The set layer of plaster acts as a level.
If it is necessary to remove the beacons, this is done after the solution has dried over the entire area. The place of their installation and all defects are repaired. If the surface is then finished with tiles, then minor defects are acceptable.
The final stage of work
Aligning the walls along the beacons allows you to create a base surface, which will later be finished. Before laying tiles, it is necessary to prime the work surface. In other cases, a number of additional manipulations are performed. It all depends on the choice of finishing material.
Plaster is not suitable for subsequent finishing with wallpaper and other similar materials. It is first sanded and coated with putty. The thickness of the layer must correspond to the recommendations given by the manufacturer on the packaging of the material. Before painting or wallpapering, the walls are puttied twice, with starting and finishing putty.
Aligning walls using beacons is a method that will allow you to cope with defects of any size on the walls of a room with minimal loss of space. Even a person who has minimal knowledge and skills in the field of construction can cope with such work if he strictly follows the instructions.
Have you ever used this method? Write in the comments. Share the article on social networks and save it in bookmarks so as not to lose it.
We also recommend watching a selection of videos that will reinforce your knowledge and answer any remaining questions.
Installation of beacons for plaster.
Plastering walls according to lighthouses.
Sources:
- https://xn—18-5cd3gb3b.xn--p1ai/raznoe/vyrovnyat-po-mayakam-steny-vyravnivanie-sten-po-mayakam-svoimi-rukami-vyravnivanie-sten-po-mayakam-svoimi-rukami-video -stoimost.html#i-20
- https://kvartirnyj-remont.com/osnovnye-principy-vyravnivaniya-sten-s-ispolzovaniem-mayakov.html
- http://tochkaremont.ru/technology/shtukaturka-sten-po-mayakam

My husband did everything himself. There is nothing complicated about this if you work according to the instructions and even better - watch the video
Your husband probably has the appropriate education? I couldn't do it all myself. There are too many nuances.