How to make a beautiful and durable aquarium - assembly diagram
A do-it-yourself aquarium at home has a unique shape and can include a lot of features.It's easy to create. The main thing is to stock up on tools, materials and follow the instructions presented below.
The content of the article:
Kinds
The most popular types of do-it-yourself aquariums:
- Standardized – standard solution. Rectangular aquarium. Usually the length is greater than the height. Sizes from 50 to 125 l. There are larger designs, but special reinforced glass is used for their manufacture. They are not mobile.
- Panoramic - to create this option you need special equipment. Well suited for private houses and large apartments. The container is placed in the area of maximum visibility. The back and front are curved at 30°-40°. This arc provides visibility from any angle.
- Corner – a structure whose installation involves the use of an angle. Essentially, it is a glass triangle.
- Round - most often these are small, tabletop aquariums. Due to their shape, they are impractical and not suitable for keeping large numbers of fish.
The designs are very different. The easiest way to make a rectangular aquarium with your own hands.
What tools will you need for this?
The first thing to start with is to prepare a drawing and inventory. Without high-quality tools and components, nothing will work. To make an aquarium with your own hands, you need to prepare:
- Metal corners for fixing the frame.
- Masking tape.
- Spatulas and brushes.
- Silicone, heat gun.
- Backings for gaps.
- Knives.
- Small clamps.
This is the minimum set of tools for assembly. Installation must be carried out on a flat surface.
Choosing the right glue
Selecting an adhesive composition is the most important step in preparing to assemble an aquarium with your own hands. The best is a silicone-based sealant. In addition, you need to carefully study the directions on the tube:
- Permission to glue glass for aquariums.
- 100% silicone.
- Eliminate the presence of antifungal components and additives.
The glue must be as pure as possible, since any additional elements can be toxic and cause the death of the fish.
Among the main recommendations it is worth highlighting the following:
- It is best to take colorless silicones - they are suitable for all types of containers. If a person decides to make an aquarium with his own hands for the first time, then unevenness in the application of glue will be hidden.
- White is suitable only if combined with interior elements.
- Black sealant works well for large aquariums.
The container in which the sealant is contained also plays a role. If you buy a tubed version, then you should take a construction syringe or pistol for it. Otherwise, it will be difficult to get the contents.
Choosing the right glass for an aquarium
It is important to initially select 2 parameters:
- Type and size of glass.
- The thickness of the structure.
Each type of glass is different:
- Acrylic is a flexible and durable material that is suitable for a variety of designs. Has a high level of strength. But the service life is relatively short - 5-8 years. In addition, it is easily scratched by mechanical stress.
- Plexiglas is easy to process and flexible. The material is suitable for creating curved surfaces, for designing streamlined or round shapes. But there are some peculiarities - plexiglass is fragile, so the load is up to 100 liters.
- Tempered glass is a durable, extremely strong material. No cracks or abrasions appear on it, and it does not become cloudy during use. Suitable for regular geometric shapes, not suitable for complex structures.
There is strong water pressure on the walls of the tank. The larger its size, the higher the resistance. There are no strict rules when choosing glass thickness. There are several recommended principles:
- For containers up to 30 cm – 5 mm.
- For an aquarium up to 60 cm - 10 mm.
- For a tank up to 80 cm - 20 mm.
Considering the properties, you can choose the material to make an aquarium with your own hands.
DIY container assembly
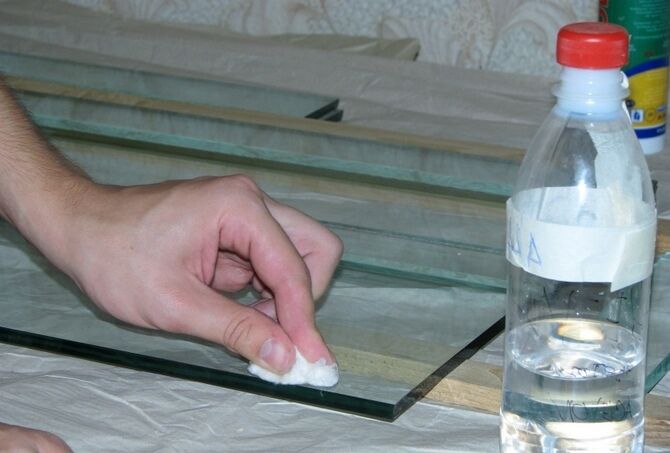
Before installation, you need to assemble all the elements together. Prepare glass, glue, sealants, tools. Then the cut pieces of glass will need to be treated with alcohol along the gluing area.
There are 2 types of assembly allowed: alternate and general. Let's consider the simplest one.
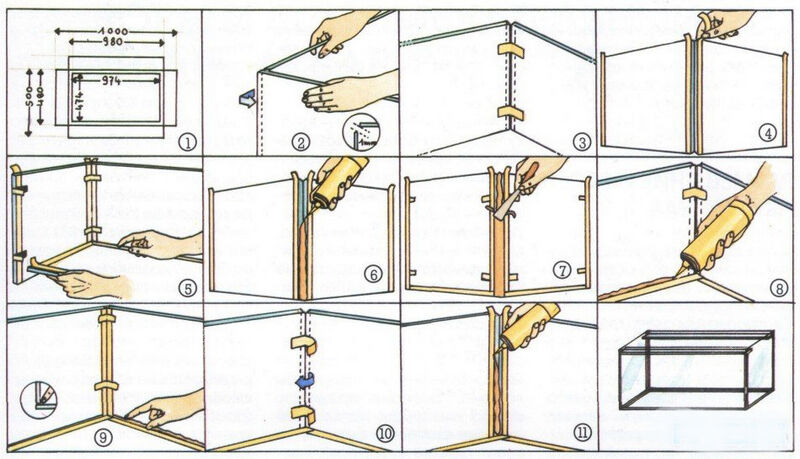
How to make an aquarium with your own hands - alternate assembly:
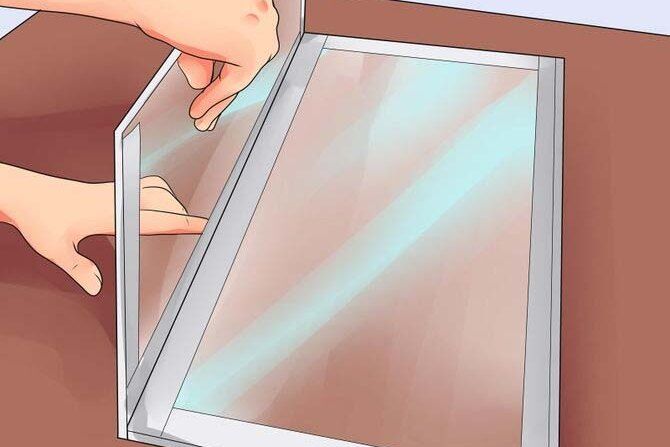
- On the side glass we apply sealant over the entire surface of the end part. Make sure to make the seam as straight as possible.
- We apply the front part to the side with sealant, press it down moderately, and fix it. Checking the correct installation is done using a level. You need to make a right angle of 90°.

- We wait 3-4 hours until the composition is completely dry.
- We repeat the same manipulation with the other 2 pieces of glass.
- Now let's install the bottom. Apply adhesive to the outside of the resulting rectangle and place a large glass (bottom). This is the last element of the frame. Let it dry.
- Using a metal level, we check all the corners and remove any excess glue that has come out with a spatula.
- We leave the frame to dry for a day. During this period, under no circumstances should it be moved.
- After this, we treat the external end parts with sealant and let the aquarium dry for 3 days.
Making a roof for an aquarium
Another point is the production and installation of the canopy. This is not a required option. But the cover serves as a fastening element for accessories and protects from dust. It is necessary if there are children or animals.
When making a lid with your own hands, you can use various options as a material:
- PVC. Plastic sheets are a popular type of blank. They are easy to install, flexible, durable. When working independently, it’s easy to adapt to the material.
- Chipboard, plywood - cheap, affordable, simple. But the durability of plywood is extremely low. It reacts negatively to moisture and becomes deformed upon contact with water.
- Glass - such a roof will look stylish. The material matches the design, allowing you to contemplate the water world from all sides.
Installation begins with accurate measurements. Depending on the size of the aquarium, a lid is created. Its edge part should be 1-1.5 cm larger than the tank. Rubber Velcro is used for the backing. They are placed on each side. The substrate eliminates friction between the lid and the fragile section of the glass.
Smooth-running closers are used as clamps. They will prevent the lid from falling sharply and are convenient to use.
How to properly make lighting in an aquarium
Aquarium lighting is an important issue. The power, spectrum and strength of influence affects the development and growth of flora and fauna of the underwater world. In addition, light provides an aesthetic component.
The choice of lighting depends on 2 factors:
- What kind of fish live? Some inhabitants of the underwater world need intense light and elevated temperatures, while others prefer cool and dark places.
- Aquarium flora. For example, corals need long daylight hours, while sea anemones, on the contrary, avoid light.
The optimal solution is to use ready-made removable design options. If you are not an electrician, then creating the wiring and connecting all the elements yourself will be difficult and unsafe.
Manufacturers offer various types of lighting:
- LEDs are a solution that is widely used in all industries. With their help, it will be much easier to control the flow of light. Suitable for night lighting as it is easy to adjust the light to create a moonlit effect.
- Incandescent lamps are a budget and old type of lighting that is still used in many areas. But it is not suitable for lighting an aquarium. Incandescent lamps, like halogen lamps, produce too intense light and a lot of heat. There is no actinic light here.
- Luminescent is the appropriate type for an aquarium. This type of lamp does not emit heat, produces actinic light and has high power. The spectrum range varies from 5500 to 10000 K.
The choice of lamp or luminaire depends on many parameters. It is important to take into account the size of the container, the microclimate in the aquarium, as well as the preferences of its inhabitants. Optimal - fluorescent lamps and lamps with an adjustment function.
Installing filters
With the help of filters, a healthy microclimate is maintained in the aquarium. They saturate the water with oxygen and purify it. There are several types:
- electric filters operating with a pump;
- flow capture of air bubbles.
For large tanks of 50, 100 liters, designs with an electric pump are installed. The equipment is powerful enough to purify large volumes of water. And for medium, small containers, air filters are suitable. They can be bottom and airlift.
Installation of the bottom filter occurs after the structure is assembled. Using a carriage and suction cups, it is installed on the bottom, and the circulation pipes are brought up and attached to one of the sides of the aquarium.
Aerolift types of products are installed after water has been poured and livestock has been added. They easily cling to the side and are also easy to remove. Among the main advantages are cost and ease of installation. Disadvantages include low productivity and short service life.
Decorative elements for an aquarium
Decorative elements for an aquarium are algae, stones, shells and special structures. When choosing vegetation, the characteristics of the natural habitat are taken into account. Those algae that have similar temperature and lighting requirements grow and develop better.
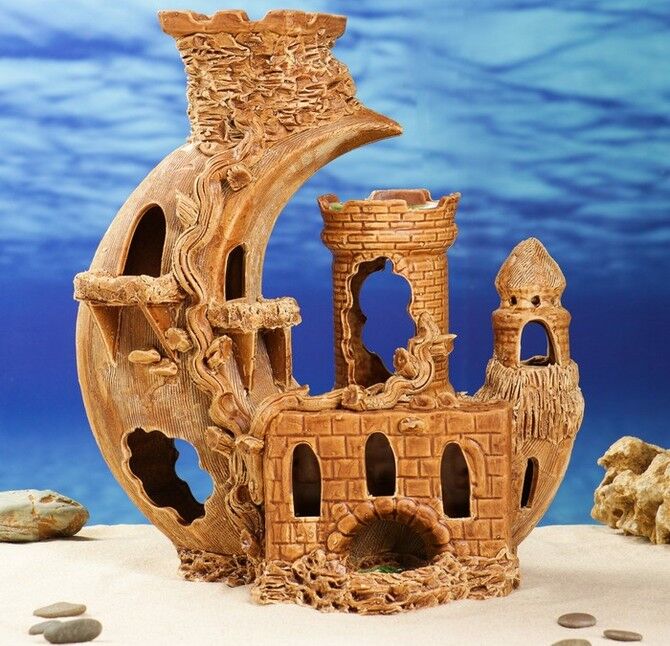
It is better to buy stones and shells in specialized stores. They must be completely cleaned and not contain any pathogenic bacteria. Water castles and grottoes, where fish will swim and hide if necessary, look advantageous. It is worth choosing natural materials.
Additional devices
To make an aquarium with your own hands, you will additionally need:
- compressor for oxygen saturation;
- siphon for cleaning the container;
- carbon dioxide generator for plants;
- UV sterilizer for water disinfection;
- samp (installed next to the aquarium and used in water preparation);
- automatic feeder (for those who are often away);
- aerators (you can use sandstone, rowan branches, etc.).
Making an aquarium with your own hands is not difficult. But you will still have to buy materials and additional equipment.
If you have experience making an aquarium, share your tips in the comments.
We also recommend watching a video that will reinforce your knowledge and answer any remaining questions.
A small aquarium with your own hands.
How to glue an aquarium with your own hands - the highest quality method.
Norm of air humidity in an apartment: methods of measurement + tips for normalization. All this can be found on our website in the article link.
Used Books:
- https://aquaspecial.ru/akvarium/akvarium-svoimi-rukami
- https://www.aqvium.ru/21-kak-sdelat-akvarium-svoimi-rukami
- http://sdelajrukami.ru/akvarium-svoimi-rukami