Do-it-yourself drainage hole in a private house: how to dig and arrange it yourself
In small settlements there is no general sewerage system.At the same time, the need for safe collection of sewage in a suburban area plays an important role. Do you agree? A well-equipped drainage pit in a private house will perfectly cope with the duties of receiving and partially disposing of wastewater.
But is it capable of providing comfort and epidemiological safety to household members? How to make sure that the hole does not cause trouble? It is worthwhile to thoroughly understand these issues before deciding to install such a system.
We will also discuss solutions to the problem of wastewater in a suburban area and talk about how to build a cesspool yourself and what you will need for this. The article contains expert advice, photo and video materials that help to better understand the arrangement of a sewerage point on the site.
The content of the article:
Features of local sewerage
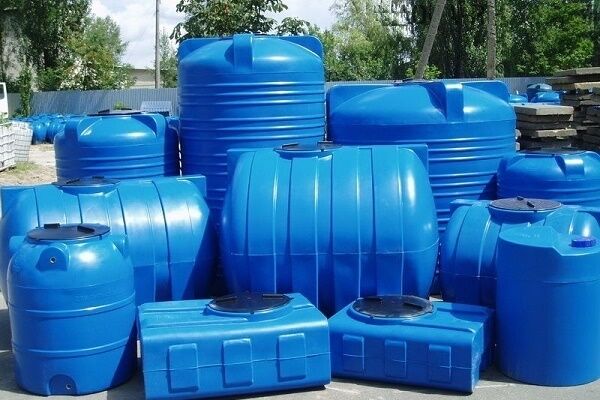
The operation of a suburban household is associated with the production of wastewater. Every homeowner is faced with the task of not so much accumulating wastewater, but rather cleaning it. Moreover, the solution common in rural areas - digging an old barrel or tank under a sewer cesspool - is ineffective.
If the daily volume of wastewater exceeds one cubic meter (1000 l), then the disadvantages "barrel" septic tanks will soon manifest themselves as unpleasant odors. Or worse – intestinal infections among household members. Finally, a do-it-yourself drainage pit made from a worn-out barrel is illegal in a number of situations.
Regulatory acts of the Russian Federation require private homeowners to comply with measures to protect groundwater from pollution by domestic wastewater.
Law “On the sanitary and epidemiological welfare of the population” (No. 52-FZ dated March 30, 1999) and “Hygienic requirements for the protection of groundwater from pollution (SP 2.1.5.1059-01) charge homeowners with solving their wastewater problem.

In turn, “Sanitary rules for maintaining the territory of populated areas” (SanPiN 42-128-4690-88), “Planning and development of gardening (dacha) associations of citizens, structures and buildings” (SNiP 30-02-97), as well as “Sewerage.
External networks and structures (SP 32.13330.2012) standardize the conditions for the organization and operation of “pit” sewerage:
- the distance from the house to the drainage pit is from 8 m;
- distance from the well (spring capture) – from 50 m;
- distance from neighboring households (fences) – from 2 m;
- the cesspool is deepened to the groundwater level, but not more than 3 m;
- cleaning is carried out upon filling, but at least once a year.
Please note that the distance requirement from drinking water sources applies regardless of where these sources are located.
Those. no matter whose nearest well turns out to be - yours, a neighbor's or a public one - cesspool it is permissible to arrange strictly 30 meters from it.Otherwise, there will be costs for fines, reconstruction of the cesspool to a two- or three-chamber septic tank, and restoration of the ecological balance in the soil layers.

Sump volume
Homeowners need to decide in advance (before choosing the type of cesspool) how to make a drainage pit of sufficient volume. Its required capacity is calculated by the formula:
V=Ndays•Xpeople•Vday/person
Wherein:
- V – design volume of the cesspool, m3;
- Ndays – number of days of operation of the pit for accumulation (before pumping out);
- Xpeople – number of permanent household members;
- Vday/person – daily water consumption per household, l.
For example, for a private household with permanent residence of 5 people, cleaning the cesspool once a month and water consumption of 150 l/person, the volume of the cesspool will be: V=30•5•150=22.5 m3.
We increase the resulting volume by at least 10% (filling the hole to the top is prohibited by regulations) and get the cesspool volume: V=22.5+22.5•0.1=24.75 m3. Let's round the value to 25 m3 – more is better than less.
The correct value of daily water consumption depends on the needs of household members for bathing and washing, i.e. from their daily habits. According to statistics, city dwellers use more water than villagers.

It is not worth digging a cesspool deeper than 3 m. Its bottom should not be in direct contact with the groundwater horizon; according to standards, it must be at least 1 m above their level. Let us assume that in the spring-autumn rainy season the perched water is at a depth of 3.5 m.This means that the depth of the drainage pit can be no more than 2.5 m.
Since laying the walls of a rectangular cube is easier than that of a round tank, a rectangular cesspool will be considered. But a round septic tank is more reliable in operation, since the soil pressure on its walls is significantly lower.
Volume is calculated by multiplying the sides of a cube. We determine the long side (width) according to the future location of the cesspool, taking into account the convenient access of a sewage disposal truck. Let the width be 5 m. Then the length will be 25:2:5=2.5 m.
There is no need to get too carried away with the capacity of the drain pit. The capacity of the sludge tank, as a rule, does not exceed 10 m3. This means that such special transport is not capable of emptying an overflowing sewer bunker of a larger volume (as in the example above) and removing waste in one go.
It is more rational to arrange a cesspool with a volume of up to 10 m3 and empty it every two weeks. After all, a large sewer bunker will take away useful space on a suburban area, which can be used for something no less important.
Construction of an independent sewer system
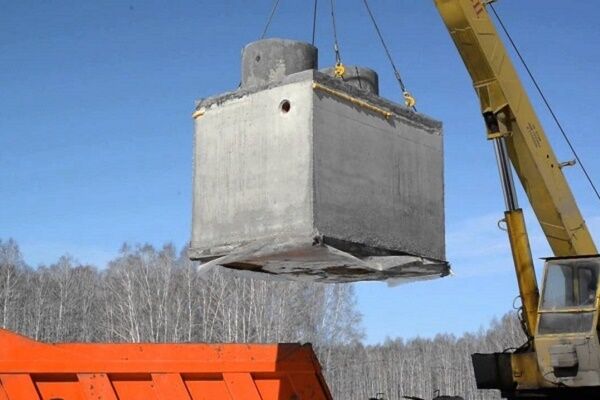
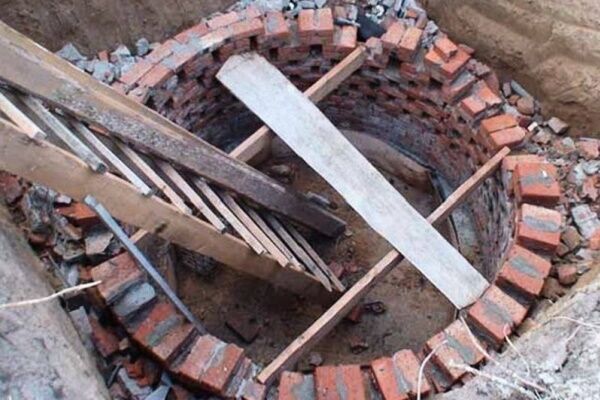
If a factory-made septic tank is easier to install, then it is cheaper to build a single-chamber brick cesspool. Such a wastewater storage tank is quite suitable if there is not much space on the site and the daily discharge of sewage does not exceed one cubic meter. Let's figure out how to properly dig and build drainage pit with brick walls.
Porous or silicate bricks are not suitable; you need a material made of baked clay. Only walls made of baked bricks are capable of withstanding mechanical loads from soil movements for years, not collapsing under the constant influence of moisture, and generally not allowing moisture to penetrate into their own thickness.
The best option for a brick single-chamber storage tank is a fully waterproofed structure, which is periodically emptied by sewer trucks.
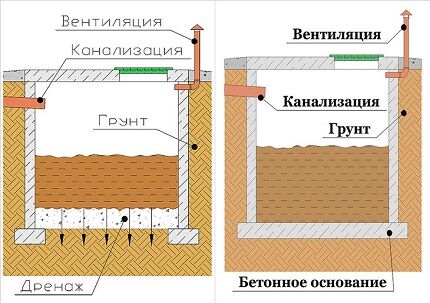
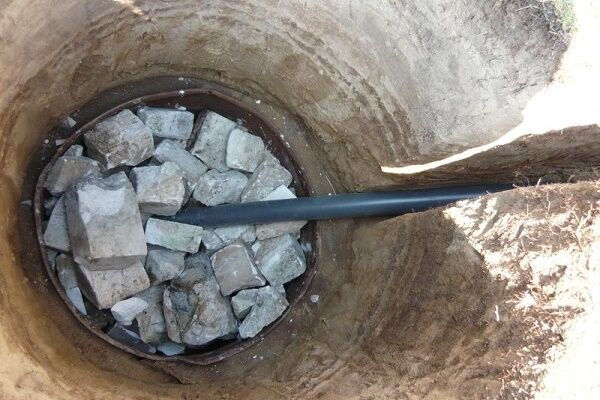
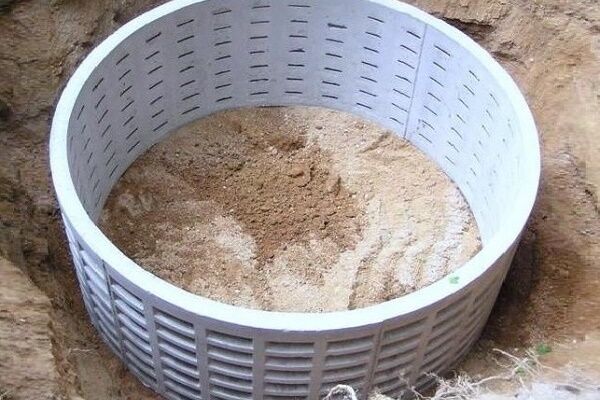
If a drainage pit is installed to dispose of gray waste coming from a kitchen sink, bathhouse, shower, etc., then a brick structure is constructed with a permeable bottom like filter well.
The bottom of a filtering or otherwise absorption well is filled with a soil filter made of layer-by-layer sand, fine, then coarse gravel or crushed stone.
The thickness of the cleansing backfill must be at least 1 m; there must be at least a meter between its conditional base and the highest groundwater level recorded during the rainy period.
If a brick sewerage structure is installed on sandy loam soil, the filtration properties of which are insufficient for the free passage of treated wastewater, its throughput capacity is increased. This is done by forming holes in the lower part of the walls, made during masonry.
We will analyze the construction of the simplest option - a storage pit for draining waste that does not perform absorption functions. Its bottom and walls will not let wastewater, clarified and disinfected with a soil filter, into the environment.

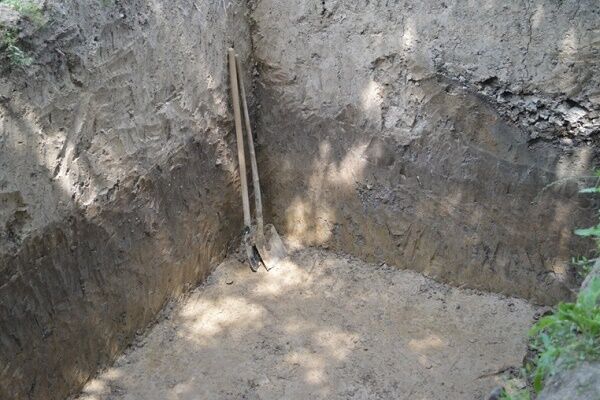
Step 1. Digging a pit
Having chosen the optimal drainage pit dimensions, we begin to prepare the pit. It is necessary to increase the distance between its walls so that a half-meter gap is maintained from the brickwork to the slope of the pit. Otherwise, applying external waterproofing to the walls of a brick septic tank will be an impossible task.
Step #2. Preparing the base of the container
A 200 mm layer of sand and gravel is poured onto the leveled bottom of the pit and carefully compacted. An overlapping roofing material is spread over the top; it blocks the leakage of laitance into the ground during concreting.

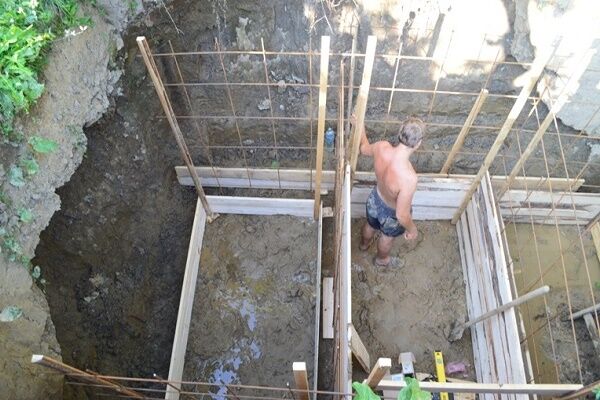
A mesh reinforcement frame (8-10 mm reinforcement, cell 100-150 mm) is placed on the roofing felt flooring.The frame is tied with flexible steel wire. Welding is not suitable because... will deteriorate the strength of reinforced concrete.
Step #3. Concrete bottom casting
To achieve better waterproofing, you should use a concrete solution of grade M300 or higher. The thickness of the concrete base of the cesspool is 150 mm. From the moment the bottom is poured with concrete, you should wait 7-10 days, only then begin laying the walls.

Step #4. Construction of drainage pit walls
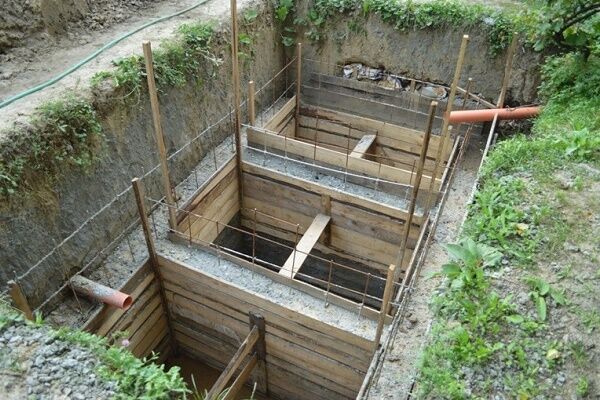
It is permissible to do the masonry “in half a brick” using ordinary mortar. However, in the final stage it will be necessary to fill the cavity between the brick walls and the slopes of the pit with a dry cement-sand mixture.
As sedimentary moisture enters, the mixture will harden and become a protective casing for the waste bin.
Step #5. Application of waterproofing
As the brick walls rise, they need to be waterproofed externally with liquid bitumen materials. You can use rolled ones, but their waterproofing efficiency is weaker. Waterproofing work should not be delayed - the higher the walls, the more difficult it is to apply waterproofing to them.
Step #6. Finishing the walls of the cesspool from the inside
It is enough to plaster them by introducing liquid glass (potassium, sodium) into the solution. A plaster layer containing liquid glass will significantly reduce the moisture absorption of the walls. Surface ironing of the plaster with cement is mandatory.

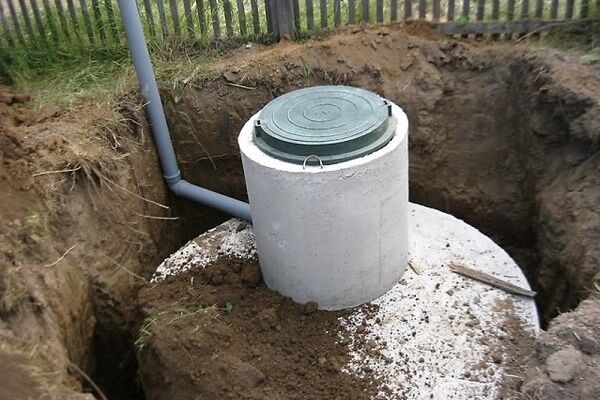
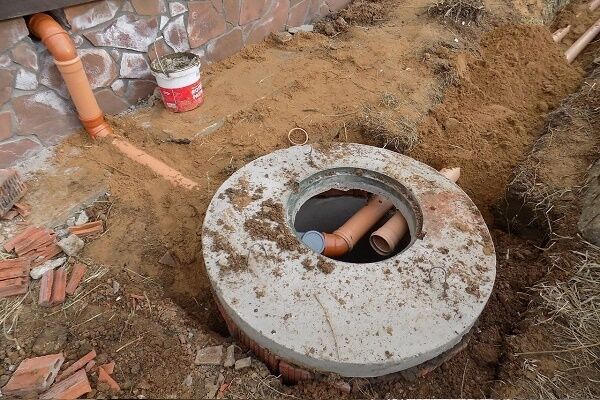
Step #7. Covering the drain pit
The waste bin must be covered with a factory-produced concrete slab.A hatch is required - sewage will be pumped out through it.
Instead of reinforced concrete slabs, you can use wooden panels, tarred on both sides and covered with roofing felt. The ceiling of the sewerage structure must be thermally insulated with polystyrene foam boards and covered with a 150-500 mm layer of soil.
A single-chamber cesspool, designed for periodic cleaning with sewage disposal equipment, is suitable for country households with temporary residence of no more than 4 people. And to ensure the daily life of a large family, a drainage pit with ground filtration of wastewater is needed. Below we describe such a complex, designed for a family of 9 people.
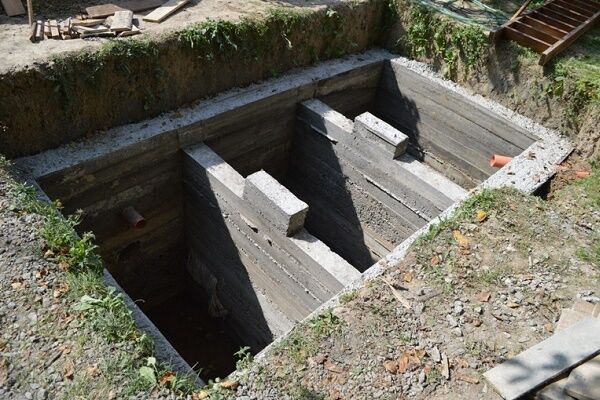
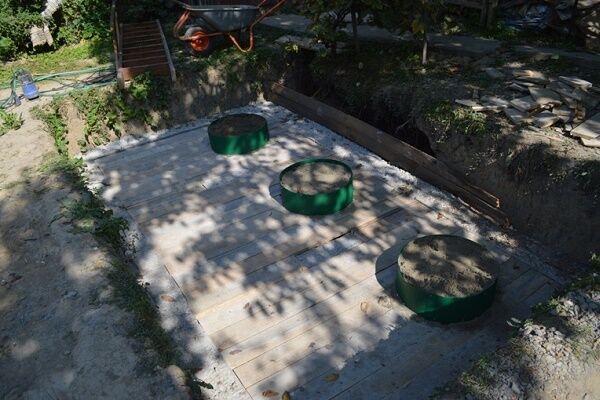
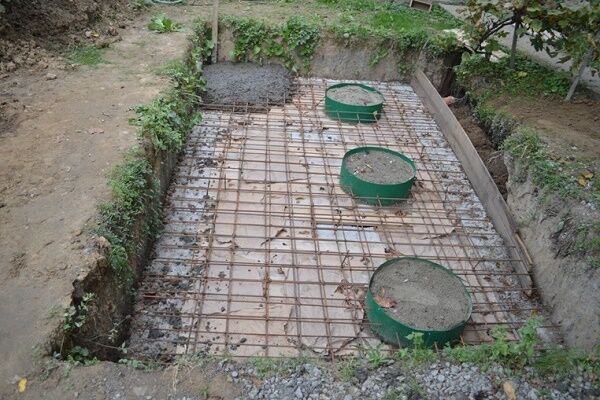
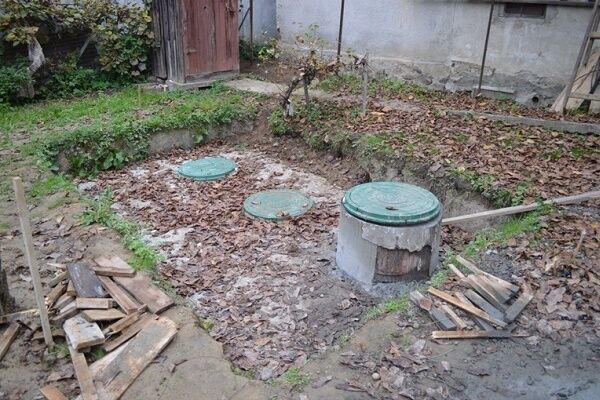
The following photo gallery will show you how to construct a drainage pit by pouring concrete into the formwork:
Local sewerage system with wastewater treatment
For a cottage equipped with modern plumbing equipment - a bathtub, toilet and bidet - a bunker-type sewer storage tank will not be enough.
A wastewater treatment complex will allow minimizing calls to specialists with treatment equipment, completely covering the need for sewerage, and avoiding local problems with soil contamination with sewage.
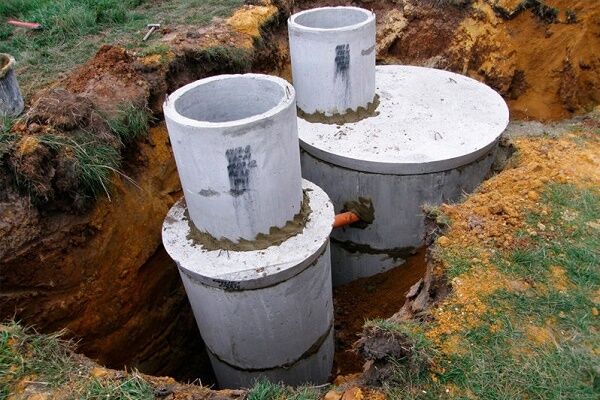
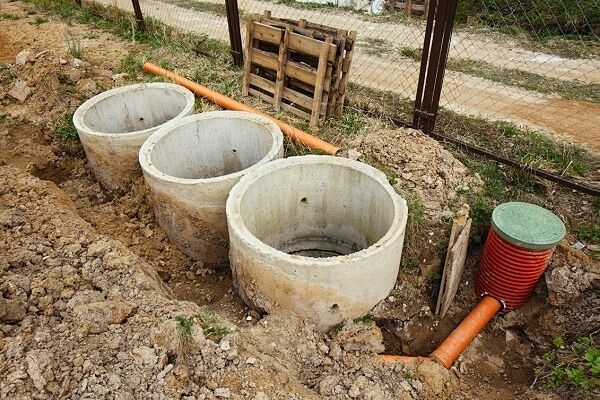
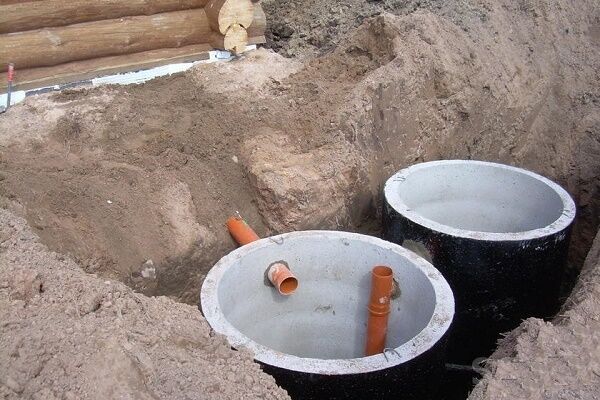
The principle of clarification (purification) of household wastewater through a system of drainage pipes is based on the natural order of filtration of fecal waste, which “works” in nature. Through the riser in the house, wastewater flows into a pipeline connecting the cottage and the septic tank. Sufficient volume of sewer well – 2.5 m3.

In such a storage tank, household wastewater is clarified with the precipitation of suspended matter. You will need to hire a sludge sucker with a team to clean the sludge deposited in the septic tank twice a year.
Self-cleaning with neutralization of sediments in a specially designed compost bin is also acceptable (see below).Clarified sewage water is sent to the drainage network, from where it goes into the ground.
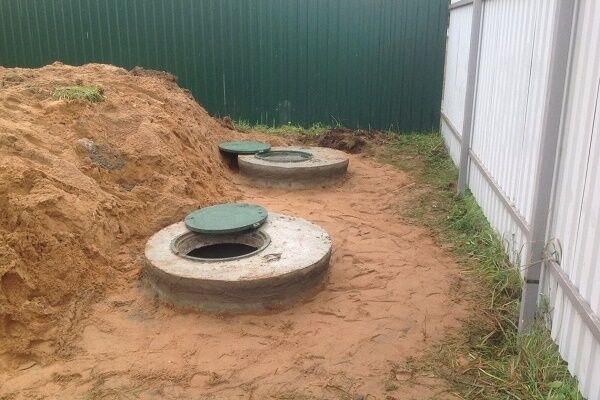
The drainage pit is located at a distance of 5-20 m from the house. The main requirement for the location and positioning of the drainage network is a sufficient distance from the building so that the wastewater entering the ground does not wash away the foundation or flood the cellar.
From the sewer settling tank, the clarified waste stream moves first into a distribution well, then from it into a system of perforated drainage pipes made of polymer or asbestos cement.
Drainage pipes are laid at a depth of at least half a meter, actually at the level of development of the soil-vegetative layer. If the soil developed on sandy soil, then the length of the drains is calculated taking into account 10 m per person.
In soil with a sandy loam base, the length of the perforated pipe should reach 14 - 17 m, with a loamy base about 20 m.

Sewage pipes from the well to the accumulation or discharge point should be placed with a slope of 0.02, i.e. There should be 2 cm of inclination per linear meter. It is desirable that the main part of the pipeline is laid below the frost depth noted in the region.
Areas located above the specified mark are thermally insulated with detachable cylindrical insulation made of polystyrene foam, polyurethane foam, polyethylene or slag backfill.
Laying a channel of 100-150 mm pipe that drains sewage water into a storage pit is carried out at least 50 mm above the distribution well with pipe routing through which clarified wastewater is directed to sealed drainage pipes.
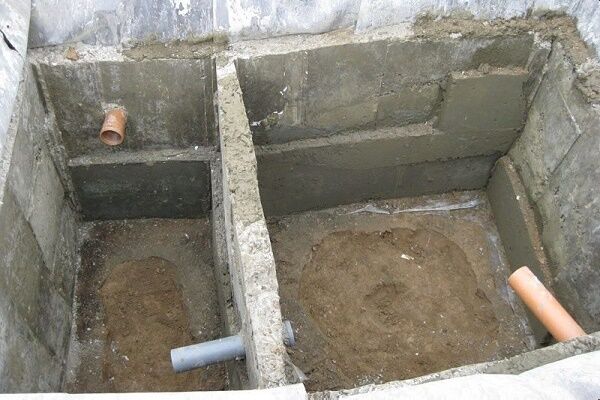
The pipeline enters and exits into the pit through tees of 100 mm diameter. Their upper ends must be left open, with cleaning pipes placed above them, having an equal cross-section with the trays supplying and discharging waste.
There is a gap of 50 mm between the open end of the tee and each cleaning pipe. Sewage pipes made of polyvinyl chloride or polyethylene are used, the diameter of which is 100-150 mm.

A pipe is attached to the lower end of each tee. It must be brought 400 mm below the calculated water level in the drain hopper.
All components of the drainage pit, together with the ground filtration system, require ventilation. This function is assigned to the sewer riser inside the house, the upper end of which is located above the roof level, the cesspool itself and each sewer pipe.

In trenches dug under the filter system, pipes are laid with the perforation down. The joints of drainage sewer pipes are insulated with roofing felt, tape, simply polyethylene or a similar material.
Drainage sewer complex
It is better to make the body of the wells, which contain the wiring elements of the drainage system intended for collecting and discharging groundwater, round.When making their walls from brick, a 400 mm internal diameter of the circle is convenient, from concrete – a 700 mm diameter.
The distribution well is not built higher than 400 mm, otherwise it will be inconvenient to work with the wiring inside it. Brick walls must be plastered and iron-clad from the inside. From the outside, it is permissible to waterproof them with clay or bitumen coating.
The necks of all distribution wells must be covered with covers made of reinforced concrete, plastic or tarred boards. A heat insulator is laid on top - slab polystyrene foam with a 200-400 mm layer of surface soil filling.

According to the direction of the drains, the wells are equipped with one-, two- and three-sided water intake outlets - open pipe outlets closed by vertical stroke gate valves. Wooden gates will be needed to regulate the water supply and when repairing the well.
At the bottom of water distribution wells, open concrete trays are formed, leading from the supply pipe to the receiving drainage pipes. The height of the trays should be equal to the diameter of the largest pipe entering the well. Their bottom is brought to the level of the lower wall of the pipes.
In polymer drainage pipes (their lower part), slots are cut 15 mm wide, with a height of approximately half the diameter of the pipe. Cuts with a pitch of 1000 mm will ensure uniform flow of clarified drain water into the ground.
The bottom of the drainage trenches is given a trapezoidal shape. They contain a 100-150 mm layer of gravel or crushed stone with a grain size of 15-25 mm. In principle, the thicker the underlying layer of crushed stone (gravel), the better the filtration of wastewater will be.
After giving the specified slope to the surface of the fill, drainage pipes are placed on it. Gravel or crushed stone is poured on top of them in a 50 mm layer, then the soil is level with the soil level.

The distance between the septic tank and distribution wells depends on the type of soil on the site. The required number of wells from which parallel drains are drawn is two or more.
Characteristics of the wastewater filtration complex depending on the type of soil:
- Sand. Two drains, each 18 m long, with a 1.5 m intermediate distance between them. Filtration field area – 70 m2;
- Sandy loam. Five drains, each 19 m long, the step between them is 2.5 m. The area of the filtration field is 231 m2;
- Light loam. Seven drains are 18.5 m long, with a 3 m distance between them. Filtration field area – 495 m2.
To prevent the formation of air pockets in the drainage pipes and to remove the methane inherent in the wastewater treatment process, the drainage system will require an air flow. At the end of each drain, it is necessary to build a riser from a pipe of 100 mm diameter, raising it 400-500 mm above the ground.
Neutralization of sediment from a septic tank
With independent cleaning out the drain hole and attempts to place sewer sludge on top of the ground, the result is the same - an abundance of flies and infections among household members. Waste can and should be converted into compost, completely disinfecting it from microbes.
Having chosen a place - 15 m from the house, 25-30 m from the well - you need to dig a hole half a meter deep and of the required size. Its pit is waterproofed with crumpled clay in a 200-300 mm layer, concreted or lined with bricks with the sides raised above the ground surface.
Sides are required - the sewage collected in the compost pit should not penetrate into the soil and contaminate it. To completely eliminate moisture exchange, cement mortar is applied to the walls of the pit, followed by ironing. It is also useful to coat the top with bitumen.
The bottom of the compost pit is sprinkled with a 150 mm layer of peat or dry soil, and waste is placed on top. Having increased the layer of sewer sludge to 250-300 mm, you need to cover it with a 100-150 mm layer of peat or dry soil.
Having raised the compost heap to a height of 1000 mm above the ground in a layer-by-layer manner, you need to fill it completely with earth or peat 150-200 mm thick and leave it for 8 months to mature.
If, during the process of filling a compost pit, you sprinkle the layers of waste with a small amount of ash and pour a little water on them, then the compost will ripen faster and of better quality.
Conclusions and useful video on the topic
Video #1. Independent creation of a brick drainage pit in loamy soils:
Video #2. Laying a drainage pit made of stone, with a brick head:
A drainage pit on a suburban area is not only a need to ensure everyday life, it is a responsibility. It is necessary to seriously evaluate the possibilities of arranging a local sewage system, choosing an expensive, but safe solution.
Please write comments in the block located under the text of the article. We are interested in your stories about your own construction of a drainage pit on a suburban area. Ask questions, share useful information and thematic photos.


My grandfather and I made a drainage pit with walls made of square bricks. At that time, reinforced concrete rings were expensive, plus you had to pay to hire workers. We tried it about 5 m from the house.There are no difficulties in construction and operation. The smell is only present when you are close to it due to the fact that they made a simple frame from thick bars and nailed it on the sides. It has been in service for about 14 years.
In a country house you cannot do without a drainage hole. It is important to remember some requirements when arranging it. We are doing it for more than one year, so you need to choose an appropriate place: as far as possible from the well or borehole and from the foundation of the house. Also think about how you will remove the contents of the pit. We dig a pit and fill it with a small layer of gravel and concrete it; laying the walls in half a brick will be sufficient. We lay a concrete slab and a pumping hatch on top.
We also have an old drainage pit, my grandfather made it. A problem arose, the asphalt began to collapse, and every year the hole gets bigger. The hatch is practically not holding up anymore. What can be done to strengthen it?
Hello. Just quickly redo the ceiling and at the same time check the integrity of the internal order, you yourself understand that such a structure can hardly be called safe. Also, by replacing the unusable part in time, you will extend the service life of the pit - a collapse will cause it to fill, and cleaning will be problematic.