How to make rings for a cesspool yourself from concrete or plastic
Doing something with your own hands is a fun activity, especially if the end result is something you can be proud of.In addition to moral satisfaction with the results of your efforts, you can also save a lot of money by making rings for the cesspool on your site.
Materials for this are not difficult to find, and the result depends only on strict adherence to technology. Therefore, in this article we will talk about how to make sump rings yourself, and what you will need for this.
The content of the article:
Technology for making concrete rings
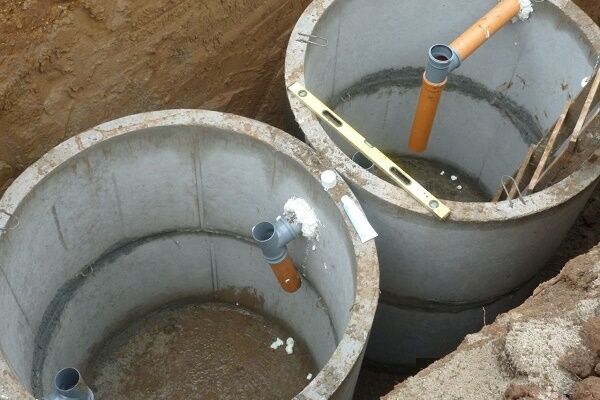
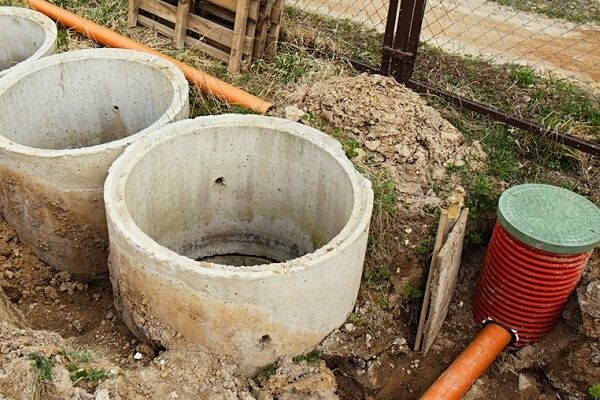
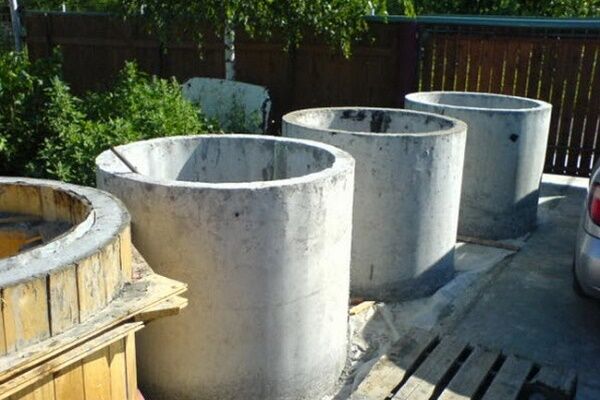
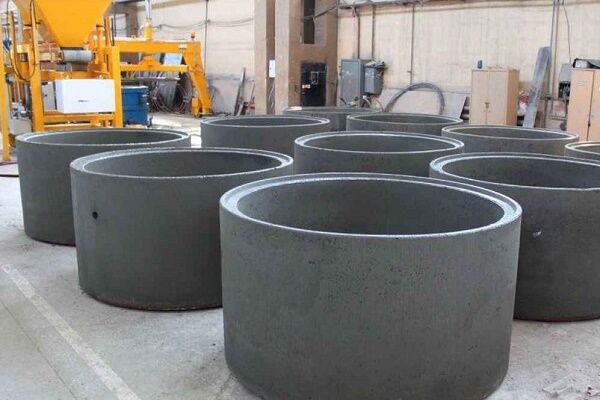
In order for a home septic tank to serve for many years, it is better to make it not from brick, but made of concrete rings. Buying them is not difficult, but you don’t need to be a great professional to make them yourself.
It will cost less, and the cesspool will not have to be adjusted to a standard size, when the designer can choose any convenient one for himself.
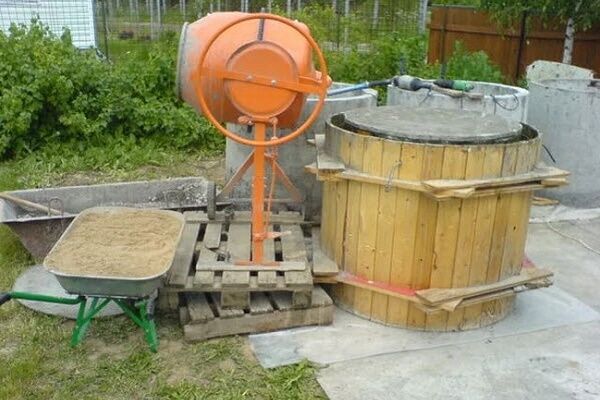
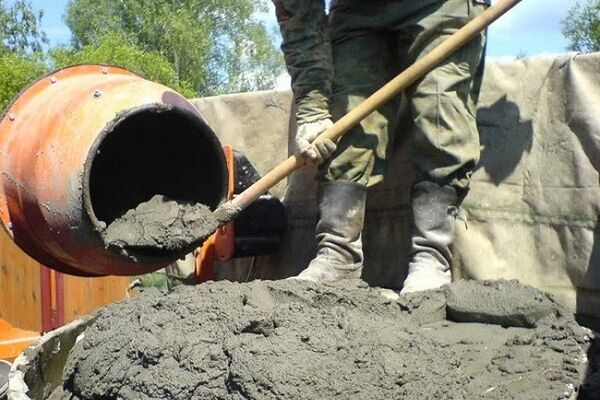
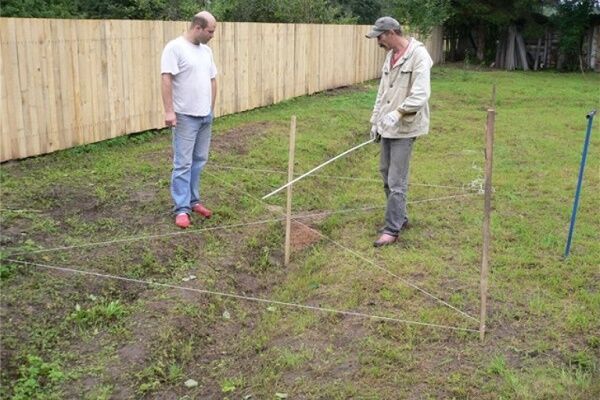
When starting to implement your plan, you must first of all decide on a location - choose a fairly spacious and flat area. You will have to prepare a lot of concrete mixture, so you will need a concrete mixer.
Since the products are heavy, lifting devices are indispensable when moving them. To form rings you need special molds.

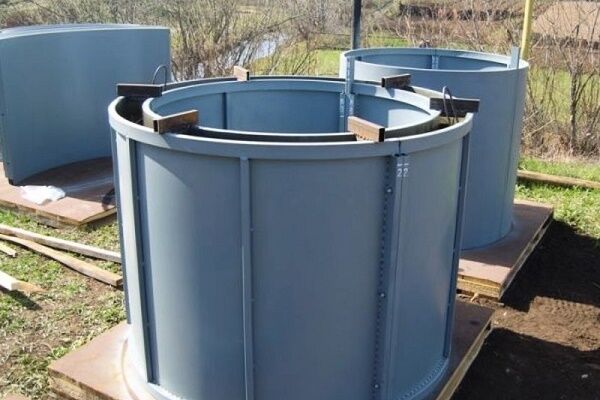
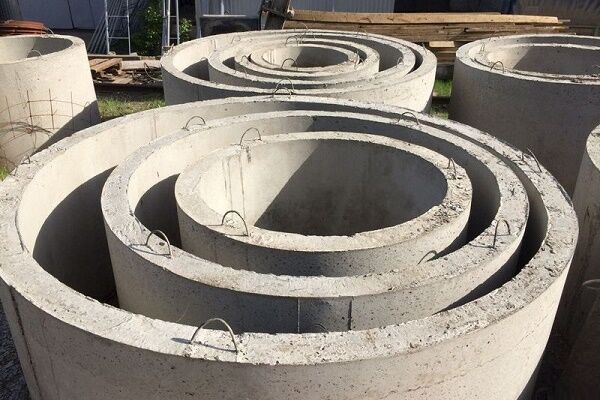
Molds for making rings
The mold for the rings has a simple geometry: a pair of cylinders - internal and external. The difference in diameters should be equal to the wall thickness, which is about 1.5-2 cm.
You can get them in different ways. The simplest is to buy a factory-made product with an internal cone-shaped core and an outer ring, reinforced with stiffeners and a vibrator installed on it.

After installing this form on a flat area, reinforcement is placed in it and filled with mortar. A vibrator will ensure shrinkage of the mixture at each stage of pouring. This prevents the formation of air pores in the body of the concrete walls. Reinforcement is an optional operation, but desirable, since the product is stronger.
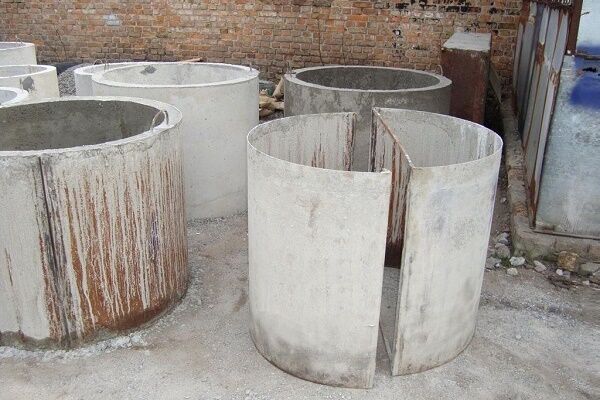
It’s even easier to take 2 metal barrels with suitable parameters or pipes. Cylinders can be made from rolled sheets.The sheets are connected to each other by canopies - door or window. The most affordable way is to make a mold using planed boards.
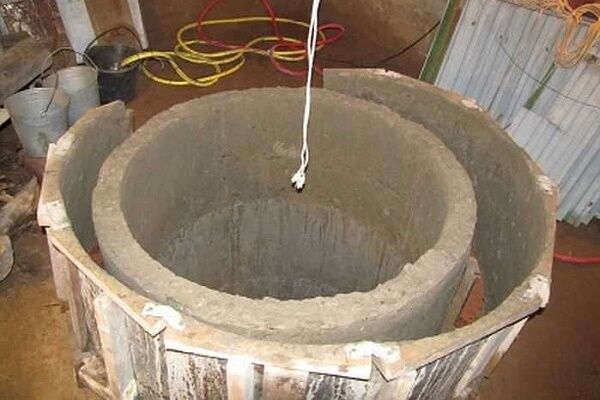
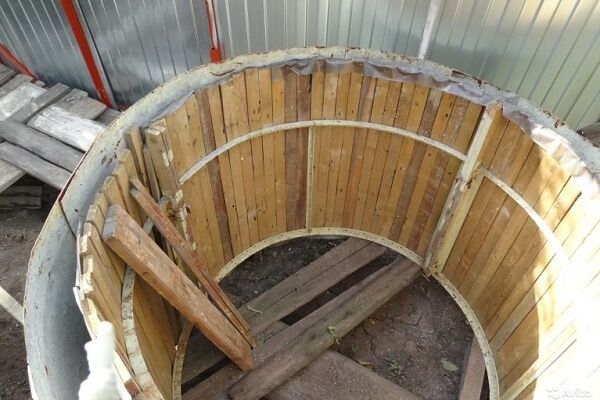
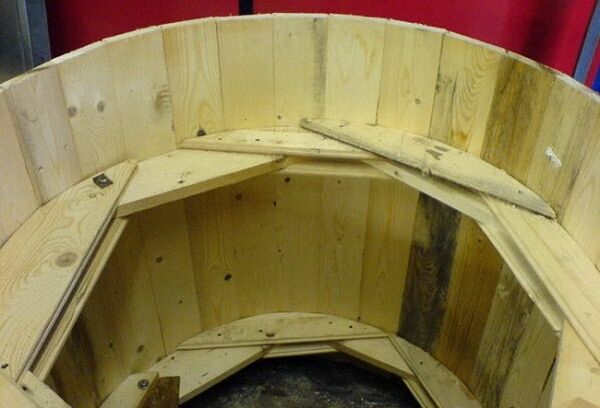
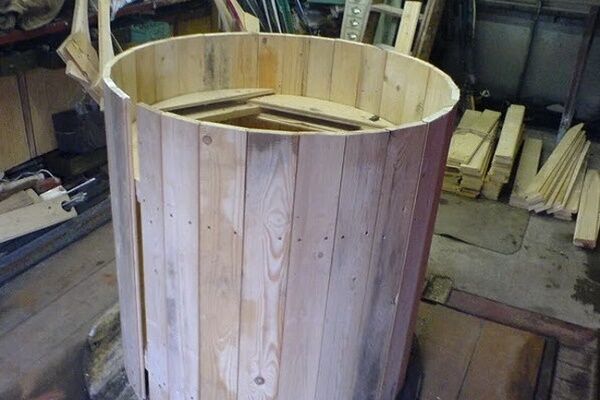
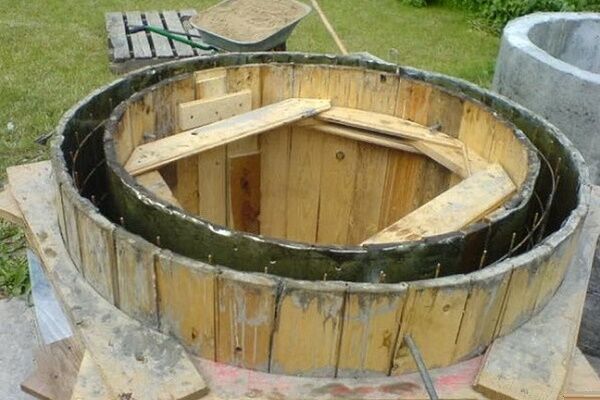
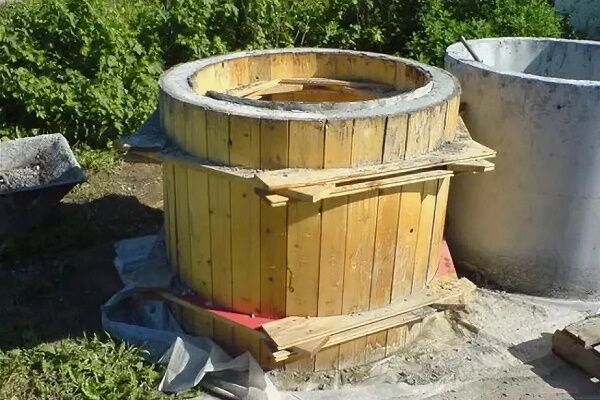
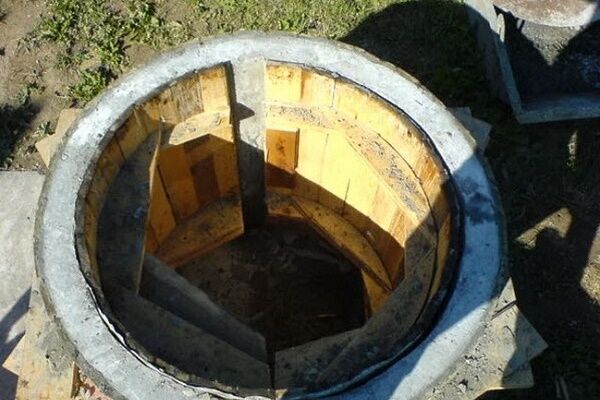
Making molds from boards
To make such a shape, you will need boards with a thickness of 2 to 5 cm. The outer and inner cylinders are made collapsible, consisting of several wooden rings. The rims for the outer cylinder are filled with well-treated boards from the inside.
The inner cylinder should also be easy to assemble and disassemble. It is made according to the same rules as the outer part of the mold, but it is sheathed not along the inner, but along the outer diameter. After assembling the mold, there should be a gap of 1.5-2 cm between the cylinders.
To obtain the product with the required parameters, it is necessary to first calculate the dimensions of the mold. Let's say for a cesspool you need rings with a diameter of 840 with a wall thickness of 140 mm and a height of 890 mm.To calculate the internal diameter, use the formula: Din.n. = D + 2h, where D = 840 mm, h = 20 mm (thickness of the sheathing board).
These values are substituted into the formula: Dv.n. = 840 + 2 x 20 = 880 mm. If we take the width of the ring to be 100 mm, then the outer diameter of the ring is Dn.n. = Dn.v. + 2S = 880 + 2 x 100 = 1080 mm.
Taking into account the fact that you need to make a ring with a wall thickness of 140 mm, the outer diameter of the wooden core is equal to: Dn.v. = D - 2B - 2h. Here D is the diameter of the product, B is the thickness of the finished ring, h is the thickness of the board. Dn.v. = 840 – 2 x 140 – 2 x 20 = 520 mm.

If the width of the inner wall ring in the formwork being manufactured is also 100 mm, then the core must have an internal diameter Dv.v. = Dn.v. – 2S = 520 – 2 x 100 = 320 mm.
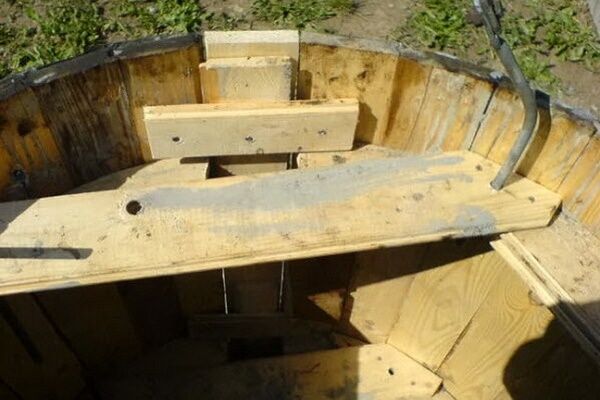
Express instructions for filling rings
The process of making concrete rings with pouring mortar into formwork made from boards will be presented step by step in the following photo selection:
The listed steps were essentially preparation for pouring work. Now you can begin the actual production of concrete rings:
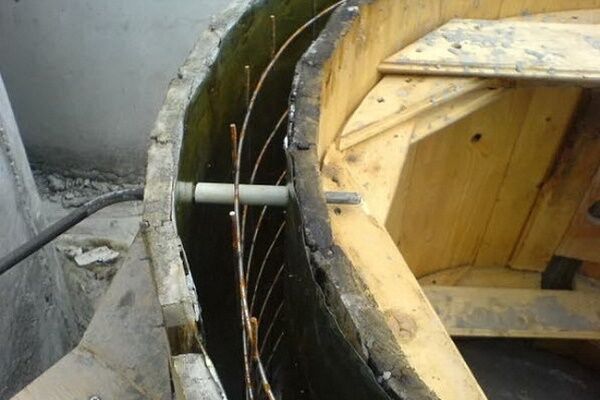
Making a belt from reinforcement
You will need to prepare round ribbed rolled products with a thickness of 0.8-1 cm, from which the reinforcing ring is knitted.
The rings, the number of which depends on the height of the product, are connected to each other vertically using pieces of reinforcement. It is advisable to maintain a distance between reinforcing belts of about 25 cm. It is recommended to maintain a spacing of 35 cm between sections of reinforcement installed vertically.

For ease of transportation of the finished product, the workpiece is tied to the top of the reinforcement frame in the form of wire loops. You can also use a steel mesh with a thickness of at least 0.4 cm for the reinforcement frame. A ring is formed from it and the edges are fixed with wire.
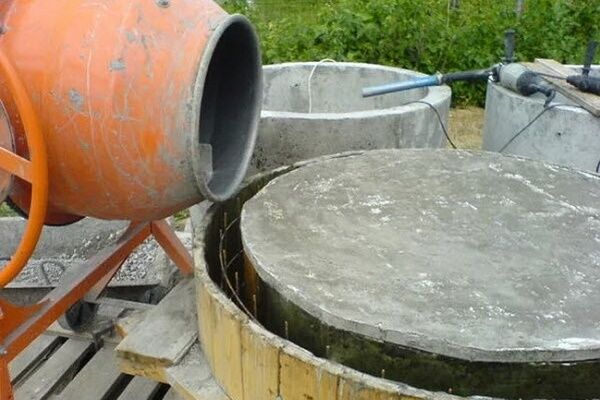
Pouring concrete mixture
You can start making rings at a temperature not lower than 8 and not higher than 22 ° C. The formwork elements are inserted into one another, having previously been lubricated with machine oil - this will subsequently facilitate their dismantling. A reinforcement frame is inserted into the space between the cylinders.
To give stability to the reinforcement, it is fixed using wedges. Subsequently, the wedges are removed as the form is filled with concrete mixture.
Prepare a solution observing the following proportions:
- Fresh cement not lower than M400 - 1 part.
- Crushed granite or limestone with slightly rounded grains no larger than 0.2 cm in size - from 4 to 5 parts.
- Quartz sand with a grain size of maximum 0.22 cm - from 2 to 3 parts.
- Water - maximum 0.7% by weight of cement.
Experts have their own secrets for preparing concrete mixtures. Sometimes they add potassium glass to it in order to increase the water resistance and ductility of the mass. To increase the strength of the composition, a component such as PVA glue is introduced into it. The fluidity of the mixture is increased by adding detergent.
It is important to immediately use the prepared concrete, so it is better to immediately calculate the required amount of mixture for one pour.

Hardness can be determined by eye by placing the mixture on a horizontal plane. If it drains quickly when tilted, the mixture is very liquid. The medium plasticity of the mixture is indicated by its slow slipping.
When the mixture sticks and does not slide, it means that it has little plasticity, and if the mass does not even change its shape and remains in a lump, this indicates its rigidity.
To navigate such a question as selecting the number of components required to prepare 1 mᶾ of concrete, you can use this table.
| Brand solution | Cement M 400 (kg) | Crushed stone (kg) | Sand (kg) | Water (l) |
| 75 | 170 | 1053 | 945 | 210 |
| 100 | 210 | 1080 | 870 | 210 |
| 150 | 235 | 1080 | 855 | 210 |
| 200 | 286 | 1080 | 795 | 210 |
| 250 | 332 | 1080 | 750 | 215 |
| 300 | 382 | 1080 | 705 | 220 |
Since the rings for the cesspool are a reinforced structure, concrete of low rigidity is more suitable here. When using Portland cement M500, the standards for M400 are multiplied by 0.88. For other brands, other coefficients are taken.
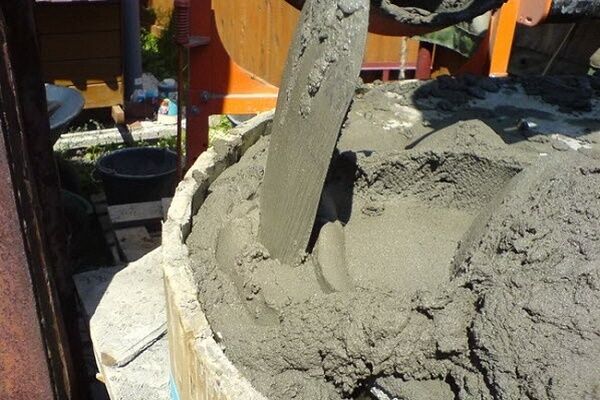
Having prepared a mixture that resembles a thick dough in consistency, the first layer, about 10 cm thick, is sent into the formwork. Then the beating is performed: a steel rod with a diameter of 20 mm is taken and the material is carefully compacted.
In this way, the entire volume between the two cylinders is filled. Having completed the work, cover the product from direct sunlight by throwing a piece of thick fabric on top.
The formwork is removed after 14 days, left in the same place for another 4 days, not forgetting to periodically water it. If filling is performed with a less dense mixture, the process is called casting. The formwork from products obtained by the second method is removed after a week.
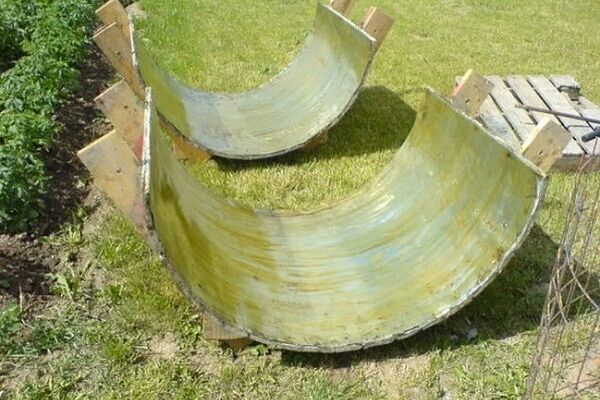
The shells will remain on the surface and are filled with cement mortar.Fewer shells are formed on products made by the second method. The oil that coated the surface of the cylinders is removed. The lock ensures a tighter connection of the rings.
To obtain this element, 2 more rings are added to the mold, forming a compatible mounting chamfer in the form of a protrusion on one product and a neck on the other. This will allow the rings to be firmly fixed during installation, protecting them from displacement.
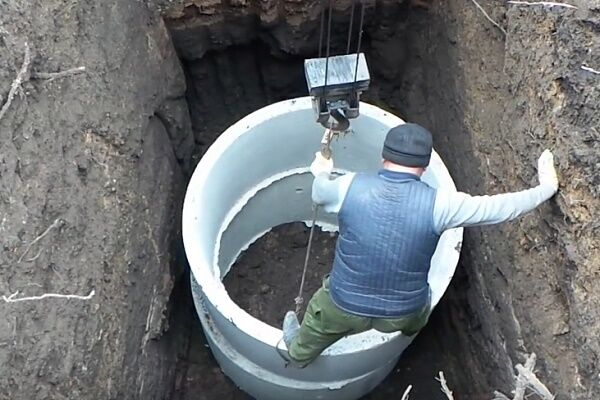
There is a known method for manufacturing rings that eliminates from the technological process such a labor-intensive operation as transporting the finished product. To do this, a mold for the ring is made at the site where the cesspool is subsequently supposed to be dug. First, a ring is cast, and then soil is selected under it and gradually lowered to the bottom, completely immersing it in the hole.
When the top edge of the product is flush with the ground, a new formwork is built on it. Make the next ring and select the soil again until the edge of the product is flush with the ground. Continue making new rings until the desired depth of the cesspool is reached.

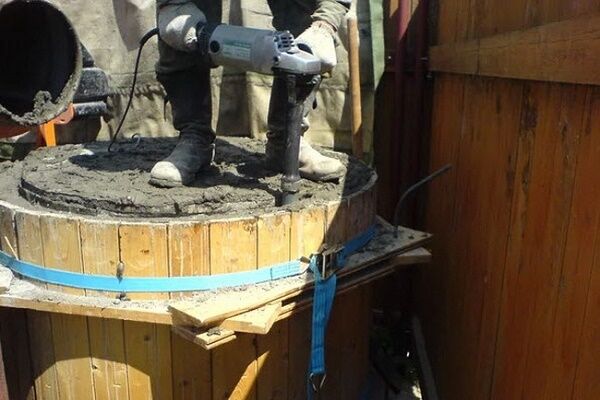
The highest quality products are obtained if it is possible to use vibration pressing technology, which involves installing the mold on a special vibrating plate with a drive.
The slab performs oscillatory movements of small amplitude and high frequency, which allows for maximum compaction of the concrete mass.
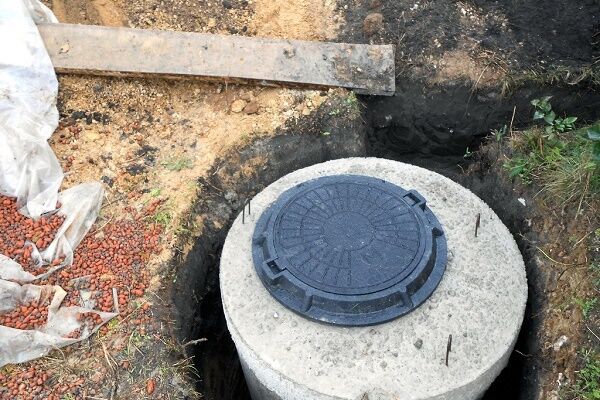
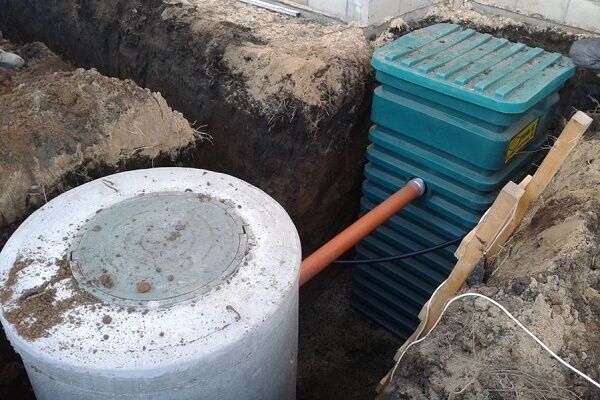
Application of plastic rings
The advantages of plastic rings for a cesspool are their light weight, durability and ease of installation. For their production, the starting material is low-density polyethylene, which has excellent strength characteristics.
The most common size is height 150 cm, diameter approximately 95 cm, wall thickness 25 cm.

The ring can withstand large mechanical loads without harm to its integrity thanks to its ribbed body. As a rule, one cesspool does not require more than 3-4 rings that act as walls.
For the bottom and top of the cesspool, other parts are used: the bottom, the hatch, a ring for framing the hole that serves to connect to the sewer.
If you compare plastic rings with concrete ones, then, in addition to their low weight, you can see a number of other advantages of the former:
- Quick installation using existing locking system.
- Easy to dismantle.
- Completely sealed.
- Possibility to replace a failed ring.
- Lack of response to moisture. Plastic will never get wet or corrode.
- Plastic is not affected by aggressive chemicals or waste products of bacteria living in waste and soil.
- A smoother inner surface that does not allow plaque to accumulate on it.
Reasonable price.
The light weight of the structure can sometimes cause it to shift under the influence of groundwater. To prevent this from happening, when filling the bottom of the hole, special metal hooks are inserted into the concrete screed. These devices securely fix light plastic rings.
You can read about how to waterproof a septic tank with a plastic insert in this material.
Sometimes the first ring is lowered into a cesspool onto a screed that has not yet hardened. This is much easier than securing it with hooks and cables. There is a negative side to this - you will have to make a lot of effort if the structure needs to be dismantled.
Having decided to make a cesspool from plastic rings, you need to decide on a place for it.
Sanitary standards regarding the location of any septic tank are the same:
- at least 5 m from the front door of the house and windows;
- no less than 3 m from the road and the boundary with the neighboring plot;
- 15 m or more from a well or well with drinking water;
- availability of access for the operation of a sewer truck;
- absence of fruit trees near the pit.
The next step is determining the volume. The daily water consumption per person living in the house is taken as a basis. The generally accepted norm is 200 liters. Digging a pit, placing a concrete screed about 200 mm high at its bottom, strictly controlling the horizontality.

There should be a gap of at least 30 mm between the walls of the dug hole and the corrugated surface of the rings. A 20 cm margin is also left on the bottom side. If the bottom of the cesspool is not planned to be concreted, this parameter is increased to 0.5 m.
When the latter option is chosen, it is necessary to install a filter layer consisting of gravel and sand, separated by geotextiles to prevent their mixing. When making plastic rings, their design already includes thermal insulation in the form of a longitudinal layer, but if your area experiences severe frosts in winter, additional insulation will be useful.
To install a heat-insulating layer, it is necessary to take a sheet of reflective material with such dimensions that, after lowering the rings, the entire surface of the pit is covered. Material with a reflective layer will not allow heat to escape into the ground. Its edges are fixed around the perimeter of the top of the pit with twine.
The rings themselves are immersed one by one using cables. A small force is applied to each of them to connect with the previous one. For this purpose, the design provides special grooves.
The cable used to immerse the rings is tied at one end to a metal hook immured in the formwork, and the other is thrown to the opposite side of the pit and secured there. This will result in additional strengthening of the rings.
Now you can start backfilling the container. Usually, soil is poured on the outside of the rings.But if the groundwater is high, a mixture of cement and sand in a 1:1 ratio is placed in the gap between the container and the pit.
At the same time as performing this operation, it is necessary to add water to the container, making sure that the level of the poured soil is 200 mm below the water level. If this is not done, cracks may appear in the plastic under the influence of pressure created by the soil.
All that remains is to cover the hole sealed hatch, protecting the cesspool from rainwater entering it. In addition to the hatch with a diameter of 0.7 m, you need to install a ventilation pipe with a cross-section of 100 mm, which will remove gases from the pit.

To clean sewage, you can buy a special product containing live bacteria, feeding on organic matter and processing it to a more liquid state. When there is no bottom in a cesspool, most of its contents will go into the ground. A closed cesspool accumulates more waste, so it must be pumped out frequently.
Conclusions and useful video on the topic
Here you will see how concrete rings are made in a suburban area:
This video will talk about making split molds that are used to form concrete rings:
By following the recommendations given in the article, you can make rings for the cesspool yourself. If this process seems very labor-intensive to you, you can always buy ready-made concrete rings or plastic. As for their installation, our article will be useful to you in this matter as well.
Do you have any questions about the topic of this article? Or maybe you yourself have built concrete rings for a septic tank, and you can give good advice to our readers? Leave your comments, upload photos of your homemade products, and share your manufacturing secrets in the block below the article.


I had problems with money. It was not possible to hire specialists who would do everything for me. Therefore, guided by the Internet, I tried to organize everything myself. I rented the forms and based on an acquaintance they gave me a reasonable price. In principle, nothing complicated, mix the solution, pour it into the mold and wait until it hardens. Well, then burying these rings is generally not difficult. I don't trust plastic rings.
If you make the rings yourself without a vibropress, then another simple option is possible. Only the inner cylinder is made for the mold. It is placed in a hole that is 20 -30 cm wider than the cylinder. The solution is poured into the space between the cylinder and the earthen wall. After solidification, the inner cylinder rises higher and the process repeats. To prevent the surrounding soils from taking water from the solution, cellophane is laid on the outside.