What to do if the gas stove is leaking gas: causes of gas leaks and their elimination
We are sure that you have heard a pungent odor from the burners more than once.The stench does not mean that the gas stove is leaking gas - you probably know what to do in such a simple situation. The first steps to take in the event of a gas leak are taught in school, but it will be better for you and your children if you familiarize yourself with this in more detail.
Critical situations are also not uncommon. The likelihood of an explosion decreases the more quickly and accurately residents find the location of the leak and eliminate its cause. You need to study this area at least in order to completely eliminate the risk, right?
If you read the article, you will be able to determine the cause of a fuel leak based on one or two signs. In a short period of time, you will prevent the worst-case scenario. Some actions require the intervention of gas workers and craftsmen, but some things can be repaired yourself. Find out what exactly.
The content of the article:
Why does a gas stove leak gas?
Gas stoves consist of many tubes and assemblies. Any threaded connections will lose their tightness over time and some fuel will leak through them. The functionality of modern stoves protects against many unpleasant moments, but even they allow gas to pass through. If you regularly use household tools, you can eliminate the leak effectively and relatively quickly.
Traditional gas stove has a hob with burners (burners), control knobs, grate, lid and oven. The operation of equipment is affected by correct installation, parts, and build quality.Due to breakdowns and problems with equipment, gas may partially escape.
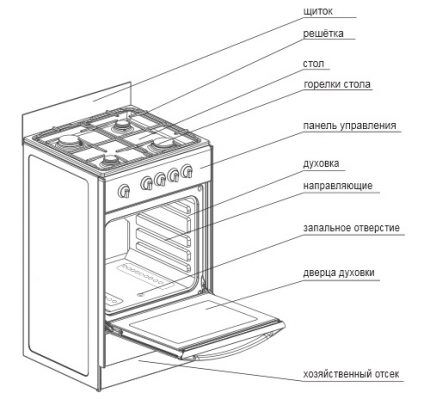
The owner should find out where exactly:
- through the burners and their nuts;
- handles that control the burners;
- gas stove shut-off valve;
- hose or its connection point;
- internal elements.
Unauthorized behavior leads to problems installation of slabs, which is prohibited by safety regulations. For older gas stoves, some insulation failure is normal. It is better to replace or repair the equipment through a service center. A faulty stove cannot be left unattended while it is on. You can rely on built-in protection, but only for a short time.
Consumers experience leaks if there is not enough lubricant in the valve plug or the valve itself is loose. Nuts often loosen and seals wear out. Solving such difficulties can be difficult, but internal breakdowns also cause great difficulties.
A faulty burner is simply stopped being used if it is not possible to repair or replace it with a new one. Gas escapes through the burners when the stove is used inappropriately. For example, if liquefied gas is supplied to the device under the gas network.
How can you tell if your stove is leaking gas?
Humans cannot smell natural gas. The safety of household stoves is increased by the odorant ethanethiol (ethyl mercaptan). The odorant emits a sharp, unpleasant odor. Due to combustion problems, carbon monoxide is produced. It is also unpleasant, but does not directly indicate a domestic gas leak.
When faced with a choice between ventilating the kitchen or keeping it closed to hear foreign odors, it is better to go with the first option.
You should be concerned about a leak when the smell of ethanethiol lingers in the air for more than 5 minutes, especially during cooking. The polluted room is ventilated. Natural gas will accumulate in the corners, so there is no point in focusing on the fragrance. Waving your hand won't do anything.
You can find out about the condition of household appliances in 3 other ways:
- manipulations with the plate;
- checking for leaks;
- by sound.
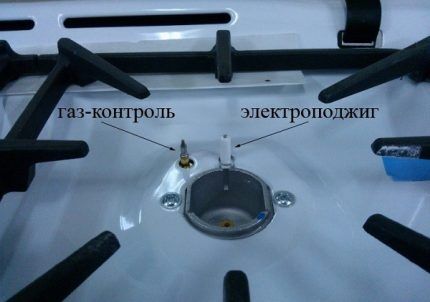
To check the burners, turn off the hob. If there is an odor of odorant near the burners or it intensifies, there is a leak in that exact place. Modern stoves have valves that protect against excess gas entering the burner and shut off the fuel when the fire goes out.
The accumulated gas will still make itself felt. Methane with impurities will collect under the hob, and the owners will hear it next to the control knobs and control panel joints. In a dangerous situation, emergency personnel will help.
The slab should be moved away from the wall. An increased smell will indicate a leak at the connection point of the unit. If there is no visible damage, then simply replace the gaskets. New hoses and fittings will be needed if the defect is serious.
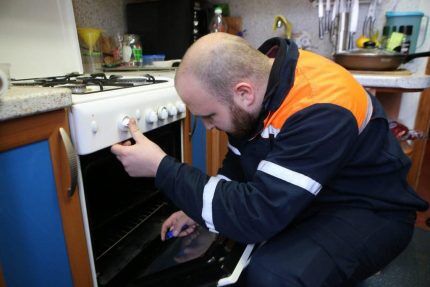
The condition of the stove tap is determined by the smell from the open oven. Its strengthening means a violation of the density in the parts, possibly a lack of lubrication.
Leak testing provides comprehensive information on leaks. Use a solution of dishwashing detergent or soap. Apply to threaded connections of a gas pipe, hose, pipes under the burners. When the first bubbles appear, it makes sense to turn off the gas and call the gas technicians. The wizard will determine all the problem points himself.
The gas does not escape silently, so quiet conditions can be created. The pressure in the unit vents everything unnecessary out, and a person will be able to find the approximate location of the leak. The strongest and most dangerous movements of fuel are accompanied by a whistle. In a room with a distinct gas sound, open the window wide and close the door. At the other end of the home, the owners will be most secure.
Methods for eliminating gas leaks
Gas workers sometimes violate installation rules, which causes leaks and interruptions in gas supply. You can't reinstall it yourself. Re-installation is requested from the company - the parties maintenance agreements.
In the case of leaks in internal components, the equipment is disconnected from the gas supply and disassembled, the problematic connections are tightened more tightly. You can act alone, but it is better to leave the work to craftsmen who know how to repair a specific stove model.
First, prepare sealing materials, gaskets, pastes, flax tow, as well as tools and accessories for the stove. All this may come in handy.
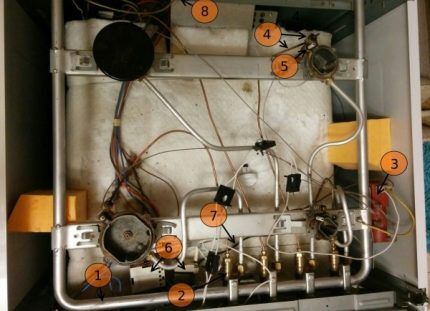
They repair the adjustment panel on their own, burners and a supply hose. In the case of a shut-off valve on the lower side, it is better to immediately contact the gas specialists. The problem with the faucet occurs due to lack of lubrication, wear of gaskets, and looseness.
To breakage supply tube There are many factors. Its seals crack, decrease in volume, and wear out. Parts of the hose lose integrity or seal. The eyeliner should not be constantly moved or touched or put pressure on it. The burners need timely cleaning, the panel handles need to be adjusted.
If everything that can be done with your own hands has been tried, and the gas stove still leaks fuel, then the parts need to be assembled in their original position. Then gas workers will not have questions.
The gas supply is affected by the size of the burner nozzle. For fuel from the gas network, choose a larger diameter. Smaller nozzles will be better for equipment that runs on cylinders.
When pipeline fuel is supplied through narrow nozzles under liquefied gas, the burners go out, which causes emissions. In the opposite situation, when gas comes from cylinders and passes through a wide opening, the smell in the room deteriorates greatly. The justification for using other nozzles is determined by the internal design of the plate.
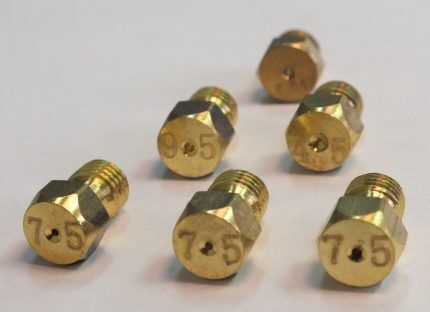
If the stove runs on cylinders, but there are no leaks anywhere, it’s worth checking the capacity. Leaking necks are blocked, wrapped with wet canvas, taken out of the house or placed on the far side of the house.
If there is a leak at the connection between the tank and the tube, seal the joint with 4-5 turns of a well-moistened rag. The container is left in place. The emergency gas service will deal with the problem. The hose is left in the stove or blocked with a pointed wine stopper at the outlet.
Some ovens also run on gas. The burners of old ovens often go out, thereby putting the owners in danger.
Method No. 1 - eliminating leaking burners
Temporary problems with burner seals are considered normal. The regularity of this situation cannot be explained by a specific cause of leaks. First of all, the burners are cleaned and removed from grease. At high temperatures, the sodium contained in the microparticles glows with a bright yellow hue. The substance thereby creates the false impression that the device is not working properly.
The burners lose density due to the nuts. In this situation, the procedure is simple: turn off the gas, and tighten the fasteners all the way. With old slabs, this defect occurs often, so you need to be careful with tools; damaging the threads means making things even worse.
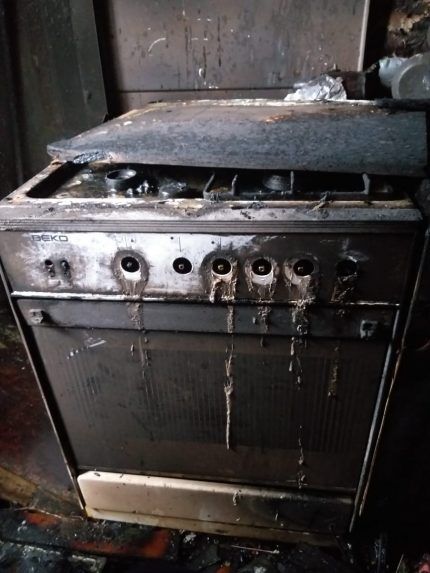
Sometimes gas escapes through the supply pipes inside. To check if there is a leak, turn off the gas and remove the hob from the stove. The movement of fuel is determined by ear or using a soap solution. If bubbles appear, you will have to tighten all the pipe fasteners more tightly.
Method No. 2 - repairing stove handles
In the current situation, they partially act independently.Along with the leakage, it becomes more difficult to turn the handles. Both difficulties are eliminated by lubricating the adjustment panel mechanism.
The procedure for independent actions looks like this:
- We turn off the gas.
- We remove the fasteners and remove the control panel and handles.
- Separate the flywheels from the console frame.
- We take out the pin that holds the rod.
- We somehow fix the position of the plug and the spring in order to install them in the future as needed. Let's take out these elements.
- Remove old grease and dirt from the plug. We do without knitting needles and needles. Damage and scratches will increase leakage in the future.
- Lubricate the plug with a new product, bypassing the holes.
- Clean the stem. We use dry wipes.
- We install the plug as needed, then the spring, and finally install the rod. We repeat points 4-9 for each handle.
- We connect the half-assembled panel without handle caps. Let's check its work.
- We install the handles and completely assemble the stove.
If the stove continues to leak gas, you should immediately call 112 or 104.
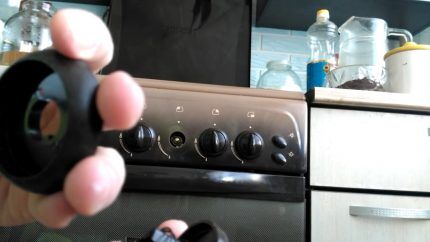
When reassembling, sometimes they experience a problem with the stem flying out. The part will pop out of the plug if there is unbalance in the stud connection or severe thread damage.
Method No. 3 - replacing the shut-off valve
The problem occurs on different stoves, including new and old. It is better to replace the valve. To work, you will need a gas key for the stove (No. 1) and the tap (No. 2). All this applies to the valves between the lowering and the slab inlet, in no case those that are located in the middle of the lowering or the pipe from which it departs.
You should proceed like this:
- First we close the valve.
- We take key number 2 and hook up the tap.
- Using wrench No. 1, grab the union nut of the outlet to the plate and unscrew it. We work so that the eyeliner does not spin.
- Take a ring tightened with soapy water. We bring it to the outlet pipe of the tap. The bubble began to inflate - we called the gas workers. There is no movement - you can try to do everything yourself, but only if you have experience.
Before the gas technician arrives, you should buy a new tap, flax for sealing, and flax paste. The gas technician will unscrew the valve, close the pipe and insulate it. Installing a new faucet will take seconds.
The gas technician will connect the new valve to the pipe, set the faucet handle in the desired position, connect the stove hose and check the tightness of the connection with a soap solution. The joint is usually coated with oil paint.

Before replacing the valve It’s worth checking the speed of action on your own. How quickly can you drop a wet cloth into a cut half-inch pipe and wrap the sealing flax around its threads.
As a result, you will have to remove the old tap, quickly close the pipe and seal it. Then bring the valve up, remove the plug and quickly but carefully screw it on. Afterwards, connect the hose for the stove.
In the process, they resort to small “tricks”. The old valve is not removed immediately, but partially unscrewed. The entrance is sealed with a wet rag. Gas will escape in minimal quantities. You can still close the hole with your palm. The position of the partially unscrewed valve is kept unchanged relative to the axis, otherwise the thread may be damaged. The flywheel is removed from the new tap before installation.This is done for faster installation and always in the closed position of the handle.
Method No. 4 - replacing the gas line
Tubes for supplying gas to the stove are indicated by a yellow shell or inclusions, sometimes with stickers of this color. Hoses come in corrugated metal coated with plastic and rubber with metal thread or braid.
The first option has a longer service life, but is prone to damage to segments. Both types of hoses sometimes leak gas, often at the connection point. The insulation of the tubes deteriorates, damage appears near the fittings and along the entire length.
For minor defects, the insulation is restored. In case of serious damage and violation of the integrity of the connecting nodes, they resort to replacing the hose.
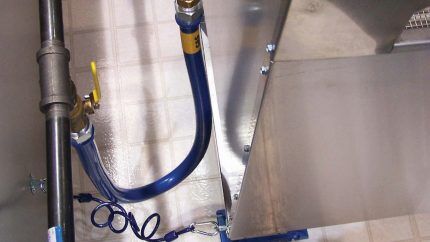
The gas poisoning tube, which has no damage, is repaired and this is done in 2 ways. Worn gaskets are replaced. If this does not help, move on to the second method - cover the thread with flax with sealing impregnation.
It is impossible to hide the gas hose in the casing, so if there are visible defects or none, but the gas continues to escape, then the tube will have to be changed.
We connect the new line like this:
- Place the gasket on the hose fitting and screw it into the stopcock. By external or internal thread, depending on the configuration.
- We connect the tube to the outlet of the stove. With a knot diameter of 3/8″ (inch), we use a 1/2″ adapter fitting, that is, the size of the hose. We also seal the direct connection or adapter with a gasket.
- We connect the hose directly to the stove manifold or to the fitting. We work with an open-end wrench.
- We check if there is any fuel leakage. Lubricate all the links with soapy water and turn on the gas.
The best gaskets for these purposes are considered to be paronite gaskets with a metal mesh against contamination. On the side of the connection to the stove, much depends on the straightness of the angle or its inclination. It is worth following this and connecting it so that there is no bending.
A direct outlet may be inconvenient for the hose, and then a metal square is also installed. On the lower side of the tap, additional structures are installed only with the permission of the gas service.
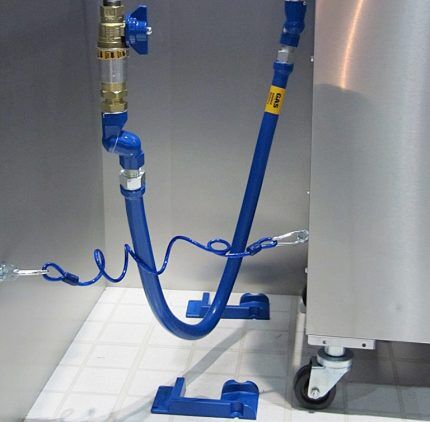
You should not hide the hose behind stationary panels or sheets; collapsible boxes are used for this. Tubes must not be painted anywhere except at the joints. Colored eyeliners sometimes crack.
You can read detailed instructions on how to replace a gas hose yourself in this material.
Conclusions and useful video on the topic
Disassembling a gas stove to find a leak:
Lubrication of control handle valves to eliminate or prevent leaks:
Leakage under welding - lubrication, installation of gaskets, sealing of nuts and checking for leaks:
You learned what to do if the gas stove starts leaking gas, and read about the causes of leaks. In an unpleasant situation, the main thing is to remain calm and find the point where the sealing problem occurred.
The fuel is supplied by the burners, control knobs, shut-off valve and supply hose, which is connected to the tap.You can detect a leak visually, by sound and smell, by checking the draft and using special manipulations. Normally, there should be no leaks, so immediately think about the operating conditions. Excessive loads on parts and careless installation by the gas fitter will sooner or later lead to malfunctions.
If you have had to fix a gas leak, tell us about your experience. Write how serious the problem was and how you solved it, and whether you needed the services of repairmen. Leave comments on the topic of the article. The contact form is located below.


If you suspect a gas leak, first of all you need to open the windows and prevent it from reaching a dangerous concentration. And then you should call the professionals. It's dangerous to climb on your own.
Hello. If you suspect a gas leak, you should first turn off the gas in the valves on the pipe, and only then open the windows and call specialists.