How to connect an LED strip: main stages of installation and connection
Practical and economical LED strips are increasingly used in interior design.They often complement or even replace conventional lighting. Subdued lighting looks unusual and attractive, don’t you agree?
Today it is not difficult to find products that are suitable in size and luminous flux characteristics, as well as convenient regulators. Manufacturers, taking into account the great consumer interest, produce LED strips of various types and colors.
In the article, we tried to provide maximum useful information about the products themselves and related devices, as well as describe in detail how to connect an LED strip in order to maintain its performance and extend its service life.
The content of the article:
Features of LED strips
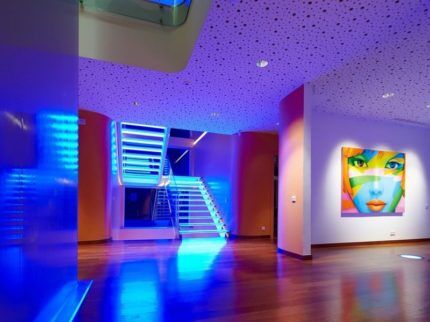
Everyone is familiar with LED lighting: white, neon, multi-colored contours often illuminate shop windows, advertising and festive structures, dance floors, and suspended ceilings. The light comes from flexible strips, outside or inside of which LEDs with accompanying elements are fixed.
Before connecting the tapes, you must first familiarize yourself with their variety in order to select suitable products and not make mistakes when connecting devices to each other. It’s better to start with the markings, which are always available for certified products: printed on stickers or directly on individual elements.
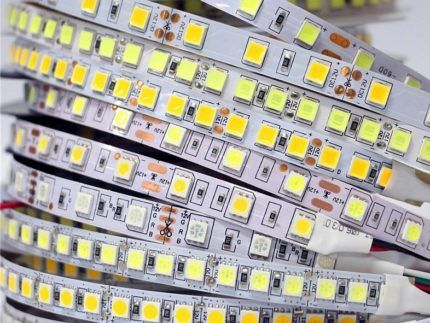
LED is a general designation for all products with LEDs.
But they can be located differently:
- SMD – fixed to the surface;
- DIP LED – located inside a transparent tube or covered with a layer of silicone.
Modules are manufactured in various standards, and the dimensions are encrypted in an understandable format:
- 2835 – 28*35 mm;
- 5050 – 50*50 mm, etc.
There is such a thing as module density - the number of LEDs per 1 p/m. Usually these are 30, 60, 120 or 240 pieces.
The marking of the glow or color is indicated by the Latin alphabet:
- CW – white cold;
- WW – white warm;
- RGB – with changing color;
- G - green;
- B – blue;
- R - red.
The protection class is indicated by a standard designation IPxx: IP20, IP65, etc.
For ease of selection, it is better to use summary tables, which are often offered by the manufacturer.

On coils or bags with meter lengths there are stickers indicating the power, voltage, and luminous flux parameters for 1 LED.
A long tape can be cut into pieces with scissors, leaving mounting pads on both sides. This is easy to do, since clear symbols are applied along the entire length.
To connect the fragments, either special connectors or soldering are used. The first option speeds up the process of merging the pieces, but is more expensive.
Do you need a power supply and controller?
The voltage in a household network is usually 220 V. It is not suitable for an LED strip, so power supplies are used to convert energy.You can find 12 V or 24 V devices on sale - the choice depends on the type of tape.
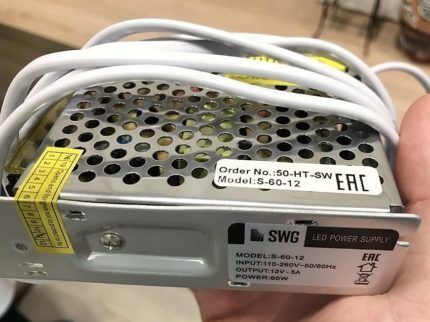
In addition to voltage, it is important to know the total power of the tapes, which you will have to calculate yourself. To do this, the power of 1 p/m is multiplied by the total number of meters that are planned to be connected to the power supply, and then another 30% is added.
Suppose we have two 4-meter tapes with a power of 4.8 W, but we want to connect them to one power supply. 2 x (4 x 4.8) + 30% = 49.92 - therefore, it is better to take a 60 W power supply.
A dimmer is a type of controller that can be used to adjust the backlight circuit settings: brightness, color selection, and others. Cheap devices usually work according to one program, for example, they slowly change 2-3 colors. If you need variety, you will have to buy a more expensive device.
Features and dimmer operating principle We looked at it in detail in our other article.
For ease of use, the controllers are equipped with remote controls. At choosing a dimmer for LED strip You also need to take into account the power, and it is better to buy a controller with a reserve.
DIY connection instructions
Assembly components are sold separately, but thanks to the proven circuits, you can mount and connect the decorative strip lighting yourself.
Let's consider several simple and affordable assembly options, thanks to which you will create a full-fledged lighting fixture and diversify your interior.
Option #1 - circuit with power supply
It is best to buy all elements in a specialized store or order on one of the trusted online sites, after making sure that the products are safe and certified.
For assembly you will need:
- 5 m of 12 V LED strip with wires for connection, 1 p/m – 60 LEDs;
- wire 2*0.5 for connecting the LED strip and power supply, the length depends on the location of the components;
- wire 3*1.5 for connecting the power supply to the network of the required length (50-150 cm);
- collapsible plug for wire, rated for 10 A;
- 6 A switch – analogue of the product for night lamps or sconces;
- 60 V power supply.
To perform the operations, a construction knife, a Phillips screwdriver, electrical tape or heat shrink will be useful. If the mounting pads are not equipped with conductors for connecting the fragments, then you will need a soldering iron.
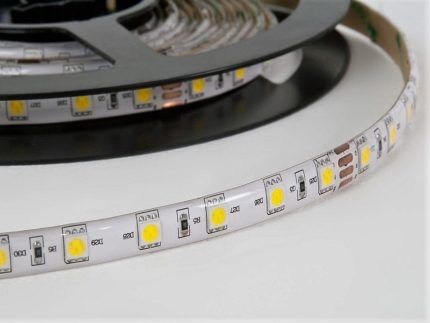
To avoid wasting money, first determine the length of the LED strip and buy a reel with the required winding. To illuminate the ceiling, a significant length may be required - 15-20 m, and for a mirror much less - 2-4 m.
Step 1 - assemble the power cable
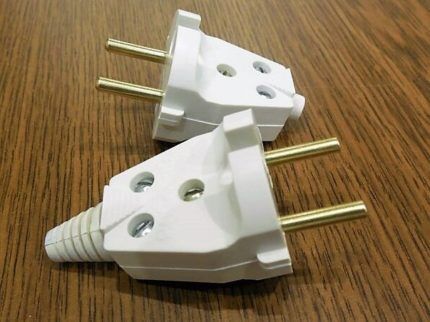
We take the plug, disassemble its body by unscrewing the fixing screw, and take out the pins. Then we strip the conductors of the 3*1.5 cord at the ends and insert them into the terminals, which can be located either on the pins or inside the housing. We place the pins back into the housing, but together with the attached wires, assemble it and tighten the fastening screw.
Step 2 – connect the power cable to the power supply
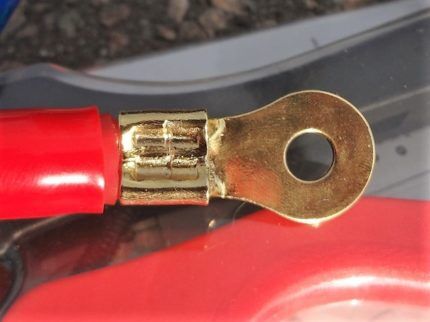
Terminals required L, N, RE on the back wall of the block housing. The ends of the wire free from the plug are stripped and twisted. We remove the cover from the housing, find the necessary terminals, and unscrew the fixing screws.
We twist the exposed wires into small rings, put them on screws, which we then screw into the seats. Do not forget that the conductor with yellow-green markings is always connected to the PE terminal.
Step 3 – connect the LED strip to the power supply
We take a 2*0.5 wire and strip the ends of the cores on both sides. We connect it to the power supply at one end, and to the LED strip at the other.
Here it is necessary to observe polarity - this is not difficult if you take into account the color markings: suppose we connect the red conductor to the V+ contact, and the black conductor to V-. The connection to the power supply takes place according to a well-known principle: we make rings, put them on screws, which we screw into the corresponding sockets.
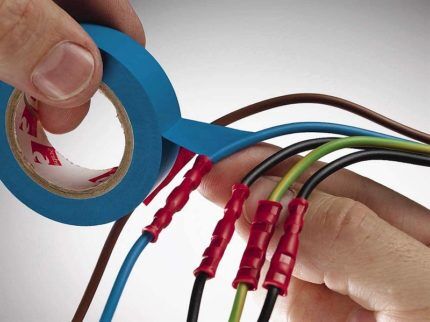
If the LED strip is equipped with mounting wires, soldering is not required. We put heat shrink on the ends, twist the wires (“+” tapes - with a red conductor, “-” - with a black one), distribute the heat shrink tube over the joint, heat it up. You can use electrical tape. If you prefer soldering to twisting, that will also work.
Step 4 – testing the backlight
We insert the plug into the socket and see if the LEDs light up. If the tape is still wound on the reel, we try not to keep it turned on - we tested it and turned it off.
The next operation will be required if you do not want to use a plug every time, but are accustomed to a more convenient method - using a push-button switch.
Step 5 – integrate the switch into the power cord
The switches differ in shape and size, but are similar in connection principle. It is easiest to find white, less often black, items on sale. It is better to choose a device of the same color as the cord.
We remove the load, that is, remove the plug from the socket. We disassemble the switch - unscrew the fixing screws.
On the power cable we mark the installation location, which we consider most convenient for further operation. We apply marks for removing insulation, focusing on the length of the switch.
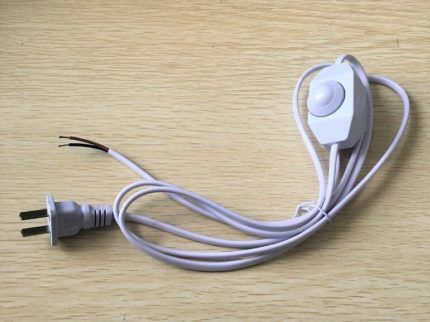
We use a knife to make cuts on the outer insulation; the inner insulation must not be touched. Carefully remove the top plastic, find the zero core, cut it in the middle and strip the ends. We don't touch the phase. We twist the protected ends of the wire and insert them into the terminals.
We place the second wire, uncut, in parallel, but on the other side. Close and secure the lid. We check whether the external insulation is hidden in the switch body - this is a necessary safety condition.
Step 6 – re-test the backlight
We plug in the plug and check the operation of the switch.
The power supply in a metal case must also be insulated to prevent accidental contact and electric shock. For protection, you can use a plastic box or other casing that does not allow electricity to pass through.
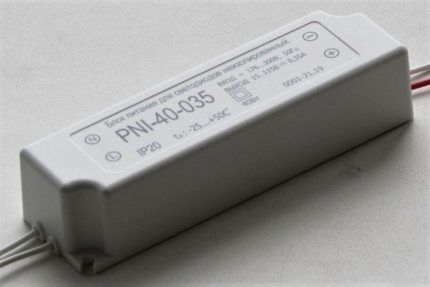
It is possible that after all the above procedures the tape will not light up. If we exclude defective products, a violation in the assembly scheme remains. The most common mistake is confusion in connection polarity. It can be fixed by reconnecting the conductors.
Option #2 - installation instructions with a dimmer
The possibilities of LED backlighting can be significantly expanded if you use a dimmer - a device with which you can adjust the brightness of the lighting, set flickering, and set a color changing program. It is often sold in conjunction with a remote control.
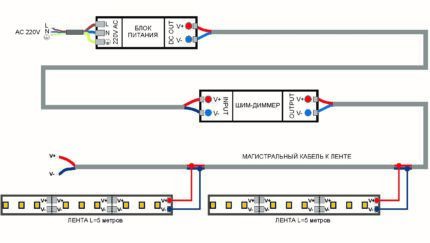
Adjustable lighting is usually used to illuminate serious structures - for example, built-in display cabinets or suspended ceilings. Let's consider the option with a plasterboard suspended two-tier structure, when the lighting can work simultaneously or separately from the main lighting.
For work you will need a kit including:
- 4 reels with LED strips;
- dimmer with 4 outputs and remote control;
- power unit;
- cable VVGng;
- installation wires PuGV.
Considering that LED lighting is one of the lighting circuits of the room, you will also need a junction box and a corrugated pipe to insulate the cable in the suspended structure.
Step 1 – connect the power cable
This is a preparatory stage at which it is necessary to transfer the wire from the switchboard to the distribution box in the room, and from there to the power supply. It can take a lot of time and effort, and it is carried out in parallel with the work of erecting a suspended structure.
All work is carried out in the same way as when installing a conventional switch: we place the cable in the groove, then insert it into the installation box, directly under which we install a socket for the main lighting switch.
Step 2 - lay the cable from the distribution box to the power supply
The cable will be located inside the suspended ceiling. It must be remembered that on the LED circuit the power is constantly connected, since there is no switch, and all control will occur through a dimmer with a remote control.
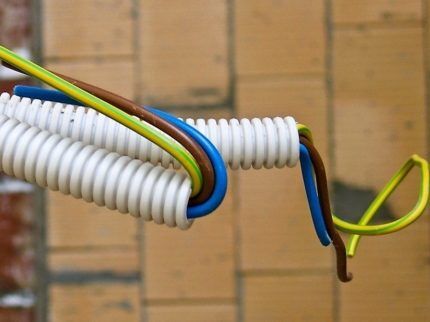
The power supply and dimmer should be hidden from view, but accessible for maintenance or repair. A small shelf located on the profile in the same place where the LED strip will go is suitable for this purpose. It is desirable that it be located at a minimum distance from the junction box.
Step 3 - connect the power supply and dimmer
Using PuGV 1 mm² wires, we connect the power supply and the dimmer. You will need a pair of conductors with insulation of different colors: conventionally red will connect the contacts with the “+” sign, black – “-”.
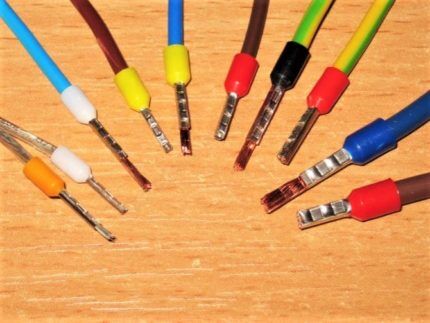
We chose a dimmer with 4 outputs, therefore it has 1 V+ socket (for the red wire) and 4 V- sockets (for the black wires).
We connect the wires to both devices, clamping the tips into the terminals and observing the polarity.
Step 4 – lay the wires from the dimmer to the strip
It is better to determine 2 connection points for LED strips and place them in opposite corners of the suspended structure - diagonally. From each of their 2 points there will be 2 parallel connected tapes (4 pieces in total).
The number of red and black wires is different: to each of their 2 nodes we connect 1 red and 2 black wires from the dimmer. Therefore, 2 red and 4 black wires go to the dimmer.
What are we doing? We connect both red ones with one tip and clamp them in the V+ terminal, and insert the black ones one at a time and fix them in the V- terminals, of which there are also 4.
At the same stage, the installation of the suspended structure is usually completed, so all that remains is to fix and connect the LED circuits.
Step 5 – connecting LED strips
According to the scheme, the ribbons will come out in pairs from two opposite corners, thus creating a closed rectangle of illumination.
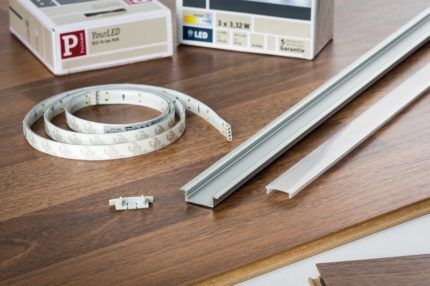
We cut pieces of tape of the required length according to the markings so that there are areas for connection on both sides. They indicate the polarity of the wires. We connect the wires coming from the dimmer to the tape using soldering or special connectors.
First we make switching in one node, then in the second. After connection, we install the backlight in the profile. To cover it, we glue a decorative baguette to the hanging structure.
Step 6 - Testing the Lighting System
We carry out testing when the work on the main lighting is completed, that is installation of spotlights/pendant lights or chandeliers. When checking the functioning of the LED backlight, we turn on various modes one by one on the remote control and change the intensity.
If the ribbons are very long, you will notice that at the ends the brightness of the glow is noticeably lower. To avoid this, implement a connection diagram for the tape on both sides.
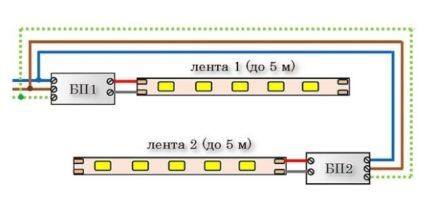
Do not forget that the maximum length of each tape is 5 meters. Over longer periods, the combustion intensity decreases, and they last much less. For the same reason, it is not advisable to use a serial connection.
When choosing a power supply, be sure to take into account the properties of all connected tapes. The parameters of the power supply must exceed their total power.
Conclusions and useful video on the topic
Three important installation principles:
Instruction from professionals – everything is straight forward:
Soldering LED strip - clearly and according to the rules:
With installed LED lighting, the appearance of the room changes noticeably. It is perfect as evening lighting or simply as a decorative frame for interior items.
Do you use LED products for design or purely practical purposes? Leave a description and photo of your projects in the comments.
We are also interested in what difficulties do you encounter during the installation process? Ask questions to our experts and other site visitors, share interesting opinions and suggestions - the feedback form is located below the article.


