How to set up a satellite dish tuner yourself: stages of setting up the equipment
Satellite television is a technology for a wide range of purposes, including domestic use, which has gained a high level of popularity.Digital equipment, which forms the basis of technology, is complex electronics.
However, with all the complexity of the hardware, it is quite easy for the end user to figure out how to set up a satellite dish tuner on their own, without involving a specialist.
This task is solved almost similarly to setting up any other modern household appliances. The basis of tuning is following the instructions supplied with each specific tuner. Let's consider this point to further facilitate self-configuration of the equipment.
The content of the article:
Purpose of the tuner and its location
For users, and there are many of them, who are completely ignorant of radio-television electronics, the word “tuner” is perceived as difficult to fully understand.
However, there is nothing complicated about this word, since in fact it hides the usual meaning of a signal receiver.
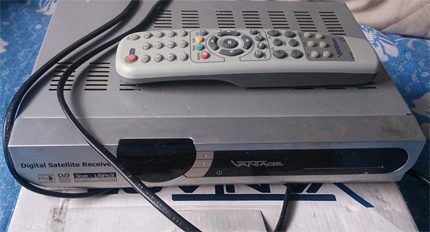
In this case, we are talking about a television signal receiver broadcast via satellite.
The signal received by the tuner is converted for consistent processing by the TV.As a result, the user visually perceives the television picture generated by the signal on the TV screen.
Before you start installing the tuner, we recommend reading our other articles, where we described in detail how to properly install a satellite dish with your own hands and adjust the “dish” to the satellite.
Correct installation of the tuner
After purchasing a television receiver, the user will need to configure it. That is, perform a series of sequential steps according to the instructions before the received signal is converted correctly and displayed on the TV screen.
Next, this process will be discussed in detail using the example of the tuner of the Tricolor TV system.
Even before you start setting up, the tuner should be installed on a flat, hard surface, preferably next to the TV, but no closer than 10-15 cm from the screen panel or back wall.
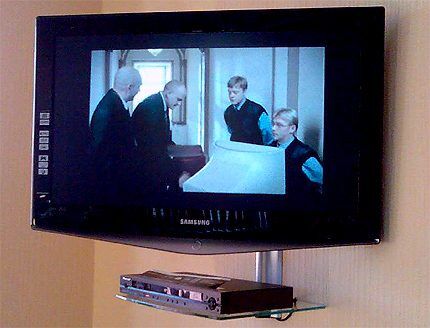
The receiver module must be installed with unobstructed air access to ventilation areas, usually the bottom and top covers or side covers. Violation of the ventilation mode can lead to overheating and malfunction of the device.
Typically the package includes:
- tuner module;
- control panel (RC);
- power adapter module;
- connecting cable type 3RCA.
The locally installed tuner must be connected to the TV using appropriate cables. This operation must be carried out with the network cable disconnected.
Interfaces and controls
The body of the standard tuner is rectangular, has a front and rear panel where operation control elements and system interfaces are located. The first ones, as a rule, occupy the front panel area. The second ones are located in the rear panel area.
The main control elements are the power on/off button, mode and channel change buttons, information display and user card slot.
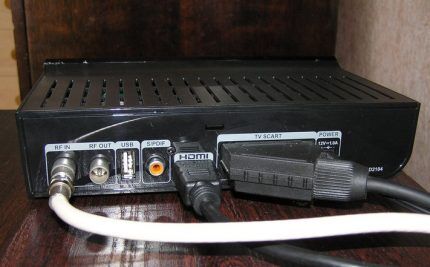
Interfaces are usually located on the rear panel. The number of interfaces of a modern tuner is quite large and can reach more than 10:
- Under the RF cable (RF OUT) connection to TV.
- For over-the-air antenna cable (RF IN).
- Connection with another tuner (LNB OUT).
- Satellite antenna cable connection (LNB IN).
- Composite video (VIDEO).
- For connection to a computer (USB).
- TV connection (SCART).
- TV connection (HDMI).
- Connecting sound via “tulip” (AUDIO).
There, on the rear panel, there is traditionally a socket for the power adapter plug, sometimes mode switches and fuses.
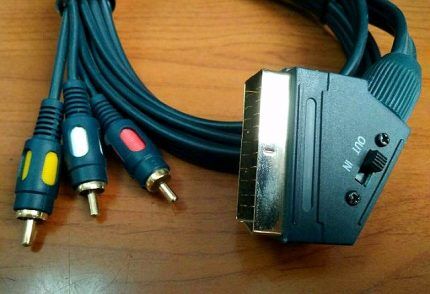
Connecting the tuner with a cable to a television receiver is usually done using a “SCART” cable (full wiring) through the appropriate connector.
However, other options are not excluded, including the RF OUT signal through the standard antenna input of the TV. But in these options, the quality of the image and sound is reduced.
Step-by-step configuration setup
So, after connecting the tuner and TV via the appropriate interfaces, you can connect the power adapter and set the network button to the “on” state.
The first launch is usually accompanied by the appearance of the “Setup Wizard” function on the TV screen. For inexperienced users, this is the optimal setup option.
Step #1 - select the language and time zone
The first screen of the “wizard” is settings according to regional standards for parameters such as menu language, audio language and time zone.
The selection of parameters on the required options screen is carried out using the up-down, left-right arrow buttons on the remote control.
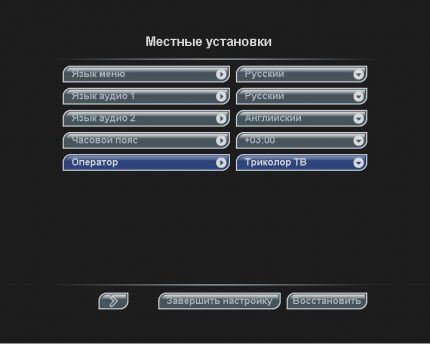
Confirm the selection - the “OK” button. While the menu language is traditionally set to regionally appropriate, the audio language is typically set to two options - one of which supports automatic selection based on content.
Step #2 - setting up audio/video interfaces
At the second (screen) stage of the setup, you should decide on the settings responsible for connecting to the television receiver.
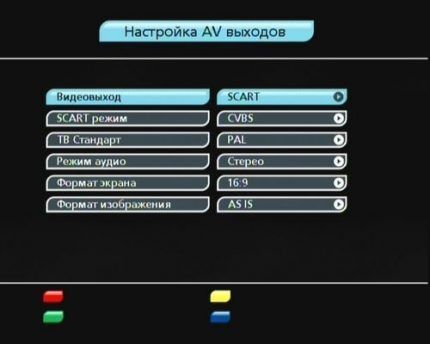
Again, using the arrow buttons, you should sequentially go through the list of on-screen menus.
And set the parameters on the appropriate tabs:
- Video mode — RGB or CVBS. As a rule, RGB is selected provided it is connected via a “SCART” cable.
- Audio channel — TV SCART or AUDIO L/R.The “mono/stereo” mode is also determined here.
- Screen Format - usually 16x9, less often 4x3.
- Image format - usually by default, in addition: envelope, trimmed, combined.
You also need to select options in the tab TV receiver standard - PAL B/G, PAL D/K, PAL I, SECAM D/K). The required standard can be determined in the documentation on the TV.
Step #3 - setting up the antenna system
Typically, the parameters for this part of the general setup menu are set by default by the satellite TV equipment supplier.
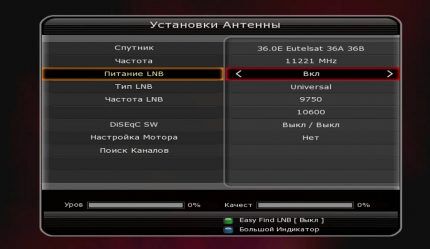
However, individual user settings may be required:
- LNB power supply;
- LNB type;
- lower frequency limit;
- upper frequency limit;
- signal tone.
The screen for this part of the setup, in addition to the setup tabs, contains control scales for setting up the antenna signal.
Using one scale, the signal level is adjusted, and using the other scale, the decoding quality is adjusted.
Step #4 - search for channels
The transition to this part of the setup is accompanied by an automatic search and detection of broadcast channels. Detected broadcasts are lined up on the screen in two lists - television channels and radio channels.
The “Setup Wizard” function then ends and the user is informed about this by a corresponding message. After confirming the message, the user can proceed to the TV viewing functions.
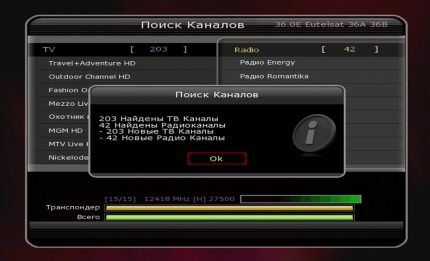
Actually, at this point setting up the satellite TV tuner can be considered complete. All subsequent operations performed with the remote control are practically no different from those carried out with a regular TV.
Working with the remote control after basic settings
Depending on the tuner model, the control functionality may differ slightly. But with any tuner, the delivery set always includes a user manual, which consistently describes all control functions.
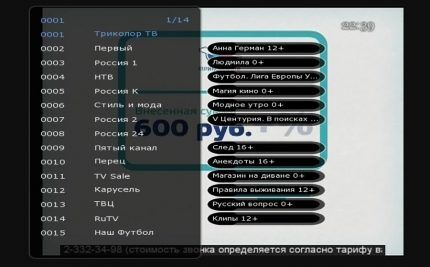
Digital tuners are quite functional devices. Therefore, in addition to the standard functions of switching from channel to channel, there are also a lot of various manipulations.
For example, all channels identified by the search can be formed in different ways, as convenient for the user:
- one column, two or three;
- quick sort;
- displaying a list of favorites, etc.
Using the remote control, you can display a list of available audio languages and set the desired language. It is also possible to choose between mono and stereo broadcasting or, if necessary, connect subtitles.
The remote control functionality, as a rule, supports the display of so-called “information banners”, which play a kind of role as a television program.
The info banner also shows the current date and time, the channel being shown, the TV program and other parameters of information broadcasting.
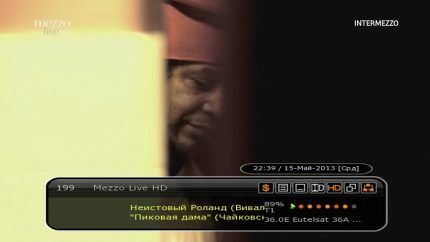
The “TV Guide” functionality seems even more “advanced” in this regard, which, in addition to the current broadcast, indicates a number of other broadcasts scheduled for transmission during the short time range.
In a word, the control functions of a tuner, even the “cheapest” one by user standards, are a very rich set of manipulations that require separate study.
We also invite you to get acquainted with interesting ideas for construction and configuration TV antennas from scrap materials.
Conclusions and useful video on the topic
The author of the video demonstrates emergency tuner setup, which may be required in various cases of failure on a previously configured receiver. Such moments happen infrequently, but can be useful in user practice:
As the user instructions above demonstrate, it is quite possible to independently configure the reception of a TV signal from a satellite with a tuner. Moreover, the process is not at all complicated, as it may initially seem to an inexperienced user.
Each manufacturer completes the delivery with instructions and calls these instructions user instructions. Therefore, there is no need to order tuning from a specialist when you can really do it all yourself.
Perhaps you have had to configure the tuner yourself and you know some subtleties that we did not mention in this material? Please share information with visitors to our site - leave your comments in the block below. There you can ask questions about the topic of the article.


Our tuner came with colorful and detailed instructions with step-by-step guidance on setting up the device. I did it myself in half an hour. But my friend bought a TV set in used status, there was no talk of any documents there. She and her husband looked for similar materials on the Internet and set up the tuner using them))) I take care of my instructions, because... They say that sometimes the settings are completely lost, and everything has to be done again.
At one time, the first tuner configured what was called the “scientific poking method.” Then such instructions would be very useful to me. But nothing, I set it up. When Tricolor TV reached our province, I connected it, at least I had a choice of what to watch. And starting this year, television is being transferred from an analogue signal to a digital one. I think the number of people using satellite dishes will increase significantly.
If the dish is correctly configured for the satellite, then in order to connect to it and configure the receiver you do not need to have special technical knowledge. The setup process is described in detail in the instructions for the receiver.
It’s another matter if you have several heads configured for different satellites, and you use a DiSeqC switch. The guy in the video tried to explain the setup process, but, in my opinion, he made it even more confusing. In this case (if there are several heads), you still need to contact professional adjusters. There are too many nuances.
Do you name the degrees, where can you get them from?