Do-it-yourself satellite dish installation: detailed instructions for installing and configuring a satellite dish
In recent years, satellite dishes have somewhat lost their importance for society. The reason is the appearance of digital TV set-top boxes on sale.Nevertheless, this equipment remains in demand, especially if the population lives outside the urban area.
Purchasing equipment is not a problem, but installing a satellite dish can become a serious task if you approach the installation yourself. However, the task can be greatly simplified if you have basic knowledge. We will talk about how the installation is carried out using the example of the popular Tricolor system.
The content of the article:
Basic concepts of a potential master
Even if we are dealing with a traditional television antenna, and in such cases, installation requires at least minimal knowledge and skills. Satellite equipment is much more complex in comparison with conventional TV reception.
If for conventional equipment there are two main concepts - cable and plug, a system where satellite reception is carried out has a number of technical concepts:
- TV satellite.
- Satellite antenna.
- Converter.
- Multi-feed holder.
- Bracket.
- Receiver.
Let's take a closer look at each of the components of satellite equipment.
TV satellite — the source of the signal that the antenna needs to receive. Accordingly, in order to receive a constant signal, it is necessary to constantly point the antenna towards the satellite.
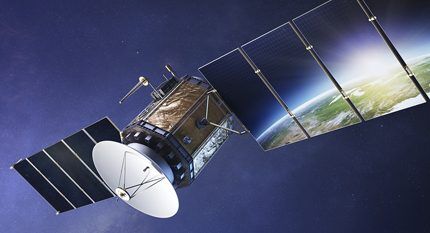
There are different satellites and different antenna designs, but the tuning principle is almost the same for all.
For this television reception technology, a satellite antenna is used, which is a disk “dish” of different diameters, equipped with a conversion device - converter.
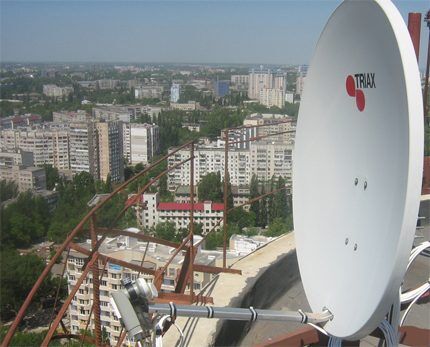
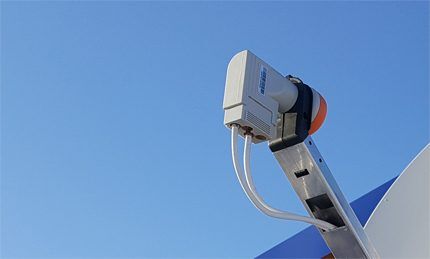
This is a module of small geometric dimensions, usually cylindrical in shape, attached directly to the “front” part of the satellite antenna.
The disk antenna has a special design that allows you not only to receive a television signal, but to additionally concentrate it and direct it to one point - namely to the converter. It is, in fact, a primary signal amplifier, from which the signal is sent via cable to the receiver.
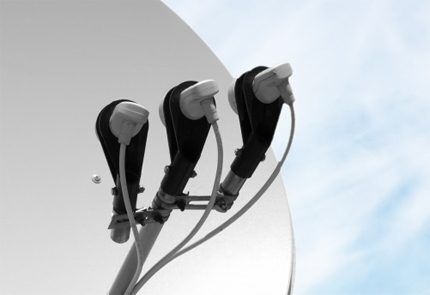
A special rod holder is used to secure the module. A device called "multifed holder" - this is the same rod-holder, only slightly modified. Allows you to place several converters to work with different satellites.
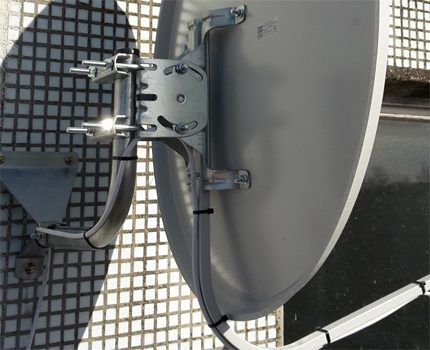
The bracket is, in fact, a mechanical structure that is assembled from component parts and fixed in the intended installation location of the satellite dish. As a rule, such a place is the wall of the building, less often the roof truss system.
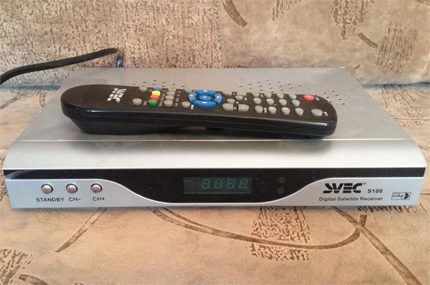
The electronic module for processing the received television signal, with subsequent display of information on the screen of the television receiver, is called receiver.
There are various designs of receivers depending on the manufacturer. However, a specific manufacturer, as a rule, completes the equipment taking into account the matching of the antenna and the device.
Therefore, it is quite problematic to coordinate any receiver (receiver) with any “non-native” antenna. This point should be taken into account before installing and installing in your home with your own hands. setting up a satellite dish under a modern TV.
Choosing a suitable location for equipment
First of all, you should choose the optimal location for the satellite dish. What should be understood by the term “optimal”? Of course, a completely free area in the direction of the transmitting satellite.
That is, in a given direction the presence of any objects such as:
- buildings;
- trees;
- advertising posters, etc.
It is also recommended to ensure that the remaining equipment (receiver, TV) is placed as close as possible to the installation point of the satellite dish. These are not critical requirements, but fulfilling these requirements will help simplify the setup of the equipment.
Traditionally, “plates” are placed on the wall of a building next to a window opening, or installation is done on the side of the wall that is part of the balcony (loggia) structure.
The instructions prohibit installation directly inside the balcony area, especially a glazed one. The equipment should also be installed at points where there is no possible fall of precipitation in the form of snow and ice from the roof.
Step-by-step instructions for installing the plate
You must first assemble the satellite antenna structure as described in the attached instructions. As a rule, antennas are supplied disassembled. Therefore, the structure should be assembled using the accessories supplied.
Next, we will consider the step-by-step installation of a satellite dish.
Step #1 - attaching the antenna holder bracket
Again, taking into account working with a branded product, where all installation elements and components are designed for the appropriate load, work is being done to install anchor bolts in the wall of the building.
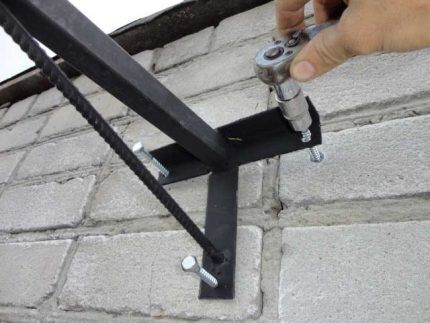
This work is done in a standard way, using a tool for working with concrete. After introducing the anchors, a support rod is attached to the installed anchors, and a metal bracket is attached to the rod.
Step #2 - installation of the antenna converter
Installation of the pre-signal amplifier - converter is carried out strictly according to the instructions, where all the details of the placement of this component are noted.
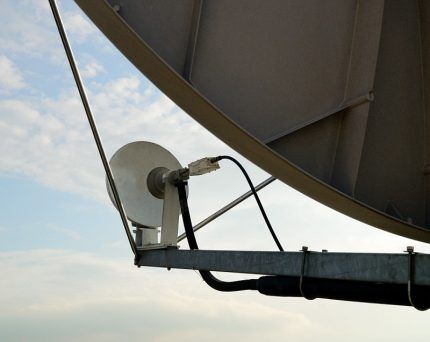
Step #3 - connecting the cable to the converter
At the current stage, the cable, which is usually also included in the kit, is connected to the converter module. The connection is made using the special “F” connector included in the delivery package.
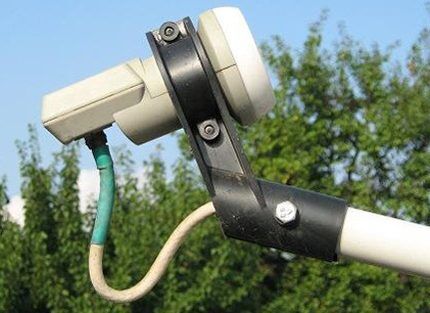
The connection area must be carefully sealed, for example, with silicone sealant. The cable from the switching point is pulled carefully and without unnecessary effort along the body of the converter holder rod. It is fixed at regular intervals with plastic ties or other means.
Step #4 - securing the satellite dish
The prepared “plate” is installed on the bracket, while the adjusting screws are not tightened all the way - they are left loose.
This approach is necessary for the simple reason that further (after installation) the procedure for fine tuning to the satellite will follow. Accordingly, the “plate” will have to be moved both vertically and horizontally.
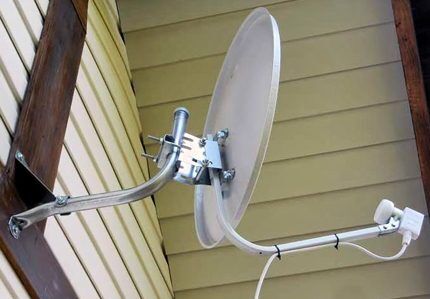
Separately, it is worthwhile to provide instructions on installing the F-connector on a coaxial cable. This operation has its own characteristics. The final area of the cable (approximately 15 mm long) must be freed from the first insulating layer.
But the insulation must be removed taking into account maintaining the integrity of the screen braid present under the insulation layer. Then the second layer of insulation is removed at a length of about 10 mm. This frees the central copper core. Next, screw the connector onto the stripped end switch until it stops, passing the copper conductor into the corresponding hole.
How to configure the installed antenna?
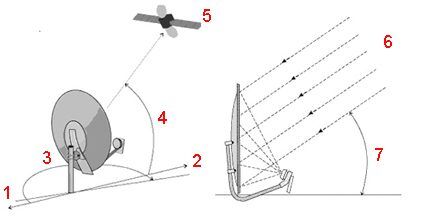
Typically, the installation instructions for the “dish” contain a table that indicates information on azimuth and angle - setting parameters in direction. The parameters are indicated, as a rule, for areas where large populated areas are located.
You should select the nearby territory from the list and take the angle and azimuth parameters for adjustment. Next, set the antenna mirror using these parameters, moving the “dish” in the vertical and horizontal planes.
This will be a "rough" setting. After which the antenna cable is connected to the receiver, and the receiver, accordingly (also via a connecting cable) to the television receiver.Next, all that remains is to adjust the angle and azimuth parameters, achieving the highest quality picture on the TV screen.
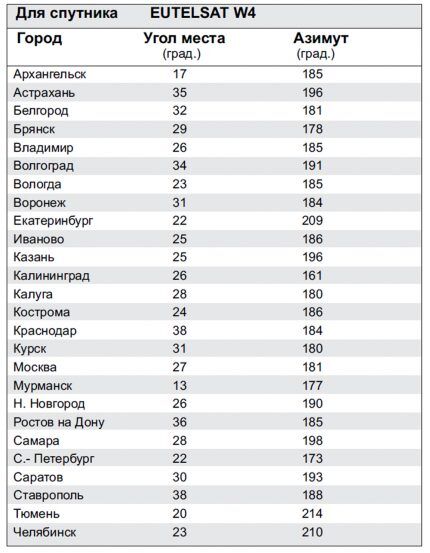
Any receiver by default has a service for monitoring the level of the received signal. Using this functionality, you can configure the equipment with high accuracy. However, weather conditions can make adjustments to the settings. Therefore, it is recommended to carry out adjustment activities under clear, cloudless sky conditions.
Having achieved the appearance of a stable, sufficiently strong control signal on the TV screen, the nuts securing the mirror on the bracket are screwed in until it stops. The equipment here is considered installed and configured.
Then they move on to regular user viewing using access cards or through free available channels. How tune the tuner, select channels and open access - all this is in the user manual.
If a dish is installed in a country house to regularly watch TV programs, most often the signal received by the antenna requires improvement due to the significant distance of the repeater. It will help in this situation antenna amplifier, the rules for choosing which will be introduced in our recommended article.
Conclusions and useful video on the topic
Below is a video where a home master explains from personal experience all the intricacies of installing the “plate”.
Accordingly, the entire process is filmed on a video camera, so the reader is clearly shown how to install a satellite dish with his own hands:
Despite the visible and invisible difficulties that appear during the installation of a satellite dish, it is quite possible to cope with such work with your own hands. The main point is the scrupulous collection, processing of relevant information and, of course, careful study of the accompanying instructions.
Would you like to talk about how you installed and configured a satellite dish with your own hands? Do you have information on the topic of the article that is worth sharing with site visitors? Please write comments in the block below, ask questions, post photographs.


My parents live in the countryside. Since the stationary antenna picks up 4-5 channels, we decided to purchase a satellite one. Still, I want to be aware of all important events. The installation was carried out independently; the kit included detailed setup instructions. Just don’t forget that such work involves heights and electricity, and this poses a certain danger to life. If you have any concerns, it is better to call installers from the company where you purchased the equipment.
I put this “plate” at the dacha. I spent most of my time with the signal amplifier (converter). After all, you not only need to fix the converter there, but also configure it. What is the plate for? It reflects the signal caught from space to the converter, which transmits it via cable to the house, to the TV. If the converter is not located ideally in the center of the reflected wave beam, then the TV signal will be worse and weaker. So you need to move it back and forth, catching that same central location. There is a longitudinal hole on the protruding pipe.Loosen the bolt and nut that secure the converter and move its holder along this hole, thereby adjusting the location of the converter relative to the plate itself. We focus on the signal strength on the receiver. It showed the maximum signal, which means that’s it, stop, we’ve found the optimal location. We tighten the bolt and nut to the end and exhale)) Maybe someone will find what I wrote useful.
It's all about azimuth - this is the angle at which the antenna mirror itself receives the signal from satellites. And from the antenna mirror the signal is reflected to the converter. To quickly select the azimuth to the desired satellites, I recommend using the Satellite Antenna Alignment smartphone app. With its help, you can quickly configure the antenna to receive signals from satellites.
This is easy to do: turn on GPS, the application launches the camera and shows the direction (azimuth) in which there will be the best reception from satellites. I hope that this information will help not only you, but also other people who are faced with the problem of setting up a satellite dish.
I installed satellite dishes for myself and my friends. From my own experience I know that the most difficult moment is to correctly orient it towards the desired satellite. Professional tuners use devices such as SatFinder, which determines the level of the received television signal. If you set it up yourself, then it is best to use some kind of portable TV with a small screen diagonal, which can be installed directly next to the “dish” and then “catch” the desired satellite (as shown in the video).The most important thing is that first you need to correctly set the azimuth and elevation angle to the desired satellite, and then things will work out on their own.
I watched a bunch of videos before installing it in the house. All you need is one assistant. The assembly was not difficult at all, but with setting the angle, we struggled for probably 30 minutes until we caught a stable signal. There's literally a few mm to the side and it's no longer the same.
It's easier to install in your home. At first I had it in a city apartment, where I had to install it on the opposite side of the house using a tower and call a professional adjuster.