DIY solar generator: instructions for making an alternative energy source
Alternative energy sources that make it possible to provide a living space with heat and electricity in the required volume are not a cheap “pleasure” that requires significant financial costs for purchase, installation and installation.
Making a solar generator with your own hands is much cheaper and is within the capabilities of many home craftsmen. Let's look at the instructions, which clearly describe all the nuances of the manufacturing process.
The content of the article:
- How does a solar power generator work?
- What do you need for work?
- Selecting the type of photoconverter
- How to make a frame for plates?
- Selecting a transparent element
- Installation of silicon photocells
- How to test the installed unit?
- The final stage of work
- Where and how to place the generator?
- Conclusions and useful video on the topic
How does a solar power generator work?
A solar generator is a complex of photovoltaic semiconductor elements that directly convert solar energy to electric.
When the quanta of light produced by the rays hit the photographic plate, they knock out an electron from the final atomic orbit of the working element. This effect creates many free electrons, which form a continuous flow of electric current.

Silicon is used as the active material.It is highly efficient and provides a photovoltaic conversion efficiency of 20% in normal operation and up to 25% under favorable conditions.

A thin coating of passive chemical elements - boron or phosphorus - is applied to one side of the silicon wafer. It is on this surface that, as a result of intense exposure to sunlight, active release of electrons occurs. Phosphorus film holds them securely in one place and does not allow them to fly apart.
There are metal “tracks” located on the working plate itself. Free electrons are built on them, thus creating ordered movement, that is, electric current.
The only disadvantages of wafers include the complexity and cost of the process of purifying the silicon itself, and in order to avoid these problems, they are actively exploring the use of alternatives in the form of gallium, cadmium, indium and various copper compounds. However, so far there are no real competitors for silicon elements.
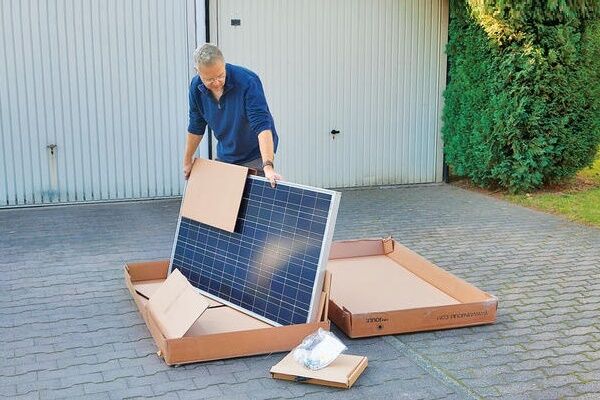
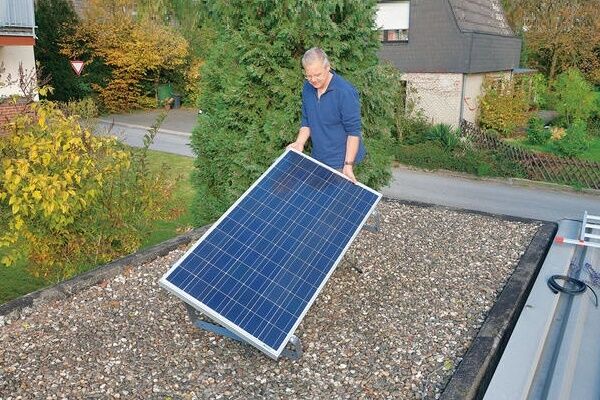
The easiest way to build a solar energy converter into electricity is to buy a ready-made solar battery and install it on the roof of a house or garage:
What do you need for work?
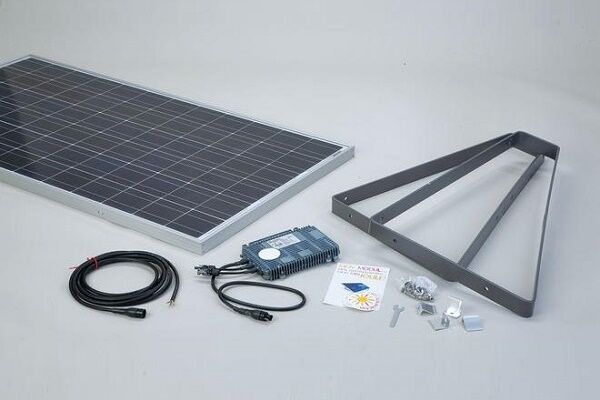
For the manufacture of a generator consisting of a kit solar panels, the following tools and materials are required:
- modules for converting sunlight into energy;
- aluminum corners;
- wooden slats;
- chipboard sheets;
- a transparent element (glass, plexiglass, plexiglass, polycarbonate) to create protection for silicon wafers;
- self-tapping screws and screws of different sizes;
- dense foam rubber 1.5-2.5 mm thick;
- high-quality sealant;
- diodes, terminals and wires;
- screwdriver or set of screwdrivers;
- soldering iron;
- hacksaw for wood and metal (or grinder).
The volume of materials needed will directly depend on the planned size of the generator. Large-scale work will entail additional costs, but in any case it will be cheaper than a purchased module.

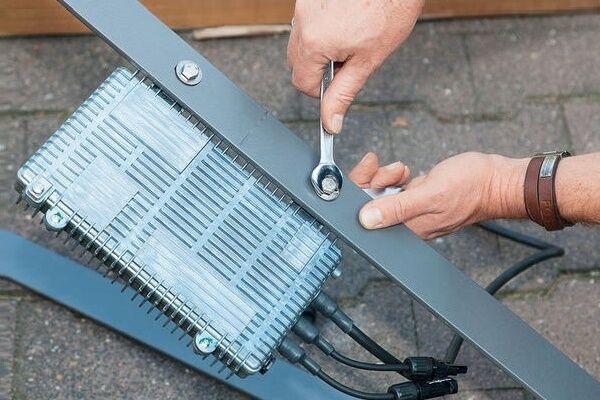
For final testing of the assembled unit, an ammeter is used. It allows you to record the real efficiency of the installation and helps determine the actual output.
Selecting the type of photoconverter
Activities to create a solar generator with your own hands begin with choosing the type of photovoltaic silicon converter.
These components come in three types:
- amorphous;
- monocrystalline;
- polycrystalline.
Each option has its own advantages and disadvantages, and the choice in favor of any of them is made based on the amount of funds allocated for the purchase of all system components.
Features of amorphous varieties
Amorphous modules do not consist of crystalline silicon, but of its derivatives (silane or hydrogen silicon). By spraying in a vacuum, they are applied in a thin layer to high-quality metal foil, glass or plastic.
The finished products have a faded, blurry gray tint. No visible silicon crystals are observed on the surface. The main advantage flexible solar panels The price is considered affordable, however, their efficiency is very low and ranges from 6-10%.

Specifics of polycrystalline types
Polycrystalline solar panels produced by gradual very slow cooling of the silicon melt. The resulting products are distinguished by a rich blue color, have a surface with a clearly defined pattern reminiscent of a frosty pattern, and exhibit an efficiency of around 14-18%.
Higher efficiency performance is hampered by the areas present inside the material, separated from the overall structure by granular boundaries.

Characteristics of monocratylic variants
Monocrystalline modules are characterized by a dense dark color and consist of solid silicon crystals. Their efficiency exceeds that of other elements and amounts to 18-22% (under favorable conditions - up to 25%).
Another advantage is the impressive service life - according to the manufacturers, over 25 years.However, with prolonged use, the efficiency of single crystals decreases and after 10-12 years the photoreturn is no more than 13-17%.

To create a solar generator at home with your own hands, you mainly take poly- and monocrystalline plates of various sizes. They are purchased from popular online stores, including eBay or Aliexpress.
Due to the fact that photocells are valued quite highly, many suppliers offer customers products of group B, that is, fragments suitable for full use with a slight defect. Their cost differs from the standard price by 40-60%, so assembling a generator costs a reasonable price that is not too expensive.
How to make a frame for plates?
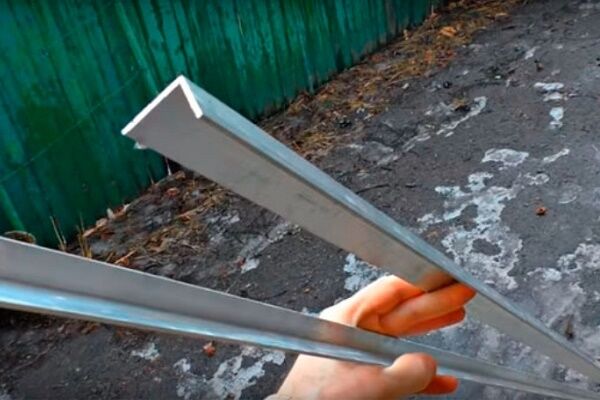
To make the frame of the future generator, strong wooden slats or aluminum corners are used. The wooden version is considered less practical, since the material requires additional processing to avoid subsequent rotting and delamination.

Aluminum has much more attractive physical characteristics and, due to its lightness, does not place unnecessary stress on the roof or other supporting structure where the unit is planned to be installed.
In addition, due to the anti-corrosion coating, the metal does not rust, does not rot, does not absorb moisture and easily withstands the effects of any aggressive atmospheric manifestations.
To create a frame structure from aluminum corners, first determine the size of the future panel. In the standard version, 36 photocells measuring 81 mm x 150 mm are used per block.
For correct subsequent operation, a small gap (about 3-5 mm) is left between the fragments. This space allows us to take into account changes in the basic parameters of the base exposed to atmospheric manifestations. As a result, the total size of the workpiece is 83 mm x 690 mm with a frame corner width of 35 mm.

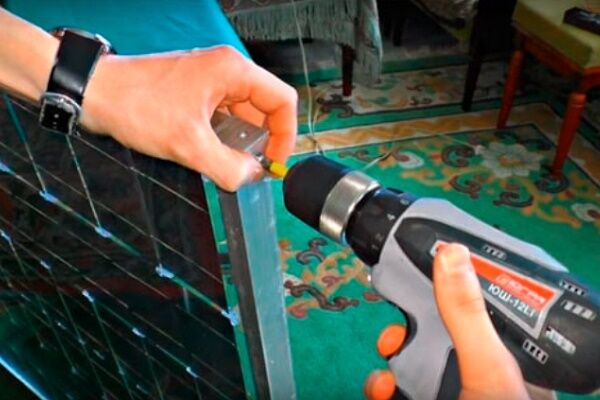
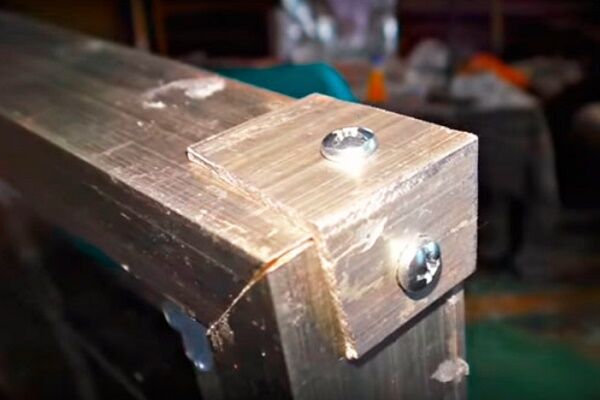
After determining the dimensions, the necessary fragments are cut out from the corners and assembled into frame frames using fasteners. A layer of silicone sealant is applied to the inner surface of the structure, making sure that there are no gaps or voids.
The integrity, strength and durability of the mounted structure depends on this. A protective transparent material is placed on top (glass with anti-reflective coating, plexiglass or polycarbonate with special parameters) and securely fastened with hardware (1 per short and 2 per long part of the frame and 4 at the corners of the body).
For work, use a screwdriver and screws of a suitable diameter. At the end, the transparent surface is carefully cleaned of dust and small debris.
Selecting a transparent element
The main criteria for choosing a transparent element to create a generator:
- ability to absorb infrared radiation;
- level of refraction of sunlight.
The lower the refractive index, the higher the efficiency the silicon wafers will demonstrate. Plexiglas and plexiglass have the lowest coefficient of light reflection. Polycarbonate also has far from the best performance.
To create frame structures for home solar systems, it is recommended, if possible, to use anti-reflective transparent glass or a special type of polycarbonate with an anti-condensation coating that provides the required level of thermal protection.
The best characteristics in terms of absorption of IR radiation have durable thermal-absorbing plexiglass and glass with an IR absorption option. For ordinary glass these figures are significantly lower. The efficiency of IR absorption determines whether the silicon wafers will heat up during operation or not.
If the heating is minimal, the photocells will last a long time and provide stable output. Overheating of the plates will lead to interruptions in operation and rapid failure of individual parts of the system or the entire complex.
Installation of silicon photocells
Immediately before installation, protective glass placed in aluminum frames is well cleaned of dust and degreased with an alcohol-containing composition.
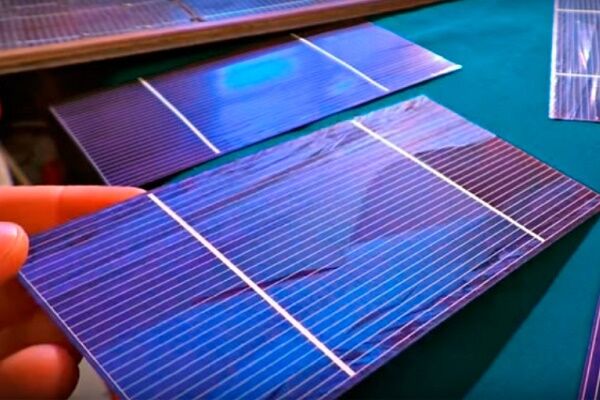
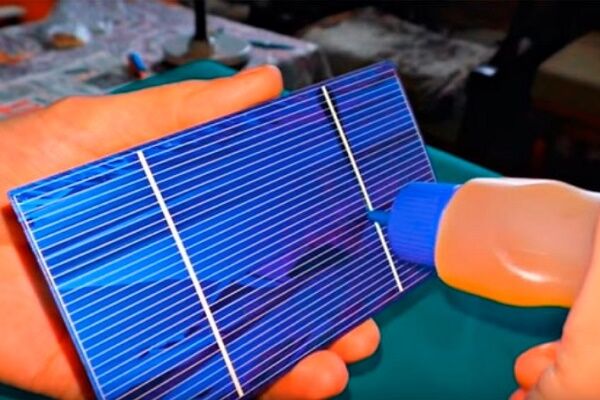
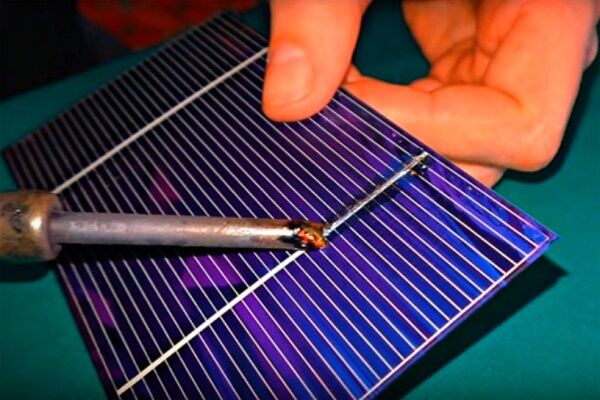
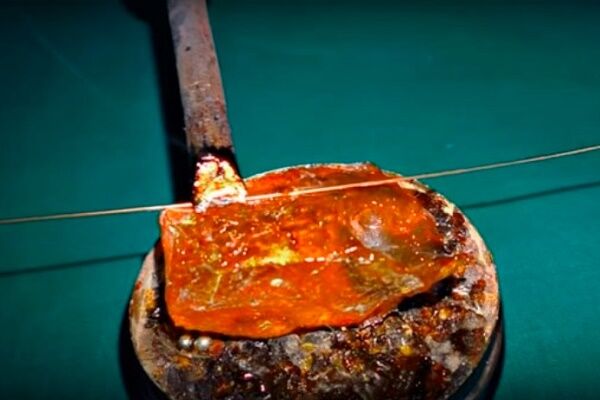
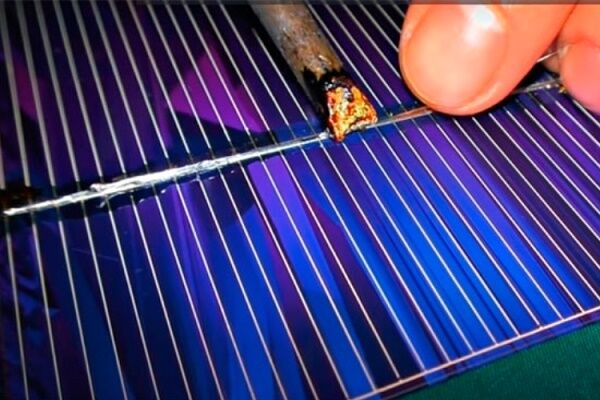
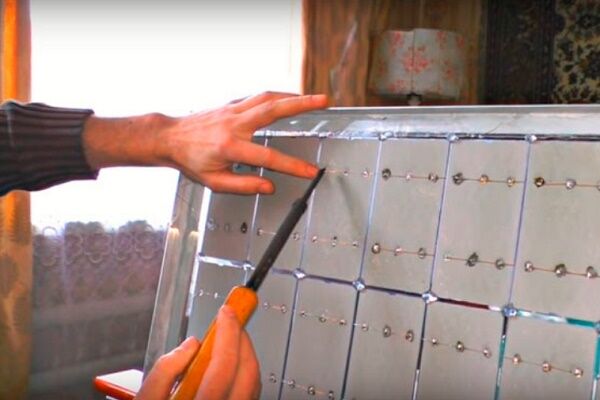
The purchased photocells are placed evenly on the marking substrate at a distance of 3-5 millimeters from each other and the corners of the overall structure are marked. Then they begin soldering the elements - the most important and labor-intensive part of the work of assembling the generator.
The soldering of the operating elements of the generator is carried out according to a scheme in which “+” are the tracks on the outside, and “-” are the channels located on the underside of the plate.
To connect the contacts correctly, first apply flux (soldering acid) and solder, and then process them in a strict sequence from top to bottom. At the end, all rows are connected to each other.
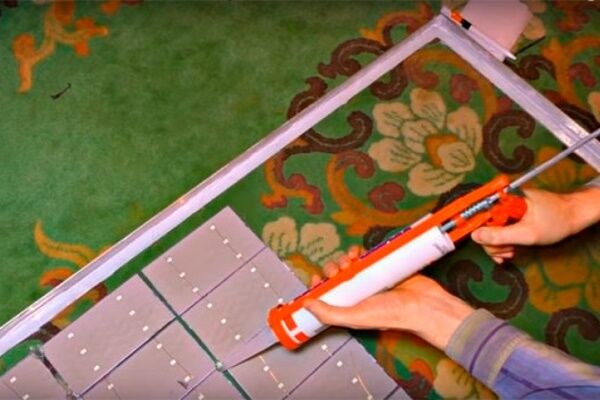
The next step is gluing the photocells. To do this, a little sealant is squeezed into the center of each silicon wafer, the resulting chains of elements are turned over with the outer side up and placed in strict accordance with the markings applied earlier.
Gently press the plates with your hands, fixing them in the right place. They act very carefully, trying not to damage or bend the material.
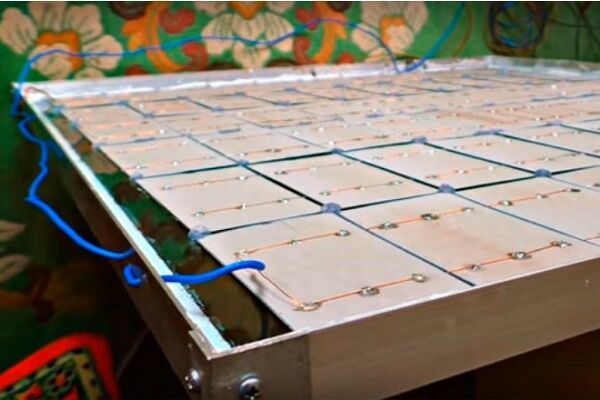
The contacts of the photocells located along the edges are output to a separate bus (wide silver conductor), as “+” and “-”. Additionally, the complex is equipped with a blocking diode. By connecting to the contacts, it prevents the batteries from discharging through the frame structure at night.
In the bottom part of the frame, holes are made with a drill through which the wires are brought out. To prevent them from sagging, use silicone sealant.
The following photo gallery will introduce you to the steps of assembling a solar panel from 60 elements:
The solar cells assembled by soldering now need to be secured to the base. Can be glued to plywood and covered with glass. However, in the example, gluing is first done to the glass:
To ensure that the battery intended for accumulating charge does not absorb the energy generated by the photocells, its solar battery is connected through a Rod diode:

This mini power plant is capable of generating up to 15 V. It should be noted that maximum performance will be observed only on sunny, cloudless days. In cloudy weather, the device will generate significantly less energy or will not generate energy at all. Therefore, the battery for it is selected so that the reserve is enough for at least a day.
How to test the installed unit?
Before finally sealing the assembled generator, it must be tested in order to identify potential malfunctions during the soldering process. The most reasonable option is to check each soldered row separately. This way it will immediately become clear where the contacts are poorly connected and require re-processing.
To carry out the test, use a household ammeter. The measurement is carried out on a cloudless sunny day at lunchtime (from 1 to 3 p.m.). The structure is placed in the yard and installed at the appropriate angle of inclination.

An ammeter is connected to the output contacts of the solar battery and the short circuit current is measured. If the device shows results above 4.5 A, the system is completely correct and all connections are soldered clearly and correctly.
Lower data that appears on the tester display indicates violations that need to be tracked and re-soldered. Traditionally, do-it-yourself solar generators from photocells with a slight defect (group B) show figures from 5 to 10 Amperes on the test.
Factory-produced units show data 10-20% higher. This is explained by the fact that the production uses silicon wafers of group A, which do not have any defects in the structure.
The final stage of work
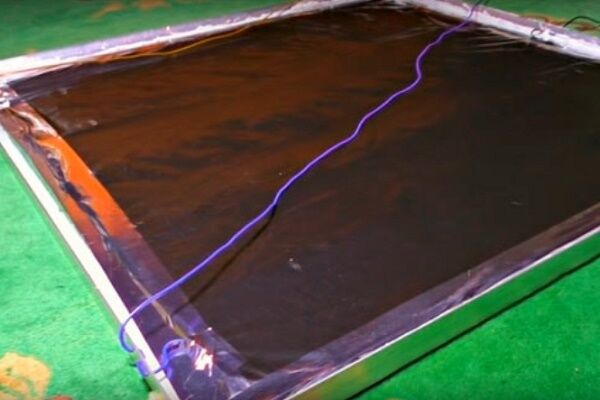
If the test shows that the battery is fully functional, it is sealed with a special silicone sealant or a more expensive and durable epoxy compound.
The work involves two ways of doing it:
- Full filling - when the entire surface is covered with a sealing compound.
- Partial treatment - when the sealant is applied only to the outer elements and the empty space between the elements.
The first option is considered more reliable and provides the system with complete protection from external factors. Photocells are clearly fixed in place and work correctly with maximum efficiency.

When the filling is completed, the sealant is allowed to “set.” Then they cover it with a transparent element and press it tightly against the plates.

Then a weight is placed on the surface, which acts on the layers and squeezes air bubbles out of them. The finished generator is tested again and finally installed in a pre-prepared place.
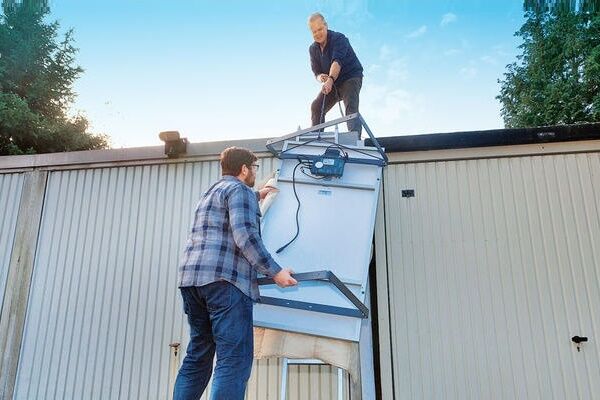
Where and how to place the generator?
The location for installing the solar generator is chosen very carefully and without haste. The plates that receive light must be placed at an angle so that the rays do not “fall” perpendicularly to the surface, but seem to “flow” neatly along it.
Ideally, the structure is positioned so that it remains possible, if necessary, to adjust the angle of inclination, in this way, “catching” the maximum amount of sun.
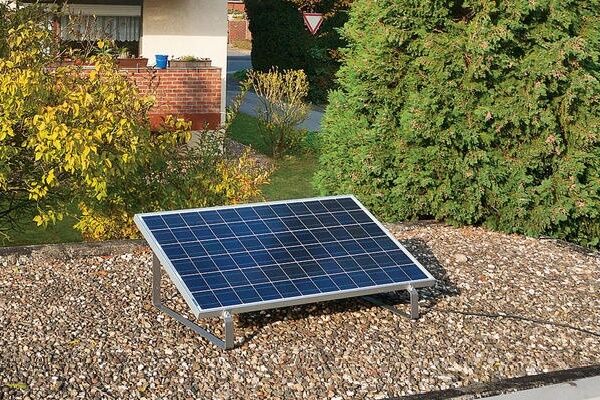
It is quite acceptable to install a solar system from solar panels on the ground, but most often the roof of a house or utility room is chosen for placement, namely that part of it that faces the most consecrated, mainly southern side of the site.
It is very important that there are no tall buildings or powerful, spreading trees nearby. Being in close proximity, they create a shadow and interfere with the full operation of the unit.

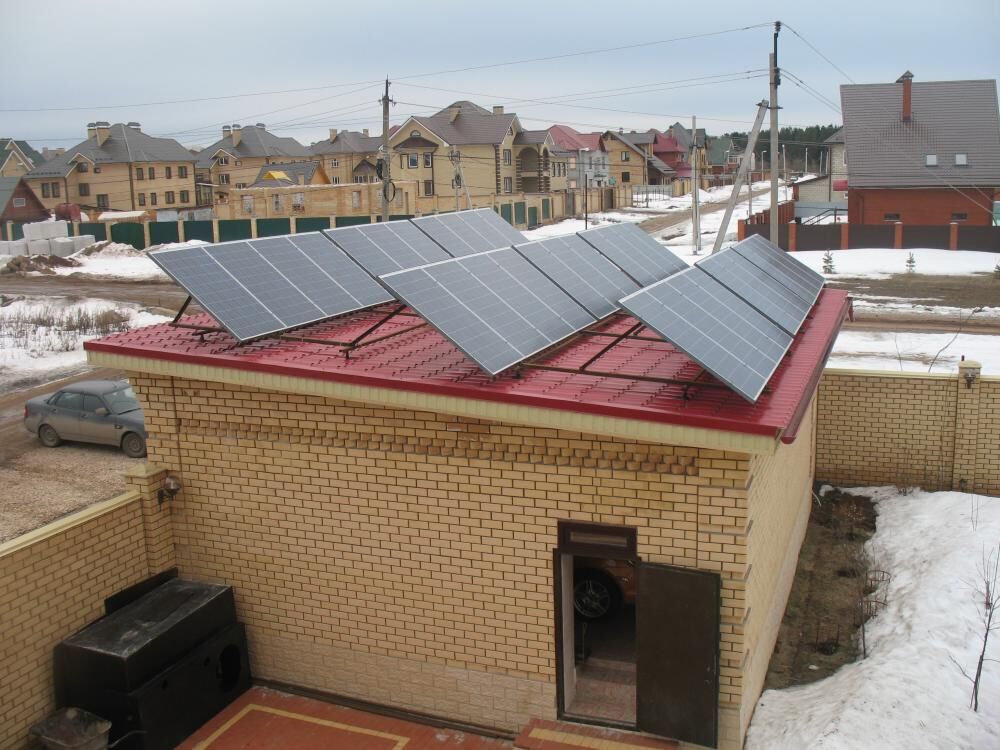
The average roof slope level for installing a solar generator is considered to be 45⁰. With this arrangement, photocells absorb solar flux very efficiently and produce the amount of energy necessary for the correct functioning of the house.

For the European part of the CIS countries, slightly different indicators apply. Professionals recommend using a stationary tilt angle of 50-60⁰ as a basis, and in movable structures during the winter season placing the batteries at an angle of 70⁰ to the horizon.
In summer, change the position and tilt the photocells at an angle of 30⁰.

Immediately before installation, the roof is additionally strengthened and equipped with special strong supports, since not every structure is able to withstand the full weight of equipment for converting solar energy.

In some cases, reinforced rafters are placed under the roof to protect the roof from collapse, potentially due to increased load, which increases significantly in the winter season when snow accumulates on the roofing surface.
To put the solar system into operation you will need batteries, inverter and charge controller. You will learn about the rules for selecting devices and their inclusion in the circuit from the articles we recommend.
Conclusions and useful video on the topic
Features and nuances of soldering photocells for making an effective solar generator at home with your own hands. Hints and tips for craftsmen, interesting ideas and personal experiences.
How to properly test a photocell and measure its main parameters. This information will be useful in subsequent calculations of the exact number of plates required for full operation of the system.
A complete step-by-step description of the process of assembling a solar battery for a generator at home. Operating rules, starting from purchasing the necessary elements and ending with a general test of the manufactured device.
Knowing about the structure of solar generators, assembling them at home will not be difficult. Of course, the work will require attention, accuracy and scrupulousness, but the result will justify all financial and labor costs. The finished unit will fully provide the building with heat and electricity, creating the necessary level of comfort for residents.
There is no point in taking on a major project right away.To begin with, it makes sense to try your hand at assembling a small unit, and then, having fully mastered all the nuances of the process, begin building a more powerful and large-scale installation.
What method of constructing a mini-power plant did you choose to arrange your summer cottage? Please write comments, share useful information and photographs on the topic of the article in the block below. Ask questions about controversial or unclear points.


Quite a long time ago, I began to worry about the constantly increasing payments for electricity, so I began to think about the problem of alternative sources. I wanted to install solar panels on my site, but I couldn’t get around to it, and my finances didn’t allow it. But, as I understand, making them yourself is not so difficult, you need, of course, to confuse a little, but still later you will have free electricity, and also less harm to the environment.
You can collect it, but you can achieve adequate efficiency only if you live in the south of our country. At one time I was interested in the topic of solar generators, but, unfortunately, in Siberia we only have enough solar energy during a couple of summer months.
I had never even thought before that you could assemble a solar energy generator on your own. I looked at the list of necessary materials - it seems that there is nothing particularly complicated. You just need to think about where to get the modules. If I can’t find it in the city, I’ll order it online. I’m tired of overpaying the government for electricity, I don’t understand where the large amounts in the bill come from, if I hardly use electricity at the dacha.