How to make a solar battery with your own hands: methods for assembling and installing a solar panel
Hydrocarbons have been and remain the main source of energy, but increasingly humanity is turning to renewable and environmentally friendly resources. This has caused increased interest in solar panels and generators.
However, many are hesitant to install a solar system due to the high cost of equipping the complex. You can make your products cheaper if you start creating them yourself. Do you doubt your own abilities?
We will tell you how to make a solar battery with your own hands using available components. In the article you will find all the necessary information in order to calculate the solar system, select the components of the complex, and assemble and install the photopanel.
The content of the article:
Pros and cons of using solar systems
According to statistics, an adult uses about a dozen different devices that operate from the network every day. Although electricity is considered a relatively environmentally friendly source of energy, this is an illusion because its production uses polluting resources.
From this point of view, solar energy much more profitable.
Assembly components solar panels and generators have long been available for free sale, and if desired, anyone can assemble a system. This will require some financial investment and time. The assembly process is painstaking and requires attention and precision, but the work itself is not particularly labor-intensive.

Advantages of using solar energy:
- Huge potential. The sun can provide enough energy to satisfy all human needs. It is renewable and inexhaustible, which compares favorably with coal, oil products, and natural gas.
- Availability. The sun is everywhere - both in hot countries and in the coldest ones. It is quite enough for all needs.
- Environmental friendliness. Due to the total energy crisis, “green” energy is the most promising area for scientific research and high-tech development. Solar panels do their job perfectly without harming the environment.
- No noise. Solar systems operate silently, which distinguishes them from many other energy sources.
- Economical. The operation and maintenance of solar panels do not require any special costs. By investing money once, the owner can use the system for 20-25 years. The main thing is to clean the elements in a timely manner.
- Wide range of applications. Solar panels can produce enough energy to provide electricity and heat to your home. However, this is not the only area of their application. Solar systems are used to desalinate water and even to provide energy to orbital stations.
Solar batteries are still expensive, although there are already ways to save significantly by making them yourself.Every year new developments are introduced that make it easier and cheaper to obtain solar energy.

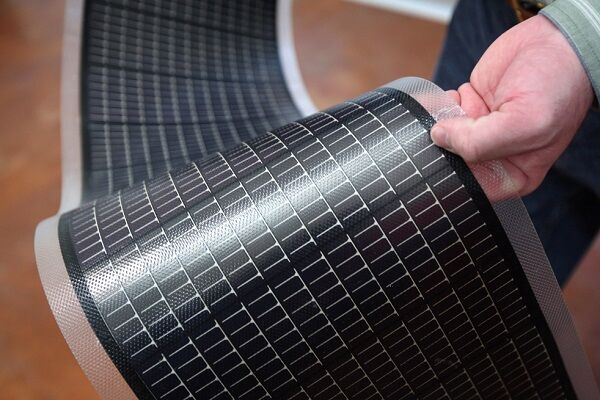
Interesting development - flexible solar panels. Thanks to its elasticity, the photo canvas is much easier to install - the panel “adjusts” to the shape of the roof or other support.
One of the modern technologies is thin-film modules, which are introduced into building materials. Transparent storage elements designed for use in window structures have also appeared.
This is the development of a Japanese company Sharp. Experts believe that in the near future such solar panels will become many times more powerful and more profitable.

For objective reasons, solar systems cannot yet completely replace hydrocarbons, because Obtaining and storing solar energy is associated with high costs, but it can be a good source alternative energy supply for home or individual electrical appliances.

Technologies are developing rapidly, and solar panels can be upgraded and expanded, so it’s worth starting to assemble suitable systems now.
A detailed overview of the types of solar panels is given in this article.
What components are needed and where to buy them
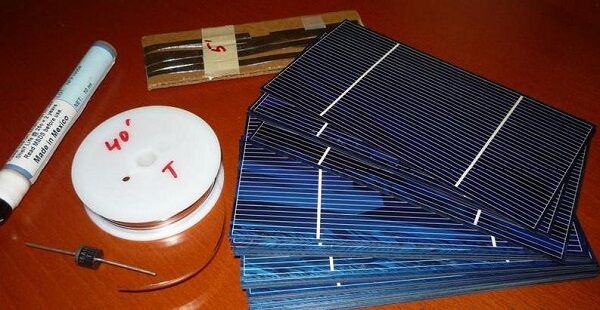
The main part is a solar photopanel. Typically, silicon wafers are purchased online and delivered from China or the USA. This is due to the high price of domestically produced components.
The cost of domestic plates is so high that it is more profitable to order on eBay. As for defects, out of 100 plates only 2-4 are unusable. If you order Chinese plates, the risks are higher, because... the quality leaves much to be desired. The only advantage is the price.

The remaining components can be purchased at any electrical goods store. You will also need tin solder, frame, glass, film, tape and a marking pencil.
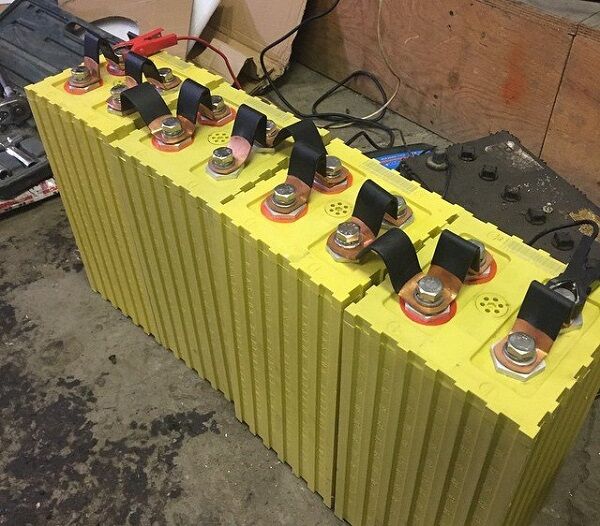
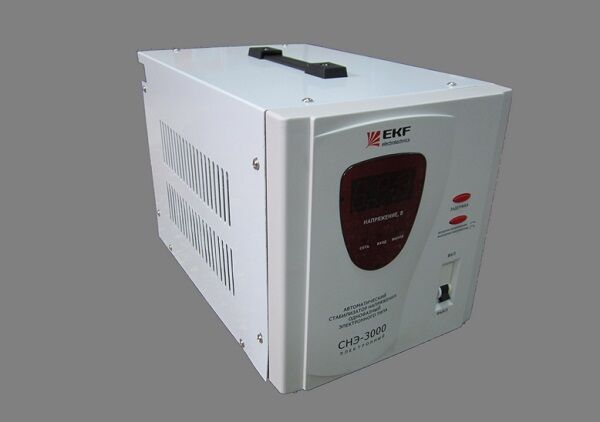
When purchasing components, you should pay attention to the manufacturer's warranty. Typically it is 10 years, in some cases up to 20. It is also important to choose the right battery. Saving on it often turns into trouble: while charging the device, hydrogen can be released, which can lead to an explosion.
Features of calculating system power
Before purchasing components and making a solar panel, calculate the required power of the device and battery capacity.
The easiest way is to use online calculators located on some websites on the Internet.

The most important indicator that will have to be taken into account is the average monthly amount of energy consumed. It can be determined by the counter.
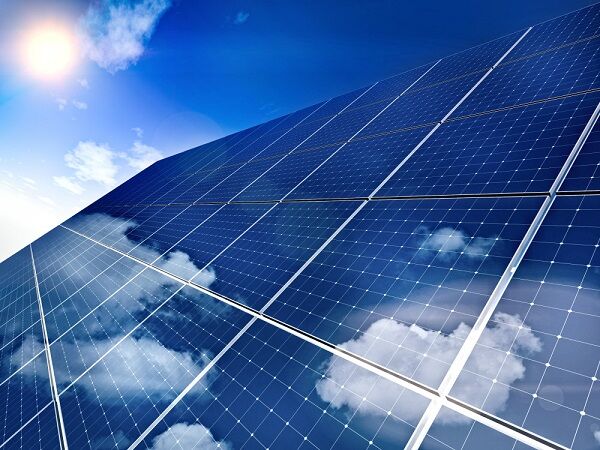
You should also make allowances for the operating features of the solar panels themselves. They are capable of delivering maximum power only under clear skies, and the angle of incidence of the sun's rays must be direct.
If the weather is cloudy or the angle of incidence of the rays is too sharp, the battery power can drop by 20 times. Even the slightest cloud is enough to reduce the figures by half. Therefore, when making calculations, they are guided by the fact that 70% of the energy will be generated from 9 to 16 hours, and the rest of the time - up to 30%.

Under conditions close to ideal, during “working hours” 1 kW panels generate 7 kW/h, and in the early morning and evening – about 3 kW/h. It is better not to take the second indicator into account at all and leave it “in reserve”, taking into account possible cloudiness and changes in the angle of incidence of the rays.
It turns out that you should focus on 210 kW/h for 1 calendar month. This is an ideal indicator that requires adjustment.

To determine the actual amount of energy, you should find data on how many sunny days a year there are in a particular region. During these periods, the battery power will not be even half of the rated value.If the devices will operate in autumn and winter, then you need to make an allowance of 30-50% for cloudy weather.
Step-by-step instructions for assembling a solar panel
The assembly work begins with a diagram and design. You need to have a clear idea of how the solar panel will be constructed and secured. So, if the efficiency of the system directly depends on the angle of inclination relative to the sun's rays, care should be taken that this angle can be changed.
Many ready-made models have mechanisms that automatically rotate the panels, but in homemade ones you will have to think about them yourself.

The assembly technology depends on the total area of the panels, their quantity, and the characteristics of additional materials. The large area of the system guarantees its higher power, but at the same time the weight of the structure increases, which also has to be taken into account, because the roof must withstand it.
Stage 1: manufacturing the structure body
When all the components are prepared, you can begin assembling the body on which the entire structure will be supported.
You will need the following materials:
- sheets of plywood cut to fit the panels;
- fiberboard boards;
- wooden slats from which the sides will be made;
- materials for fastening: self-tapping screws, corners, suitable adhesive composition;
- plexiglass;
- paint and impregnation to improve the appearance of the finished structure and protect it from rotting.
First of all, prepare the base - low sides are glued to the plywood.They should not cover the panels, so you should choose slats of about 2 cm. To prevent the sides from coming off, they are additionally secured with screws and corners.

The bottom of the base and sides are drilled in several places to ensure ventilation. The cover cannot be drilled, because structural elements may become wet. For fastening panels, it is better to choose fiberboard slabs, since they do not conduct current. If desired, fiberboard can be replaced with another material.
Stage 2: installation and fastening of elements
Solar cells should be evenly laid out on the substrate with the “wrong” side and the conductors soldered. To do this, you will need to mark the soldering points. In order not to spoil all the modules, it is better to first connect only two elements in series.
If everything is in order, solder the remaining modules in the same way. As a result, a neat chain of connected elements should appear on the substrate.

Once all the modules are connected, they can be turned over to secure them to the panel. Epoxy resin or silicone sealant can be used as an adhesive. It is advisable not to coat the edges of the modules so that the structures do not break if the frame is deformed. It is enough to firmly glue the elements in the center.
Stage 3: features of fastening the cover
After assembling the battery on the frame, it is covered with a plexiglass cover, checked and fixed again. It is important that the adhesive is completely dry before installing the cover, otherwise it will continue to evaporate and leave cloudy marks on the plexiglass.
A two-pin connector is installed on the output cable. It is needed to connect the controller. It remains to check the operation of the system again and correct any shortcomings if they are found.
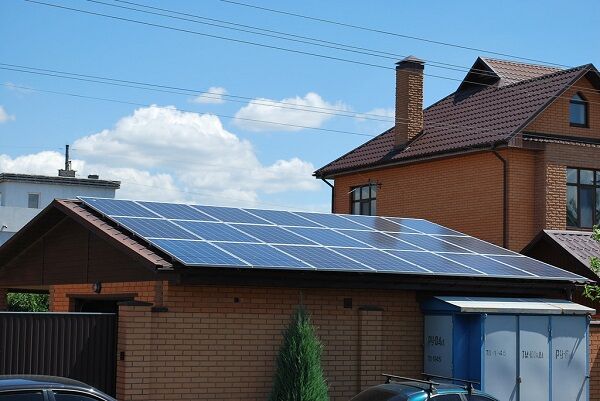
Stage 4: installation of the finished system
The batteries are installed on the ground, on the walls or roof. It depends on the wishes of the owner of the building. The main thing is that the system is located on the south side of the building and nothing interferes with its operation.
If the structure is planned to be mounted on a roof slope, you need to make sure that the surface can withstand the additional load. The system is installed so that it is located at an angle of 30-40° to the roof, and firmly fixed.

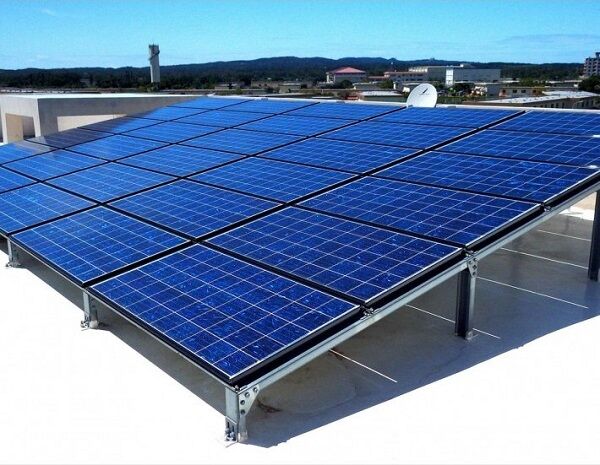
An excellent solution is to attach the system to a metal frame structure made of a thick profile. The minimum cross-section is 25*25 mm, and if the structure is large, it is better to choose a more durable profile. A snow retainer is installed in front of each such frame or the brackets are equipped with snow blowers.
On our website there is a block of articles devoted to the assembly, installation and connection of solar panels, we recommend that you read:
- Schemes and methods of connecting solar panels: how to properly install a solar panel
- Connection diagram for solar panels: to the controller, to the battery and serviced systems
Conclusions and useful video on the topic
Descriptions are sometimes not enough to fully understand the features of the assembly and installation of solar panels. In addition, there are various methods of fastening, and “traditional craftsmen” improve their skills and constantly invent new ways to solve old problems.
We offer video instructions and advice from experienced craftsmen to make it easier for you to understand the process of assembling solar systems. Choose those recommendations that best suit your plans and wishes.
Where to buy components and how to assemble the system is described in the video below:
Full step-by-step description of the assembly process:
An original approach to assembling solar panels, expert advice:
Instructions for assembling a solar power station for your home:
Alternative energy is really important. If you decide to look into ways to generate energy without hydrocarbons, you can be proud of the fact that you are taking care of not only yourself, but also the planet as a whole.
A simple solar battery will help you provide yourself with “green” electricity and save our common home. Assembling a system is not difficult, the main thing is to want and do it.
Do you have experience in making solar panels? Please share information with our readers and suggest your method for assembling a solar system. You can leave comments and add photos of homemade products in the form below.


The information is well chosen; it can really be used as a guide when making a solar battery. I learned about the existence of green energy a few years ago. It still amazes me to think that there are inexhaustible renewable options (solar and wind energy) and humanity is not yet using them to their full potential.Even in my dreams I have a desire to completely switch my house to green energy. But so far there are no funds for this, since all this equipment is expensive, as in principle it is written here. But if you switch to green sources, at the end of the payback period of your equipment, you will receive energy for FREE. This, of course, is hard to believe; now all that remains is to wait for progress to reach Russia, making this technology generally available.
Aliya, in fact, “solar energy” in its current form will never pay for itself. With the use of high-quality panels and components, timely maintenance and suitable weather conditions, the payback period for such a system will be at least about 10 years. And by that time it will be time to change solar controllers, inverters, batteries in autonomous systems, and the panels themselves will not last forever. And all this in conditionally ideal conditions. In general, there is no economic feasibility. Yes, and there is no environmental one either.
Unfortunately, I agree with Alexey. Another thing to add (decipher) about environmental feasibility. Silicon, from which photocells are made, must be mined. How? Not electric excavators, etc. equipment. How much of this silicon is on Earth? Maybe much less (in terms of specific energy) than hydrocarbons? Production of these "green" panels. Probably (research is needed) at some point it will be possible to produce them using “green” energy; Today we have what we have - I don’t remember how much, but 60-80 percent of the electricity required for the production of the same panels is generated by burning hydrocarbons. Etc. and so on.But there is another strong argument in favor of panels - independence. But it can be achieved with “cosmic” investments - some kind of “clearing” of panels for 100 kilowatts (and a warehouse of batteries so that you can sit through the winter for a week or two or three without denying yourself anything) in order to get your 3-4-5 kW in any (almost) weather.