How to properly install a well adapter with your own hands: the best alternative to a caisson
One of the mandatory conditions for the uninterrupted operation of autonomous water supply is the protection of communications from icing in winter. This problem can be solved by diverting the system below the dangerous level of soil freezing, as well as connecting the pipe coming from the well pump through an adapter.
We will tell you what this device is and what advantages it has in comparison with the construction of a caisson. You will learn how to correctly install a well adapter with your own hands, how to connect it to the pipeline and at what depth. Taking into account our advice, you can install it yourself without any problems.
The content of the article:
Well construction using an adapter
Installing a well adapter is the cheapest way to drain water and does not require thermal insulation of the pipeline when laid below the ground freezing level.
With proper installation of structures such as pits and caissons, there is no need to protect pipes from freezing. This provides access for repairing the wellbore and pump.
Design features of the device
The downhole adapter is a special device.It ensures a hermetically sealed entry of water supply pipes through the casing when installing a non-freezing water supply system. Essentially, the adapter is an angle connector.

Although downhole adapters have a fairly simple design, equipping a well with their use is associated with many features. This specificity largely determines the service life of the hydraulic structure.
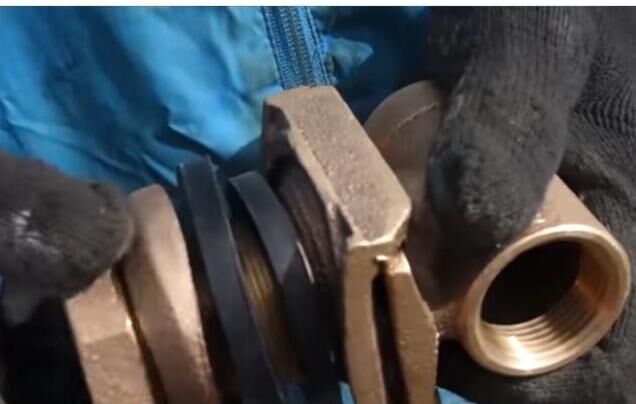
The main elements of the adapter are the outer and inner parts.
Internal flow part
Externally, this part of the device resembles a tee. One of its sides is blank. It is equipped with technical threads required for joining the two parts of the adapter. The other part is connected to the pipe leading to the deep-well pump. The central branch of the tee-like connection is equipped with the second half of the general connection of the dovetail design.

Its installation is carried out in the hole of the casing pipe, securing it with a union nut equipped with a sealing ring.
Rubber seals are designed to seal the well from the ingress of groundwater. The first seal is placed on the inner surface of the holder plane, the second - between the outer wall and the union nut.
External mate
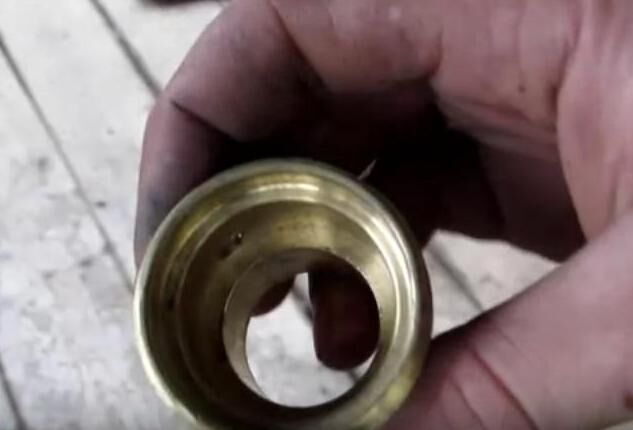
This is a compact threaded pipe.It is connected to the HDPE pipe and to the discharge pipe of the pump, and is connected to the main part by threading a special rod into the wedge slide. In addition to the wedge, it is equipped with an annular groove and two fittings with internal threads.
The main feature of the device is the strong connection of the external and internal elements, called the “dovetail”.

The intermediate element nipple, which is a single structure with a holder, is intended for connecting the water supply to the pump.
Advantages and disadvantages of “adapter” technology
Well construction technology using an adapter is a worthy alternative caisson installation. And the reason for this is a number of undeniable advantages that the downhole adapter has:
- Affordable price. The price of the adapter is many times cheaper than the caisson, thanks to which a wide range of buyers can afford to purchase and install the device on their site.
- Easy to install. It does not require the use of welding equipment or the welding skills of the performer. Excavation work is carried out to a minimum - only along the connected water supply branch. Even a novice master can handle the installation of a downhole adapter.
- High system tightness. The adapter links are adjacent extremely tightly to each other. The sealing ring of the device is quite capable of withstanding a system pressure of 7-8 atmospheres.The design, which provides for disassembling the flow part of the device inside the casing pipe, will ensure the operation of the device even in the presence of a leak.
- High load-bearing capacity. Depending on the thickness of the walls of the device and the material of manufacture, all sections of the adapter thread are able to withstand connected communications and a submersible pump, the total weight of which reaches from 200 to 800 kg.
- Aesthetic qualities. Thanks to the possibility of hidden installation, a well equipped with an adapter will be practically invisible on the site. This is especially true for owners who are afraid of theft of the pump.
Due to the high tightness of the device, it can be safely used when constructing a system in areas with high water typical for the off-season, as well as those located in close proximity to underground communication lines.

But, like any device, this very useful device is not without its drawbacks. For example, when installing a downhole adapter, it is impossible to provide quick access in case of need for maintenance and repair work.
The tightness of the joining of parts of the downhole adapter can be guaranteed only if preventive treatment of external and internal gaskets is carried out, as well as their timely replacement.
For example, an external gasket in direct contact with the ground becomes unusable after use for 2-3 years. And to carry out this work, you have to dig a pit, which is not always possible.

Brass and other metal alloys used in the manufacture of cheap adapters oxidize during use. As a result, parts are often jammed at the joints, which complicates the process of removing the pump.
For this reason, experts advise purchasing adapters made of bronze, stainless steel and specialized “food” alloys. These oxidation-resistant metals will last from 20 to 50 years.
In European countries today only adapters made of food alloys, such as DZR or Sanitary Brass, are used. But domestic GOSTs allow the use of stainless, bronze and brass devices due to the fact that the area of contact of its elements with water is negligible.
Another vulnerable point is the connection of the adapter with the drainage pipe and hose on which the pump is installed.

The connecting elements of the system react differently to the effects of temperature and moisture, and also have different periods of wear and aging. Therefore, experts advise, if possible, the pipe leading from the well to the house should be made of stainless steel.
Instructions on equipping a well with an adapter
Install the borehole adapter on casing pipe It is possible both in a newly constructed hydraulic structure, and in an already installed one.
The adapter, attached to the wall of the casing pipe, occupies a certain place inside it.Therefore, the cross-section of the casing pipe should be 20-25 mm larger than the diameter of the pump used.
Step #1 - preparing the necessary materials
To carry out the work you will need a set of tools:
- bayonet shovel;
- adjustable wrench;
- metal pegs;
- bimetallic core cutter.
It is worth purchasing a neutral water-repellent lubricant in advance, which will need to be used to treat the insertion points before digging into the ground.

The following materials should also be prepared:
- adapter;
- puller;
- FUM tape;
- silicone sealant;
- connecting fittings.
The puller is a steel mounting pipe of the required size, equipped with a thread at the end. It will be necessary both for installing and dismantling the adapter in case of repair work.
Before starting work, the purchased adapter should be brought into a condition suitable for the upcoming installation. To do this, remove the industrial grease from it and treat the O-ring with silicone sealant.
Step #2 - excavation work
It is better to carry out excavation work in the off-season. During this period, the moisture-saturated and cooled soil does not crumble as much. When carrying out work during dry months, take care to strengthen the walls of the pit. For this purpose, use pieces of boards and chipboard sheets.

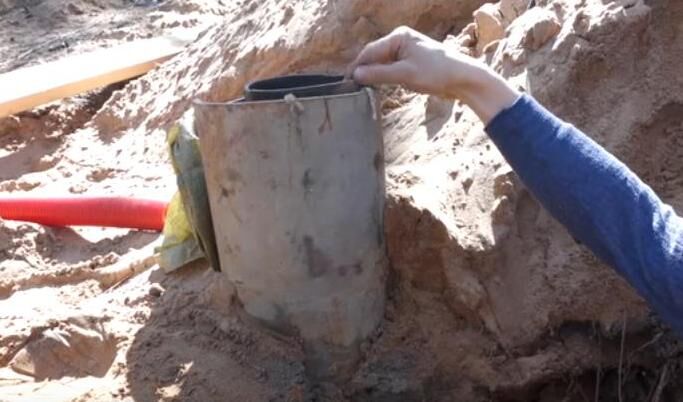
To gain access to the installation site, the first step is to dig out the casing pipe.The depth of the pit should be such that it exceeds the freezing level by 20-40 cm. For regions located in mid-latitudes, this value is 1.5-2 meters.
The sample width must be at least 160 mm. This will provide further convenience when performing work on inserting the device.
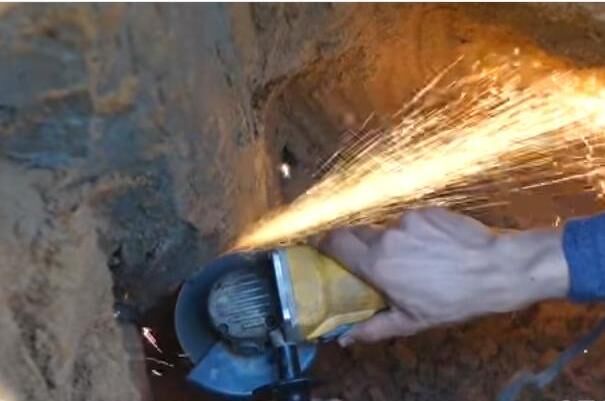
To hide the well in the ground and make it inconspicuous to “uninvited guests”, as well as inaccessible to winds and snowfalls, the casing is shortened to ground level.
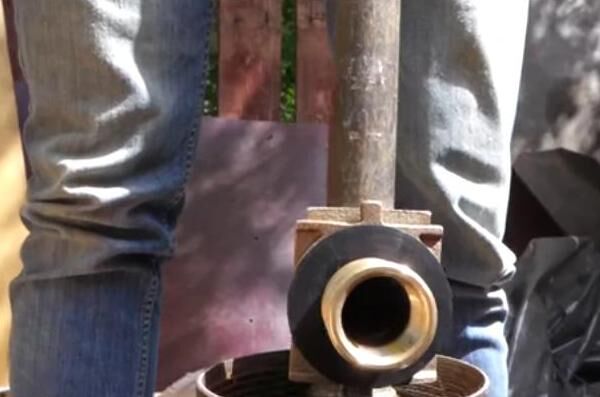
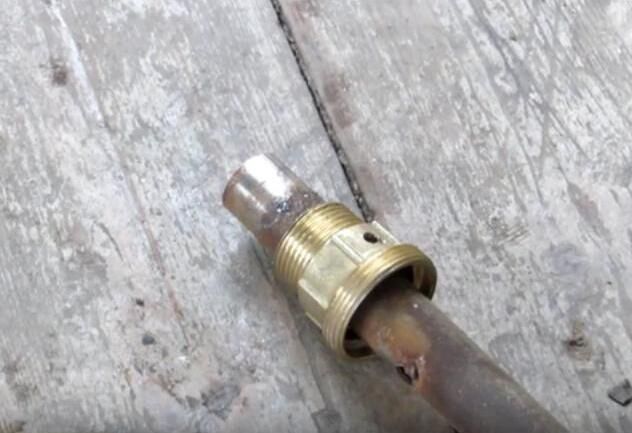
Step #3 - installation of the main part
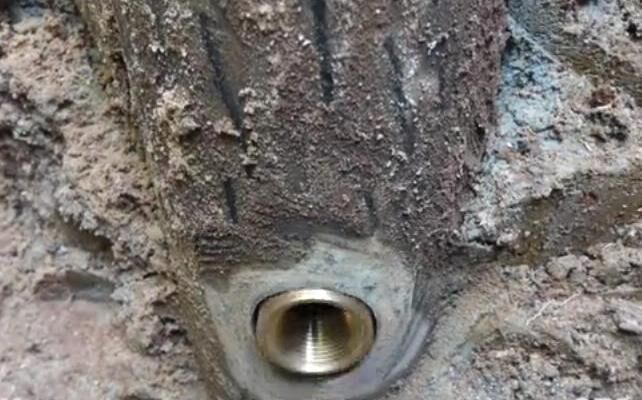
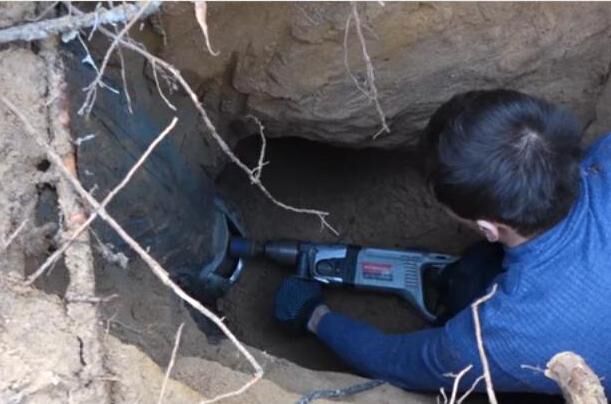
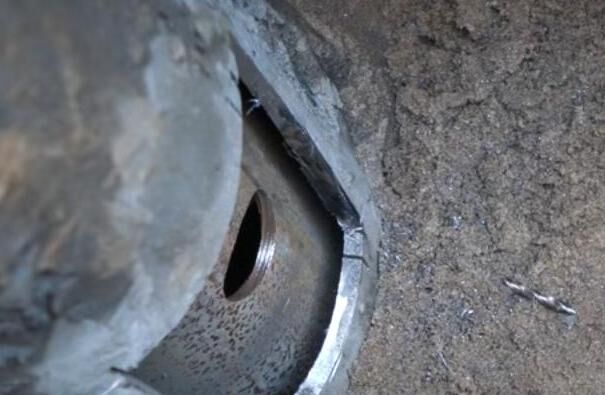
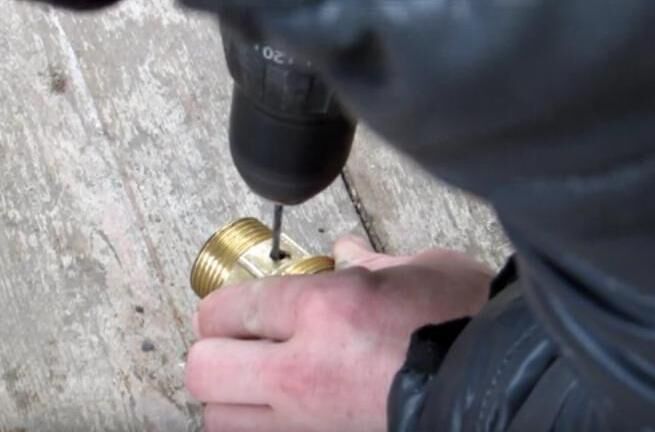
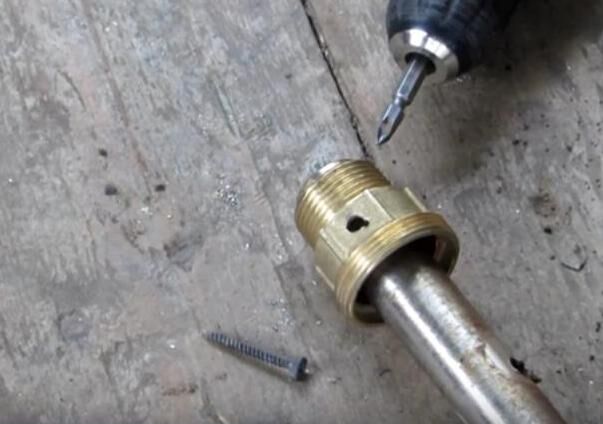
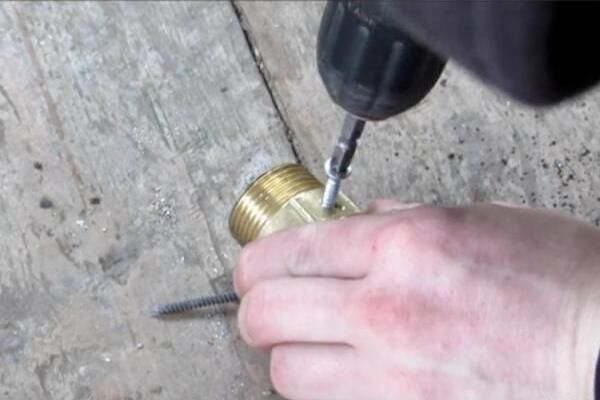
The holder and wedge of the device are mounted separately. Before installing the main part of the well adapter, it is necessary to pre-drill a hole for it in the wall of the casing pipe at the depth of laying the water supply pipe.
This can be done using a crown equipped with a bimetallic core cutter, the diameter of which corresponds to the dimensions of the device:
- for 1ʺ - holes d 4.4 cm;
- for 1ʺ1/4 - holes d 5.4 cm;
- for 2ʺ - holes d 7.3 cm.
Do not be afraid of clogging the well with metal filings. Most of them will spill out or remain in the cavity of the crown.

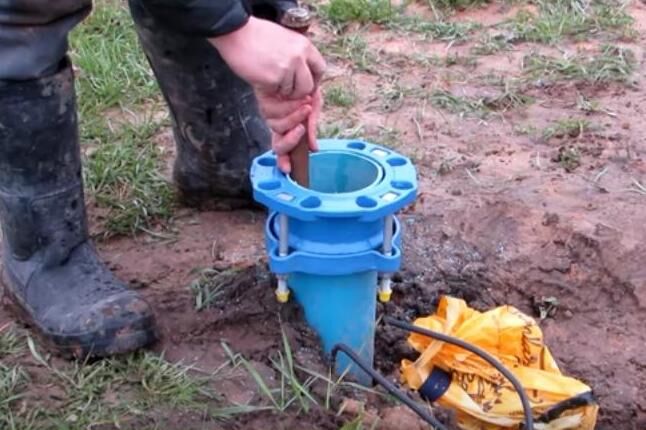
The structure is installed using a steel mounting pipe equipped with threads. The required length is calculated by lowering a measuring lot into the well. Having calculated the depth of the equipment, cut off the excess part of the pipe so that it is flush with the neck of the cut casing.
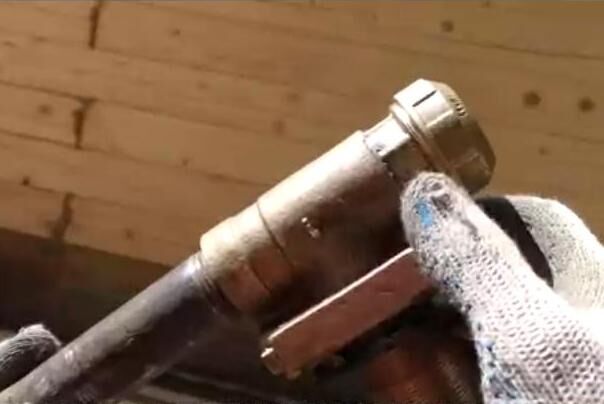
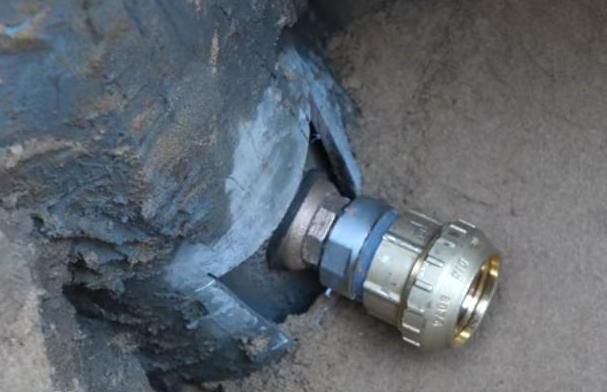
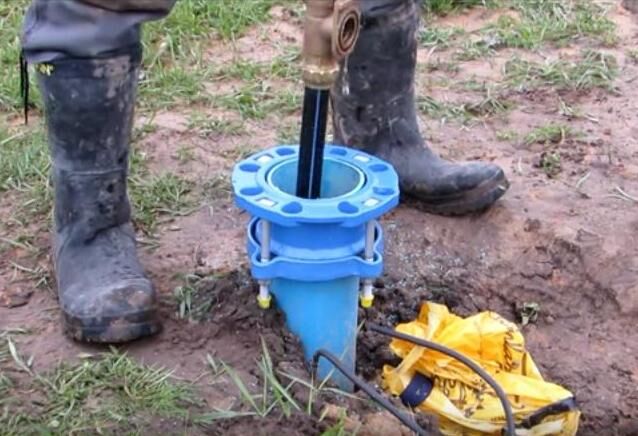
Having lowered the main part of the device into the cavity of the pipe, carefully insert it into the hole and securely fix it with the crimp ring included with the device.The nut connecting the elements is carefully tightened using an adjustable wrench.

After installation is completed, the steel pipe is usually removed to the surface. But some craftsmen still recommend leaving the pipe section in the device. The main argument is that this solution will prevent damage to threaded connections due to vibration of the deep-well pump.
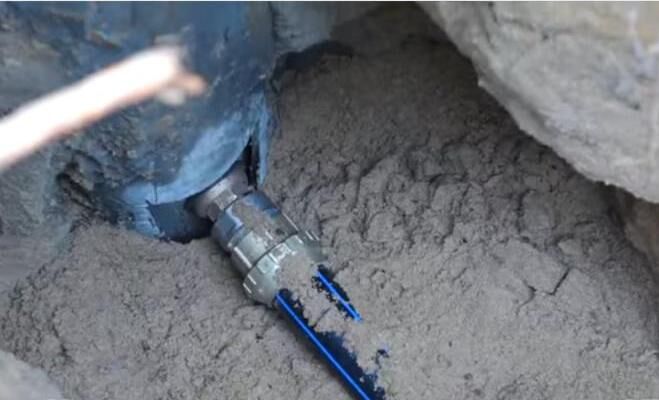
The outlet of the water pipe is fixed to the outer part of the adapter, equipped with a threaded connection. To keep the connection strong and reliable, it is sealed with FUM tape or any other packaging material.
Step #4 - installation of the counter part
This part of the adapter is attached to the pump hose. Submersible well pump It’s more convenient to do it with two people: the first one lowers the equipment, the second one holds and straightens the hose.After the pump has lowered to the required depth, all that remains is to dock and snap both parts of the adapter.

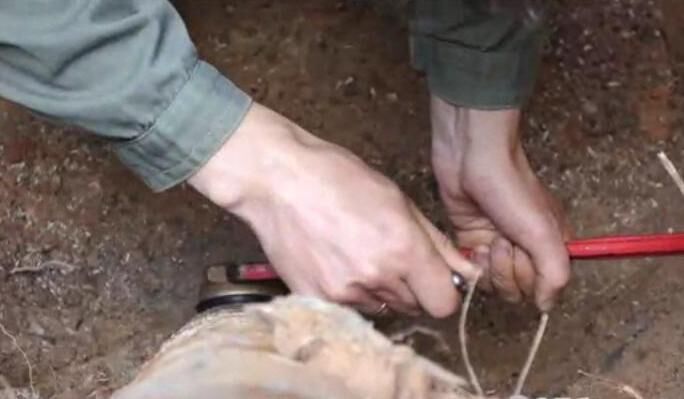
At the final stage, the safety cable is carefully pulled out and fixed so as to remove part of the load from the pump, thereby reducing the risk of mechanical damage. To do this, the cable is brought to the well head and securely secured with metal stakes.
Option for inserting the adapter into a pipe enclosed in a conductor:
All that remains is to connect the pump cable to the power supply and check the functionality of the equipment. The testing stage should be approached with all responsibility.
It will help identify all the shortcomings made during the installation process. By eliminating the shortcomings at the test run stage, you will protect yourself from serious troubles in the future.
General recommendations for installing the device
Taking into account the inevitable vibrations to which the adapter will certainly be subjected during operation, and the considerable weight of the equipment, when well construction experts advise using casing columns made of steel.

To facilitate the adapter installation process submersible pump, the safety rope, cable and hose should preferably be assembled in advance into a single structure.
It is more convenient to perform assembly on a flat surface in a separate clean room; and transfer the hoses and cables already secured with couplings and rolled into a coil to the site near the well head. This approach will minimize the risk of dirt getting into the cavity of the hydraulic device.
If necessary, you can use a homemade device to remove the adapter from the pipe.
In the future, when choosing a submersible pump, you should focus not only on the operational parameters of the casing, but also make allowances for the dimensions of the adapter. Proper calculation will ensure free passage of the pump in the pipe without touching or damaging the protruding parts of the device.
Conclusions and useful video on the topic
Video #1. What is better to install - a well adapter or a caisson:
Video #2. The device installation process is clearly presented in the video:
Installing an adapter for a well is an excellent alternative to a caisson when constructing a well whose depth does not exceed 50 m. Hydraulic structures of this type are on average designed to operate for 15-20 years.
There is no point in investing extra money in their arrangement. And by correctly installing a device made of high-quality material, you don’t have to worry that the well with the adapter will work properly throughout its entire service life.
We will be glad to hear your stories about how you constructed a well without a caisson using an adapter. Perhaps you can tell site visitors interesting technical nuances that are not mentioned in the article. Please write comments in the block below, ask questions, discuss the topic, post photos.


