Ventilation in the steam room: examples of proven schemes and analysis of arrangement rules
The bathhouse on the site is an extremely useful structure: you can sit with friends and improve your body’s health.But for the effect to be maximum, you need good ventilation in the steam room.
If this moment is missed during construction, both the well-being of bathhouse visitors and the integrity of the structure may suffer.
Let's try to understand the principles of ventilation operation, as well as how to properly arrange forced ventilation in a sauna.
The content of the article:
Features of the functioning of natural ventilation
Ventilation of any living space must be organized correctly, and in relation to a bathhouse this is even more important. This room is characterized by high humidity and sudden temperature changes. If the air exchange is not balanced, then a bathhouse built from natural wood will need serious repairs within a couple of years.
In addition, without ventilation, the steam room will have an extremely unpleasant and even hazardous microclimate: heavy air, mold, unpleasant odors, etc. Natural ventilation is considered optimal for a Russian bath, the organization of which does not require large expenses or complex construction skills.
As you know, warm air currents usually rise upward, and cold air is characterized by downward movement. The action of natural ventilation is based on this physical principle.
Cold air enters through the openings located at the bottom, heats up, rises and is removed through the openings at the top.

For this ventilation scheme in the steam room to work, there must be a difference in the air temperature inside and outside the room. In ordinary living spaces with natural ventilation, problems may arise in the summer, since both the rooms and the street are equally hot.
But in a bathhouse, due to the specifics of this structure, it is not difficult to ensure such a difference, since the air is constantly warmed up during bathing procedures.
If ventilation is thought out at the construction stage, then special supply openings will be provided in the lower part of the bathhouse, and exhaust openings will be provided on the opposite side at the top.
But a special hole in the wall is not the only option for ventilating a bathhouse. For example, in log baths, the flow of fresh air can be through the crowns of the walls or simply through the door, which is left ajar for ventilation.

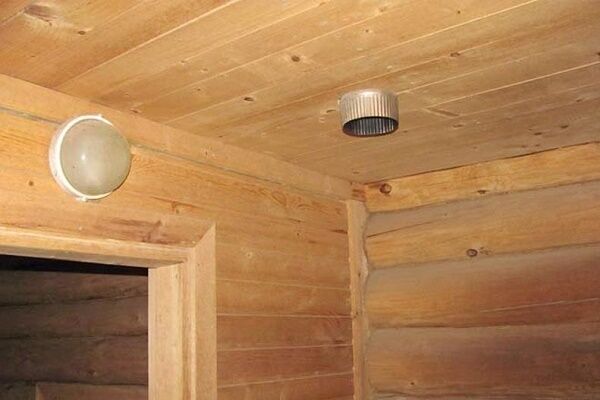
Vents, special vents, and even the chimney of a heating stove are suitable for the role of hoods. If ventilation is carried out through special openings, they must be properly designed. To begin with, all such objects should be covered with a protective grille from the outside.
It also helps to have shutters or other regulators that allow you to regulate the air flow speed or completely block the ventilation hole. The vents in the steam room are sometimes closed so that the room warms up faster.But then you must open them to restore air exchange.

Choosing the most suitable scheme
If in residential premises constant air exchange is expected, then in bathhouses this is not always convenient, it all depends on the size of the bathhouse and its internal structure.
Ventilation of Russian baths is carried out using the following methods:
- burst ventilation;
- exhaust through a chimney;
- use of special holes.
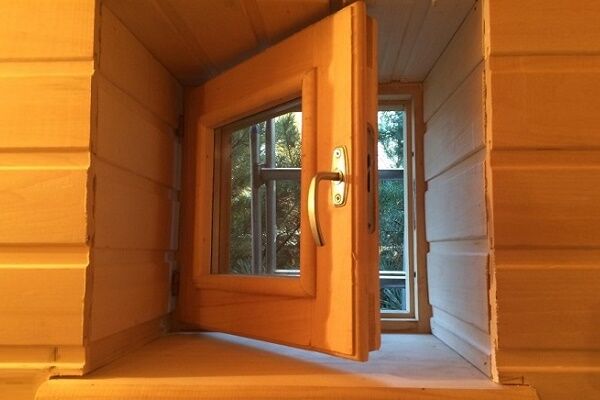
Burst ventilation is a fancy name for ordinary ventilation. This method is quite appropriate for small steam rooms. The idea is to periodically open windows and doors, thus creating conditions for intensive and short-term ventilation.
Of course, it makes no sense to ventilate during bath procedures.

The room is ventilated at those moments when there is no one in the steam room, as well as at the end of the process. For ventilation, simply open the window and door to the steam room for just a few minutes.
During this period, the air inside the room will be renewed, and the surfaces will dry out a little, and the walls of the steam room will not cool down, so visitors to the bathhouse will not experience any unpleasant sensations in the future. The possibility of burst ventilation should be provided for at the construction stage of the bathhouse.
Opposite the door you should make a window with a window so that air exchange is carried out correctly.Ideally, the door should be made in the corner, and the window should be placed not opposite, but diagonally and as close to the ceiling as possible. For burst ventilation to be effective, you just need to remember about it. We took a steam bath, took a couple of minutes to ventilate, and you can calmly continue the procedures.

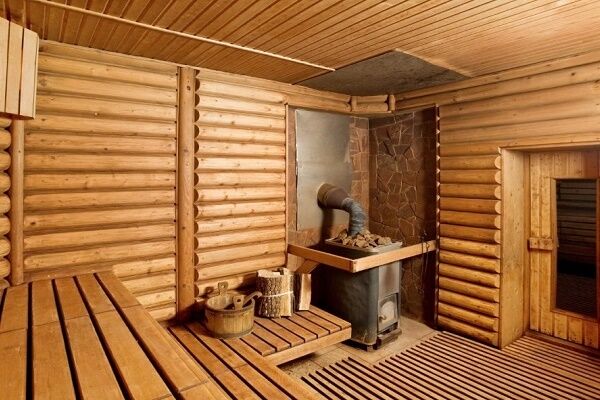
Discharge of exhaust air through a chimney requires the presence of a stove or other suitable device with a chimney duct. In such a furnace there is a blower through which exhaust air is removed.
But for this scheme to work effectively, you need to make sure that enough fresh air enters the room.

In log houses, gaps are specially left in the lower crowns of the walls; an alternative option is a small, only 10-15 mm gap under the door to the steam room. If there are no such gaps, and you don’t want to bother with organizing them, it’s enough to just leave the door to the steam room a little open.
Another important condition for organizing exhaust through a chimney is that the stove must burn all the time, otherwise the air will not be removed, and accordingly, the inflow will be limited. If the bathhouse only has a stove designed for short-term use, you will have to choose a different ventilation method.
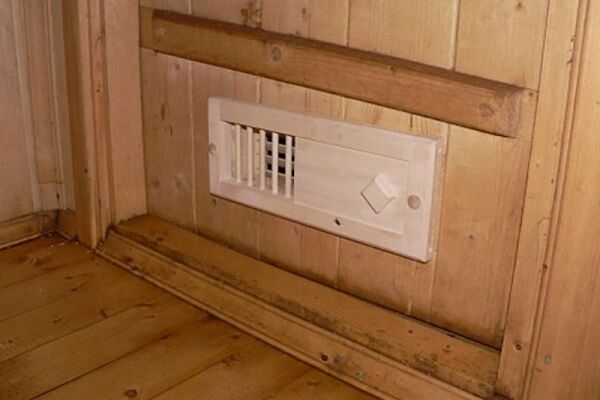
A universal way to organize natural ventilation in a bathhouse is to make special openings for this - vents.In this case, ventilation will be carried out without obstacles, and the intensity of air flows can be regulated using special dampers or adjustable grilles.
The air in the steam room will be gradually renewed. The optimal rate of air exchange is around five or six volumes of the room every hour. Of course, such ventilation must be properly designed and installed so that there are no drafts in the room.
So, you will need to make two holes: supply and exhaust. The cross-sectional area of these holes should vary slightly; the exhaust in the bath should be larger than the inflow. You can make one supply opening and two exhaust openings.
The location of the inflow and exhaust should be done on opposite walls and in corners located diagonally.
In this case, it is best to make the exhaust hole right under the ceiling, higher than the top shelf, and the supply hole should be below, about 30 cm from the floor level. It is best to carry out the influx as close to the stove as possible or even behind it, so that air flows from the street have time to warm up.
What happens if you ignore these recommendations and make holes at approximately the same level? Nothing good, that is. draft. Air flows will cross the room too quickly, and fresh air will simply leave the steam room immediately. It is clear that the effectiveness of such ventilation leaves much to be desired.

You should not make holes for exhaust and supply on the same wall, this will also negatively affect air exchange.To obtain sufficient air flow, a round hole is usually made in the bathhouse wall for a pipe with a diameter of 100-200 mm.
For the hood you will need to make the opening a little larger. You can use a slightly larger diameter pipe or two smaller pipes. The main thing is that the total cross-sectional area corresponds to the calculations.
On our website there are several more articles about the rules for arranging ventilation in a bathhouse, we recommend reading:
- Ventilation device in a bathhouse: technical options and popular schemes
- Ventilation in the bath: an overview of traditional schemes and nuances of the device
How to make vents for ventilation?
Installation of ventilation in the bath is carried out as follows:
- In selected places, holes are made of such a size that the pipe or box fits freely into it.
- The space around the pipe is sealed so as not to compromise the tightness of the room.
- From the outside, the holes are covered with gratings.
- Special dampers or adjustable grilles are installed inside.
It looks simple, but there are a few things to consider. For example, ventilation holes can be made not only round, but also square or rectangular with approximately the same cross-sectional area. In wooden baths, instead of plastic or steel pipes, wooden boxes are installed.
In this case, choosing a rectangular hole looks logical, because such a box is easier to make from ordinary boards.
It is best to plan vents at the design stage so that you do not have to drill into the finished wall. Ventilation openings that open to the street should be additionally protected with insect screens. The cross-section of the supply ventilation hole in the bathhouse is calculated based on the standard: 24 sq.cm of cross-section for each cubic meter of volume of the ventilated room.
Thus, for a bath with a volume of 12 cubic meters. m. you will need a hole with an area of 284 square meters. cm. If you plan to make a round hole, then its radius is calculated using the inverse formula for the area of a circle. We divide the resulting indicator by 3.14 (the number “pi”), and extract the square root from the result.
In our example, we get a radius of approximately 9.5 cm, and its diameter is 19 cm. Exact adherence to dimensions in this case is not relevant, so a pipe with a cross-section of 200 mm is quite suitable. Or you can take two 100 mm pipes. If the ventilation cross-section is square, the approximate dimensions will be 17X17 cm.
Natural ventilation has undeniable advantages. Its installation is simple and relatively inexpensive; operation does not require electricity costs or the installation of special devices. The simple design guarantees no breakdowns and a long service life of the ventilation system.

In winter, due to the significant difference in temperature inside the steam room and outside, the draft can increase noticeably. This may cause slight discomfort due to the air flowing in too quickly. In addition, odors, which are not always pleasant, can also penetrate into the bathhouse from the outside. Controlling the ventilation flow can solve this type of problem.
The need for forced ventilation
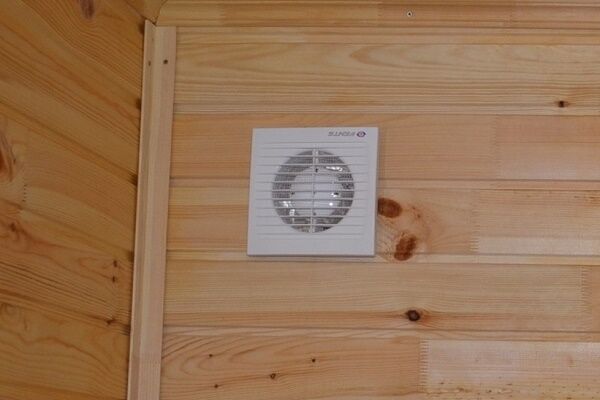
Forced ventilation in the bathhouse is used extremely rarely. It is usually used in large complexes with a large steam room, swimming pool, etc.And in a standard-sized bathhouse, such methods are used in cases where, for some reason, natural ventilation does not work very well or does not work at all.

To correct the situation and turn natural ventilation into forced ventilation, it is enough to install a supply fan in the appropriate opening or an exhaust fan in the hood. Both fans are usually not installed at the same time; complex supply and exhaust ventilation is used only in large facilities. And in a regular bathhouse, a mechanical hood is sufficient.
If air is forcibly removed from the room, fresh flows will take up the free space in accordance with the laws of physics. In large bath complexes everything is a little more complicated. At such facilities, the air exchange rate is first calculated, a ventilation system is designed and fans of suitable power are selected.
For a small steam room, an ordinary, not too powerful fan, which can be purchased in a store, is also suitable. Some craftsmen even make mechanical hoods using a cooler from an old system unit. Here is a simple example of calculating fan power for a regular bath.
Let's say there is a room with an area of 9 sq.m. with a ceiling height of 2 m. The volume of such a room is 18 cubic meters. m. The air exchange rate recommended for baths is five. Multiplying the volume of the room by the air exchange rate, we obtain the required performance of the exhaust fan - 90 cubic meters. m/h.
It is possible to use a fan of slightly higher power, but you should not be overzealous, otherwise the air exchange will become too intense. If you want to upgrade the forced ventilation in the bathhouse, you can set a timer so that the device automatically turns on at certain periods of time.
Using appropriate sensors, you can configure the ventilation to turn on when the specified air temperature or humidity is reached. But in an ordinary bathhouse such difficulties are usually unnecessary.
A few words about sauna ventilation
The ventilation options for an ordinary Russian bath are described above. In the sauna, everything works a little differently. Here only forced or combined ventilation is acceptable. In small saunas, the latter is more appropriate, namely a mechanical hood.
The main task when ventilating a sauna is to ensure that the flow of cold air quickly warms up and spreads smoothly throughout the room.

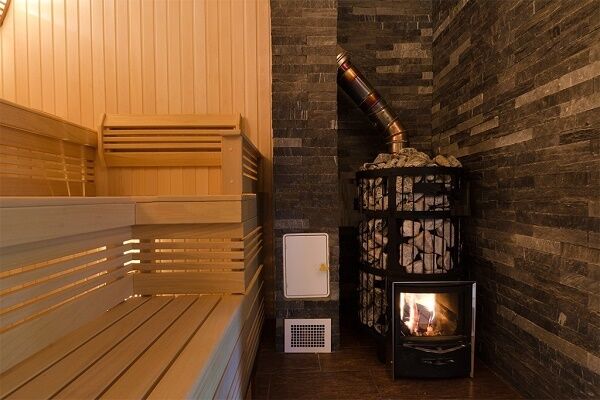
Even a hint of a draft is categorically unacceptable, since the effect of soaring will lose all its charm. Therefore, the dimensions of the inlet opening are calculated according to the diagram outlined above, and the opening itself is located strictly behind heater stovesto ensure fast, almost instantaneous heating of the air flow.
The exhaust vent can still be located in the opposite corner of the room under the ceiling, however, if there is an exhaust fan, this requirement is not so strict.There are situations when the sauna room has only one outer wall, through which both fresh air is taken in and exhaust air masses are removed.

In this case, it is recommended to make the inlet hole at a level of approximately 20 cm from the floor, but it should be located strictly behind the heater. The hood is placed on the opposite edge of the wall, still under the ceiling. The flow of cold air will warm up and move in a circle along the walls of the room, gradually mixing with the rest of the air in the sauna.
This order will ensure the necessary air exchange and maintain the air temperature at an acceptable level. To achieve the fastest possible air exchange, the so-called high-speed scheme is used. The inlet hole is made as usual - 20 cm from the floor level. A mechanical hood is also placed at the same level from the floor, only it is mounted on the opposite wall.
Hot air rises to the ceiling of the sauna, where it cools down, falls down along the opposite wall and leaves through the exhaust hole. Ventilation is carried out quickly, and the change in air temperature is practically not felt.
The gentlest mixing of fresh air from the street and heated air masses indoors can be achieved if you install the supply opening at a level of about 50 cm, but still in close proximity to the heater. The hood is placed near the floor at a height of 20 cm. The ventilation speed in this option is slightly lower than when using other schemes.
Read about how to organize the ventilation of a sauna with an electric heater. this material.
Conclusions and useful video on the topic
Detailed and interesting information about the principles of steam room ventilation is presented here:
Undoubtedly, ventilation in the bathhouse is necessary. Only with proper air exchange will bath procedures really bring real benefits to the health of visitors, and the owners of the building will be spared additional costs for mold control and ongoing repairs.
Do you have any questions about arranging ventilation in the sauna? Or maybe you have had the opportunity to arrange this system yourself and you can share your experience with visitors to our site? Please leave your comments in the block below.


I only have so-called burst ventilation. I didn’t provide anything else besides the window and door. But I can say: this is quite enough. I have a very small steam room. Eight squares at most. But it’s enough for our family. I equipped it in a former permanent barn. I did everything myself, we’ve been using it for almost two years now, we’re happy with everything.
We also have our own bathhouse. We steam every week. I believe that burst ventilation is the most accessible and simplest. There is no need to figure out what and how to do it correctly so that the steam room is ventilated. And so they took a steam bath, opened the windows and doors. Everything has weathered and there is no mold or mildew. We have been using the bathhouse for several years now, and everything is fine, it’s as good as new.
Experienced guys built our bathhouse several years ago. They themselves recommended burst ventilation. We didn’t really understand much then, we just trusted the builders. Now we understand that we did not miss.We don’t particularly monitor the bathhouse and don’t ventilate it. We steam once a week. Over all these years, no dampness or mold has appeared. We are pleased with the result. In my experience, burst ventilation is the most practical. Well, of course, it’s a matter of taste.
And I did it for my clients as in the second option, i.e. the air inlet is behind the boiler, and the exhaust duct is opposite in the corner. Plus two adjustable holes - one under the ceiling, and the second under the shelves. When you steam, the upper one is closed, the lower one is open, when you ventilate, you open the upper one and close the lower one. They've been using it for four years now, the steam room is like new (they use it intensively)!