How to make a home air conditioner with your own hands: popular diagrams and instructions
The heat, even if it has been expected for a long time, still hits us suddenly.The rains, of course, are boring, but the scorching heat also exhausts and reduces the ability to work. It’s good to have a split system, but few people think about it in winter or rainy spring. And in the summer, its purchase and installation turn into a hole in the family budget.
Some craftsmen decide to make a home air conditioner with their own hands, using improvised means and inexpensive materials. The idea of assembling a budget homemade product is quite attractive, but before you begin to implement it, you need to evaluate the effectiveness of such a unit and study the technology of its manufacture, don’t you agree?
We invite you to familiarize yourself with the different options for constructing a home air conditioner. Among the proposed technologies, you will definitely choose the appropriate solution and be able to assemble the cooling device yourself. Step-by-step guides and photo instructions will help you implement your plans.
The content of the article:
Factory air conditioners: types and disadvantages
Before you try to make an air conditioner yourself, it would be good to understand what this device is, how it works and what effect can be expected from its operation.
An air conditioner is a technically complex device that was originally used only to cool the room in the summer.Over time, air conditioner models have improved and become more complex.
Modern climate control devices are able not only to control the indoor climate, but even to humidify and purify the air in it.

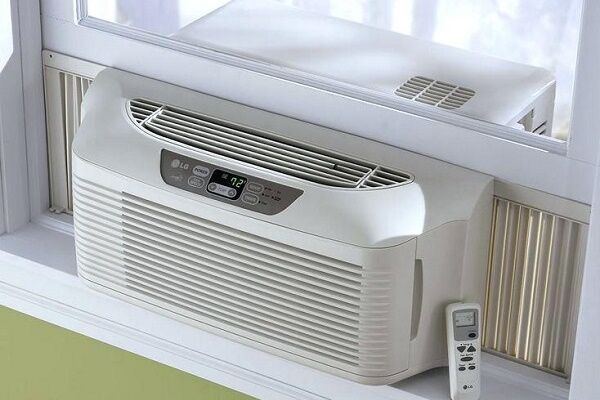
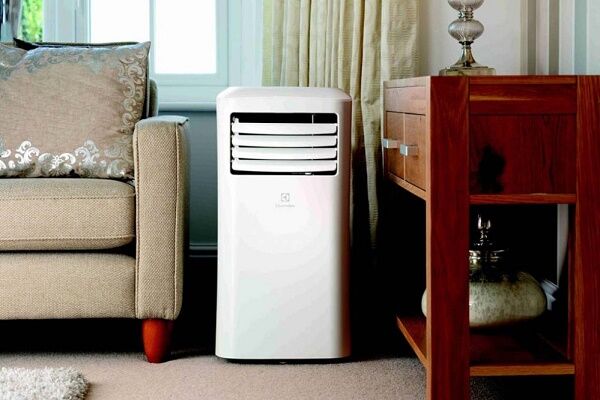
The devices that are currently commercially available can be divided into two types: evaporative and compression.
If evaporative models can only cool the air and influence its humidity, then compression models can both reduce and increase the temperature in the room.
Compression device and its design
Compression is the most common type of air conditioner, which is most often used in everyday life.Its design consists of components usually included in any refrigeration equipment: compressor, condenser (radiator), evaporator, thermostat and fans.
Each of the elements of the complex performs a specific task:
- compressor ensures the movement of refrigerant (for example, freon) along the circuit of the device;
- radiator used for cooling and condensation of freon;
- evaporator – the place where the liquid becomes vapor when the freon pressure decreases;
- thermostat needed to control the flow of refrigerant moving through the evaporator: this ensures that the set temperature is maintained;
- fans help to activate the heat exchange process and direct a flow of cooled air into the room.
Schematic work compression air conditioner can be represented as follows.

The refrigerant in a gaseous state (t +10-20°C; pressure 3-5 atmospheres) flows from the evaporator to the compressor. There the gas is compressed and heated (t +75-90°C; pressure 15-25 atmospheres). It then enters the capacitor.
Here it turns into a liquid state because it is cooled with the help of an external air flow, which is driven through a heat exchanger.
When the refrigerant leaves the condenser and moves into the thermostatic device, it is at high pressure and at a temperature 12-20°C higher than the surrounding environment.
Typically, the temperature control device is a thin spiral tube made of copper. In this case, the cross-section of the device for passing freon is adjusted.According to Bernoulli's law, where the speed of movement of the refrigerant is higher, the pressure is lower. The pressure drop ensures a decrease in the boiling point of the liquid and active evaporation of the substance.
In the evaporator, where freon then enters, it again becomes a gas due to active expansion and heat removal from the air in the refrigerated room. The device is used precisely for this stage, which is the main one. The gas then enters the compressor again. The cycle completes itself, only to repeat itself again and again.
Evaporative device: device principle
A remarkable feature of the evaporative device is that it does not use gases, the use of which negatively affects the environment. The operation of the device is not based on a change in the state of aggregation of refrigerants, but on the evaporation of ordinary water.
The device body with a tray is made of moisture-resistant materials that do not react to sudden temperature changes. It contains all the components of the device.
The basis of the design is a water pump, which is used to saturate the cooling filter with moisture. The pump is equipped with a filling tank with valves through which water is supplied.

Cold water for the filter comes from a container into which it is pumped from a pan. To enhance the cooling effect, you can put ice in the tray.
Cooling filters are used to increase the area of water evaporation, which helps to increase the efficiency of the device. Cellulose or special polymers are used as the material for their manufacture.
The honeycomb structure of such filters ensures the maximum possible cooling of the air passing through them.
A fan helps activate the movement of air masses and force them through the air and then the cooling filter.
This device works like this:
- the fan draws warm outside air inside the case;
- air flows pass through filters, where they are cleaned and saturated with water from the container;
- water evaporation cools and humidifies the air that enters the room.
The drier the outside air, the more active the process of water evaporation occurs, and the better the device works.
Pros and cons of factory air conditioners
In many regions of our country, people cannot survive the summer heat without air conditioning. These devices are necessary and useful. It is unlikely that anyone will argue with this statement. But along with their advantages, they also have a number of disadvantages that you need to know in order to predict and reduce their negative impact.
So, let's start with the pros:
- creating a comfortable temperature microclimate in the home;
- filtration of air masses;
- the use of humidifiers and ionizers in a number of modern models.
These benefits are obvious. They are the ones who make us make a positive decision when purchasing this device.

But there are also disadvantages":
- the device itself will not be cheap, and you will also have to pay for its installation and maintenance;
- electricity consumption and, accordingly, bills for it will increase;
- dust extracted from the air accumulates on filters, which promotes the proliferation of microorganisms, for example, legionella bacteria - the cause of serious lung disease;
- an air conditioner without a humidifier helps reduce indoor humidity, which negatively affects the mucous membranes of the nasopharynx and eyes and promotes skin aging;
- cooled air flow can cause colds;
- The noise produced by the device can irritate people.
If the device is poorly maintained, it can transmit unpleasant odors that will fill your entire home. Detailed information about the features of servicing a split system is given in this article.
So, it makes sense to try to make your own device that has the advantages of factory air conditioners and is devoid of at least a few of their disadvantages.
What can you do with your own hands?
Please note that we do not strive to outperform factory products. It is unlikely that we will be able to achieve the same cooling power.
Our goal is to build a device that does not consume a lot of energy, is inexpensive and, in case of ineffectiveness, can be thrown into a box and trash without regret. But imagine how this homemade product will please you if you are successful!
Most homemade devices, as experience shows, consist of two main parts:
- a block that allows you to reduce the ambient temperature;
- an element that helps spread the cooling effect throughout the entire room.
So let's figure out how to make an effective air conditioner at home from what we have on hand.
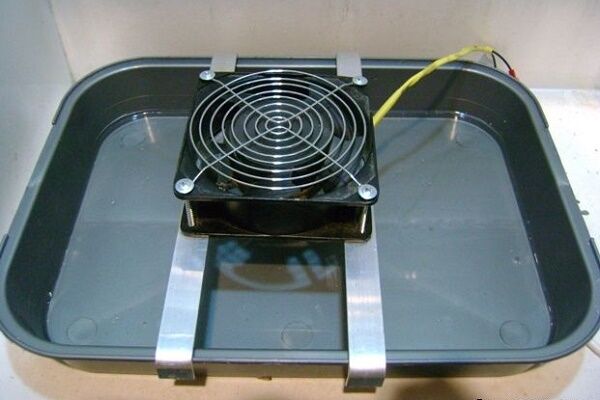
Ice paired with a fan
The only thing simpler than this device can be a damp sheet used to curtain a window opening. Also, by the way, a way to cool and humidify the air entering the room.
To construct it, you need plastic bottles or other containers filled with ice. Flat containers with special coolers for cooler bags - cold accumulators - have proven themselves well.
They can be screwed to the fan grille with wire or placed in a basket attached to the bars of the grille. The more ice, the better the cooling device works.

The efficiency of this structure, consisting of ice in a container and a fan, can also be increased by assembling it in a special way.
We will need:
- five-liter plastic water bottle with lid;
- computer fan - diameter 120 mm;
- four self-tapping screws and a screwdriver;
- pre-frozen ice.
Two holes are made in the bottle opposite each other. One will be round: a fan is inserted into it so that it draws air inside the tank. The fan must be firmly secured with self-tapping screws to the surface of the bottle.

The second hole is made rectangular. In this case, only the bottom and side walls of the rectangle are cut through. The resulting valve is bent upward. Ice is placed inside the bottle through a rectangular hole, the fan is turned on, and that’s it. You can enjoy the coolness.
When there is no longer a need to operate the device, you can close its window with a valve to retain the remaining cold.
We suggest you familiarize yourself with a device of a similar, but more complex and “long-lasting” design in the block of video instructions located at the bottom of the article.
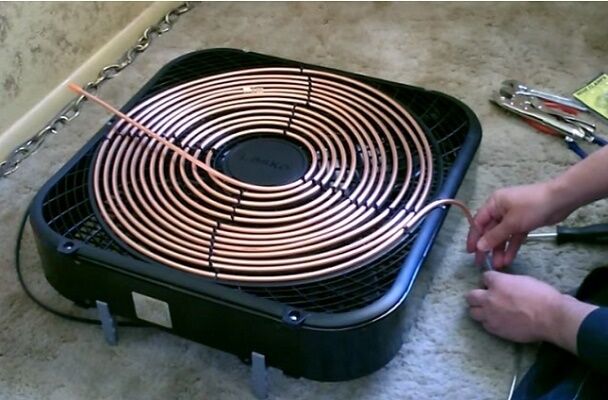
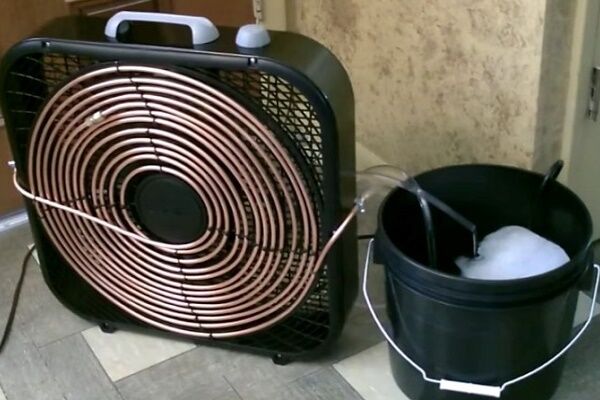
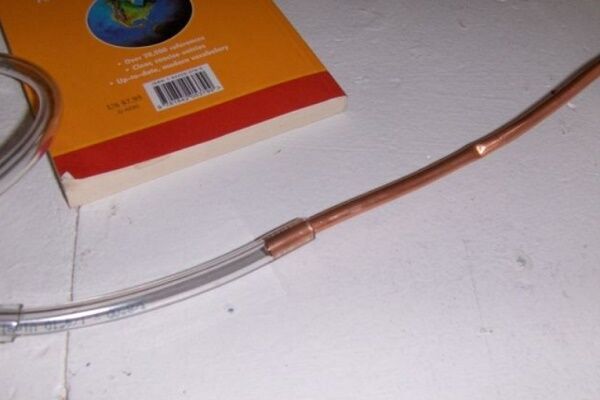
Fan and copper tubes
If we are going to make a compact cooler from a fan with a protective grille and copper pipes through which water will move, then we should immediately focus on the topic of water.
It should either be running, or the water should be placed in a bucket that will become part of the device. If the house has a water meter, then the second option with media recirculation is preferable.
One of the options for a successful tandem of ice with a fan and a copper coil will be presented in the following selection of photos:
This useful homemade product will cool the air in the room by 5-7º in half an hour of productive work.
To work we need:
- fan with front protective grille;
- copper tube with a cross-section of 6.35 mm and a length of 5-10 m;
- thin wire or flexible plastic clamps;
- flexible hose made of transparent plastic with an internal diameter of 6 mm;
- aquarium submersible pump (capacity 600-1000 liters per hour);
- bucket or thermal box (the latter is preferable);
- metal clamps;
- cold accumulators.
Flat containers filled with quick-freezing liquid are cold accumulators, which are used in cooler bags, car thermal boxes and other products for similar purposes to maintain the desired temperature.
They may contain water-salt solutions, gel or silicone as a filler.
For our homemade product, a silicone battery is best suited. If the tank in which it is placed is well thermally insulated, then it will be able to maintain a temperature of 0 ... + 2 ° C for a week. You can use a bucket as a thermal box, but not with a round, but with a rectangular cross-section.
To enhance the insulation, it (with a lid!) is covered on the outside and inside with a layer of polystyrene foam 3-4 cm thick.

If everything you need is prepared, we get to work.
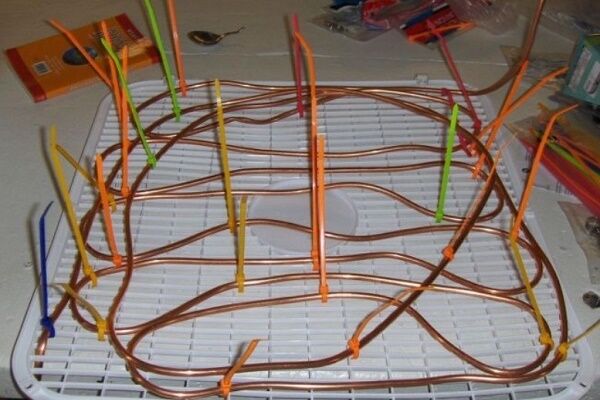
Remove the front protective grille from the fan and secure the copper tube to it using plastic clamps. The more turns are secured, the more efficient the device will be, but you need to know moderation in everything: air flows from the fan must move freely between the turns of the tube.
The ends of the copper tube remain free. But it is better to cut off the ends of the plastic clamps to make the product look more aesthetically pleasing. The grille is installed on the fan, and the ends of the copper tubes are directed towards the location of the water tank.
Plastic transparent hoses are put on copper ends and secured with metal clamps.

There will be two plastic hoses. They must easily reach the cooling reservoir. The end of one of the hoses is connected to the pump nozzle. The second hose (long) is located in the tank. The container is filled with cold water and ice.
You can also place cold storage batteries there. It is better to drill holes for the hoses and wires so that the lid seals the thermobox tightly.

After turning on the pump and fan, the water should begin to move freely through the hose to the fan, then through the copper tube, releasing the cold distributed by the fan, and again through the hose into the thermobox. If this is the case, the system is working properly.
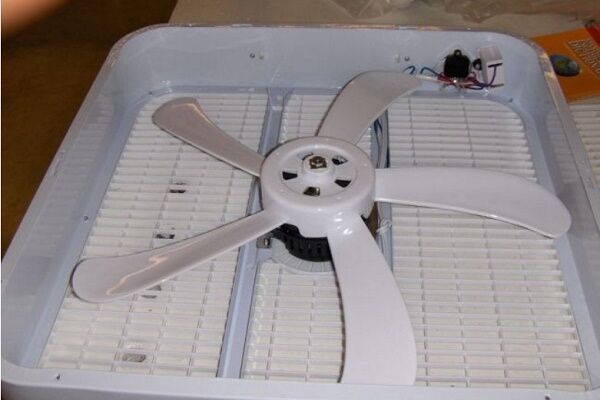
Brief photo guide to making
In essence, the presented options for climate control devices are modernized fans. It still won’t be possible to make them highly efficient and provide them with a number of related useful functions. However, they will really help to cope with the sweltering heat in an emergency.
For those wishing to build a climate control device from waste materials, we also offer this interesting model:

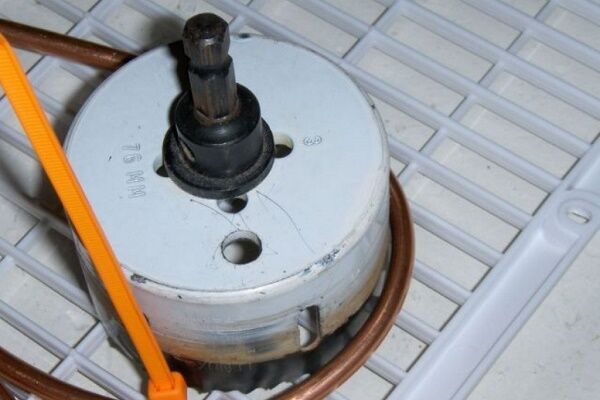
To assemble this device, you will need an axial fan with a removable grill panel, a copper tube, plastic ties, a mini submersible pump and a portable refrigerator - a box with thermal insulation made of foam plastic.
Having completed the assembly, we test the homemade product by immersing the pump in a foam cooler with water and ice. To make sure the system is working, we will measure the temperature in the room before starting work and half an hour later. The model can be improved by including in the working diagram fan speed controller.
Cardboard box tricks
The basis of this design is the same table fan and ice. But the device turns out to be quite interesting, so we decided to show it to you. The best part is that all the valuable components of this device can be easily returned to their original position without losing their functionality.
We will need:
- a corrugated cardboard box large enough to accommodate a large saucepan;
- the pan itself;
- table fan with protective grille;
- wide tape;
- gypsy needle and raw thread;
- scissors, stationery knife;
- ruler or tape measure and marker;
- ice.
We need to make a box without a bottom from the corrugated cardboard of the box according to the size of our pan. The pan should fit tightly into this box, that is, match it in length and width, but the height of the box must exceed the pan by 15-20 cm.
To do this, we cut out the box with a stationery knife and cut off its bottom and lid. We roll the box according to the markings, gluing its edges and edges with tape in 2-3 layers.

There should be no holes in the walls of the box. We cut out a square box lid from the remnants of corrugated cardboard. It's better to make it two-layer.
In its center we mark a circle, the diameter of which should be 2-2.5 cm greater than the span of the fan impeller, so that its blades fit freely into the cut out round hole and do not touch the edges during their rotation. We secure the lid in its place with tape.
At the level of the upper edge of the pan placed in the box, cut out a rectangle 3.5-4 cm high in its wall.The length of this “embrasure” may vary, but it should not reach 4 cm to each of the side edges of the box in order for the structure to maintain rigidity.
Cooled air will flow out from this cutout. And to control the flow, you need to build blinds for it.
To do this, we cut out two strips from corrugated cardboard, the length of which is 4-5 mm less than the cutout, and the width is 5 mm greater. We connect these strips together at a distance using a gypsy needle and harsh threads. We make punctures in the top strip at a distance of 7-8 mm from the edge, and in the bottom - 12-15 mm.
We insert the blinds into the opening and fix each strip at three points. We do not tighten the threads, but secure them with knots.
Try moving the blinds with your finger. The structure must move freely and not crumble when moving. Now you can start assembling the device. Place a rug or old cloth in several layers under the pan to make the appliance work more quietly. The stability of the pan should not be affected.

Place the pan and cover it with the front protective grille of the fan with the concave side up. Place pieces of pre-prepared ice on the grid. It is better to prepare it in plastic glasses, because large pieces melt more slowly than small ones. We cover the structure with a box.
Insert the fan into the hole in the top cover with the blades down. You can turn it on and check the quality of work.
Melted ice turns into water, which must be poured out of the pan in time so that it does not leak out and soak the box.Otherwise, the fan may fall into water, causing a short circuit.
You can get a good look at the entire process of constructing this air conditioner by watching the video that we placed in a special block at the bottom of this article.
Plastic bottles and plywood sheet
This wonderful design does not require electricity or even frozen water. The only thing needed for it to work is a draft.
The principle of operation of the device is easier to explain with an example. Open your mouth wide and exhale sharply onto your hand. The skin will feel warm. Now you need to stretch your lips with a tube and blow again with the same force as the first time.
This time the air jet cools your skin. If air passes through a narrow channel, then when it expands instantly, it cools.

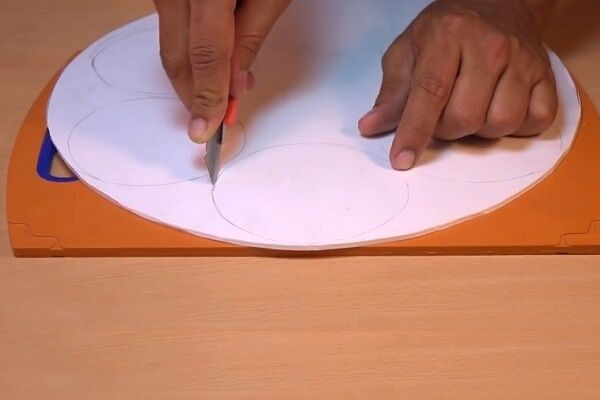
Let's prepare a sheet of cardboard, but better than plywood. It must correspond to the size of the window opening that we want to close with this design. We'll also stock up on plastic bottles. From each of them we will need only the upper third with a cork. We'll cut it off.
By the way, the plugs need to be removed, but not thrown away. They will be useful to us for securing bottles to the surface of the sheet.
We will need so many bottles so that they cover the entire surface of the sheet, but do not touch each other. To measure the holes for them, you can use a long pencil, which is used to mark the center of the cut through the neck.
To drill a hole for a standard bottle, you need a crown with a diameter of 18 mm. Using a drill, drill out all the holes one by one.

The cut-off tops of bottles without corks are inserted into the holes and secured with their own corks, the tops of which have been cut off. This produces rings with internal threads that perfectly hold bottle segments.
All that remains is to install the finished air conditioner in the window opening with the funnels facing outwards. Experts guarantee that the temperature in the room will drop by five degrees.
Adding a fan to the circuit
One of the obvious disadvantages of the previous device is that it deprives users of natural light in the room. Additionally, drafts may be a problem in your area. Then use this idea.
To implement it, prepare:
- sustainable household fan;
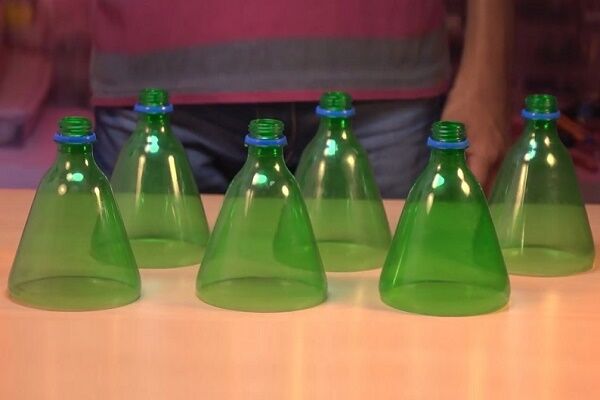
- six plastic bottles;
- a sheet of thin plastic or thick cardboard - whatever you find;
- plastic clamps;
- stationery knife;
- silicone hot glue.
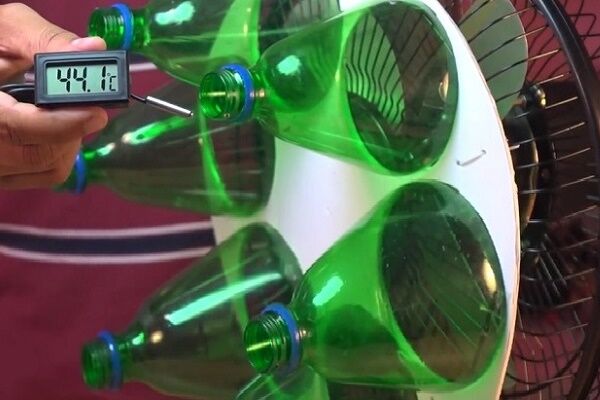
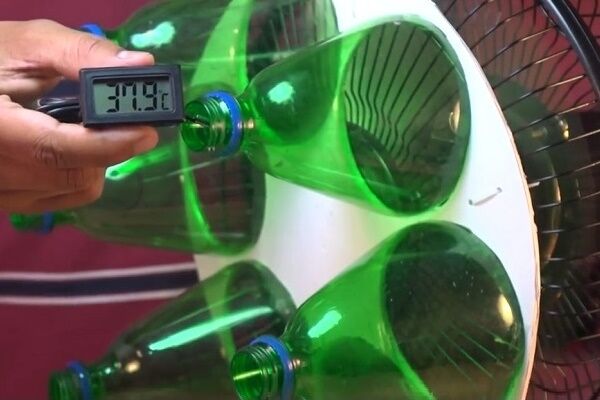
The operating principle of this cooler is the same as the previous model. Only you don’t need to install it in a window opening, and it can work in any room: it’s portable.
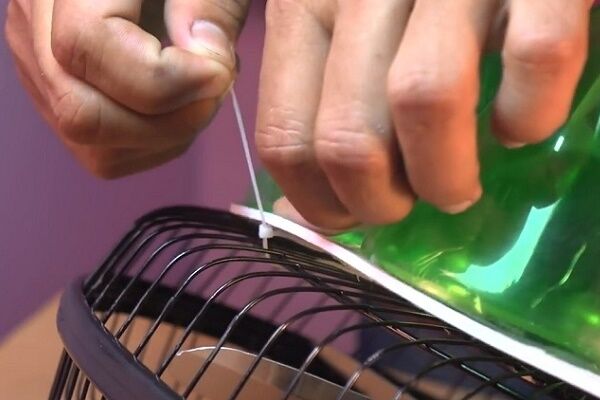
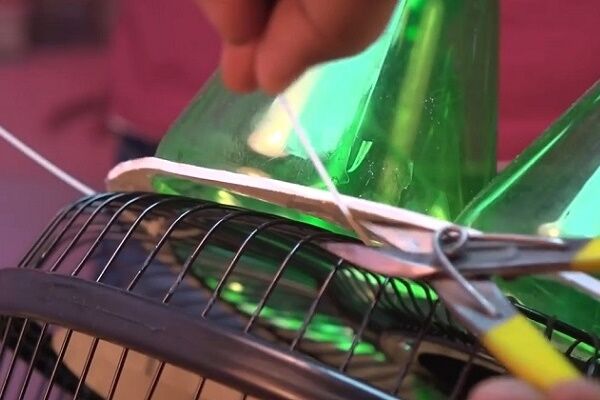
The following photo instructions will introduce you to the manufacturing process in great detail:
All actions related to cutting the base and cutting out circles for attaching blanks from bottles should be performed extremely carefully and accurately. If you cut more than required, the workpiece will not “sit” firmly in the socket. True, there is still an opportunity to correct the mistake - you can correct the defect by gluing it with tape. Further:
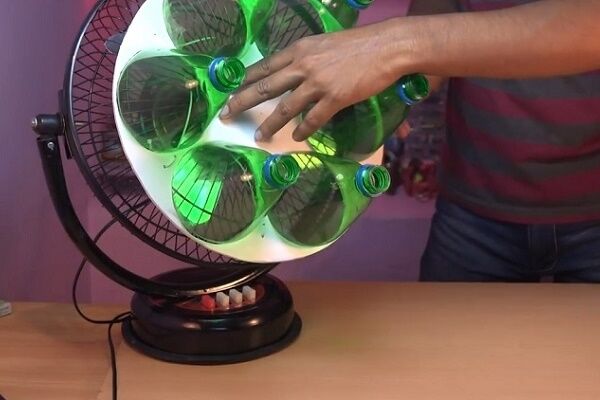
Now the homemade device, which should concentrate air flows and enhance its movement, remains to be assembled and attached to the fan:
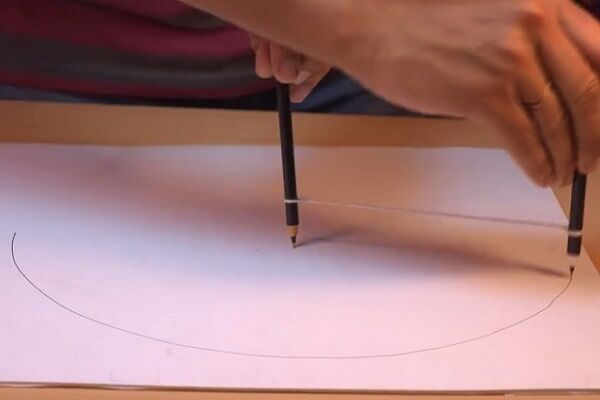
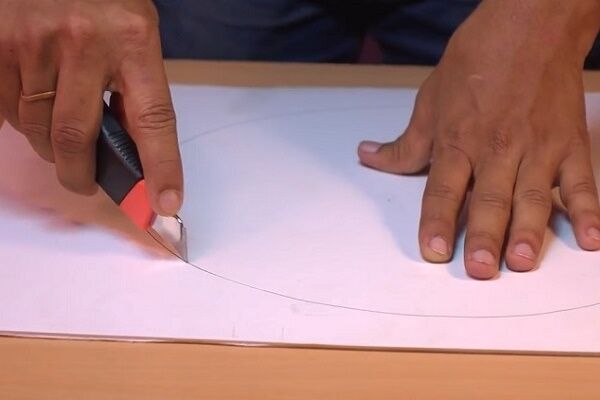
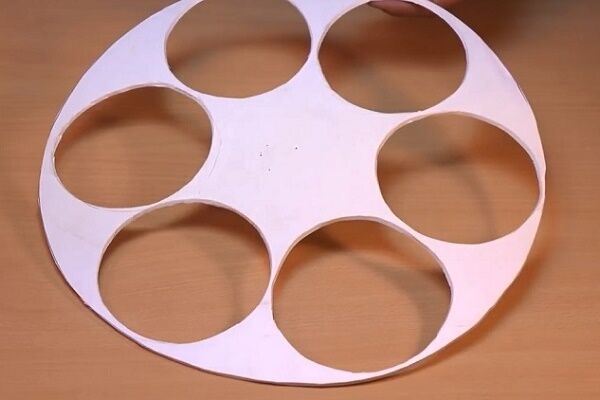
We cut off the top part of the bottles, focusing on the line of the label, to get identical segments. Next we will make the base. To do this, draw a circle on a sheet of plastic or cardboard that corresponds to the diameter of the fan. Using a utility knife, cut out a circle.
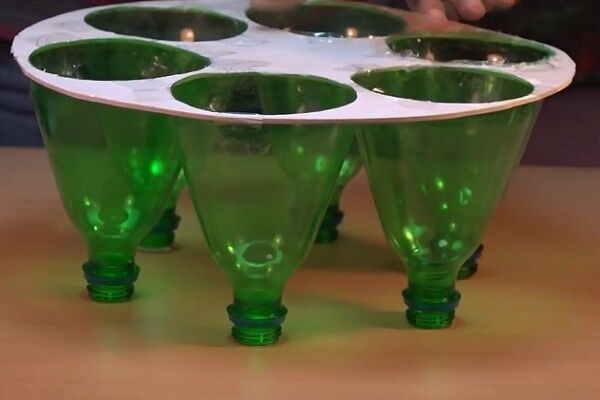
On the resulting circle, we evenly place the bottle segments with the bells facing down. We trace the circles of the bells and carefully cut them out. The result is a mounting panel.
We apply the sockets of the bottles to the holes and fix them in this position with tape so that they do not change their position during the gluing process. We glue the bottles to the mounting panel, applying glue on both sides.
All that remains is to make holes on the mounting panel between the bottles to secure the plastic clamps with which the panel will be attached to the fan grille. We tighten the fasteners by cutting off their ends, otherwise they will interfere with the rotation of the blades.
If you don’t have time for experiments, and the issue of cooling the room is becoming more and more urgent, then you can buy a practical and inexpensive model of a split system.
We have prepared a block of articles that will help in choosing a home air conditioner:
- How to choose a split system for an apartment or a house: the best brands + recommendations for buyers
- Mobile split systems: ten best options for portable climate control equipment
- Split system for 2 rooms: how the equipment is designed and works + nuances of choosing such equipment
- Inverter or conventional split system, which is better? Advantages and disadvantages + tips for choosing
Conclusions and useful video on the topic
This video shows the fastest and most affordable way to make air conditioner from a five-liter plastic bottle.
A visual sequence that reproduces the process of creating a cooling device from a pan and a cardboard box will help you clarify all the nuances if something remains unclear.
This article presents the simplest and most popular designs that anyone can build, but for those who like to use their existing craftsman skills, we also have something.
An air conditioner is a technically complex device, without which the summer life of modern city residents is difficult and joyless. But this expensive device requires maintenance and power costs.
We invite you to build one of the above most popular devices with your own hands and use it. Perhaps the factory model will not seem as attractive to you as this budget homemade product.
Do you have experience making a home air conditioner? Please tell the readers about your method of assembling the cooling device. Comment on the post, participate in discussions and add photos of your homemade products. The feedback block is located below.


We've had unbearably hot weather for a couple of weeks now. At work there is an air conditioner, that’s the only way we can escape. But the problem is that literally after a couple of hours in the room it becomes impossible to breathe, your head feels like cast iron. We begin to open, ventilate and turn on again. The options for home-made air conditioners pleased us with their simplicity and affordability. I even wanted to try to make it myself. I especially liked the option with a cooler, ice and a plastic bottle.Everything ingenious is simple!
Frankly, I have seen a lot in my life. I've been reading even more nonsense on the Internet lately. But this post just hit me in the heart. Of course, I now have an air conditioner. And, of course, I don’t regret it, although we need it for two months a year. But how have I never thought of such a simple and elegant idea before??! I’m especially surprised when I look at my own fan, the same as in the photo, and next to it the freezer. In the summer, just out of research interest, I’ll try out the design to see what volume of room, how long the bottles last, and what the real cooling effect will be.
Well, why immediately “nonsense”. It’s clear that such a homemade system cannot be compared with a real factory air conditioner, but it works quite well. When I was a student, I made a device similar to the material above - a fan and bottles of ice. And it really helped in the almost forty-degree heat, just have time to change the bottles. By the way, for a better effect, a casing was made of cardboard and tape around the fan. Otherwise, the fan would suck in not only the cold from the ice bottle, but also the hot air, and part of the effect would be lost. It’s also worth placing a container in advance into which the condensation from the bottle will drain.
I will answer both the author of the question and the commentator immediately. I'll start with the last one. So, I understand that the author’s nonsense is not this idea about a homemade air conditioner, but the various implementations that were offered on the Internet!
Regarding your “student” air conditioner, such simple solutions in the form of bottles with ice near the fan are the most popular solutions. Only for some reason many people place them in front of the fan, and not at the back, where the air is taken in.
Now to the author of the question. The ideas in the article are really very good, plus everything is described in detail and with pictures. Of course, when there is an air conditioner in the apartment, such homemade products cause laughter. What I liked best was the idea of a copper coil and cold water in a bucket. As for me, this is the best option in terms of implementation and subsequent use. But it is better to buy an air conditioner in winter at a discount, and then install it in the spring.
1) The most interesting thing is not said in the article? where can I get a thin copper tube and thick cardboard??? I don’t care about the designs shown in the article (it’s all crap), but the problem of getting such material really deserves attention!
2) The only suitable option for a homemade “air conditioner” is a “water cooler with a cooling tower”: a closed water circulation system consisting of two radiators, both with fans, the first radiator is located inside the room, and the second is outside - the outer radiator needs to be periodically sprayed with water.
You don't have to thank me.
P.S. radiators are bought at auto parts stores - there are small ones that cost less than 1000 rubles. The fans on them are in the same place. Connecting tubes - in any hardware store. Any pump: even for an aquarium, even for a car (for example, the one that supplies washer to glass rinsers).For those who don’t understand, here’s the gist: a) “dropsy” senses the transfer of heat from one radiator to another; b) by pouring water on the external radiator, we cool it below the temperature of the outside air, because this is physics: when the liquid evaporates, the surface cools.