Waterproofing a bathroom under tiles: what is better to use under tiles
When renovating a bathroom, the bathroom must be waterproofed under the tiles, which is best done with the assistance of a qualified specialist.
If this is not possible and you plan to do the work yourself, we recommend that you familiarize yourself with the requirements for moisture protection, materials and methods that are used for these purposes. We examined all these points in our article, and also gave the procedure for performing the work, focusing on the nuances of preparing and applying each of the popular types of waterproofing.
The content of the article:
Basic requirements for waterproofing
Proper implementation of waterproofing allows you to protect the finishing of floors, ceilings and walls from the destructive effects of moisture, prevents mold, and provides protection from flooding in the rooms located below.
In order for waterproofing to successfully cope with these tasks, it is necessary to ensure that it meets certain requirements.
The following can be considered the main ones:
- quick application will allow the formation of a complete coating and will prevent the occurrence of cracks and crevices;
- minimum intervals between application of layers — each subsequent one should be laid immediately after the previous one has dried, which will ensure the best adhesion;
- compliance with recommended overlap parameters when laying rolled source materials with insulation output to the walls when creating moisture protection for the floor.
In addition to the above, it is recommended to use a primer, which allows you to save on the number of sources and improve adhesion to the insulated surface. Before performing work, it is necessary to clean the surface as much as possible. We provide detailed instructions on general waterproofing of a bathroom on our own. brought here.
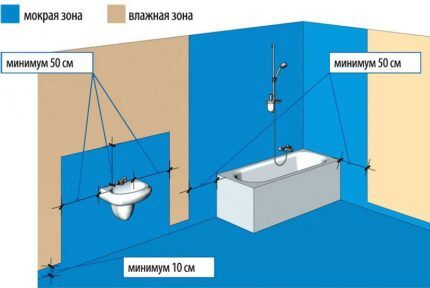
If it is not possible to completely isolate the bathroom, you can limit yourself to the areas most exposed to water, which suffer more from dampness than others.
Types of moisture-proof materials for the bathroom
There is no shortage of special moisture-protective products on the shelves of construction stores. It will be difficult for an ignorant buyer to make a choice if they do not know their types and purpose.
Materials are mainly divided according to the components used for their manufacture, structure, and specific properties:
- masticapplied by coating surfaces;
- roll devices, which are applied by pasting;
- pastes and liquids;
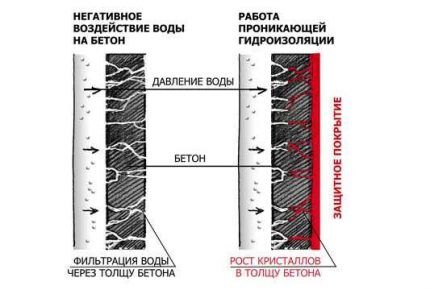
- penetrating mixtures, used for application to porous substrates.
In addition to the listed materials, powdered mixtures intended for creating waterproofing solutions by dilution are suitable for moisture protection of bathtubs.
If the walls are uneven, you can use special plaster; in addition to being resistant to wet environments, it will ensure leveling of the surface.Finally, for the same purposes, a film made of polymers or rubber is often recommended, which is applied by spraying and forms a powerful barrier after drying.
When choosing a suitable insulator, you need to focus on the recommendations of the instructions, which usually indicate the scope of application of a particular product. You should choose materials recommended for use in interior spaces.
Barrier for tiles for floors and walls
Waterproofing walls and floors can be done with any composition, but it has its own nuances. Walls usually do not require high levels of moisture insulation. Gender, on the other hand, needs more careful protection.
Optimal floor materials
To protect the floor from the harmful effects of a wet environment, protective agents are combined with a screed. Rolled insulators are placed under it. They are easy to use - special adhesive strips are provided to hold individual strips together.
An alternative to them are coating mastics, which benefit in durability and efficiency. They are applied under and over the screed and combine well with penetrating mixtures. The combination of such mastic, applied under the screed, with penetrating impregnation on top of it, can provide the most effective water barrier.
Options for creating a barrier for walls
Wall materials are easier to choose. To protect against moisture penetration, any of the compositions listed above can be used. If you plan to do the work yourself, you should choose what is easiest to apply/use.
When the material factor is important, cost savings will be provided by one-component mixtures, which are diluted with water and are inexpensive. Two-component ones involve the use of polymer emulsions and are more expensive.
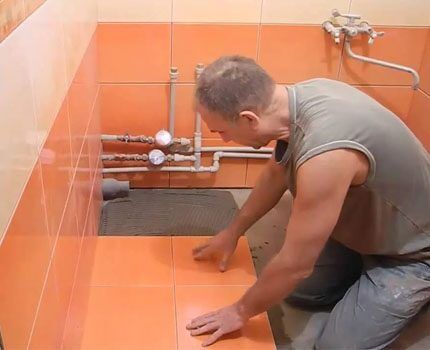
As with floor tiles on walls, coating or impregnating mixtures are usually recommended, which are easy to apply independently and do not burden the budget with significant expenses.
Possible waterproofing methods
When working with any protective agents, it is often necessary to first level the surfaces and prime them. After the composition has dried, you can proceed to the main work. If the insulation will be carried out independently, it is advisable to select the most affordable technologies that do not require special equipment and special skills.
Method #1 - applying coating mastics
Such compositions are recommended for use in rooms that have a complex layout. They allow you to carefully process corners and protrusions.
Among the most popular options are usually polymer mixtures, polymer-cement and bitumen. They easily penetrate pores, isolate cracks, and form an effective moisture barrier that does not crack for many years.
The advantage of such mixtures is ease of use:
- Before application, the floor or walls are cleaned of dust and debris, if necessary, leveled, moistened or treated with a primer that increases adhesion;
- the dry mixture needs to be diluted with water at a temperature no less than room temperature, in the ratio specified in the instructions;
- Mix the composition thoroughly with water until smooth, let it sit for up to 5 minutes, then mix again and begin application.
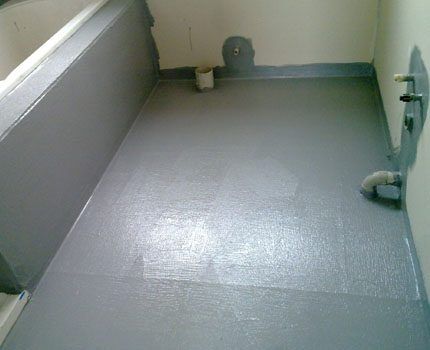
The mastic is distributed over the surface in two layers immediately after the last mixing. After the first, the corners are glued with a special tape, which is carefully pressed into the insulation and straightened.
It prevents the penetration of wet environments and allows you to maintain an integral barrier, which is especially important in corners and at joints.
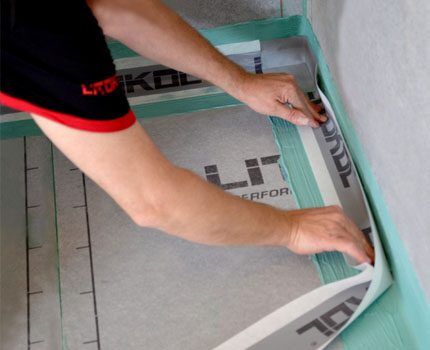
After completing the application of the first layer of insulation using this type of material, mesh reinforcement is performed and another one is laid on top, repeating the procedure from the beginning. It is important to completely cover the previous layer.
Method #2 - treatment with an impregnating composition
Impregnating compounds are mixtures that penetrate deep into the structure, completely fill all cavities, strengthen, form a durable hydrobarrier, increasing the level of hydrophobicity of the surface.
These can be polymers, bitumen compounds, liquid glass and other options. Just as in the previous case, the base is cleaned and primed.
And then do the following:
- Dry compositions are diluted according to the instructions for half an hour of work, after which the mixture dries out and becomes unusable.
- After applying and drying the first layer, the base is treated again. To apply the mixture, you can use a roller or brush, depending on the consistency.
- When the work is finished, the surface is allowed to dry. Depending on the composition, this may take several days.
It is recommended to periodically moisten the surface throughout the drying period, which will ensure good crystallization of the insulating agent.
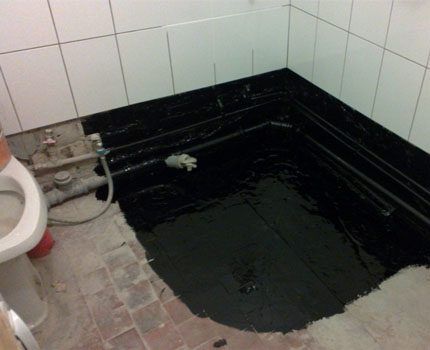
An additional advantage of any penetrating composition is the ability to use it to restore the integrity of old insulation that has lost its original characteristics.
Method #3 - using roll materials
In this case, you can use several options for roll products. Fiberglass insulators are durable, insensitive to rotting, but are expensive, require careful installation, and are easy to damage.
Rolls of roofing felt or glassine are cheaper, but they deteriorate faster.
Depending on the complexity and equipment used, there are three laying technologies:
- fasteners — the rolls are laid on the floor and fixed with special fasteners, which are then additionally insulated;
- heat gun — it creates a certain temperature regime necessary to fuse the coating used;
- adhesives or polymer-bitumen mixtures, the latter form additional protection against moisture.
Options with fasteners and the use of a heat gun are not often used for waterproofing a bathroom.
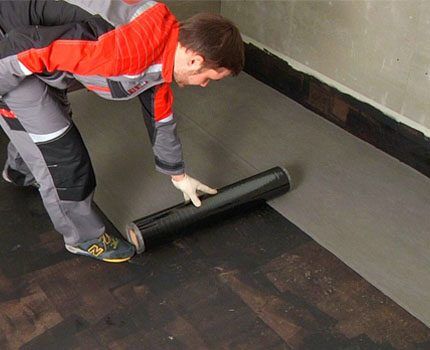
The optimal method is gluing, which is accessible to non-professionals and does not require special equipment. Before starting work, check whether the surface requires leveling. If necessary, make a concrete screed. Then the joints are rounded, which will help prevent cracks from occurring.
After standard cleaning, drying and priming, they begin laying the material:
- the rolls are cut into pieces of the required length, the rolled strips are treated with diesel oil for greater elasticity and kept in this position for a day;
- the screed on top is treated with coating or adhesive and the rolls are overlapped according to the manufacturer’s recommendations;
- If bubbles appear, they are opened, the edges of the cut are treated with mastic and re-glued, carefully smoothing them out.
At the point where the wall meets the floor, the rolls are folded and placed on the walls up to 15 cm, which ensures reliable waterproofing.
Method #4 - applying waterproofing plaster
The option to create plaster moisture protection involves the use of polymer additives that increase the hydrophobicity of the base. The technology is almost no different from applying coating mixtures.
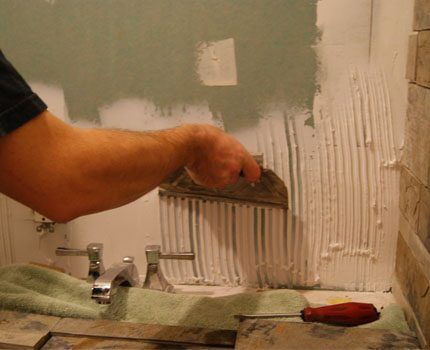
After the necessary surface preparation, sealing tapes are glued to the corners and joints. Then the prepared solution is applied in 2-3 layers in different directions.For example, the first with vertically directed movements, the second with horizontal movements.
Features of waterproofing a wooden room
For a bathroom whose walls and floors are made of wood, you cannot use all the options discussed above. Let's figure out how to properly implement moisture protection in such rooms.
How to properly protect wooden floors?
For bathrooms in wooden buildings, it is not recommended to use insulation with a concrete screed. It increases the load on the foundation and increases heat loss. For this reason, the main method of arranging the floor is lag, which, if necessary, is insulated, following the correct technology. Read about floor insulation using joists In this article.
Even at the stage of planning a house, you should provide flooring in the bathroom below the general level by about 10 centimeters. This will create the necessary barrier for water to penetrate into other rooms in the event of a leak.
One of the common options for field insulation in this case is coating.
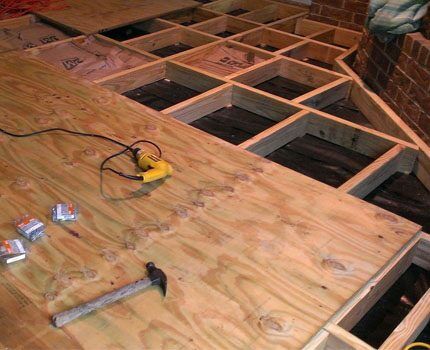
Before applying the mastic, preliminary preparation is necessary:
- all cracks and holes are sealed with special mastic for wood;
- the floor is thoroughly cleaned;
- treated with impregnation with antiseptic properties, which will prevent the occurrence of mold;
- A mandatory step in preparation is the primer, which increases adhesion to the insulator.
If leveling is necessary, you can use sheets with a cement-bonded particle base, which are laid in two layers. When the preparation is completed, the floor is given time to dry, and the main work begins.First of all, insulate all joints using special tape.
Next, the first layer is laid using a roller; a spatula or brush is used in the corners. After it dries, which takes about 6 hours, apply a second layer strictly perpendicular to the first. The insulation is dried during the day, then tiling work is carried out.
Creating a barrier for wooden walls
Just as in the case of the floor, the walls must be pre-treated with an antiseptic, any existing cracks must be sealed with mastic. The surface can be treated with wax, which will protect the wood from deep penetration of moisture.
Next, apply a double layer of primer, increasing its density closer to the ceiling, where condensation usually accumulates. After drying, roll materials are laid or coated.
In the latter case, the work is performed as follows:
- before application, leveling of the surface will be required, which is achieved using plaster along beacons using a level;
- the corners are also insulated with tape;
- The mastic is applied with a brush or spatula with a wide profile.
If partial tiling is planned, the areas around the sink, toilet and bathtub are coated with three layers of mastic. Each of them is applied after the previous one has dried. The tiles are laid on completely dried insulation.
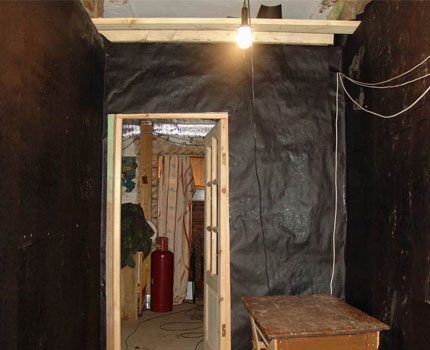
High-quality waterproofing materials, applied correctly, will ensure reliable protection of walls and floors from moisture. But to achieve maximum results, it is equally important to apply reliable sealants when installing plumbing, carefully sealing all joints.
Conclusions and useful video on the topic
Video about the stages of creating a moisture barrier in the bathroom with recommendations and explanations:
Video about the features of applying insulation to a dusty floor and other mistakes when renovating a bathroom:
Video about high-quality work on moisture insulation, tips on choosing materials:
When planning waterproofing of a bathroom, you need to decide not only on the types of appropriate materials, but also on the brands. There is no shortage of such compounds on the shelves of construction stores, but, as a rule, imported ones remain the highest quality.
To avoid mistakes, it is best to listen to the recommendations of experts. Typically, useful advice can be given by sellers of specialized stores, where personnel are selected taking into account relevant experience..
Would you like to supplement the material we have presented with useful information or share your personal experience of using a specific brand of waterproofing material? Write your comments and recommendations in the block below, ask questions on the topic if you still have doubts about the choice of application technology or protective composition option.


I have an apartment in a Khrushchev-era building; according to this layout, there is a window in the wall between the bathroom and the kitchen. Soon I’m thinking of starting a major renovation in the bathroom, during which I decided to get rid of this window. Is it possible to use moisture-resistant drywall to seal the specified window opening? Will the tiles stick to it? If so, what is the best way to protect it from moisture?
Hello.It will stick easily, there is no need to treat it with anything special, apply a special primer before and after puttying, before laying the tiles. The putty is moisture resistant.
Frankly speaking, not everyone follows these waterproofing rules. I laid the tiles on regular walls, which I leveled and primed. I used the most common primer. And it's the same with the floor. Over the years of operation, no problems have arisen. And I don’t see why they would do it, if people lived in the apartment for ten years before me, and the walls in the bathroom, like the floor, were simply painted with ordinary paint.
Aren't there a lot of problems? My husband is involved in renovations and in 5 years of working in this field, he has never done this, he always made do with plaster, primer and tiles on top and that’s it. I also understand insulating under the bathtub or shower, but why the whole room?
You can waterproof not the entire bathroom, but only important areas. But I don't recommend doing that. There are a lot of risks in the bathroom - leakage of the washing machine or pipes, children splashed while washing, or even just spilled something.
Waterproofing is not a particularly expensive thing, but it is very useful. Especially if your husband can do it himself. There's nothing complicated there. Take waterproofing from Knauf, it requires virtually no preparation - open the can and coat the walls in 2-3 layers.