Do-it-yourself temperature regulator for a boiler: manufacturing instructions
The boiler design provides for the presence of several control elements that control the outlet temperature of the coolant. A thermostat is a device that responds to changes in temperature. Often, in old or budget models of heating boilers, primitive types of this element are installed. They can only activate or deactivate the heating function. Therefore, in order to optimize the operation of the system, homeowners are thinking about how to make a temperature controller for the boiler with their own hands.
The content of the article:
Types of temperature controller for heating boiler
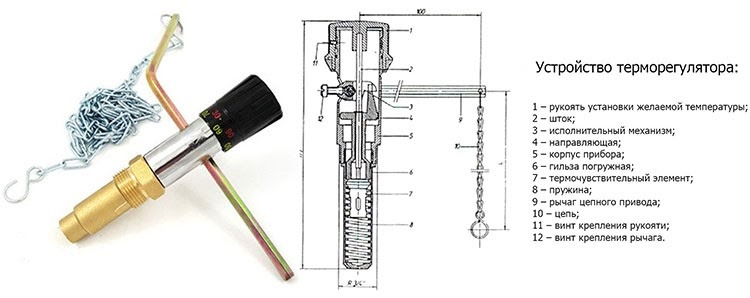
According to the standard, a simple thermostat is installed in boiler units of any type, the task of which is to monitor the temperature of the coolant in the heating circuit. The owner of a house or apartment sets the optimal temperature regime at his own discretion, after which the thermoelement is switched on. It activates the gas burner or heating element, which leads to heating of the coolant.
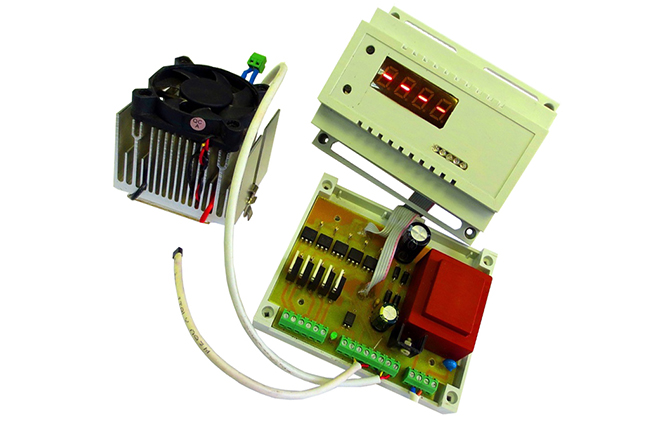
Manufacturers supplement modern and expensive models of heating boilers with remote temperature controllers. Their functionality has been expanded, so they are able to:
- activate the heating system in accordance with the data of a weather-sensitive sensor located outside. That is, if the temperature drops below certain indicators, the regulator senses this and turns on the boiler in the house or apartment;
- constant monitoring of the temperature of the coolant in the heating circuit;
- a remote room temperature regulator for a gas boiler allows you to control the unit from anywhere in the house;
- It is possible to measure the temperature in any room using a remote sensor.
A weather-dependent temperature controller is ideal, but at the same time it is the most expensive. In addition, difficulties may arise with its installation and adjustment. But a weather-dependent sensor allows you to more effectively control the boiler and heating system, because it reacts to changes in the weather outside the window. Therefore, the rooms will always have an optimal microclimate.
If you install the temperature controller at a distance from the boiler unit, it will automatically transform into an external control module. Its main function is to scan thermocouple readings and turn on the heating remotely if the readings are lower than those set by the homeowner.
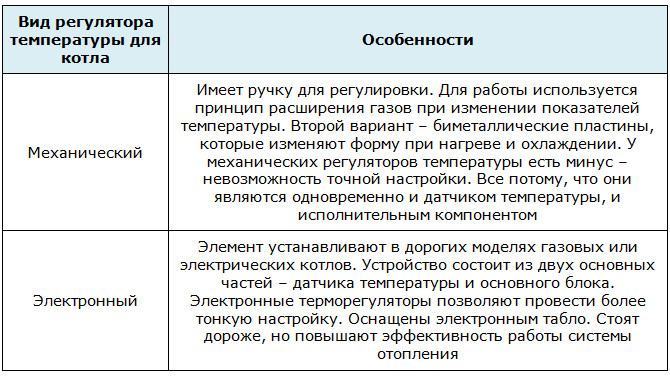
Thermostats also differ in their operating principles. The types are shown in the table below.
Do-it-yourself temperature regulator for a heating boiler
Expensive boiler units are usually equipped with high-quality temperature controllers, so they do not cause any complaints from the owners. But not everyone can afford to purchase expensive heating equipment. Therefore, those who have at least a little knowledge of electronics and electrical engineering can independently make a device that will be no worse than expensive factory thermostats.
Not everyone can assemble a complex, high-precision programmable temperature controller. Therefore, it is worth starting with simple schemes. In addition, the components for them are not expensive.
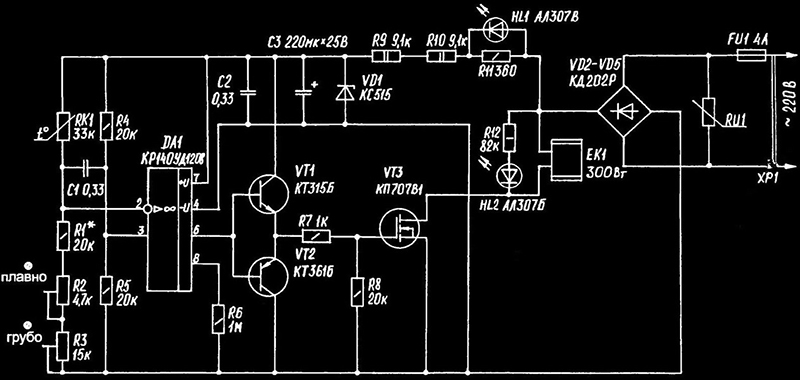
Manufacturing diagram of a temperature controller for a heating boiler
Before you get started, you need to collect everything you need.And the first on this list is the diagram of the future thermostat. You need to build on it when selecting components and necessary parts. The standard set will look like this:
- a part or element that will “monitor” temperature indicators;
- transistors and microcircuits from which the processing unit will be assembled. Its function is to compare the user-set values with the received ones;
- part responsible for activating or deactivating the boiler.
Step-by-step instruction
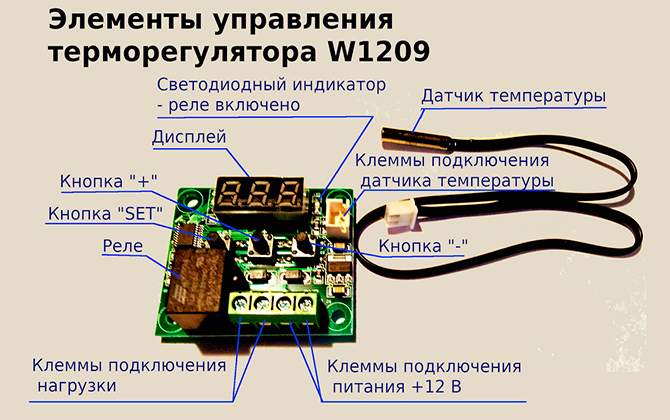
If a person has only basic knowledge in the field of electronics and working with electrical engineering, then when assembling a regulator for a boiler, it is better for him to rely on the option with a zener diode. This is a semiconductor diode capable of passing electric current in one direction.
Necessary parts for assembling a thermostat with your own hands according to the diagram:
- base – zener diode TL431;
- power supply (12 V is enough);
- thermistor – 22 Ohm;
- 2 resistances at 100 Ohm and 10 kOhm;
- reed relay (RES-47);
- wires for connecting parts;
- pads;
- printed circuit board;
- frame;
- soldering iron
Assembly instructions:
- Compare the dimensions of the printed circuit board and the case. If necessary, adjust it to size. The tool creates several holes for fastening and also forms current-carrying paths. Then the pads are secured.
- Study the diagram. In accordance with it, all the main components of the future thermostat for the boiler are placed on the board. Fix them with a soldering iron.
- Thermal resistance, power and control lines are connected.
- The final stage is to check the functionality of the device with the device. It is important here that the power relay is triggered when measuring the resistance of the trimming resistor.
There are 2 options for placing the assembled thermostat - next to the boiler or in a room at home. If the device does not look very presentable, it is better to hide it closer to the boiler unit.
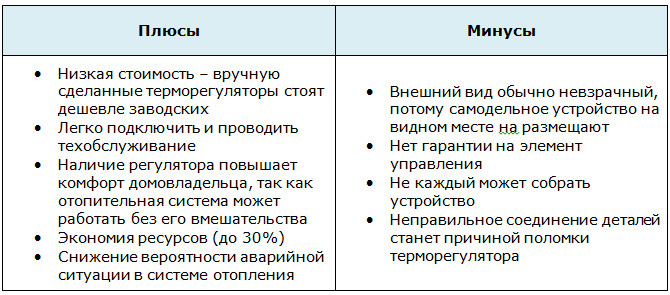
Advantages and disadvantages
A homemade regulator has both positive and negative qualities. For ease of assessment, they are all listed in the table below.
A temperature regulator for a boiler is a small but functional device that will save on heating costs and also help create and maintain a microclimate in the house. You can assemble it yourself if you have basic skills in working with electronics. Device diagrams are freely available.
Have you ever assembled such an important component of a heating system with your own hands? Did it work the first time? Write in the comments. Save the article to bookmarks and share it on social networks.
Video on the topic: Thermostat for a gas boiler.
