Beretta gas boiler malfunctions: how to decipher the code and troubleshoot the problem
Beretta gas boilers have proven themselves as a source of thermal energy in autonomous heating systems.The units are equipped with a self-monitoring function for the processes occurring in units and parts during boiler operation. Equipment malfunctions can be identified by light signals.
We will analyze the typical malfunctions of the Beretta gas boiler and their elimination. Let's consider in what cases it will be possible to solve the problem on our own. Let's find out when you will have to call a gas service technician for repair operations.
We will talk about how to identify an error in the operation of the equipment, about which it independently warns the owner. We'll tell you what the combinations of letters and numbers that appear in the event of a problem with the built-in display or indicators mean. With this information, you can decide how best to proceed.
The content of the article:
Common failures of Beretta boilers
According to gas technicians involved in the repair and adjustment of Beretta gas boilers, there are several main malfunctions that most often occur in equipment of this brand:
- There is no flame on the burner, resulting in the equipment being blocked. This problem can be caused by several reasons, ranging from a blockage to a lack of gas supply.
- Control board failure. Occurs due to the accumulation of condensation on the board, which leads to its failure. Also, board failure can occur due to burnout of parts on it.
- Increased flue gas pressure. This failure can be caused by ice in chimney of a gas boiler, clogging with soot, increased wind force. As a result, the operation of the equipment is blocked.
- Self-diagnosis sensor failure.It also causes the control system to shut down the equipment.
- Low water pressure when supplied to the heating circuit. The most common cause is a leak or problem with the expansion tank.
Statistics collected by experts do not mean that exactly such problems will occur in every Beretta boiler.
It is possible that problems will not appear at all for a long time, or completely different failures will occur for other reasons. Each problem or failure in Beretta gas boilers has its own code, which is displayed by the control system on the LCD display.
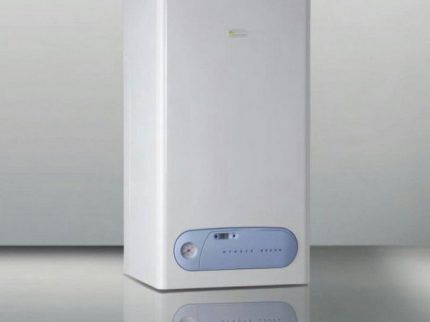
Fault detection occurs thanks to a self-diagnosis system, which allows you to instantly identify problems when they arise and take appropriate measures.
How does the self-diagnosis system work?
In Beretta boilers, the self-diagnosis system consists of a network of monitoring sensors located on the main working units of the units.
After turning on the boiler, the sensors begin to function in continuous mode; they do not require an additional special start. Using the same principle, it is impossible to disable the sensors without stopping or blocking the gas boiler.
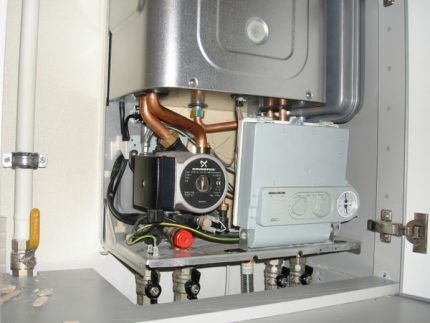
When the monitored parameters change or the operation of a particular unit is disrupted, signals from the sensors are sent to the control module, which blocks the equipment.At the same time, an error code is displayed on the display, allowing the boiler owner to determine the type of problem and take measures to eliminate it.
In addition to the display, malfunctions in Beretta boilers are signaled by special indicators located depending on the design features of different models of heating equipment.
Error codes on the boiler display
The LCD display, which is equipped with almost all models of Beretta gas boilers, displays information about the operating mode of the equipment, as well as error codes and malfunctions that arise during operation.
Most failures are resolved by rebooting the boiler. But if the problem does not disappear after rebooting, you need to check the parts and components listed below.
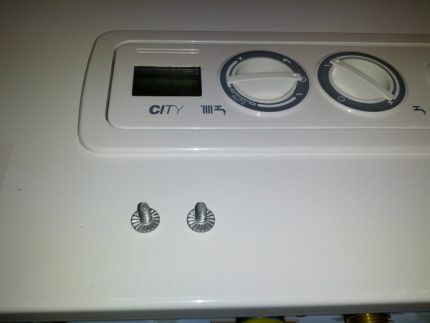
We tried to collect the most complete list of errors.
A01 — there is no flame on the burner, 5 unsuccessful attempts to ignite.
Check:
- presence of gas in the pipeline;
- boiler shut-off valve position;
- adjust the gas valve;
- clean the burner with nozzles;
- ignition electrode, if necessary, clean the contacts;
- ignition relay;
- change the slave board.
A02 — thermostat overheating.
Check:
- thermostat, integrity of wiring to it;
- clean or replace the circulation pump;
- If the pressure in the circuit is low, add fluid.
A03 — violation of smoke removal.
Check:
- presence of traction;
- clean gas boiler chimney, if necessary, chop off the ice at the outlet;
- clean or replace the fan, check the contacts;
- smoke sensor and its contacts.
A04 — decrease in water pressure in the system.
Check:
- presence of leaks;
- pressure sensor, its contacts;
- circulation pump;
- presence of blockages in the system;
- change the slave board.
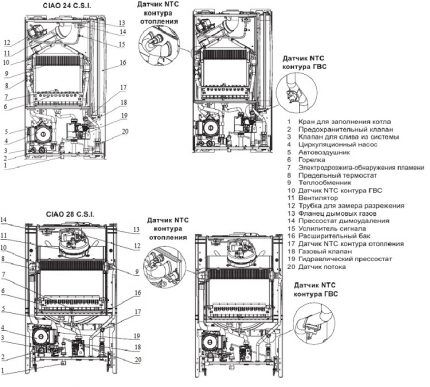
A05 — breakdown of the NTC hot water supply temperature sensor.
Check:
- NTC sensor, its connections, replace the part if necessary;
- change the slave board.
A06 — failure of the NTC heating temperature sensor.
Check:
- NTC sensor, its connections, replace if necessary;
- change the slave board.
A07 — The thermal relay does not open.
Check:
- change the slave board.
A08-A10 — internal error of the slave board.
Check:
- change the slave board.
A11 — flame simulation (fire on a switched-off burner).
Check:
- press Reset, reboot;
- contact service specialists.
A12, A15 - errors on the slave board.
Check:
- change the slave board.
A16, A18 - errors on the main board.
Check:
- replace the main board.
A20 — the fire remains after closing the gas valve.
Check:
- gas valve, replace if necessary.
A24 - fan malfunction.
Check:
- fan connection, its contacts;
- if damaged, replace the fan.
ADJ — failure in the min and max power settings.
Check:
- configure the necessary parameters.
E02 — NTC1 sensor is not connected.
Check:
- NTC1 sensor and its connections, replace if necessary.
E04 — NTC3 sensor is not connected.
Check:
- NTC3 sensor, its connections, replace if necessary.
E18 — short circuit of the NTC1 sensor.
Check:
- NTC1 sensor connector;
- replace the part.
E20 — short circuit of the NTC3 sensor.
Check:
- NTC3 sensor connector;
- replace the part.
E23-E26 - errors on the main board.
Check:
- replace the main board.
E32 — no slave (SALVE).
Check:
- position of two-pole switches on individual units, bring them to the ON state.
E33 — the phase and neutral are incorrectly connected.
Check:
- reconnect in the correct order.
E34 — Reset button error when pressed more than 7 times within 30 minutes.
Check:
- wait 40 minutes for the error to disappear;
- replace the slave board.
E35 - pressure switch failure.
Check:
- check the water flow in each circuit, bring it to the norm of 2 m3/h;
- replace with a new part with a setting of 500 l/h.
E36 - error on the slave board.
Check:
- change the slave board.
E37 — failure when fire is detected.
Check:
- clean or replace electrodes.
E38 — short circuit of the smoke sensor.
Check:
- replace element.
E39 — there is no contact with the smoke sensor.
Check:
- smoke sensor connector;
- replace the part.
E40 - error 50 Hz.
Check:
- frequency in the electrical line;
- connect a voltage stabilizer.
E41 - error on the slave board.
Check:
- change the slave board.
E42 — short circuit of the sensor on the supply pipe.
Check:
- sensor connector on the supply pipe;
- replace the part.
E43 — there is no contact with the sensor on the supply pipe.
Check:
- sensor connector on the supply pipe;
- replace the part.
E44 — short circuit of the sensor on the return pipe.
Check:
- sensor connector on the return pipe;
- replace the part.
E45 — there is no contact with the sensor on the return pipe.
Check:
- sensor connector on the return pipe;
- replace the part.
E46 — overheating of the sensor on the supply pipe.
Check:
- measure the water flow in each circuit;
- bring the flow rate to the norm of 2m3.
E47 — overheating of the sensor on the return pipe.
Check:
- measure the water flow in each circuit;
- bring the flow rate to the norm of 2m3.
E48 — overheating of the smoke sensor.
Check:
- measure the water flow in each circuit;
- clean the heat exchangers on both sides.
Sometimes situations occur when errors are not shown on the display of a Beretta gas boiler, but other signs of equipment malfunctions appear.
Such signs include the appearance of gas or burning odors in the room with the boiler, delayed operation of the boiler burner, as well as a noticeable difference between the heating of the boiler and the temperature of the batteries. These manifestations of problems should be treated with no less attention than the codes on the display.
What do the indicator signals mean?
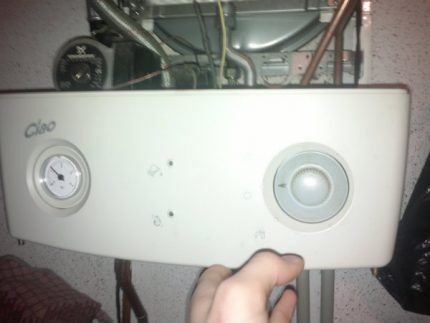
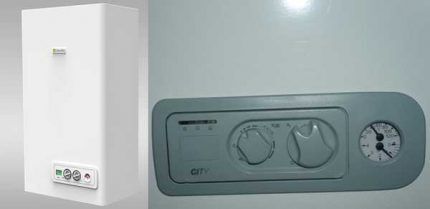
In some models of Beretta gas boilers, for example Beretta City, the occurrence of malfunctions in the operation of the units can be judged by the signals of the red, yellow and green indicators.
The indicators are two or three light diodes located on the central panel, which begin to blink with different intensities when a particular failure occurs.
A blinking green indicator may mean the following:
- 1 time/3.5 sec - the equipment is switched to standby mode, the fire is extinguished;
- 1 time/0.5 sec - the boiler is stopped due to a breakdown;
- 1 time/0.1 sec - the unit is switched to the auto-regulation system;
- the indicator is on and does not blink - the boiler is working normally, the fire is burning.
Beretta City can stop on its own due to a breakdown if it receives a signal from pressure and smoke sensors.
The boiler may pause operation for 10 minutes, during which the correct parameters must be restored. During this time, the system will automatically scan. A detailed guide on how to check the sensor readings of a Beretta gas boiler should already be included in the self-diagnosis system.
The red indicator turns on in the following cases:
- the indicator is on and does not blink - if after stopping the boiler operation is not established, the unit goes into emergency mode;
- the indicator is flashing - the limit temperature sensor is triggered. Sometimes you can eliminate the error using the operating mode switch.
Simultaneous flashing of the red and green diodes occurs in the event of a breakdown of the NTC sensor.
The yellow indicator lights up and stays lit when preheating of the coolant in the circuit is turned on.
To eliminate all the above-described problems with Beretta gas boilers, it is strongly recommended to use the services of specialists from authorized service centers and organizations with which contract signed for the maintenance of gas units and the supply of blue fuel.
Independent intervention in the complex design of boilers can lead to an even more serious breakdown, which will result in expensive repairs and a long shutdown of the autonomous heating system.
Conclusions and useful video on the topic
To eliminate malfunctions and errors when operating a Beretta gas boiler, you need to understand the principle of its operation:
The video below will help you recognize errors in Beretta boilers:
An example of identifying and eliminating a Beretta gas boiler error:
If your Beretta gas boiler begins to produce one or another error, it is not recommended to let things take their course and delay repairs or adjustments. But before contacting gas workers, it would be a good idea for the owner of the equipment to figure out for himself what the equipment’s error is.
Knowing the cause of the identified failure will help the owner find the optimal solution to the problem when communicating with an authorized service technician.
Would you like to tell us how you independently determined the breakdown of a Beretta brand gas boiler based on the indication or code? Is there useful information that may be useful to site visitors? Please leave comments in the block form below, ask questions, and post photographs related to the topic of the article.


There are also floor-standing Berettas! They break too! What about them? Floor-standing Beretta, live thermocouple. The boiler is turned on for 3 sec. and off We changed the machine. I worked all night! In the morning - the same garbage! Change the machine again?