How to paint drywall: choice of paint, tools, application instructions
Drywall - an indispensable material for repairs.It is used to implement bold design ideas - to make an arch, decorate a niche or other decorative elements. They cut it out, design it into whatever they want, all that remains is the finishing. There are many recommendations on how to paint drywall correctly. Before starting to work with this material, carefully study its characteristics.
The content of the article:
How to prepare drywall for painting
Drywall is an economical material that allows designers to realize even incredible renovation ideas. Due to the fact that it is easy to use, to make it, for example, an additional storage cabinet, you do not need a huge number of tools and accessories. Even a person encountering this material for the first time can construct it.
Among the options for plasterboard structures, there are several basic ones that can be easily upgraded into something new:
- Cabinets. We are talking not only about ordinary cabinets that are sold in furniture stores, but also about entire dressing rooms (due to the nature of the rooms, not particularly large, but certainly functional). Every woman dreams of having a wardrobe; with the help of this material, they can make their dream come true even in a small apartment, while spending a relatively small amount.
- Niches. Additional shelves with lighting, plasterboard niches for a TV - such interiors will help to properly organize the space in the apartment and create additional comfort.
- Arches. An excellent option if using an interior door is not practical. It is supplemented with niches, creating new storage spaces.
- Partitions. They are popular in one-room apartments and studios, as they are a great way to divide space. When constructing partitions, niches are added, or simply additional storage spaces, decorated with glass and lighting.
- Communication boxes. During repairs, many are faced with the problem of protruding ventilation, water and gas pipes. They stand out from the interior and attract attention. In this case, the box will be the ideal solution, because it is designed to match the decor.
- Fireplace. It is impossible to install a real fireplace in an apartment, but it is difficult in a private house. A cozy artificial false fireplace is made from plasterboard, next to which you will feel as comfortable as with a real one.
- Column. It serves as decoration and is functional. The column itself is supplemented with niches or hidden inside communications.
As when working with any other materials, there are subtleties and nuances that are studied before starting work. Depending on the choice of product, where it will be located, the material is chosen. Drywall can be found in almost any specialized hardware store:
- GKL. A simple material that is suitable for normal humidity conditions.
- GKLV. Moisture-resistant, used in bathrooms, showers, and other rooms with high humidity levels.
- GKLO. Fire resistant is used in rooms where there is a high level of fire.
- GKLVO. Moisture- and fire-resistant plasterboard. The material is resistant to moisture and fire at the same time.
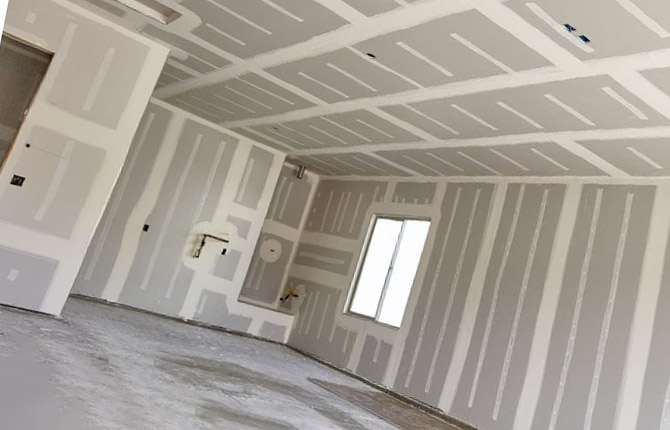
After completing the stages of choosing drywall and designing, they begin to prepare the material before painting. The main goal is to obtain a perfectly flat and smooth surface on which the coating will fit well.When preparing drywall for painting, you need to remove excess, clean the surface from excess dust and dirt.
Preparation for painting consists of several stages:
- Finishing wall seams. Using putty and spatulas, smooth out the corners, leveling the seams for painting. It is worth paying attention to this stage. A special reinforcing tape is used - it should not stick out or be visible after painting. It is important that before starting work you need to mix the putty composition, eliminating lumps.
- putty. To properly putty before painting, take a large metal spatula (30-50 cm). If there are doubts about the evenness, then apply 2 layers - this will not affect the quality of the coating or its durability.
- Grinding. Even if visually the coating looks smooth before painting, go over it with sandpaper or a special grinding machine. This way you can eliminate even the smallest imperfections before painting. The main thing is to use only a fine-grained cloth so as not to damage the putty layer.
- Primer. The last step in preparation before painting. If the primer is a concentrate, then it is diluted according to the instructions; if not, then it is applied to a dry surface in an even layer. Eliminates smudges due to uneven absorption of the composition into the drywall.
Before painting, pay attention to cleaning so that excess dust, dirt, and debris do not get into the compositions used. Not all the debris that gets in while painting and gets stuck in the coating is easy to remove. To remove large inclusions in drywall, you will have to remove a layer, for example, of putty and paint again.
What paint to choose for covering drywall
Before starting painting work, make sure that the layers of previously applied compounds have dried.The basis for preparing drywall is to level the surface using putty.
3 groups of putty compounds:
- Starters. Used for the first rough layer of drywall leveling before painting. Dries quickly. Suitable for additional reinforcement of walls, reinforcement of meshes and joining tapes.
- Finishers. This type of putty is applied to a dried starting layer no more than 3 mm thick.
- Universal. Such putties are used instead of starting and finishing putties. They both level and complete the preparation of plasterboard walls for painting the surface.
Separation of compounds by purpose:
- Cement putty. The main ingredient is cement. Because of it, this putty is resistant to temperature changes and various humidity levels. Used for exterior or when finishing drywall in rooms with high air humidity - kitchen, bathroom, shower. The main disadvantage is the difficulty in processing after drying.
- Gypsum putty. It has a rich white color, and one of the main properties of gypsum is plasticity, which makes puttying with this material easier than with cement. Gypsum putty perfectly absorbs and releases moisture, which allows you to create an ideal indoor microclimate. One of the advantages is that it is used as a starting and finishing line. However, it is not suitable for external work due to the fact that gypsum is sensitive to weather conditions and temperature changes.
- Acrylic putty. This material is easy to apply to drywall for painting, because it is plastic and easy to sand. Used as a starting and finishing layer.Putty is more expensive than gypsum and cement, but it is an environmentally friendly product that ideally levels and completes the finish of drywall, giving the surface a beautiful white color and light gloss after painting.
- Polymer putty. Suitable if you have doubts about your own abilities. The material is simple to apply, easy to level even with the thinnest layer, and not difficult to sand. Even a beginner can putty correctly. Polymer putty is vapor-permeable, the walls breathe, and have a thermal insulation effect. The main disadvantage is the high price. However, if you correctly calculate the amount per application area, you won’t have to buy extra.
It is important to apply a primer to the putty (when preparing drywall for painting). This layer improves adhesion properties. Benefits of applying primer to drywall before painting:
- Additional strengthening of previous layers.
- Reduced absorbency, which is an additional advantage at high humidity.
- Reducing the consumption of the coloring composition due to uniform application.
- Protection against the formation of mold and fungi.
- Improving adhesion properties between coatings.
Like plasters, primers for drywall for painting are sold in several types. They have various additional properties that are relied upon when choosing:
- Water-repellent primer. For rooms with high levels of moisture, such as kitchens, shower rooms and bathrooms. Surfaces treated with this composition are able to transmit steam without retaining water.
- Anti-corrosion primer. It is mainly used on metal surfaces that are susceptible to corrosion and rust.However, many advise using such a primer when processing before painting plasterboard boxes for radiators and other communications.
- Antiseptic primer. Often this type is also fireproof, so it is used in rooms where the level of fire hazard is increased. However, the main property of this primer is to prevent the formation of fungus and bacteria. It is used on already affected surfaces as a preventive measure to avoid the appearance of mold.
- Adhesive primer. Has an increased level of adhesion to the coating. If the drywall being prepared has a lot of roughness and other damage, painting will work perfectly with this product.
- Deep penetrating primer. This type is suitable for those who do not want to understand the difference between the starting and finishing layers and plan to wisely save on materials. This product penetrates deeply into the structure of the previous layers of drywall treatment, impregnating them, increasing the strength of the coating for painting.
After completing the stages of preparing drywall for painting, proceed to the final coating. However, there are nuances here, because the choice of paint is not limited to color. Before painting drywall, consider:
- Moisture resistance. When working in rooms with high humidity, choose drywall preparation products with moisture-repellent properties, so the paint should also have the same effect. Otherwise, the starting coating will stick, but the paint will appear in spots or simply fall off.
- Breathability. This factor is taken into account to avoid moisture accumulation under the coating.
- Washable surface.This is important to consider on coatings in the kitchen and similar rooms, where drops of grease and other contaminants may fall on the plasterboard product.
- Safety. An important point, especially for interior decoration. Non-toxicity is necessary for the safety of children and pets. The composition should have minimal odor. If you use a coloring composition intended for external use that has a strong chemical odor indoors, you may experience dizziness, nausea, poisoning, and increased symptoms of asthma and allergies.
- Abrasion resistance. If the drywall to be painted is located in a place where there will be frequent contact with any other objects, then take this point into account. After some time, the paint will wear off and a stain will appear, this will be especially noticeable on bright, dark surfaces.
- Consistency. If the paint is too thick or vice versa, the liquid coloring composition will lie unevenly when painting. The problem is easily solved with the help of a solvent in the case of thickness. However, before purchasing a large volume of coloring compounds, study reviews or purchase a small tester.
- Covering power. This factor determines how many layers of the coloring composition will be applied, because depending on the color and consistency, the coating will lie evenly, in a dense layer the first time, and in some cases 2-3 paintings will be required.
Drywall itself is not picky about the type and composition of the paint, which is why it is considered a universal material for painting.
2 large groups of paints for finishing:
- Organic-based. This type is created on the basis of alkyd varnish, and white spirit is used as a solvent.
- Water-borne.This type is used for finishing both internal and external walls; the solvent for it is ordinary water.
Each species has its own subspecies, which have their own nuances and characteristics.
Organic:
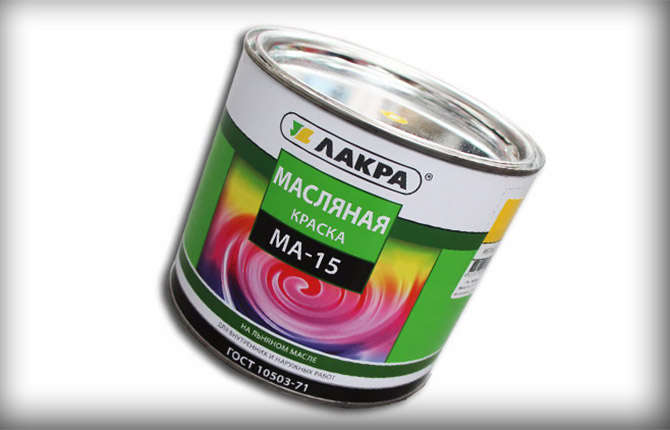
- Oily. The advantage of this type of coverage is the cost. There are more disadvantages. The first and obvious one is that it has a pungent odor. Therefore, it is not recommended to use it when working indoors. The second disadvantage is that this coating does not allow air to pass through and takes a long time to dry. Another drawback is that the service life of this coating is relatively short - about 3 years. Exposure to direct sunlight speeds up this process. Using an oil composition for external work, the service life is reduced even more, to a year and a half.
- Alkyd. As in the case of oil-based ones, this type has a strong odor due to the fact that gasoline or turpentine is used as a solvent. Therefore, it is not recommended to perform interior work with this product. Often chosen due to low cost. Resistant to direct sunlight, temperature changes, and moisture.
Waterborne:
- Water-based. The basis of this type of coating is an aqueous solution with the addition of oil particles. There are many advantages here, which is why it is the “water-based emulsion” that is chosen when finishing plasterboard products. One of the obvious advantages is the cost. It is slightly higher than that of oil or alkyd, but not critical. The absence of an unpleasant odor and quick drying are the arguments when choosing the final coating. Due to the consistency of the “water emulsion” they are laid out in a dense, even layer. However, there is one drawback - they are washed off with water, so they are not recommended in kitchens, where surfaces are frequently wiped to remove dirt, and in showers and bathrooms.
- Water-dispersed.This type is popular when used for painting drywall products. They are based on an aqueous dispersion of polymers. Of the nuances, only one is highlighted - it cannot be stored at temperatures below 0 ˚С. Plus in service life. This type of coating is resistant to moisture.
- Acrylic. This coating can be tinted well in any shade and dries quickly. Doesn't have a strong unpleasant odor and is cheap. Tolerates temperature changes and changes in humidity levels. There is another type - acrylic latex compositions. They additionally level the surface, hiding even small imperfections.
They are chosen based on composition, but in a water base they are distinguished not only by the absence of odor, the speed of drying, but also by other factors, including a long service life. When making various plasterboard products with your own hands, “water emulsion” is a favorite.
What tools and materials to prepare
At the very beginning, prepare the equipment that will be needed for painting and working with drywall:
- Brushes. Take several sizes, including thin ones, for working with corners.
- Roller. A regular one will do, but if there is a large amount of work, you will need several pieces.
- Putty. Select based on the type of drywall.
- Priming. Take acrylic.
- Spatulas. Just like brushes, you will need different sizes.
- Paint tray.
- Sandpaper. Several types with different grain sizes from 80 to 180.
- Ladder. In case the work will be performed at height.
- Additional lighting. When preparing material and working with it, sufficient light will help you see even small flaws and quickly correct them.
- Respirator. When working with paint and other similar substances.
- Masking tape. For marking, if required.
When performing the final stage of work (painting), determine with the tool:
- Roller. It is not recommended to use foam rubber ones, as they leave strong stains.
- Professional spray gun. With this method of application, the coating will be even, and the application process itself is simple and quick.
- Brush. A simple method, it takes a long time, and there is a high probability of leaving texture stains.
Applying paint with a roller is a budget-friendly method. In this case, the work itself will be easier and faster than coating with a brush. However, when choosing a roller, pay attention to some nuances. The use of foam rubber when painting is not recommended.
Any construction mass market has rollers:
- Polyamide. These rollers come with different lengths of artificial pile, from 8 to 20 mm, for a certain type of paint and coating texture. They allow you to apply a thin and even layer without streaks.
- Natural. With sheep fur. Both water-soluble and solvent-based paints are perfectly applied, distributing them in an even layer over the surface.
- Velor. Their covering is a fabric base with plush pile. These rollers can even apply a thin layer of coating without leaving marks or streaks.
Rollers vary in pile length, which is worth paying attention to when performing the finishing stage of work:
- Short – up to 4 mm. Suitable for applying a glossy finish.
- Medium length - from 4 to 8 mm. This look works well with matte paint.
- Long – more than 8 mm. It is more convenient to create textures at the final stage of work with a roller with such a pile.
Rollers vary in width of the surface being processed:
- Mini rollers. Working surface width 50 to 100 mm.This type of roller is used for painting hard-to-reach places, embossed surfaces with many small details.
- Midi rollers. From 100 mm to 150 mm. Otherwise they are called standard, because sold in any construction mass market. They are used due to their versatility.
- Maxi rollers. In another way they are called professional. Used for painting large areas, since the size of the working surface is from 180 to 270 mm.
Technology of applying paint to drywall
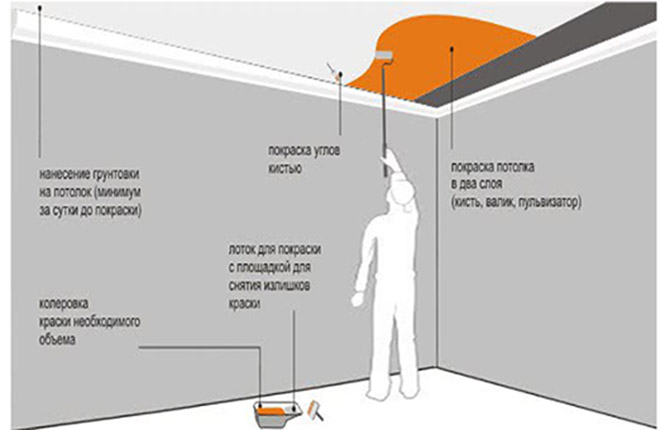
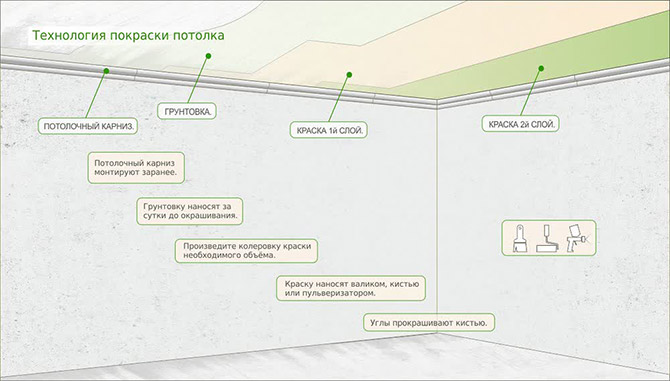
After preparing the tools, materials and surfaces, the final stage – painting – begins. To ensure that the result is the same as expected, carefully follow the instructions for applying the finishing coat of paint.
The tool for applying paint is a roller. Following the recommendations, select the material and size.
Step-by-step instructions for applying paint to a prepared drywall surface:
- Prepare the paint by mixing it thoroughly so that there are no streaks and the color is even. Pour into a special bath.
- Apply paint onto the roller without excess to avoid smudges and streaks. To do this, roll the working surface of the tool several times along a special ramp on the container.
- Apply paint using up and down movements.
- Don't try to apply more paint to the wall at one time. This will lead to leaks. They also make sure that the drops are rolled out, excluding the creation of relief.
- When painting walls, it is recommended to first apply paint to corners and other hard-to-reach places, and then to the rest of the surface.
- Ensure the uniformity of the coating and avoid streaks. Change the roller if necessary.
- When applying the second layer, wait until the first one dries, and only then begin repainting.
After finishing painting the surface, you need to protect it from external damage until it dries. This depends on the paint chosen, but on average it takes about a day. For oil you will need a little more.
Having carefully studied the nuances when working with drywall, even a beginner who is not privy to the intricacies of finishing work can make a visually complex niche or arch from it. And the painting technology is simple if you follow the recommendations and properly prepare the surface.
How do you paint drywall, what do you use in preparation? Share the link on social networks and bookmark the article.


Be sure to use mesh tape on the seams. There will still be vibrations during operation, everything will crack along with the paint.
Be sure to prime even flat drywall without applying putty. The paint will last forever.