How to properly glue non-woven wallpaper: step-by-step instructions and expert advice
Wallpaper on an elastic non-woven base has an original design, looks stylish, and also allows you to hide minor wall defects.But the cost of material and work on covering the walls is not a cheap pleasure, do you agree?
Why not save money by hanging wallpaper yourself? We will tell you how to do this and where to start in our article. Let's look at how to properly glue non-woven wallpaper, look at the intricacies of surface preparation, and show you how to cut the canvas and adjust the pattern. To prevent the canvas from swelling and falling off, we will reveal to you professional gluing tricks.
The content of the article:
Gluing technology and material calculation
Non-woven fabric is wider than paper and weighs more. It can be painted (white or colored), embossed or with a decorative coating (vinyl, textile, paper).
The technique for gluing such wallpaper comes down to eight basic rules:
- The glue must be of the required thickness and viscosity.
- Wallpaper should be glued after puttying and priming the walls.
- Apply the adhesive directly to the walls, and not to the non-woven base, unless the latter is specified by the fabric manufacturer.
- Follow the direction of the pattern, the order of which is indicated by special symbols on the wallpaper packaging.
- Adjust the pattern along the edges: either in a straight line, when the strips are glued in one direction, or reversely - when the strips are glued in the opposite direction.
- Press the wallpaper from top to bottom, smoothing it with a wallpaper spatula or wallpaper brush, and roll the joints with a roller with a rubber base.
- The finishing material should be glued without seams, at the joint.
- Maintain the same temperature in the room, avoid drafts.
The listed rules will help you carefully hang non-woven wallpaper, choose the right pattern, and prevent the appearance of airy areas.
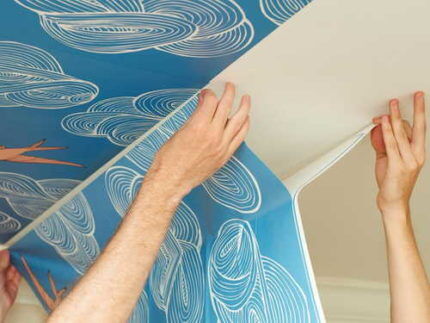
Subtleties of gluing and joining of canvases
To avoid misunderstandings during the gluing process, before starting work, read the instructions for using wallpaper and glue. It is important to choose the right adhesive base - intended for gluing non-woven wallpaper. An unsuitable composition increases the risk of low-quality gluing.
Tips for gluing and the subtleties of joining the canvases:
- Start gluing from the window openings in the direction of the line of sunlight. This way the seams will be invisible.
- Match the wallpaper patterns following the manufacturer's recommendations and the diagrams on the packaging. This way you can get the effect of a seamless pattern.
- For accurate gluing, first fix the wallpaper from the top to the center, then along the edges.
- Don't cut too many pieces at once. Adjust the canvases individually to the place where they are glued, matching the pattern.
- Correctly determine the top and bottom of the wallpaper in the roll. Leave 5-10 centimeters for leveling on top, and align the bottom part with the baseboard.
When gluing non-woven fabrics for painting, you must first wait for the surface to dry completely. And only after that you can start painting the wallpaper.
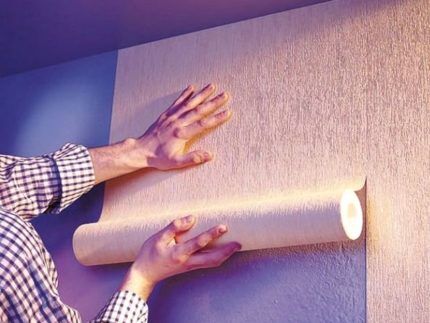
If you have never covered non-woven wallpaper, we recommend choosing a plain version. This material is easier to work with. Texture without relief minimizes errors, will hide minor defects.
How many rolls will you need?
In order to calculate the number of rolls, multiply the height by the length of each wall. Afterwards, the obtained data is added up to determine the total area. The area of door and window openings is subtracted from the resulting amount. This step can be skipped if the window is one or two and small in size. Then the area of the walls is divided by the area of wallpaper in one roll - this will be the required number of rolls.
The result obtained is subject to correction:
- Increase the number of rolls based on the actual number of canvases. You have to divide the length of one roll of wallpaper by the height of the wall to find out how many canvases come out, for example, 10 / 2.6 = 3 canvases of 2.6 m each + 2.1 m left. Therefore, the final number of rolls will have to be increased, starting from the required number of canvases.
- Increase the consumption of material for adjusting the pattern. If the wallpaper is not monochromatic, then the pattern will have to be adjusted. The height of the pattern is called repeat, it is indicated on the packaging. In the worst case scenario, the entire height of the design will have to be cut off in order to properly align the canvases.
As a rule, finishers add two more rolls on top to adjust the pattern. To simplify the gluing of canvases and reduce consumption, choose a plain material without a pattern.
Selecting glue and calculating consumption
A high-quality, durable finish directly depends on the chosen adhesive base, which can ensure good adhesion of the canvas to the walls and does not cause yellowing.
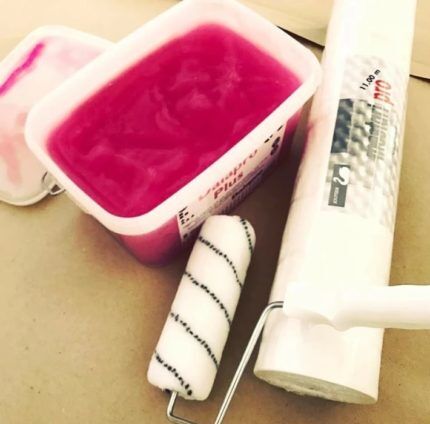
Glue for light or heavy non-woven wallpaper is diluted to a thick consistency, applied in a thin layer, leaving no marks or smudges.
Available on the shelves are:
- Moment Interlining. It creates good sliding for the wallpaper when joining, has additives against mold and fungi, and retains its properties when diluted. For material with a three-dimensional pattern, it is better not to use glue; it is also difficult to bring it to a homogeneous mass.
- German "Methylane Interlining ultra premium" and French "Quelyd Special interlining“—adhesive bases that work equally well with wallpaper with a three-dimensional pattern, without ornament, and hold light and heavy panels. These lines from the middle price category are selected for smooth, corrugated, light or heavy wallpaper.
Among other things, experts recommend “Kleo Non-woven», «FliziLex» as the optimal brands for gluing non-woven wallpaper.
The packaging, which indicates the number of rolls per box of glue, will help you calculate the number of packs. Therefore, it is necessary to divide the area of the walls by the consumption (given on the pack) of glue in m2 and round the total up.
Stages of wallpapering
To make the process of self-pasting walls with non-woven wallpaper clearer, and to please you with the result, we recommend step-by-step instructions, including selecting the necessary tools, adjusting the pattern, and pasting rules.
Step #1 - preparing tools
Before you start gluing, assemble a set of universal equipment from: a level - regular or laser; a plastic spatula of standard sizes and a narrow one made of metal.
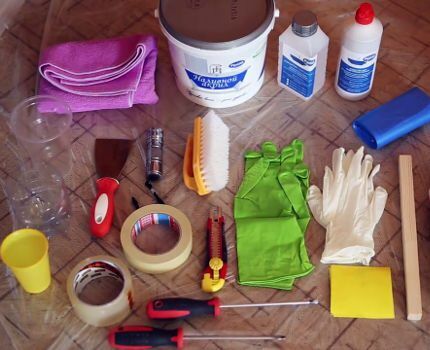
You will also need a tape measure, a container for liquid and adhesive, and also:
- a ditch, which can be replaced by a mesh that removes excess glue from the roller;
- hand towel;
- a lint roller, a cone-shaped roller for corners and joints, a rubber roller;
- knife with a sharp blade (removable);
- pencil or marker;
- foam sponges;
- non-woven wallpaper;
- glue.
This list is supplemented with plastic film, a plumb line, scissors (for trimming excess wallpaper in corners and near joints), sandpaper, screwdrivers and gloves.
From building materials, it is advisable to have putty for leveling the walls and a primer to improve adhesion between the surface and the wallpaper.
Step #2 - preparing the walls
If the walls still have the same finish, get rid of it first. Old wallpaper is soaked and removed using a soft spatula.
The brick wall is puttied in two layers to cover the cracks and smooth out defects on the surface. If the old wall decoration is tile, it is pryed off or beaten with a mallet. Afterwards, the holes are masked with putty, the boxes of switches and sockets are removed, and the existing unevenness is leveled with a solution. Craftsmen advise waiting until the putty has completely dried, and then sanding the uneven surfaces with sandpaper.
Using a building level, check the result for evenness of the applied putty layer, then the surface is primed.
If the walls have been painted, they are cleaned with sandpaper, and after removing the paint, the surface is puttied.
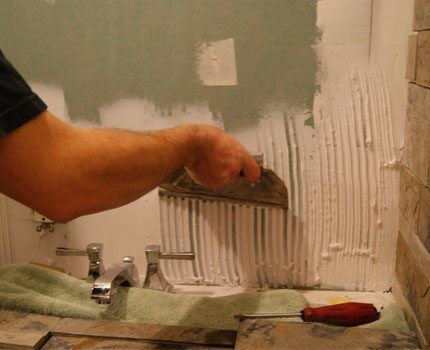
Make sure the putty surface is strong by, for example, drawing two intersecting lines with the tip of a knife. The remaining recesses that do not have chips at the intersection indicate the strength of the putty layer.
Don't forget about a few important features:
- If the wall is covered with oil paint, it needs to be cleaned. Then level with putty. Next is the primer - use a compound that penetrates deeply into the walls. This way the wallpaper will not swell or fall off, but will stick firmly to the walls.
- For wallpaper to be painted, add a little paint to the primer. This way the final color of the wall decoration becomes more uniform.
Do not forget to leave a margin of about 5-7 centimeters when preparing canvases, since in different parts of the room the height of the walls, as a rule, may differ. After preparing the walls, the wires (if any) are insulated, sockets with switches are unscrewed and removed.
Step #3 - thinning the glue
To properly dilute the glue, experienced craftsmen advise adding 200 ml more warm water (40-45°) over half an hour than according to the rules.
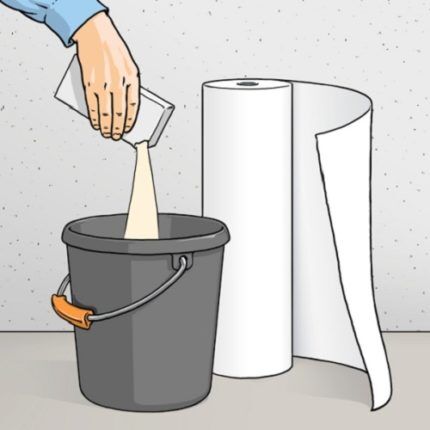
Glue must be applied to the wall and only then wallpaper should be applied. You need to start pressing the canvas from the top of the wall, gradually going down.
Step #4 - cutting the blades
Before cutting the canvases, measure the walls in height from floor to ceiling in 4-5 different areas.From the obtained indicators, choose the maximum, adding up to a few centimeters on top for safety.
Plain non-woven wallpaper without a pattern does not require adjustment. Such canvases are cut by drawing horizontal lines using a pencil or marker, in accordance with the previously obtained values. The wallpaper is cut along these lines with scissors or a knife.
Step #5 - adjusting the pattern
If you have to cut wallpaper that has patterns and designs, then they are unrolled on the floor, the pattern is adjusted, for which the excess height of the pattern (rapport) is cut off. The size of the repeat is interconnected with the height of the patterns and ornaments - the larger they are, the greater the step and the number of waste.
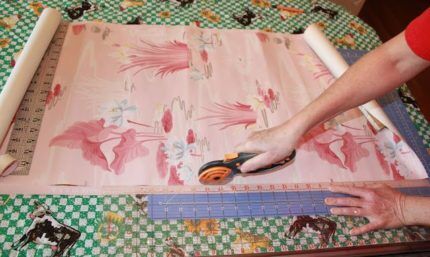
To begin work, follow three steps: customization according to the drawing, marking of elements, folding the cut strips in the required sequence:
- First, lay out two rolls of wallpaper on a clean floor. Taking into account the height of the ceiling, a length of + 5-10 centimeters is measured from the first roll. The resulting strip is combined with the second until the pattern of the first strip is continued on a fragment of the second strip.
- Next, marks are placed at the point of contact between the fragments. Using this frame, the fabric is cut using scissors. Usually the edge turns out to be uneven, and to even it out, the 10 cm allowance left in advance will come in handy.
- The upper part is marked on the strip of wallpaper with markings, then the canvas is removed for a while. To save space, the strips are placed vertically along the walls on which they will later be glued.
With the standard gluing technique, each cut strip is laid flat on top of the other so that the front side with the pattern faces the floor. Similarly in the case of non-woven wallpaper, only the top strip is not coated with glue.
Step #6 - marking the walls and applying glue
It is important to maintain an even vertical strip when gluing the first piece and maintain the width of the adhesive strip, which is 5–10 cm larger than the width of the wallpaper.
In the future, focusing on the initial markings, the remaining canvases are glued. Markings begin from the corners of the walls, using a level. Vertical lines are applied exactly across the entire wall, maintaining a distance of 1 meter. Meter rolls are standard 106 cm wide, 6 of which are for stock.
It is better to apply glue only to the wall. Sometimes the manufacturer recommends covering the wallpaper with glue as well. To apply a thick layer, use a roller, carefully covering the entire surface with it, paying special attention to the corners. In hard-to-reach areas, use a small brush.
Step #7 - installation of canvases
You need to glue and trim the wallpaper in the following order: glue the first strip. To do this, apply the adhesive composition slightly wider than the width of the wallpaper, apply the first strip, taking it by the ends from above so that it is 2 cm higher than the baguette. Align it according to the applied vertical mark. If you couldn’t do this right away, you need to lift the pasted wallpaper from below and move it in the right direction.
The canvas, which lies in the correct vertical position, is pressed tighter and smoothed with a roller, spatula, or soft cloth.This procedure is performed from the center up, then smoothly down the sides of the canvas, controlling the formation of bubbles.
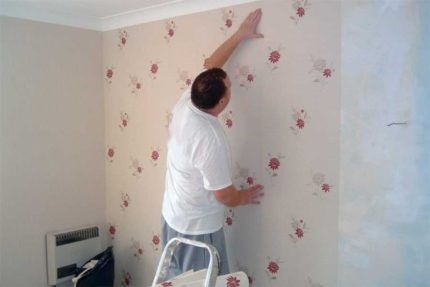
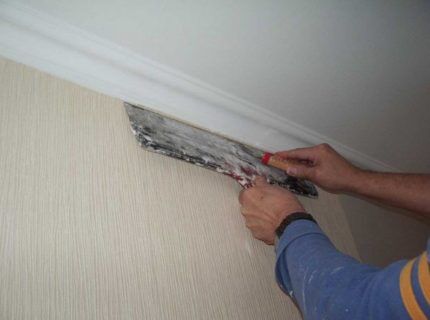
Wallpaper trimming is done immediately after gluing is completed. Trim the upper area, mark the cut line in parallel, drawing the blunt end of the spatula along the wallpaper strip under the baguette. In this case, the canvas seems to be pushed under the baguette, displacing excess glue and air.
Afterwards, along the intended line, use the sharp end of a spatula or a knife to cut off the excess so that the canvas adjoins the baguette without external defects. The strip is cut along the edges in the areas where they join the surface. At this time, the spatula is placed evenly on the wall, and excess material is cut along its line.
To avoid nicks when cutting, do not tear the knife off the material, but move it forward to the end of the spatula. Excess adhesive base is immediately wiped off with a damp cloth.
Glue the remaining strips like this: smear the next section with glue, apply the canvas to the wall, holding it along the upper edge. To match the patterns, the wallpaper is shifted until the composition matches. The canvas is laid end-to-end with the first glued strip.
There should be no areas where the wallpaper is glued overlapping. They are very noticeable, especially on wallpaper to be painted, and spoil the appearance of the finish. To ensure that the pieces fit tightly at the joints, they pass over this area with a spatula or roller up to several times.
We join the corners correctly
To ensure that the wallpaper lies evenly in the corners, it is better not to glue solid meter-long non-woven pieces.
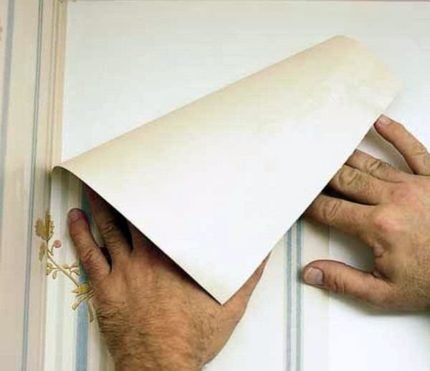
In internal and external corners, specialists paste wallpaper after measuring the distance of the segment from the last glued strip to the corner. Add 1.5–2 centimeters to the resulting value and cut off the required piece. Glue is applied to the resulting canvas and the wallpaper is glued in the corners.
The next piece of wallpaper is applied to the resulting ledge with an overlap. Non-woven wallpaper must be glued closely. If the required joint is not obtained, the fabric is straightened.
It is necessary to apply glue in large quantities - this creates good slip, making it easy to move the strips towards each other and straighten them.
The nuances of gluing around doors and switches
In the case of a plain canvas, wallpaper around doors, sockets and switches is glued to the sides, leaving the necessary space. Then they measure, cut off the strip and join it to the adjacent one. The excess is cut off from the resulting overlap, and the gaps above the door and around sockets and switches are filled.
If the wallpaper has patterns, then allowance is not made. Pasting is done by adjusting the pattern.
How to cover the radiator area?
At the place where the radiators are, the gluing process is carried out either after dismantling the batteries, or by passing a strip under the radiators about 15 centimeters.
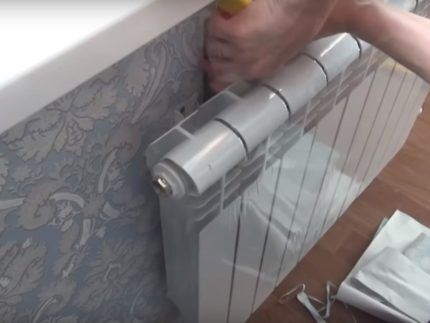
The glue is applied carefully, otherwise its excess will stain both the radiator itself and the surface of the non-woven fabric.
The subtleties of wallpapering alone
The stages of wallpapering are the same whether you work alone, or with two or three people.The difference is that among the necessary tools you need to stock up on a stepladder.
And keep in mind that it is possible for one person to glue meter-long canvases if they are on a non-woven backing that fits well at the seams and in the corners. It is also easy to level without assistance. The span of your arms allows you to glue even meter-long non-woven wallpaper alone.
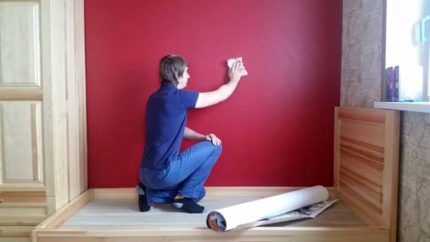
Do you want to change something in the interior, but are not ready to completely re-paint the rooms? We recommend taking a closer look at photo wallpaper - this solution will refresh the room and take minimal time to repair.
Recommendations from experts for beginners
To hang wallpaper correctly and beautifully, you cannot do without certain knowledge, which you can glean from advice from professional finishers:
- Give preference to a stepladder rather than a scaffold - this is a more stable option.
- When gluing with non-woven fabric, there is no need to coat the strips with glue in advance. It is applied to the walls.
- A 1-2 centimeter allowance on the slopes will allow you to get a neat edge. Wait for the wallpaper to dry, then trim off any excess.
- Do not join the panels at the corners; make transitions from wall to wall with a large allowance, the size of which is equal to the length of the deviation of the wall in a vertical position.
- Remove excess fabric with a sharp knife blade.
Also, do not neglect the use of a building level - it makes it easier to glue the canvases.
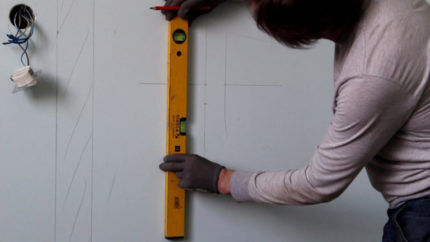
During the pasting process, it is important to keep your hands clean, promptly wipe them with a napkin, removing glue and dirt.
To avoid injury, experts advise laying plastic film on the floor after each sheet. But tiles and parquet are covered with cardboard or paper.
Conclusions and useful videos on the topic
We properly glue non-woven wallpaper in the corners:
Gluing non-woven wallpaper with your own hands:
You can also hang meter-long wallpaper yourself. It is important to choose a non-woven base, calculate the number of canvases, and stock up on the necessary equipment. And remember the advice of professional finishers, one of which is: the eyes are afraid, but the hands do the work.
After all, gluing non-woven wallpaper is not as difficult as it might seem.
If you have any questions, ask them in the comments below the article. Here you can also share your own experience of successfully covering walls with non-woven wallpaper and talk about the difficulties you encountered in the process, or add original photos of the finished work.


