DIY roller blinds: step-by-step instructions + nuances of choosing fabric and rolling options
In a small room it can be difficult to find the optimal solution when decorating a window opening.Agree that bulky drapes or floor-length curtains will visually overload such a room and interfere with the arrangement of furniture. In a kitchen where the window is located close to the gas stove, this is simply dangerous. The problem will be solved if you use roller blinds, which you can make yourself.
And we will tell you in detail how to do this in our article. Let's look at the design features, talk about choosing the material that is suitable for sewing roller blinds with your own hands, and step-by-step instructions with visual photos will help with this.
The content of the article:
Instructions on making roller blinds
Roller curtains are suitable for decorating bay windows. They will correspond to loft, high-tech, minimalism styles, and with appropriate design and suitable choice of material, Mediterranean and country styles.
The advantage of roller blinds is that they are economical, since the fabric is small in size, especially if you make them yourself from improvised means. They do not form folds and therefore do not accumulate dust, which is important for people with allergies.
Step #1 - choosing fabric for curtains
To make roller blinds, you first need to select the appropriate material. So, they are most often sewn from a single-color fabric.
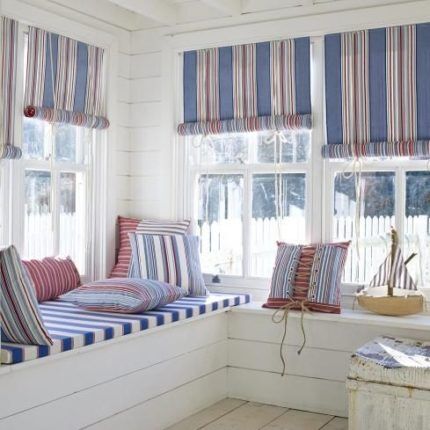
Rough fabric can create problems with wrapping the fabric onto the roller.
Also, the material should not easily wrinkle or lose its shape; it is better to use natural or mixed types. For curtains, they are produced with a special impregnation that prevents contamination and the absorption of odors. The most commonly used synthetic fabric for roller blinds is polyester.
There are also ready-made kits for roll rolling on sale.
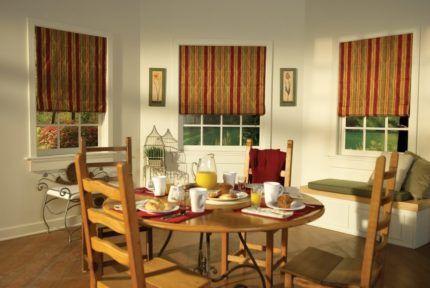
To hide from prying eyes, a light material of medium density is suitable, for example, for the kitchen, and translucent canvases or with a perforated pattern will look good in the loggia.
For the bedroom, those that do not let in light are suitable. The standard width of a regular piece of fabric is quite enough for one window opening. The length depends on where the rod will be attached: if on the wall, then it can be placed higher, and the curtain can then go down to the windowsill or to the radiator.
Step #2 - preparing tools and materials
For curtains you will need to stock up on material. How to take measurements will be described below.
In addition to a piece of fabric, for curtains you will need:
- roller rod;
- 2 or 4 mounting brackets;
- 2 plugs;
- weighting agent;
- cord;
- retainer;
- 2 rings.
The bar on which the canvas will be wound can be located either below or above. In the upper position, it is attached using brackets to the wall, in the window opening or directly to the frame.
A weighting strip is placed along the lower edge of the fabric, which gives rigidity to the fabric by pulling it horizontally and pulling it down vertically.
The roller simultaneously plays the role of a weighting agent if placed below.
To make roller blinds, you can purchase a ready-made fastening mechanism consisting of:
- roller for twisting the fabric;
- brackets for fastening;
- slats for weighting and giving shape;
- spring mechanism;
- lifting lever;
- cord.
There are also sets with special cassette boxes where the shaft is hidden. Often there are kits with side guides.
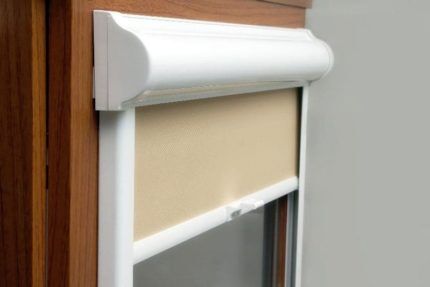
If you have such a kit, you only need to sew the curtain fabric and assemble the entire structure according to the instructions included with the kit.
Step #3 - making the fastening mechanism
You can make a simple design yourself. Let's consider the option when the shaft is placed on top. To do this, you will need a round rod of the required size, with a diameter of 2 - 3 cm. It can be metal (preferably duralumin, aluminum) or wood. The most affordable and budget option is a plastic water pipe.
By the way, you can make it from plastic pipes screen, chair, hanger and many others useful homemade products.
The size of the roller should be longer than the curtain fabric, by 4 - 6 cm, depending on where the curtain is placed.In each case, the size will depend on the size of the canvas + two holder brackets on each side + about 2 cm for winding the cord + the size of the plugs is added.
When a bar is placed on top of a window, its dimensions can vary, which cannot be said about the window opening itself, much less the sash. In these cases, they are limited by the parameters of the window or frame.
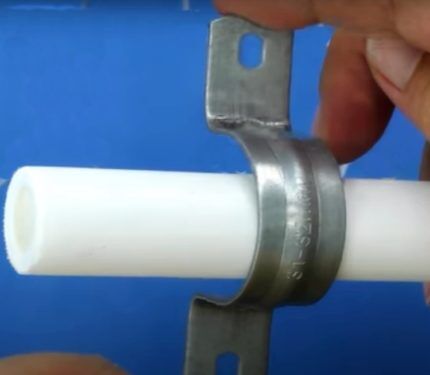
If the brackets are small, then you can take two on each side, connecting them with bolts. One bracket will be attached to the wall or window frame with a self-tapping screw. Together, the two staples will form a circle that the barbell fits into. The brackets must be arched and larger than the diameter of the rod so that it rotates easily.
To prevent the cord from flying off the roller when winding, plugs must be attached to the ends. For a more glamorous look, decorative details can be purchased at a specialty store that has a selection of curtain rod ends. There you can also buy two rings for the cord or large eyelets, the cord itself for adjusting the curtain, a hook for fixing the cord, as well as the bar itself.
When using a polypropylene pipe, we take plugs, as well as a retainer, used for such pipes. It is better if it is a latch, but an open one will also work.
Plastic plugs as bushings are suitable for metal pipes and wooden rods, you just need to choose the appropriate size. You have to choose a suitable color or paint this part to match.
It is also necessary to prepare a weighting material.Any wooden strip 2-3 cm wide will do. If the structure is attached to the sash, then take a regular wooden glazing bead. The length of the weighting material should be 1.5 - 2 cm less than the width of the finished curtain fabric.
Step #4 - taking measurements and assembling the curtains
First of all, you need to decide how the canvas will be placed.
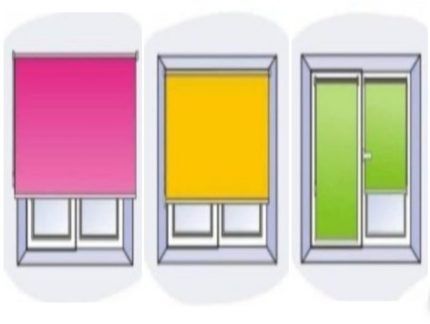
The first case shown in the figure above (mounting on the wall above the window) is convenient in that the canvas is lowered at a certain distance from the sashes, so they can be opened for ventilation when the window is partially draped. The last option (mounting it on the window sashes) also allows you to open the window, but in this case the number of roller blinds must correspond to the sashes.
In accordance with the chosen option, measure the width. In the first case, it will be larger than the window opening; for better light resistance, allowances of 10 cm can be made on both sides. In the second, the length of the rod along with the plugs should be slightly less than the window opening. In the third option, the rollers should correspond to the width of the closed window sash, but so that they do not interfere with each other.
You also need to take into account that in the last two options, at cold temperatures, from condensation collecting on the glass, the curtains can get wet and there is a possibility of fungus, so the best option is the first one, when the roller blind is attached to the wall.
The width of the material should correspond to the width of the window opening or glass, but it is necessary to add allowances for hems of 2 cm on each side. The length of the material cut should be equal to the length of the window opening or glass.To it you need to add 2 cm for finishing the seam, at the bottom one and a half times the width of the weighting material, and at the top edge a length slightly larger than the diameter of the rod. That is, the total length of the canvas should be equal to the vertical size of the window + 15-20 cm.
If the rolls will be placed on the shutters, and the fabric on them is colored, then try to adjust the pattern so that it is symmetrical on both roller blinds. You can also make a double curtain sheet if the fabric is not very thick and stiff.
When making a double fabric, two pieces of fabric are folded right sides to each other and stitched along the perimeter. You need to leave a small area, about 10 cm, unstitched, through this hole, the resulting “bag” is turned to the right side. The seams need to be ironed and the remaining area stitched.
If the curtain fabric is made single, then it is necessary to stitch the hems on the seams on the sides and iron them. Next, both in the case of double and single fabric, it is necessary to bend the bottom to the width of the weighting material, so that it subsequently with effort, but still fits into the drawstring made for it (the “groove” formed as a result of stitching), and stitch .
The same drawstring must be made in the upper part of the fabric for the rod. It should also pass with difficulty, but still into the prepared hole.
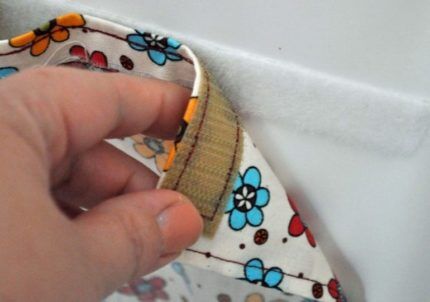
If the curtain is made of silk or other sliding fabric, then there may be problems when winding. To solve this problem, you can not make a drawstring for the barbell, but use adhesive double-sided tape and a textile fastener - Velcro tape.Double-sided tape is glued to the rod, the rigid part of the textile fastener is glued to it, their length should be slightly less than the width of the curtain.
The soft part of the Velcro is sewn onto the curtain from the wrong side, it is attached to the shaft with Velcro. This method is convenient because the fabric can be easily removed from the bar for washing without disassembling the structure.
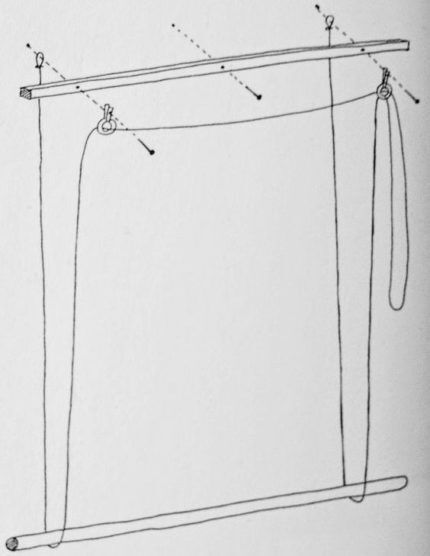
At both ends of the rod, you need to pre-drill through holes to secure the cord. After the rod is inserted into the “groove,” we wind the curtain fabric tightly onto the shaft, and insert a weighting strip into the drawstring at the bottom.
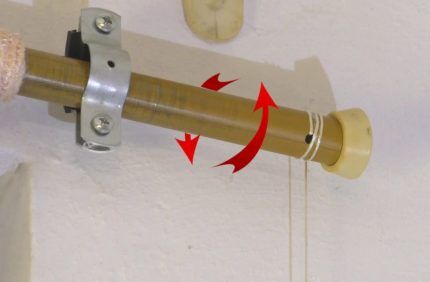
The length of the cord on each side must be at least one and a half lengths of the curtain. We tie rings or eyelets at the ends, then the knot will not be visible. If you don’t have rings on hand, you can make two tassels from threads and attach them to the ends of the cord.
The lace on the other side is left free. We insert the rod into the brackets fixed to the wall or window opening, and attach plugs to the ends. They will not allow the cord to fly off while winding on the shaft.
Step #5 - checking the functionality of the roller blinds
When the roller blind is secured, all that remains is to pull the short cord wound around the rod. The curtain fabric will begin to straighten, and the opposite cord will twist onto the shaft. In order to open the curtain, you will need to pull it.
In principle, the cord should hold when the curtain is open. If the canvas unwinds under its own weight, then you will need to secure the cord lock in a convenient place.This will hold the roller shade open.
Features of assembling drapery with decor
Roller blinds can be decorated with a figured cut along the bottom of the canvas.
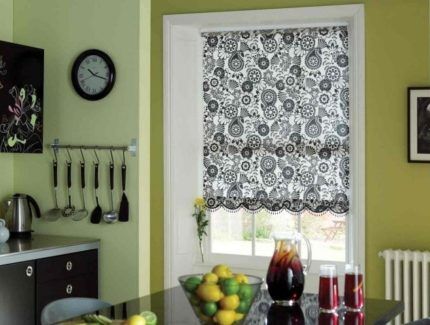
The curtains are cut as in the first case, but for decoration, another 25 cm is added to the length. To cut out the figured edge, you need to prepare a template from paper. If the fabric is double, then the fabric is folded with the right sides facing each other and chipped.
The template is applied to the bottom edge of the curtain and outlined with chalk. The curtains are sewn down according to the applied pattern, the side seams are sewn up. The curtain is turned to the right side, the seams are ironed. The top edge is folded inward, secured with an iron and a stitch is laid.
Next you need to stitch the drawstring on the side that will face the glass. To do this, you need to prepare in advance a piece of material equal to the width of the curtain. The width of the segment should be such that the weighting material can fit in, plus the hem for the seams.
First you need to process the side cuts, and then place it face down and stitch. Then you need to apply a weighting agent, wrap the drawstring around it, mark where the second seam will go, and remove the weighting agent. Pin the second edge of the drawstring to the curtain fabric and stitch it.
Sewing a bottom-rolling curtain
You can make a roller blind of a different design with your own hands, with a simpler mechanism of action. In this case, the roll bar is located at the bottom, serving as a weighting agent. The curtain fabric is cut and sewn in exactly the same way as in the first case.
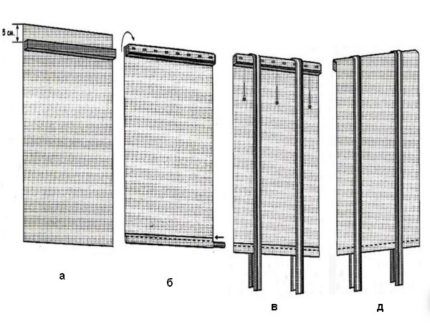
You can also secure the curtain with a stapler, furniture nails, or, as an option, with adhesive tape and Velcro, which makes it easy to remove the curtain for washing.
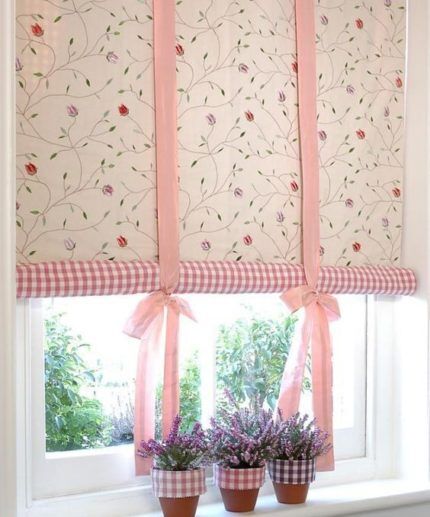
The curtain is wound onto the roller by hand and secured with braid or tape. You will need two ribbons equal to two and a half curtain sizes. Each tape should be located at a certain distance from the edge of the canvas. It needs to be thrown over the curtain and secured at the top.
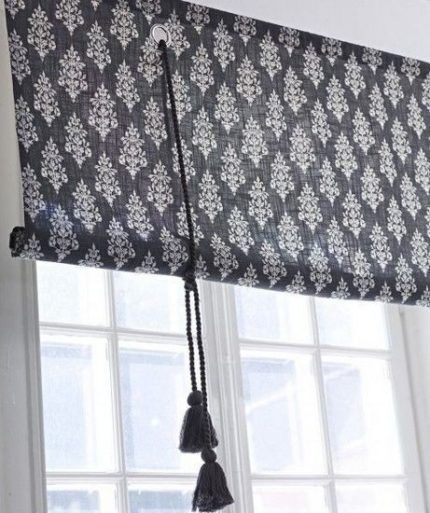
If necessary, the curtain is rolled onto a roller and secured with tapes.
In addition to attaching the roller blinds to the rail, in the case where the roller is made at the bottom, they can be hung on a cornice with a round cross-section using sewn loops, or another drawstring can be made at the top to fit the size of the cornice.
Conclusions and useful video on the topic
To make the whole process clearer, we suggest watching videos on this topic.
This video demonstrates how to sew curtains to replace the old ones, which are placed on a finished mechanism:
This video describes in great detail not only the sewing process, but also the assembly of the mechanism for winding curtains onto a rod:
According to the above recommendations, you can easily make a roller blind yourself.With its help, you can protect the window quite tightly, you can combine it with other types of curtains, and in small rooms you can use only roller blinds.
They are very easy to sew and hang yourself, and they are also easy to change, since little fabric is required to sew curtains. Features of such drapery for a window: you can partially close the double-glazed window, and with translucent or perforated fabric the room will be quite light. The process of making roller blinds with your own hands is simple and does not involve any failures.
Do you still have questions about making homemade roller blinds? Or want to share your personal sewing experience? Tell us about your roller blinds, sewn at home - the feedback block is located below. You can also add original photos of the curtain making process and the result of the finished work.


