Crimping twisted pair 8 and 4 cores: basic diagrams + step-by-step instructions for crimping
Computer networks are a traditional reality of modern digital technologies.Such structural elements are used everywhere and on a large scale. Meanwhile, network designs involve the massive use of a special cable, through which individual points (nodes) are connected to each other.
Such a cable is technologically seen as a standard version of products of this type, and a unique feature of the product is a twisted pair - two conductors. These conductors are twisted together along their entire length, being insulated. In this case, a certain twisting step is observed.
We will talk about how twisted pair cables are crimped to establish reliable contact. The article we presented describes the connection for a four-core (2-pair) and eight-core (4-pair) cable. Taking into account our advice, you will easily carry out the entire scope of work yourself.
The content of the article:
Features of crimping conductor from 8 and 4 cores
Before considering the technology for crimping copper conductors that make up the internal contents of a network cable, it is logical to familiarize yourself with the options for connecting terminals.
Network cable lug crimping diagrams
The tip is a plastic plug of the standard version of the 8P8C series connector.Such a connector (plug + socket) is often classified by computer network “experts” as an RJ45 connector.
However, such a classification is incorrect. But this is for general information.
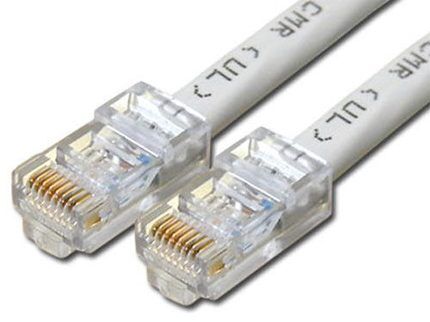
As can be seen from the series designation (8P8C), the plastic plug and socket are also 8-pin. These eight pins can be connected in different schematic patterns, depending on the type of cable connection.
Actually, there are two standards for wiring plug conductors T568A and T568B and two options for crimping them:
- Straight.
- Cross.
For comfort twisted pair cable pinouts and subsequent crimping, each core is marked with a specific color. Moreover, the veins of one pair are similar in color. For example, the classic color of the first pair for the T568A standard for direct crimping of the first twisted pair: 1 - green-white; 2 - green.
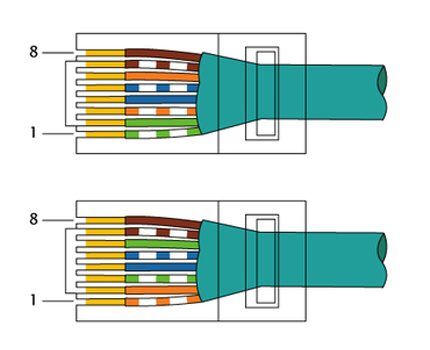
Direct and cross configuration
The difference between straight and cross crimping schemes for copper conductors should be obvious. The direct configuration provides a circuit solution when the core numbers (colors) match at two opposite ends of the network cable.
The cross configuration, accordingly, provides a circuit solution when a slightly modified pattern of matching conductors by numbers (colors) relative to each other is marked at the opposite ends of the network cable. In particular, conductors 1, 2, 3 and 6 are swapped.
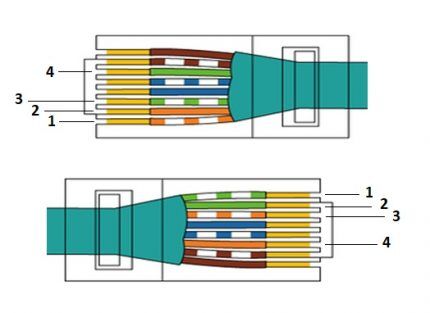
Both crimping schemes provide for the arrangement of conductors on opposite end plugs, taking into account the correspondence of numbering, when the first wire is located opposite the eighth and vice versa - the eighth wire is located opposite the first.
In addition to these two schemes, there is another one, called “console”. In this case, the conductors along the end plugs are arranged in reverse order.
That is, the first conductor of one plug corresponds to the first conductor of the other plug, and, accordingly, the eighth wire at one end corresponds to the eighth wire at the opposite end.
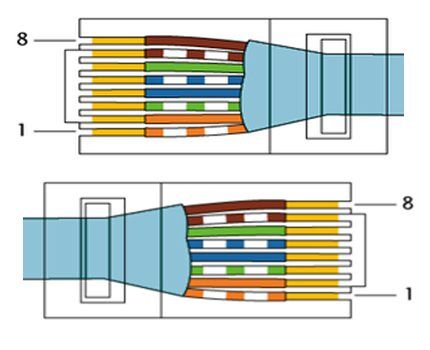
The purpose of a particular scheme
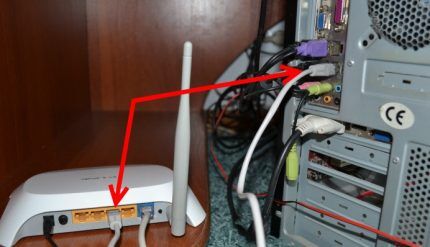
Specific application of the considered twisted pair crimping circuits determined by the connection options for computer equipment. As a rule, a direct configuration is used to connect a network card and a switch (hub).
A crossover configuration is usually used when there is a need to connect two network cards of personal computers.The same scheme was used for communications of outdated models of communicators (hubs).
It is worth noting an important detail: at the present stage of development of digital technology, the cross configuration has practically lost its significance. This is due to the development and implementation of technology for automatically detecting signal circuits of network terminals.
Step-by-step instructions for crimping a network cable
Considering that cable connections are used quite often in a variety of conditions, including domestic ones, the question of how to crimp a cable onto 8 cores is quite relevant. Moreover, if not specialists are taken into account, but ordinary users - owners of personal computers.
Let's look at this simple process to make things easier for potential home network circuit builders.
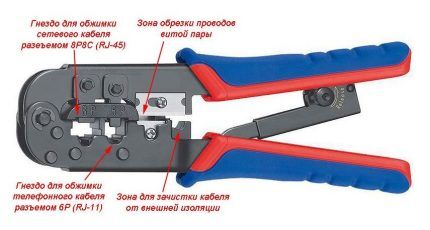
For crimping work twisted pair cable you will need a special tool:
- crimper;
- stripper;
- ordinary knife.
The first two tools with exotic names are a special press, reminiscent in design of ordinary electrician's pliers and a cutter for removing cable insulation.
In essence, a cutter is an ordinary knife, with the only difference being that it is additionally equipped with recesses for removing the insulating coating.
Step #1 - cable preparation
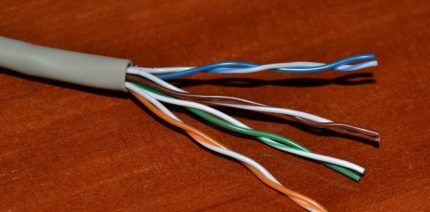
Here you will need to select the desired option based on the number of cores and the required length. For home use, it is often necessary to crimp a 4-core copper twisted pair, that is, you need a piece of cable with four wires.
In principle, the use of an eight-core cable design cannot be ruled out. In this case, unused pairs are simply not used. Another issue is savings, because the price of four-pair products is higher than two-pair ones.
Step #2 - trimming the insulation
Having prepared a piece of the required length, you must carefully remove the insulation on the short end sections of the network cable. It is enough to retreat 40-50 mm from the edge of the end cut, then cut the cable sheath with a light circular pass.
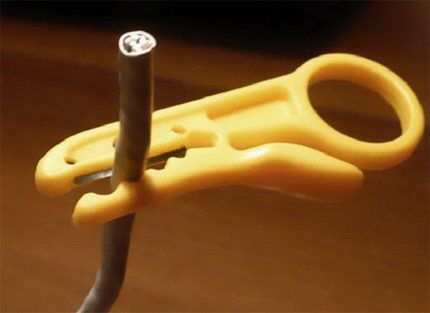
It is recommended to perform this step carefully so as not to damage the insulation of the internal conductors. Usually the shell is not cut to its full depth, but only partially. Then, with a smooth movement of the hands, the cable is bent in the area of the cut, due to which the sheath is torn in a circle.
It is quite convenient and high-quality to remove the cable sheath using a stripper. However, first you will have to spend some time mastering this tool. Even professionals are rarely able to perform high-quality removal with a stripper on the first pass.
Step #3 - preparing the cores for loading the fork
Opened, twisted-in-pair conductors in the area freed from the insulating cable sheath should be unbraided (untwisted) and smoothed. Copper conductors in thin insulation are quite soft, so performing such actions is not difficult.
Then all the wires should be aligned relative to each other and cut exactly perpendicularly, 2-3 mm away from the end. This operation can be conveniently performed with ordinary paper scissors. The result should be an even end row of four (or eight) insulated copper cores.
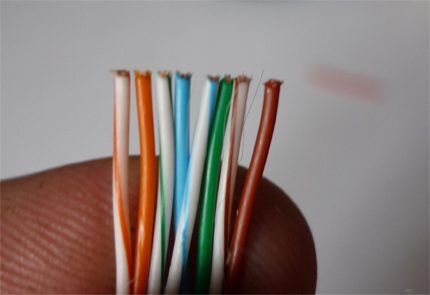
Next, a new plastic plug with eight pins (8P) will be used, on which crimping will be performed - contact fastening of the copper conductors. It is worth considering that there are no 4-pin plugs for computer networks. Therefore, in any case, an 8-pin plug is used.
Step #4 - crimping the pads
The back of the plug (8P) is technically the entry gate for loading the copper cores. A kind of gateway contains eight rectangular cells into which conductors corresponding in color are loaded.
Loading the copper cores of the network cable into the “gateway” of the contact plug is carried out without removing the insulation. The wires are simply inserted into the channels until they stop.
Then a standard 8P8C connector press is used. The press block is placed on a plastic fork, after which the tool handles are compressed until a characteristic click occurs.
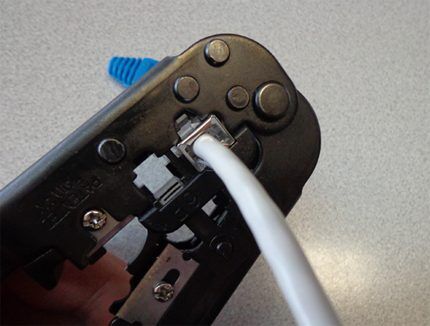
Step #5 - testing the quality of the press
After crimping, the press is removed and the connection is checked for strength by attempting to physically pull the conductors out of the plug. If everything is done exactly according to the technology, the crimp strength will not allow the cores to be removed from the pressed slots.
At this point, the crimping procedure is considered complete. A similar process is carried out at the opposite end of the cable.
The completion of crimping the two ends of the cable is usually accompanied by a subsequent electrical test. For this purpose, a special tester is used, which includes a transmitter and receiver of the test signal. The treated cable is included in the device and is tested for integrity of connections using control LEDs.
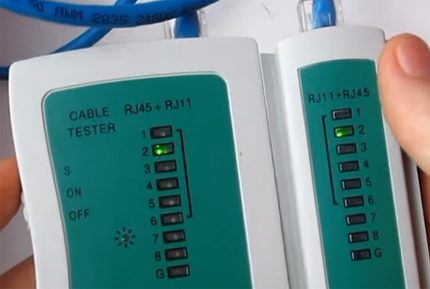
Application of non-standard pressing methods
Considering that purchasing a special tool (the same crimper) requires money, some craftsmen practice a non-standard method of crimping wires. Use a regular electrician's screwdriver with a flat blade of suitable width and thickness.
Using such a screwdriver, the contact rods are pressed, sequentially pressing one at a time into the body of the plug.
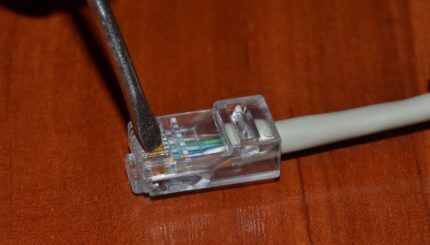
If it is necessary to perform twisted pair extension, the work is carried out in the order described in detail in the next article. We recommend that you read the useful information material.
Conclusions and useful video on the topic
The video below demonstrates a household version of working with cable crimping, the use of a special tool and a step-by-step process.
This video, although not entirely technically correct, will help you understand the essence of the process more fully.
The procedure for crimping the copper cores of a network cable can be studied theoretically without much difficulty. Meanwhile, even with theoretical knowledge, practical skill is required.
In fact, this skill is developed quite quickly even when you have to deal with work for the first time. True, a novice master cannot do without ruining a couple of plastic forks - he will have to practice first. This is the law of practice.
Please leave comments, post photos and ask questions in the block below. Tell us about how you crimped twisted pair cables with your own hands. You may know techniques and methods that will be useful to site visitors.


