Time relay: operating principle, connection diagram and configuration recommendations
A device that is triggered upon expiration of a designated time interval is called a time relay - the device is widely used in electrical engineering, electrical engineering, and electronics. Thanks to its use in circuit solutions, it is possible to implement more flexible control functions for various equipment and devices.
Depending on the design and operating principle of the device, electrical circuits of varying complexity can be organized.
We propose to understand what types of time relays exist, what are their specific features of operation and application. The theoretical material is supplemented with practical recommendations for connecting and setting up a temporary control device.
The content of the article:
Operating principle of a time relay
Electronic devices are represented by a variety of designs, so the principle of the time relay design should be considered taking into account each design variation separately.
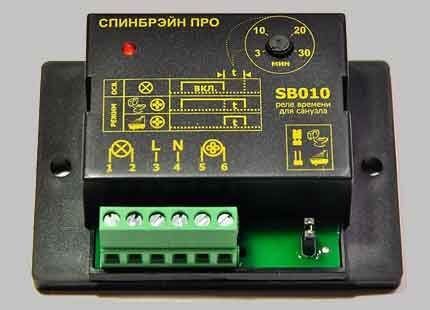
From the point of view of the actions performed, electromagnetic, pneumatic, electronic structures and clockwork devices are used in practice.
Option #1: electromagnetic devices
Devices that support the electromagnetic principle of operation are generally designed to operate exclusively in DC-powered circuits.
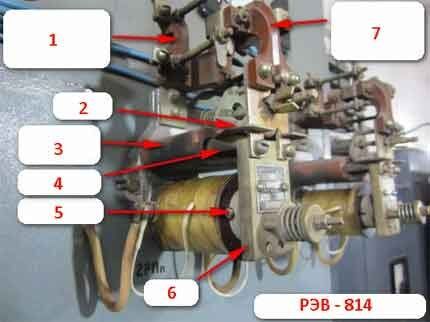
The time response range is usually 0.07 - 0.11 seconds when turned on and 0.5 - 1.4 seconds when turned off. The design of such time relays contains two working windings, one of which is a short-circuited circuit in the form of a copper ring.
When electric current passes through the main winding, an increase in magnetic flux is observed. This flux forms the current of the short-circuited winding, due to which the growth of the magnetic flux of the main winding is limited.
As a result, a time characteristic of the armature movement of the actuator is formed or, in other words, a time delay for switching on is created.
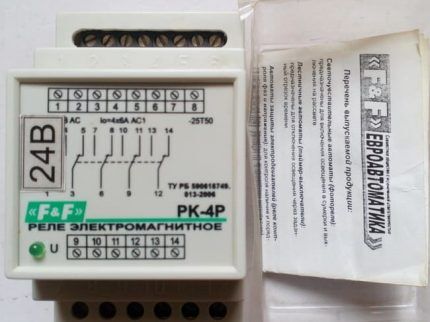
If the current supply to the circuit of the main winding is stopped, due to the effect of inductance, the magnetic field of the short-circuited winding remains active for some time. Accordingly, during this time the relay does not turn off.
Option #2: pneumatic devices
Designs based on pneumatic systems are a kind of exclusive devices. Such devices are equipped with a special deceleration mechanism - a pneumatic damper mechanism.
The holding time of pneumatic relays can be adjusted by decreasing or increasing the flow area of the tube through which air is supplied. For these purposes, pneumatic relay designs are equipped with an adjusting screw.
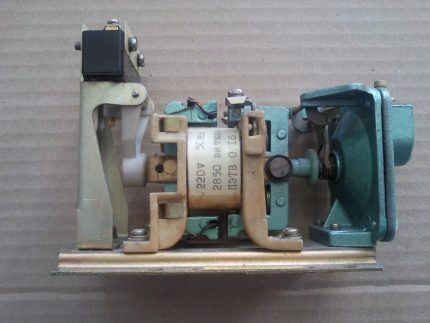
The setting range for the time delay of pneumatic relays is on average 1 – 60 seconds. However, there are specimens that cover this range almost twice. True, in practice, small errors (about 10%) are noted in terms of the accuracy of operation according to the set values.
Option #3: clock modifications
The so-called clock time relays are widely used in electrical engineering. This type of device is often used in designs circuit breakers, designed to protect circuits with voltages of 500 - 10,000 volts. The shutter speed range is 0.1 – 20 sec.
The operating principle of watch models is based on the operation of a spring charged by a mechanical drive (anchor) of an electromagnet. Switching of the contact groups of the time clock relay is carried out based on the fact of the elapsed time, the value of which was previously set on the device scale.
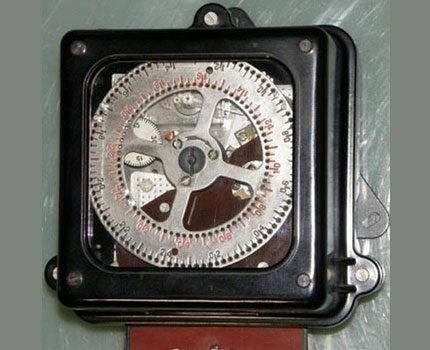
The speed of the device mechanism is directly related to the strength of the current flowing in the electromagnet winding. This factor allows you to configure the device to perform protection functions.The peculiarity of such protection is expressed by complete independence from the influence of ambient temperature.
Option #4: electronic relays
Over the past few years, almost everywhere where time relays can be used, outdated electromechanical models have been replaced by electronic versions.
This type of device has a number of advantages:
- small body dimensions;
- high operating accuracy;
- convenient setting mechanism;
- visual display of information.
Electronic versions operate, as a rule, on the basis of digital pulse counters. Many modern devices are built on high-performance microprocessors. Digital relays are usually designed for switching low-inductive or non-inductive loads.
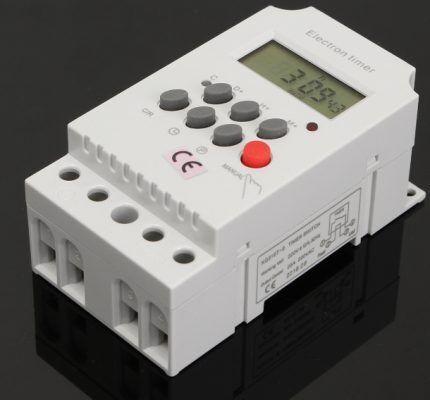
To configure a digital time relay, it is enough to set the required time parameters using the function keys located directly on the front panel of the case.
Settings are usually available over a wide time range, allowing you to cover not only seconds, minutes, hours, but also days of the week. For example, we can consider a model of a weekly electronic relay - timer.
An electronic timer with automatic on/off functions can be successfully used in control circuits for different types of devices. The so-called “weekly” time relay ensures that switching functions are performed in accordance with a set period of time within a weekly cycle. Such devices are used in systems "smart House".
For example, thanks to the device, the following opportunities open up:
- switch lighting systems at a given time;
- start or stop process equipment;
- activate/deactivate security systems.
The device is small in size and has several functional control keys. Using the system keyboard, the user can easily configure (program) it.
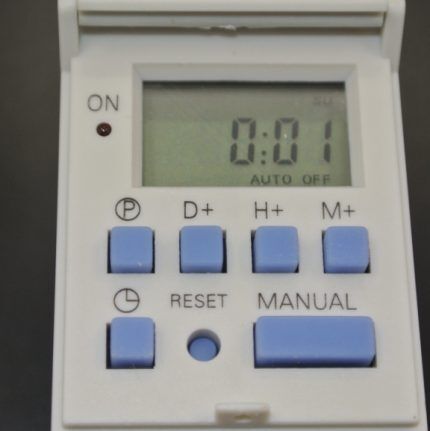
Programming mode is activated by pressing and holding the button indicated by the “P” symbol. The “Reset” key helps you perform a system reset. Changing the relay time settings is carried out using the keys for setting minutes, hours, days of the week when the programming mode is active.
The standard connection diagram for a time relay provides for setting one of two action control modes - manual or automatic. Convenience of setting up a digital relay is provided by an information liquid crystal display.
Configuring electronic-mechanical analog relays
Industrial automation systems, as well as various household modules, are often equipped with electromechanical devices, the design of which allows for adjustment using potentiometers.
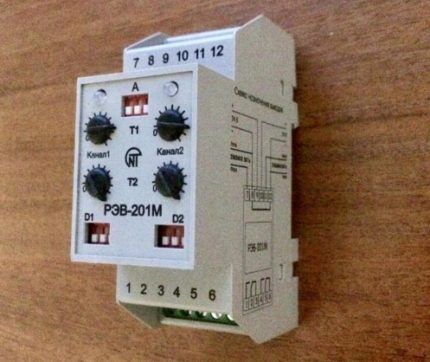
On the front panel of the housing of such devices there is a potentiometer rod (or several rods) designed for rotation with a screwdriver blade.A marked scale of installation values is applied around the circumference of the rod(s).
The slot on the rod for the screwdriver blade is a kind of pointer that changes its position when the rod rotates. By placing this pointer opposite certain values of the marked scale, the desired parameter can be adjusted.
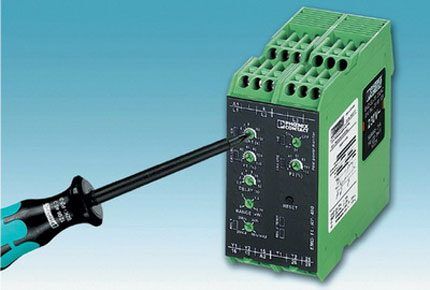
Devices of this type (for example, NTE8) are widely used in control circuits for ventilation systems, heating modules, and artificial lighting devices.
Adjusting instruments with a digital scale
The use of devices with mechanical adjustment functions can be demonstrated using the example of a household brand timer REV Ritter, designed to be plugged into a home power outlet.
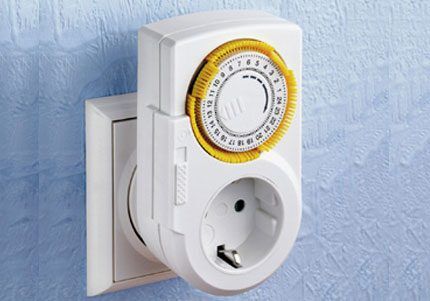
With help sockets with timer You can control almost any household appliance within a given time range. To use this daily timer, just plug the device into a power outlet and set it up.
The setup is accompanied by the following actions:
- Raise all segments located around the circumference of the tuning dial.
- Omit only those segments that correspond to the setup time.
- Turn the dial to set the dial pointer to the current time.
For example, if the segments between the scale numbers 18 and 20 were omitted, after the relay starts timing, the load will be turned on at 18 o'clock and off at 20 o'clock.
In general, the design of the REV Ritter mechanical relay allows up to 48 activations in a full 24 hours.
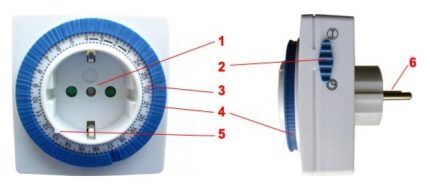
At the same time, the device supports the function of out-of-program load switching. For this purpose there is a separate button located on the side of the case. If the user activates this button, the load is connected to the network directly, regardless of the state of the relay contacts.
Connecting a time relay in the control circuit
The device must be connected taking into account the compliance of the installation location with the conditions stated in the technical data sheet of the device. As a rule, installation involves vertical installation of the device with a deviation from the vertical tolerance of no more than 10º.
The temperature limits of the room where the time relay is supposed to be installed and operated usually do not exceed the range -20°C + 50°C.
The level of air humidity in the area where the device is installed should not exceed 80%. The electrical circuit where the timer is installed should be disconnected from the mains power during installation.
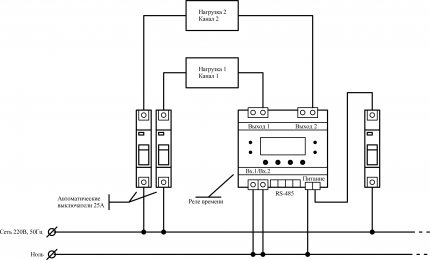
A device of any design traditionally has a technical passport, which shows the connection diagram. Many electronic-mechanical and digital timers are complemented by a diagram printed directly on the case and showing how and in what sequence to connect the time relay.
The classic connection option looks like this:
- Connecting the voltage line to the power terminals of the device.
- The phase line is connected through a circuit breaker to the input load contact of the relay.
- The load output contact of the relay is connected directly to the load phase line.
In fact, the connection diagram for the majority of devices is built on an identical principle: connecting power to the device itself and turning on the load through a group of switched contacts.
Depending on the type of relay (single-phase, three-phase), as well as on the design features, there may be several of these contact groups.
A simple version of a time relay can be made with your own hands. Schemes of various homemade products are described in this article.
Conclusions and useful video on the topic
The video discusses the possibility of using a modular device, where there are two independent time-switching devices. The scheme provides for turning on two household appliances, setting their operation in time intervals and other functions.
Of course, all existing modifications of time relays cannot be covered in one modest review. To review the entire range of devices, you would need to write an entire book. Actually, reference books on different types of timers are available, and if you wish, you can always find the necessary information.
Do you have anything to add, or do you have any questions about the operation, selection, connection and configuration of a time relay? You can leave comments on the publication and participate in discussions. The contact form is located in the lower block.


