Do-it-yourself wind generator from a car generator: wind turbine assembly technology and error analysis
Wind turbines are a promising alternative to traditional energy.Wind energy, converted into electricity, promises to be cheap, easy to produce and low-cost. And if we take into account the bills that come in now for electricity, then in order to save money, it’s worth trying to build your own wind generator, don’t you agree?
There are real examples of creating installations that generate a decent amount of energy. Nevertheless, the capabilities of wind turbines are still significantly ahead of competitors that can withstand the traditional method of generating electricity.
We have presented a guide, following which you can assemble a wind generator from a car generator with your own hands. The article offered for your attention discusses in detail the common mistakes that are made when designing wind turbines. For clarity, the article is accompanied by thematic photo and video materials.
The content of the article:
About homemade windmills for home
Particular interest in wind energy is manifested at the household level. This is understandable if you glance at the next bill for consumed energy. Therefore, all kinds of craftsmen are becoming more active, using all the possibilities of obtaining electricity inexpensively.
One of these possibilities, quite real, is closely related to a windmill from a car generator. A ready-made device – a car generator – just needs to be equipped properly made blades, in order to be able to remove some value of electrical energy from the generator terminals.
True, it will work effectively only if there is windy weather.

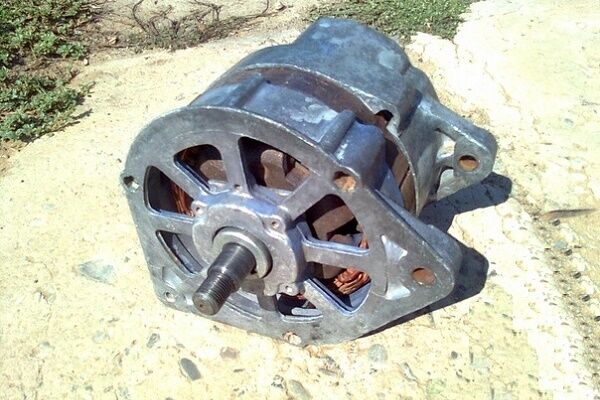
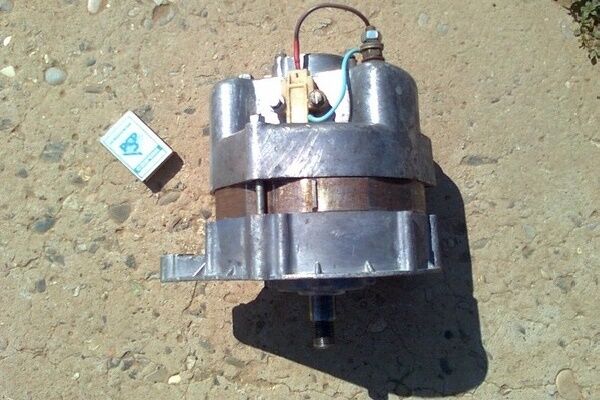
The use of virtually any automobile generator is acceptable for constructing a windmill. But they usually try to choose a powerful model for the job, capable of delivering high currents. Here, the design of generators from trucks, large passenger buses, tractors, etc. is at the peak of popularity.
In addition to the generator, to manufacture a windmill you will need a number of components:
- two- or three-blade propeller;
- car battery;
- electrical cable;
- mast, support elements, fasteners.
The design of the propeller with two or three blades is considered the most optimal for a classic wind generator. But a household project is often far from an engineering classic. Therefore, most often they try to select ready-made screws for a home structure.

This, for example, could be an impeller from an external unit of a split air conditioning system or from a fan of the same car. But when you want to follow the traditions of constructing wind generators, you will have to build the windmill propeller from start to finish with your own hands.
Before deciding to assemble and install a wind generator, it is worth assessing the climatic data of the site and calculating the payback. Significant assistance in this will be provided by information very interesting article, which we recommend for familiarization.
Wind generator assembly technology
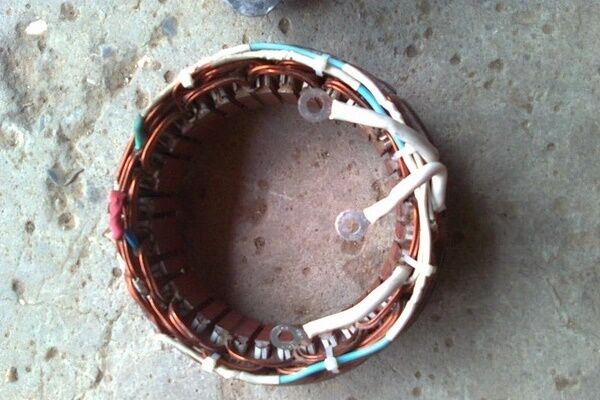
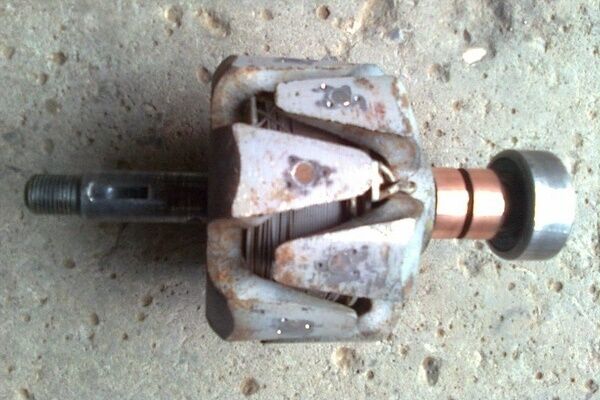
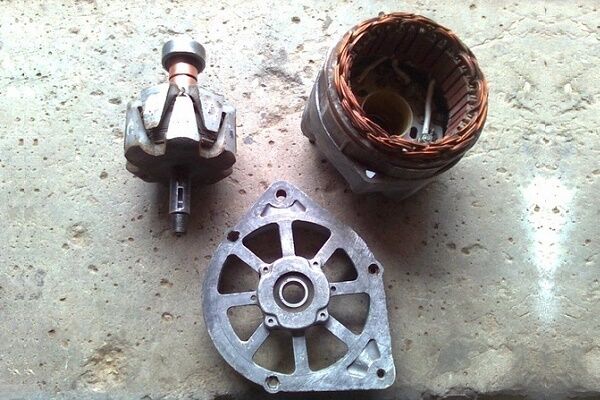
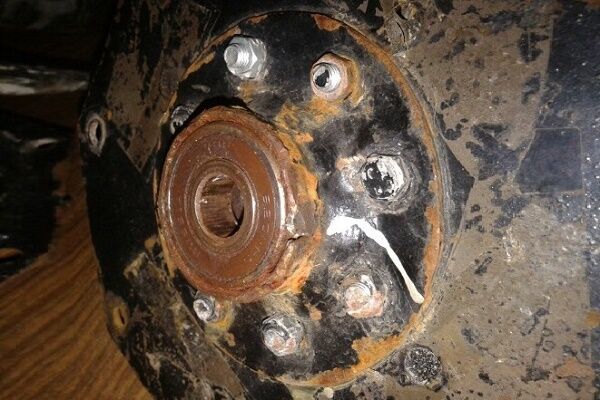
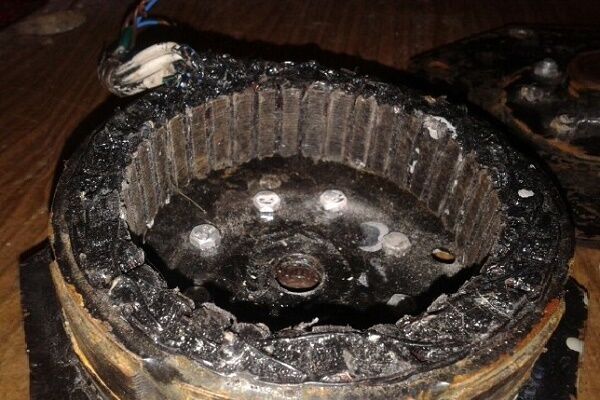
The optimal basis for a home windmill generator seems to be the AT-700 model, taken from a DT series tractor. True, this tractor generator in its original form is designed for rotor speeds of up to 6000 rpm. For the design of a home windmill, this parameter is clearly excessive.
There are two ways out of this situation:
- Use some kind of multiplier gearbox that gives the required gear ratio.
- Rewind the existing AT-700 stator winding at low speed.
In principle, both options for upgrading the device are achievable. But, judging by the reviews of accomplished designers, the option of rewinding the stator winding is more acceptable. Moreover, if you take into account the weight of the AT-700 generator itself, reaching 6 kg.

If the device is supplemented with a gearbox, the weight of the overall module will double. And this is an important parameter for the design of a wind turbine. We are always trying to reduce weight.
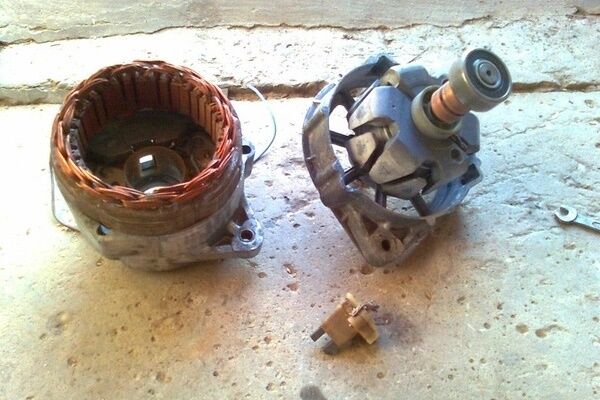
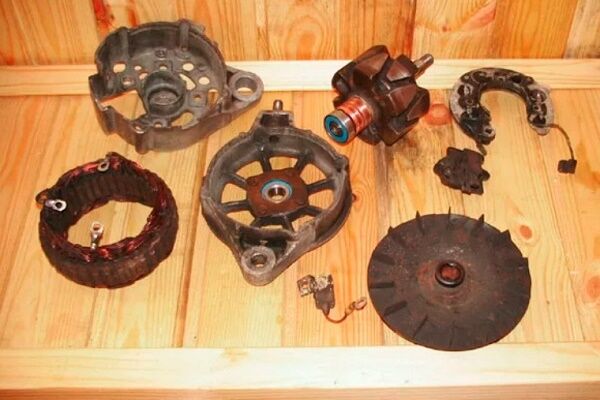
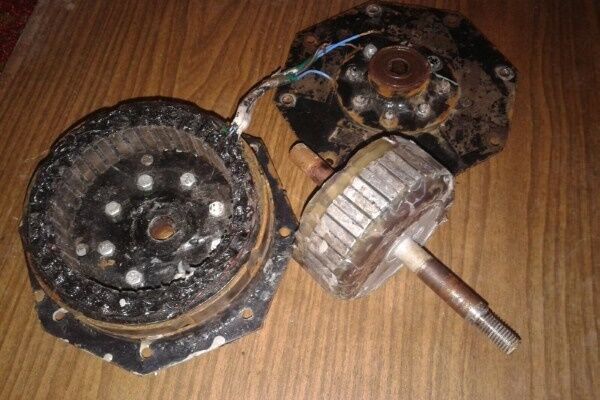
When using the K 701 generator in the design of a wind turbine, some modernization will be required:
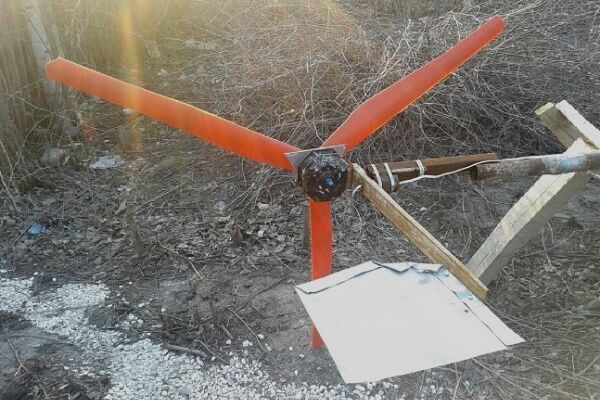
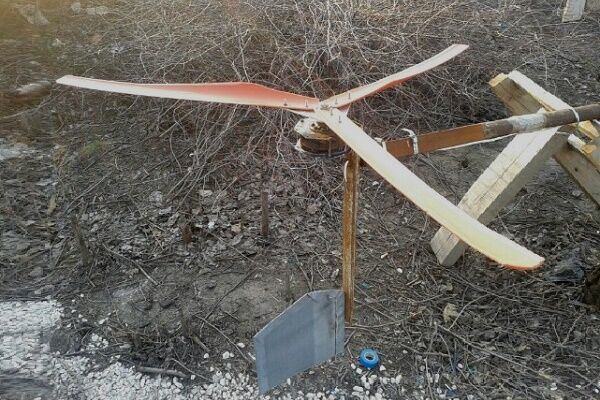
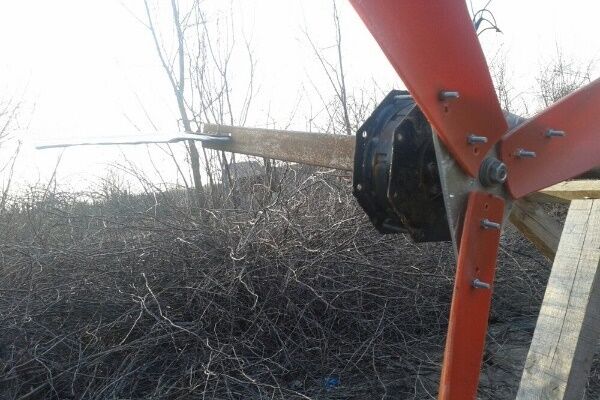
Step 1. Wind turbine propeller
The material for the manufacture of propeller blades is a cast aluminum pipe (d = 200 mm) 0.7 - 1.0 m long. Initially, it is cut lengthwise into four sections, and then blades of the required shape are cut out of two or three resulting parts.
Since aluminum is a material that can be easily processed, cutting the desired blade shape from a piece of pipe is not a problem. The main thing is to correctly calculate and draw the template.
The manufactured blades of the future propeller must be somehow fastened and mounted on the generator shaft. This work is more complex, requiring precise balance and especially when performing a three-bladed design.There are many options for making a propeller disk. One of them is to create this part from aluminum plates.
You will need to calculate the diameter of the propeller disk taking into account the meter length of the blades. For a wingspan of 2 meters, the estimated diameter of the disk can be 150-200 mm. Based on the calculated diameter, the required number of round plates (6-7 pcs.) is cut out of sheet aluminum.

The cut round plates are placed on top of each other, aligned along the edges and fastened. For bonding, it is best to use high-quality epoxy glue. But other fastening methods are also possible.
On the finished glued disk, it is necessary to mark and drill a hole at the central point for mounting on the generator shaft. Modify the hole with a keyway to match the size of the key installed on the generator rotor shaft.
The propeller disk prepared in this way is marked for mounting the blades. Drill holes along the marked lines for the mounting bolts of the brackets. These parts are also made of aluminum with a thickness selected sufficient to compensate for the transmitted forces.
All that remains is to attach the previously made blades to the disk at the intended connection points, balance them on a flat surface and secure them with bolts.
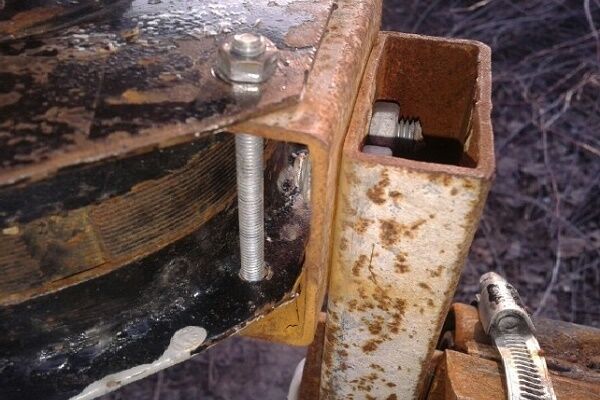
Step #2. Making a mast from a pipe
The AT-700 tractor generator, equipped with a homemade propeller, is already a real windmill. In order to obtain the maximum effect from the structure, it is advisable to raise it by 5-7 meters and also provide 360° circular movement.
Therefore, the wind vane is placed on a mast, which is easiest to make on the basis of a metal pipe.

A mast 5-7 meters high, equipped with a wind generator at the top, will experience significant loads. Accordingly, the diameter of the metal pipe needs to be quite large - at least 50 mm in outer size.
The mast is secured by four guy wires, fixed from above closer to the windmill and stretched in opposition to each other.
A pair of suitable bearings are pressed under the upper edge of the mast pipe, into the inner area, or secured in some other way. This will be a supporting rotating block where a weather vane with a generator and a propeller will fit. All that remains is to make the weather vane itself and install all the necessary equipment on it.
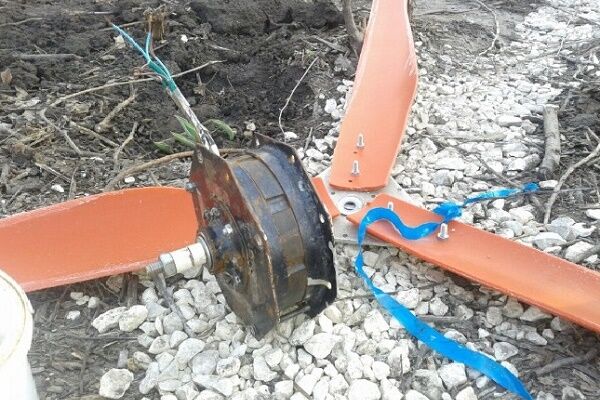
Step #3. How to make an aluminum weather vane
It is recommended to make a weather vane structure, at one end of which there is a place for a car generator with a propeller, and at the other - a place for a “shank,” from a lightweight, durable material.
For example, an aluminum pipe with a rectangular profile would fit just right under the base. To fasten the generator to the profile pipe, it is more convenient to use clamps made of soft metal tape (preferably stainless).

The tail of the weather vane can be constructed from the same aluminum sheet and secured to the profile pipe with corners.At the center of gravity point, on the profile pipe, it is necessary to strengthen a stainless steel metal pin.
This part is in the form of a long bolt (250-300 mm), with a diameter of about 30 mm (calculated), passes across the body of the profile aluminum pipe and is secured from below with a nut. A locknut is placed on top of the nut.
The diameter of the bolt thread should be slightly smaller than the internal diameter of the bearing rings pressed into the mast pipe. A 7-10 mm hole is drilled in the center of the bolt, along its axis. The electrical cable from the generator will be passed through this hole and will go down the pipe to the connection point.
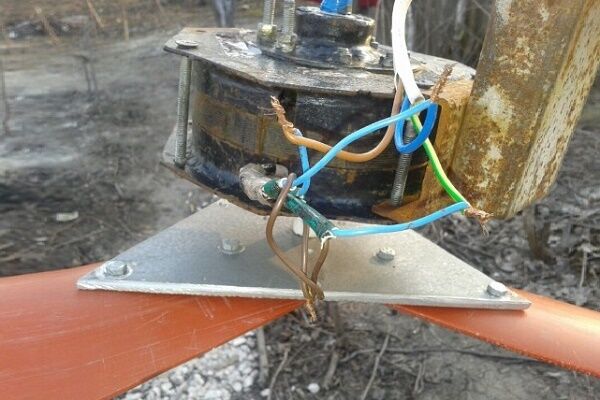
Step #4. Wind generator installation and connection
After all the described preparations (necessarily in calm weather conditions), proceed to installation:
- A tractor generator is secured to the base of the weather vane with clamps.
- Raise the mast from the ground 1.5 - 2 meters and install the weather vane with a support bolt on the bearings.
- At the same time, pass the cable from the generator through the body of the bolt and further inside the pipe to the lower exit point.
- Also, just below the weather vane base, a limiter is rigidly installed, allowing the weather vane to rotate 360° in one direction or the other, but nothing more.
- The mast is finally raised and reinforced with cable braces.
- Connect the ends of the cable to the receiving device (usually through controller to the battery).
At this point, the construction of the wind generator can be considered complete. However, there are still a lot of individual details of the process that you will have to deal with during the use of the device.

These details are already associated with automation that regulates the accumulation and distribution of energy. Devices such as a charge controller, a current inverter and others are mandatory components of wind generators.
Photo example of assembling a windmill step by step
Let's consider an example of the construction of a 24 V windmill assembled on the basis of a car generator. The homemade product begins to work stably at a wind force of 5 m/s. In moderately windy weather with gusts of 15 m/s, the installation supplies from 8 to 11 A; on days with strong winds, the efficiency increases. Power no more than 300 W.
In fact, all the work is done, all that remains is to connect the disparate components of a useful installation for everyday life:
The self-built installation develops 24 V; it can be used to charge batteries of mobile equipment and to supply energy to lighting lines with energy-saving lamps.
Analysis of design errors
Assembling a wind generator at home with your own hands is, of course, not an infallible task.Even in the designs of industrial wind turbines, engineers make mistakes. But they learn from mistakes, as evidenced by well-established household structures.
So, among the errors in the design of household wind generators, such a detail often appears as the absence of a braking module in the design of the generator. The standard version of such devices (automotive or tractor) does not provide such a part. This means that the generator needs to be modified.
However, not every “designer” wants to deal with this delicate matter. Many people ignore this detail, hoping for “maybe.” As a result, in strong winds the propeller spins to incredibly high speeds. The generator bearings cannot withstand it and break the seats of the aluminum covers. The rotor becomes wedged.

The same issue relates to the defect associated with the lack of a weather vane rotation limiter. Often this component is simply forgotten to be installed and remembered only when wind currents begin to spin the “cockerel” around its axis, like the spinning top in the program “What? Where? When?". The result is disastrous.
The minimum damage is kinking and breaking of the electrical cable, and in severe cases, destruction of the entire structure.
Another notable assembly error was the incorrect calculation of the center of gravity point on the base of the weather vane. In this case, the device may function normally for some time. But over time, a misalignment forms on the bearing assembly, freedom of rotation is limited, and the efficiency of the structure in terms of energy output decreases sharply.
How correctly calculate the wind generator, you will learn from the article we have proposed.
Often, they try to directly power the battery with the current received from the generator. Very soon they begin to wonder why the battery does not hold a charge or they discover a breakdown of 2-3 cans.
This is a banal and natural mistake, since in any case, the battery must be charged under conditions of certain currents and voltages. Here we need control of this process.
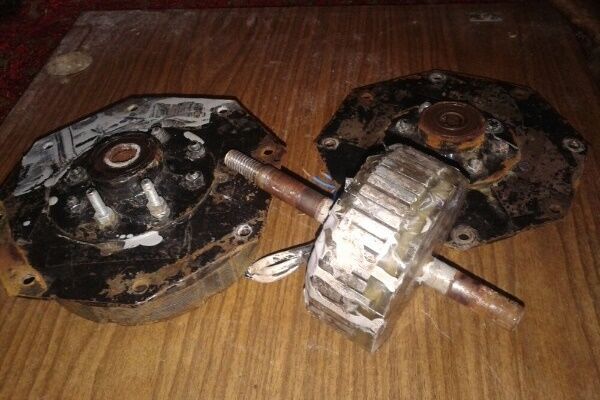
For home craftsmen interested in the topic wind generator assemblies, we suggest you familiarize yourself with another original option. This article describes the manufacture of a generating unit from waste washing machine parts.
Conclusions and useful video on the topic
Even an ordinary electric screwdriver can become a windmill if you know the basics of a wind generator.
Interest in wind generators is not decreasing. On the contrary, this option for producing electrical energy is increasingly being considered at the level of country property owners.
Obviously, if you combine several types of energy at once - wind, solar, hydro turbines or nuclear power plants, such a combination can provide an economic effect. In this case, the user’s risk of being left without electricity is reduced to zero.
Would you like to tell us about how you assembled a windmill with your own hands to provide electricity to your dacha? Would you like to share useful information not mentioned in the article? Please write comments in the block below, share your impressions, technical nuances known only to you and photos on the topic of the article.


This is interesting, I didn’t think that you can save not only on the method of generating energy, but also on the device itself.It is even unusual that you can turn one thing into another and get such a good result. And think about the planet, because such alternative sources have a good effect on the environmental situation. I’m also interested in the fact that you write that process control is needed to avoid errors. Or maybe there is a device that will help identify these errors without the participation of the owner? Because you’re not near him all the time.
How little attention we still pay to windmills
Yes, little, but not as little as is commonly believed. There are 22 large wind power plants in Russia.
Why are they lying again? the main thing for all devices is the speed at which copper crosses the electron field, which can be said from the school magnetic field. So think about it, what kind of rotation speed does a car generator need, so it is reflected on the device and is equal to the engine speed. Wow. And what kind of wind turbine propeller will give 50 revolutions per second? The answer is none. if without gearbox